Introduction
Welcome to this guide on how to download your Ancestry tree. Ancestry is a popular online platform that allows you to create and explore your family tree, uncovering valuable information about your ancestors and connecting with relatives you might not have known existed. While Ancestry provides a great platform for building and editing your family tree, you may want to download a copy for various reasons, such as sharing it with others, making offline backups, or further analyzing your genealogical data.
In this step-by-step guide, we will walk you through the process of downloading your Ancestry tree in a few easy-to-follow steps. Whether you’re a beginner or have been using Ancestry for some time, this guide will ensure that you can access and save your family tree for future reference.
Before we dive into the steps, it’s important to note that Ancestry offers different formats for downloading your tree, such as GEDCOM (.ged) files or PDFs. Different formats may vary in terms of the amount of information they contain or the features they support. It’s a good idea to consider your specific needs and preferences before choosing the format that best suits you.
Now, let’s get started on downloading your Ancestry tree!
Step 1: Go to the Ancestry website
The first step in downloading your Ancestry tree is to visit the Ancestry website. Open your preferred web browser and type in “www.ancestry.com” in the address bar. Press Enter to navigate to the site.
If you already have an Ancestry account, proceed to the next step. If you don’t have one yet, you will need to create an account by clicking on the “Sign In” button at the top right corner of the page. From there, select “Create Account” and follow the instructions to set up your Ancestry account.
Creating an account is a simple process that involves providing your email address, choosing a password, and agreeing to the terms and conditions set by Ancestry. Once you have created an account, you can log in and access all the features and resources available on the website.
Note that Ancestry offers both free and paid membership options. While the free membership allows you to create and build your family tree, certain features and records may only be accessible with a paid subscription. It’s worth considering whether a paid subscription would be beneficial for your research before proceeding.
Now that you’re on the Ancestry website and logged in, it’s time to move on to the next step: accessing your family tree.
Step 2: Log in to your Ancestry account
Once you’ve reached the Ancestry website, the next step is to log in to your Ancestry account. If you’re not already logged in, look for the “Sign In” button at the top right corner of the page.
Click on the “Sign In” button, and a pop-up window will appear, prompting you to enter your email address and password associated with your Ancestry account. Enter the required information and click “Sign In” to proceed.
If you’ve forgotten your password, you can click on the “Forgot?” link below the password field. An email will be sent to the registered email address with instructions on how to reset your password. Follow the steps provided in the email to regain access to your Ancestry account.
It’s important to ensure that you are logged in using the correct account that contains the family tree you want to download. If you have multiple Ancestry accounts, be sure to log in using the correct credentials.
Once you are successfully logged in, you will have access to all the features and options available to you as a registered Ancestry user. Now, it’s time to move on to the next step: accessing your family tree.
Step 3: Access your family tree
After logging in to your Ancestry account, the next step is to access your family tree. Ancestry offers a user-friendly interface that makes it easy to navigate and manage your family tree.
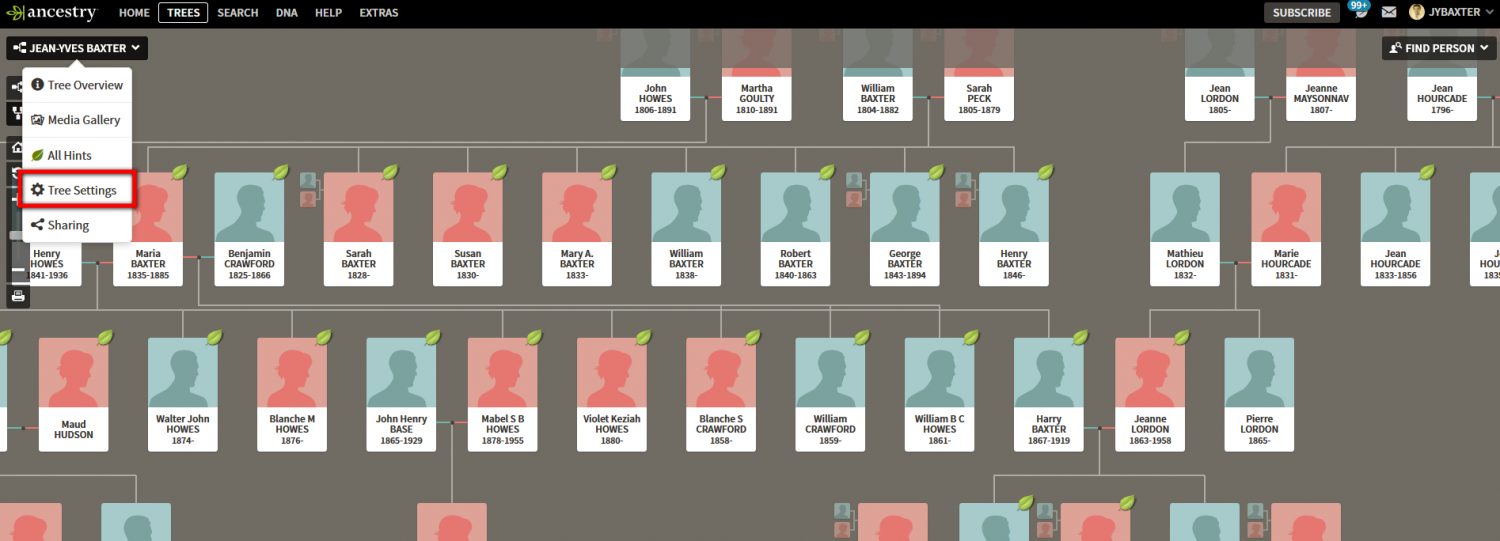
To access your family tree, locate the “Family Trees” tab at the top of the page. Click on it, and a drop-down menu will appear. From the menu, select the family tree you wish to download. If you have multiple family trees, ensure that you choose the correct one.
Once you’ve selected the desired family tree, you will be redirected to the main page of your family tree. Here, you can view and edit the information, add new relatives, attach documents or photos, and explore the various features available to enhance your research.
Make sure that the family tree you are accessing is up-to-date and contains all the information you want to download. If you need to make any last-minute additions or changes before downloading, take the time to do so now.
If you are satisfied with the content of your family tree and are ready to proceed, let’s move on to the next step: clicking on the “Tree Pages” button.
Step 4: Click on the “Tree Pages” button
Once you have accessed your family tree, the next step is to click on the “Tree Pages” button. This button provides access to various options related to your family tree, including the ability to export and download it.
Locate the “Tree Pages” button, which is typically located towards the top right or left corner of the page. It is represented by an icon that resembles a combination of two pages. Click on this button to proceed.
Clicking on the “Tree Pages” button will open a drop-down menu that displays a list of options related to your family tree. These options may include features such as printing, sharing, and downloading your tree.
For the purpose of downloading your family tree, you will need to select the option that mentions exporting or downloading your tree. The specific wording may vary slightly depending on the version of Ancestry you are using.
Click on the export or download option, which will take you to the next step in the process: selecting the desired format for your download.
Step 5: Select “Export Your Tree”
After clicking on the “Tree Pages” button, a drop-down menu will appear with various options related to your family tree. Look for an option that mentions exporting or downloading your tree, and select it.
In most cases, the option you are looking for will be labeled as “Export Your Tree” or something similar. This is the option that allows you to save your family tree data in a format that can be downloaded to your computer.
By selecting “Export Your Tree,” you are indicating to Ancestry that you want to create a file that contains all the information in your family tree. This file can then be saved to your computer for offline access, sharing, or further analysis.
It’s important to note that the available export formats may vary depending on the version of Ancestry you are using. The most common format for exporting family trees is the GEDCOM (.ged) format, which is a standardized file format for genealogical data.
Once you have selected “Export Your Tree,” you will be prompted to choose the desired format for your download. Proceed to the next step to learn more about selecting the format that best suits your needs.
Step 6: Choose the desired format for your download
After selecting “Export Your Tree,” you will be presented with the option to choose the format in which you want to download your family tree. The most common format available is the GEDCOM (.ged) format, but other formats, such as PDF or CSV, may also be offered depending on the Ancestry version you are using.
The GEDCOM format is widely supported and compatible with various genealogy software and online platforms. It allows you to preserve the structure and detailed information of your family tree, making it a popular choice for downloading and sharing genealogical data.
If you intend to continue your research in third-party genealogy software or share your family tree with others, selecting the GEDCOM format is usually the recommended choice. However, if you specifically require your family tree in a different format, such as PDF for easy viewing or CSV for data manipulation, choose the format that best suits your needs.
Consider the purpose and future use of your downloaded family tree when making your selection. If you are unsure or would like to explore the available formats further, take some time to research the benefits and limitations of each format before making a decision.
Once you have decided on the format you want, select it from the list of available options. The chosen format will be used to generate the file that contains your family tree data, allowing you to proceed with the download process.
Now that you have chosen the desired format for your download, let’s move on to the next step: confirming the download.
Step 7: Confirm the download
After selecting the desired format for your download, the next step is to confirm the download process. This step ensures that you have selected the correct format and are ready to proceed with the download of your Ancestry tree.
The confirmation process may vary depending on the version of Ancestry you are using. In most cases, you will be presented with a confirmation message or a dialog box that provides information about the selected format and asks for your confirmation to proceed with the download.
Take a moment to review the confirmation message and verify that the format mentioned is the one you intended to choose. Double-checking this information is crucial to ensure that you receive the file in the format you desire.
If you are satisfied with the selected format and are ready to proceed, click on the confirmation button or choose the option that confirms your download. This action will initiate the download process and save your Ancestry tree in the chosen format to your computer.
It is essential to be patient throughout the download process, as the file generation and download time may vary depending on the size of your family tree and your internet connection speed. Avoid interrupting or closing the browser until the download is complete to ensure that the file is saved successfully.
Once you have confirmed the download and the file is being generated, you can proceed to the next step where you will need to wait for the download to finish.
Step 8: Wait for the download to finish
After confirming the download of your Ancestry tree, it’s time to wait for the download to complete. The length of time required for the download to finish will depend on various factors, including the size of your family tree and the speed of your internet connection.
During the download process, it’s important to avoid closing the browser or interrupting the download. Doing so may result in an incomplete or corrupted file. Make sure to keep the browser window open until the download is complete.
You may notice a progress bar or indicator that shows the download status. This can give you an idea of how much longer it will take for the download to finish. Alternatively, some browsers may display a message indicating that the download is in progress.
While waiting for the download to complete, you can take this opportunity to prepare for the next step. For example, locate a suitable folder on your computer where you want to save the downloaded file. This will make it easier for you to locate and access the file once the download is finished.
While the download is in progress, you can also double-check your internet connection to ensure it remains stable. This will help avoid any potential disruptions that could result in an incomplete or unsuccessful download.
Once the download is complete, you will be able to proceed to the next step, where you will learn how to locate the downloaded file on your computer.
Step 9: Locate the downloaded file on your computer
After the download of your Ancestry tree is complete, the next step is to locate the downloaded file on your computer. The downloaded file will be in the format you selected, such as a GEDCOM (.ged) file or any other chosen format.
The default location for downloaded files can vary depending on your computer’s settings and web browser. However, most browsers typically save downloaded files in the “Downloads” folder, which is accessible from your computer’s file explorer.
To locate the downloaded file, follow these steps:
- Open your computer’s file explorer.
- Navigate to the “Downloads” folder.
- Look for the filename that corresponds to your Ancestry tree download. The filename may include the name of your family tree or the date and time of the download.
If you can’t find the downloaded file in the “Downloads” folder, you can try using the search function in your file explorer. Simply enter the filename or a keyword related to your family tree, and the search results should help you locate the file.
Once you have located the downloaded file, you can proceed to the next and final step, where you will learn how to access and use your downloaded Ancestry tree file.
Step 10: Access your downloaded Ancestry tree file
Now that you have located the downloaded file of your Ancestry tree on your computer, it’s time to access and use the file. The accessibility and usage of the downloaded file may vary depending on the format you chose for your download.
If you selected the GEDCOM (.ged) format, you can open the file using genealogy software or online platforms that support this format. Common genealogy software that can open GEDCOM files include Family Tree Maker, Legacy Family Tree, and MyHeritage Family Tree Builder. Simply open the software and import the GEDCOM file to access your Ancestry tree.
If you chose a different format, such as a PDF or CSV file, you can access the file using their respective compatible software. For example, you can use Adobe Acrobat Reader to open a PDF file or Microsoft Excel to open a CSV file. Double-click on the downloaded file, and it should open in the associated software.
Once you have opened the downloaded file, you will be able to view and explore the content of your Ancestry tree. You can analyze the information, make further edits or additions, or use the data for any research or sharing purposes.
If you encounter any issues opening or accessing the downloaded file, double-check that you have the necessary software installed on your computer. If not, you may need to download and install the appropriate software before being able to access the file.
It is also a good practice to make a backup copy of your downloaded Ancestry tree file to prevent any data loss or accidental deletion. Store the backup file in a secure location, such as an external hard drive or cloud storage service.
With the downloaded Ancestry tree file accessible, you can now fully utilize the information you have saved and continue your genealogical research or share your family tree with others.


