Introduction
Welcome to this guide on how to add contacts on Cash App! Cash App is a popular mobile payment service that allows you to send and receive money from friends, family, and other contacts. Adding contacts on Cash App makes it easier and more convenient to send and receive money, especially for regular transactions. Whether you want to split a bill, pay your share of the rent, or simply send money to a friend, Cash App provides a seamless and efficient platform for these transactions.
This step-by-step guide will walk you through the process of adding contacts on Cash App. From downloading and installing the app to entering contact details and verifying them, we’ll cover everything you need to know to successfully add contacts and start using Cash App to send and receive money.
Please note that Cash App is available for both iOS and Android devices, and the steps may slightly vary depending on the operating system you are using. With that said, let’s dive in and get started with adding contacts on Cash App!
Step 1: Download and Install the Cash App
The first step in adding contacts on Cash App is to download and install the app on your mobile device. The Cash App is available for free on both iOS and Android platforms. Here’s how you can download and install the app:
- Open the App Store (for iOS users) or the Google Play Store (for Android users) on your mobile device.
- Search for “Cash App” in the search bar at the top of the app store.
- Locate the official Cash App developed by “Square, Inc.”
- Tap on the “Install” or “Get” button next to the app listing.
- Wait for the app to download and install on your device.
- Once the installation is complete, you will see the Cash App icon on your home screen or in the app drawer.
It’s important to note that the Cash App is a legitimate payment app developed by Square, Inc., so make sure you are downloading the official app from a trusted source. Avoid downloading any unofficial or third-party versions, as they may pose security risks to your personal information and financial transactions.
After successfully installing the Cash App on your mobile device, you’re now ready to proceed to the next step: signing up or logging in to your Cash App account. Let’s move on to Step 2!
Step 2: Sign Up or Log In to Your Account
Once you have downloaded and installed the Cash App on your mobile device, it’s time to sign up for a new account or log in to an existing one. Follow these steps to sign up or log in:
- Launch the Cash App by tapping on the app icon.
- If you are a new user and don’t have an account yet, tap on the “Sign Up” button to create a new account. If you already have an account, tap on the “Log In” button to access your existing account.
- When signing up for a new account, you will be prompted to enter your email address or phone number. Choose the option that suits you best and follow the on-screen instructions to continue.
- If you are logging in to an existing account, enter your email address or phone number and your password. Then, tap on the “Log In” button to proceed.
- For new users, you may need to verify your email address or phone number. Follow the verification instructions provided by Cash App to complete the process.
- Once you have successfully signed up or logged in, you will be taken to the main screen of the Cash App.
It’s important to use a valid email address or phone number during the sign-up process, as this will be used to send you notifications and important updates about your Cash App account. Additionally, make sure to choose a strong, unique password to protect your account from unauthorized access.
After signing up or logging in, you are now ready to proceed to the next step: accessing the “Contacts” section. Let’s move on to Step 3!
Step 3: Access the “Contacts” Section
After signing up or logging in to your Cash App account, the next step is to access the “Contacts” section. This is where you can view, add, and manage your contacts on Cash App. Follow these steps to access the “Contacts” section:
- Open the Cash App on your mobile device by tapping on the app icon.
- You will be taken to the main screen of the app, which displays your current balance and recent activity.
- Look for the “Contacts” tab or icon, usually located at the bottom navigation bar of the app. Tap on it to access the “Contacts” section.
- In the “Contacts” section, you will see a list of your existing contacts, if any. From here, you can view, edit, and delete contacts.
Depending on the version of the Cash App and the layout of your device, the exact location and appearance of the “Contacts” section may vary. However, it is typically easily accessible from the main screen or navigation menu of the app.
Now that you have accessed the “Contacts” section, it’s time to move on to the next step: adding a contact. Let’s proceed to Step 4!
Step 4: Add a Contact
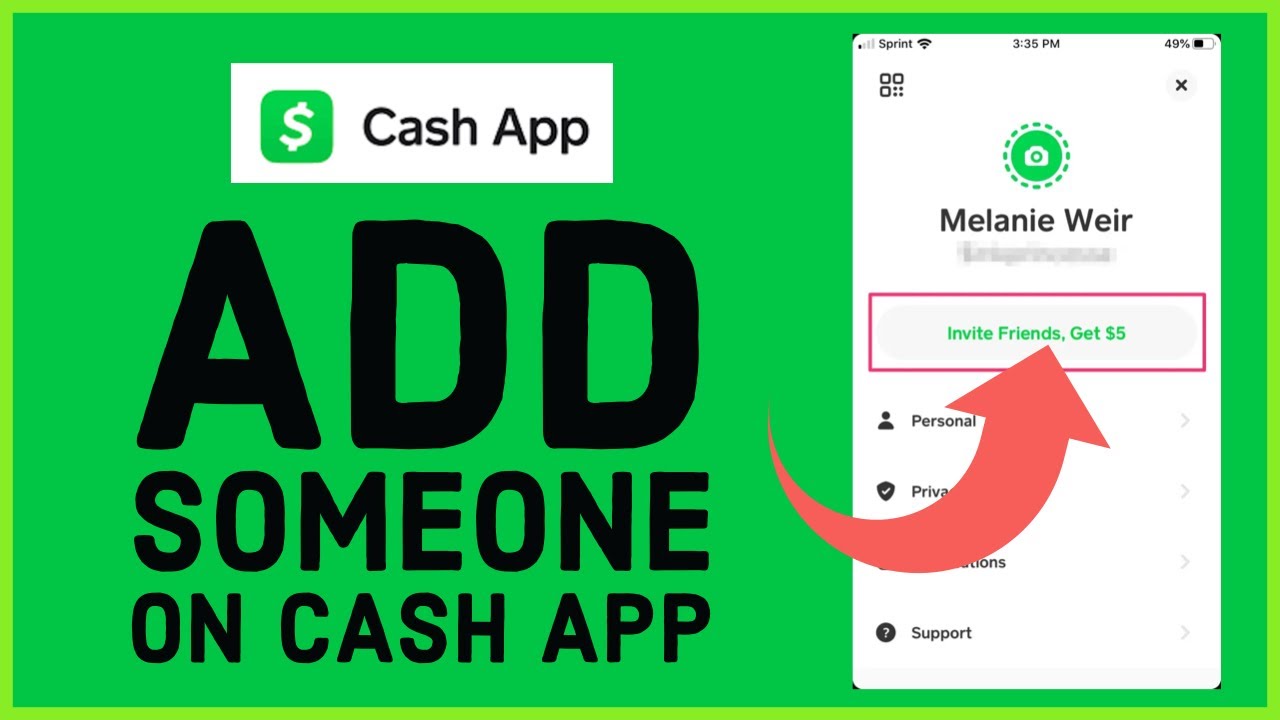
Once you have accessed the “Contacts” section in Cash App, you can start adding contacts to your list. Adding a contact makes it easier to send and receive money from that person in the future. Follow these steps to add a contact:
- In the “Contacts” section, look for the option to add a new contact. This is usually represented by a “+” or “Add” button.
- Tap on the “Add” or “+” button to initiate the contact creation process.
- You may be prompted to choose the source from which you want to add the contact. Cash App allows you to import contacts from your phone’s address book or manually enter the contact details.
- If you choose to import from your phone’s address book, Cash App will request permission to access your contacts. Grant the necessary permissions to proceed.
- If you choose to enter the contact details manually, you will be presented with fields to enter the person’s name, phone number, or email address, depending on your preference.
- Fill in the required contact details accurately. Double-check the information to ensure it is correct.
Once you have successfully added the contact, they will be added to your “Contacts” list in Cash App. You can now easily send or request money from that person by selecting their name from your contacts.
It’s worth noting that Cash App allows you to add both Cash App users and non-Cash App users as contacts. When adding non-Cash App users, they will receive a notification and instructions on how to sign up and link their account to receive the money. For Cash App users, the money will be instantly transferred between accounts.
Now that you have added a contact to your Cash App, it’s time to move on to the next step: entering contact details. Let’s proceed to Step 5!
Step 5: Enter Contact Details
After adding a contact in Cash App, the next step is to enter their contact details. Providing accurate and up-to-date information ensures that you can easily send and receive money from the contact. Follow these steps to enter contact details:
- In the “Contacts” section of the Cash App, locate and select the contact you want to edit or update.
- You will be presented with the contact’s details, such as their name, phone number, or email address.
- To edit or update the contact details, tap on the respective field that you want to modify.
- Enter the correct and complete contact information for the person. If necessary, you can also add additional details, such as a nickname or a note.
- Double-check the contact details to ensure they are accurate and error-free. A typo or incorrect information may result in payment issues or difficulties in identifying the correct contact.
- Once you have entered and verified the contact details, tap on the “Save” or “Update” button to save the changes.
By entering the contact details correctly, you can easily search for the person when you want to send or request money. Cash App will use the provided information to display the contact’s name and details in your contacts list.
It’s important to note that Cash App respects the privacy of its users, and contact details are kept secure. Cash App does not share your contact information with others, and you have control over which contacts you add and interact with on the platform.
Now that you have entered the contact details, it’s time to move on to the final step: verifying and saving the contact. Let’s proceed to Step 6!
Step 6: Verify and Save
After entering the contact details in Cash App, it’s important to verify and save the contact to ensure its accuracy and usability. Verifying the contact details reduces the risk of sending money to the wrong person and helps in maintaining the integrity of your transactions. Follow these steps to verify and save the contact:
- In the “Contacts” section of the Cash App, locate and select the contact you want to verify and save.
- Review the contact details and ensure that they are correct and up-to-date.
- If you are adding a non-Cash App user as a contact, Cash App may provide an option to send a payment request for them to validate their contact information.
- If you are adding a Cash App user as a contact, you can send a small amount of money as a test transaction to verify that their account is correct.
- During the verification process, Cash App may prompt you to confirm the contact’s details or provide additional instructions for the verification.
- After verifying the contact information, tap on the “Save” or “Confirm” button to save the contact.
By verifying and saving the contact, you can easily identify and select the correct person when initiating money transfers on Cash App. It provides an extra layer of security and ensures that your money goes to the intended recipient.
It’s important to keep in mind that verifying the contact details is a crucial step to prevent any potential mistakes or errors in transferring money. Take your time to verify the information before confirming the contact.
With Step 6 completed, you have successfully verified and saved the contact on Cash App. You can now confidently use the contact to send and receive money securely and conveniently.
That concludes our step-by-step guide on how to add contacts on Cash App. By following these steps, you can easily manage your contacts and facilitate seamless transactions through the app. Now you can enjoy the convenience and simplicity of sending and receiving money with your Cash App contacts!


