Introduction
Are you looking to elevate your TV viewing experience to new heights? Look no further than the innovative IV-11 Surround Sound System. Designed to provide immersive and high-quality audio, this surround sound system will bring your favorite movies, TV shows, and games to life like never before. Whether you’re a seasoned audio enthusiast or a casual viewer, setting up the IV-11 Surround Sound System is a straightforward process that will greatly enhance your entertainment setup.
In this guide, we will walk you through the step-by-step instructions on how to hook up the IV-11 Surround Sound System to your TV. We will cover everything from unboxing to configuring the audio settings, ensuring that you have a seamless and immersive audio experience right from the start.
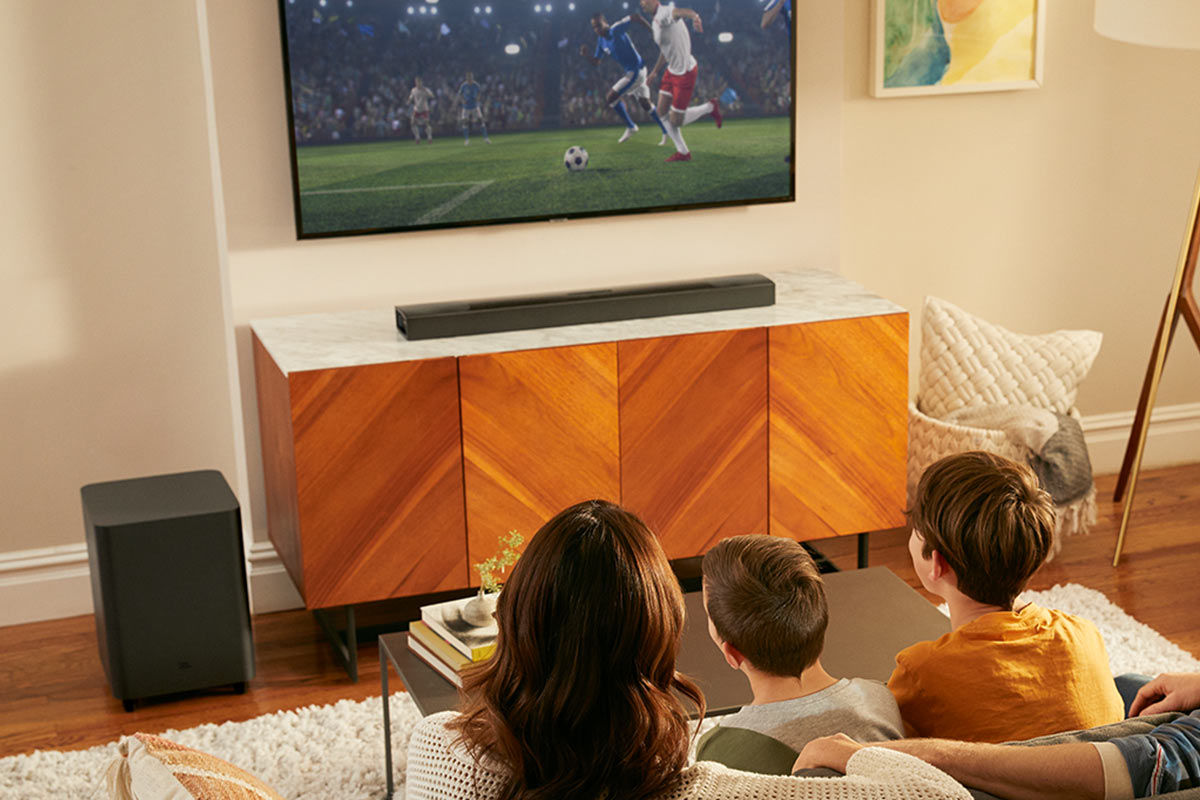
Before we dive into the setup process, it’s important to emphasize the benefits of using a surround sound system. While TVs are equipped with built-in speakers, they often lack the power and clarity necessary to deliver an immersive audio experience. The IV-11 Surround Sound System solves this problem by providing a dedicated soundbar, subwoofer, and rear speakers, all working in harmony to create a truly cinematic soundscape in your living room.
With that said, let’s get started with unboxing the IV-11 Surround Sound System and getting it ready for setup.
Step 1: Unboxing the IV-11 Surround Sound System
Before you begin setting up the IV-11 Surround Sound System, it’s essential to unbox the package carefully. Ensure that you have all the components needed for installation. The box should contain the following items:
- Main soundbar
- Subwoofer
- Two rear speakers
- Power cords
- Mounting brackets
- Remote control
- Owner’s manual and setup guide
Once you have verified that all the components are present, you can proceed with the setup process. Make sure to place the components on a clean and stable surface. It’s also a good idea to read through the owner’s manual and setup guide. These resources will provide additional instructions and tips for a successful setup.
Next, carefully unpack the main soundbar. Remove any protective packaging and place it in its designated spot. The soundbar is the centerpiece of the IV-11 Surround Sound System, responsible for delivering crisp and clear audio.
After unboxing the soundbar, locate the subwoofer, which is responsible for producing deep bass tones. Place it near the soundbar, as it will work together to create a balanced and immersive audio experience.
Finally, find the two rear speakers. These speakers will be positioned behind your viewing area, adding depth and surround sound effects to your audio. Place them strategically to ensure an optimized listening experience.
With the IV-11 Surround Sound System unboxed and all components in their respective positions, you’re ready to move on to the next step: connecting the soundbar to your TV.
Step 2: Identifying the Components
Before you proceed with connecting the IV-11 Surround Sound System to your TV, it’s important to familiarize yourself with the various components. Understanding the purpose and functionality of each component will make the setup process much easier and ensure that everything is connected correctly.
Here is a brief overview of the main components you will encounter:
- Main Soundbar: This is the central component of the surround sound system. It houses the speakers that deliver the majority of the audio output.
- Subwoofer: The subwoofer is responsible for producing deep bass tones, adding richness and depth to your audio experience.
- Rear Speakers: These speakers are responsible for creating a surround sound effect, immersing you in a true cinematic experience. They are placed behind your viewing area, strategically positioned to fill the room with sound.
- Power Cords: These cords are used to connect the soundbar, subwoofer, and rear speakers to a power source. Ensure that each component is plugged into an outlet or power strip.
- Mounting Brackets: If you prefer to mount the soundbar or rear speakers on the wall, mounting brackets are provided for your convenience. Refer to the setup guide for detailed instructions on how to properly install them.
- Remote Control: The included remote control allows you to adjust the volume, change audio settings, and control other features of the IV-11 Surround Sound System.
- Owner’s Manual and Setup Guide: These resources provide detailed instructions on how to set up, operate, and troubleshoot the surround sound system. It’s recommended to keep them handy throughout the installation process.
Take a few moments to locate each component and familiarize yourself with their connections and functions. Understanding how each component works together will ensure a smooth and successful setup of the IV-11 Surround Sound System.
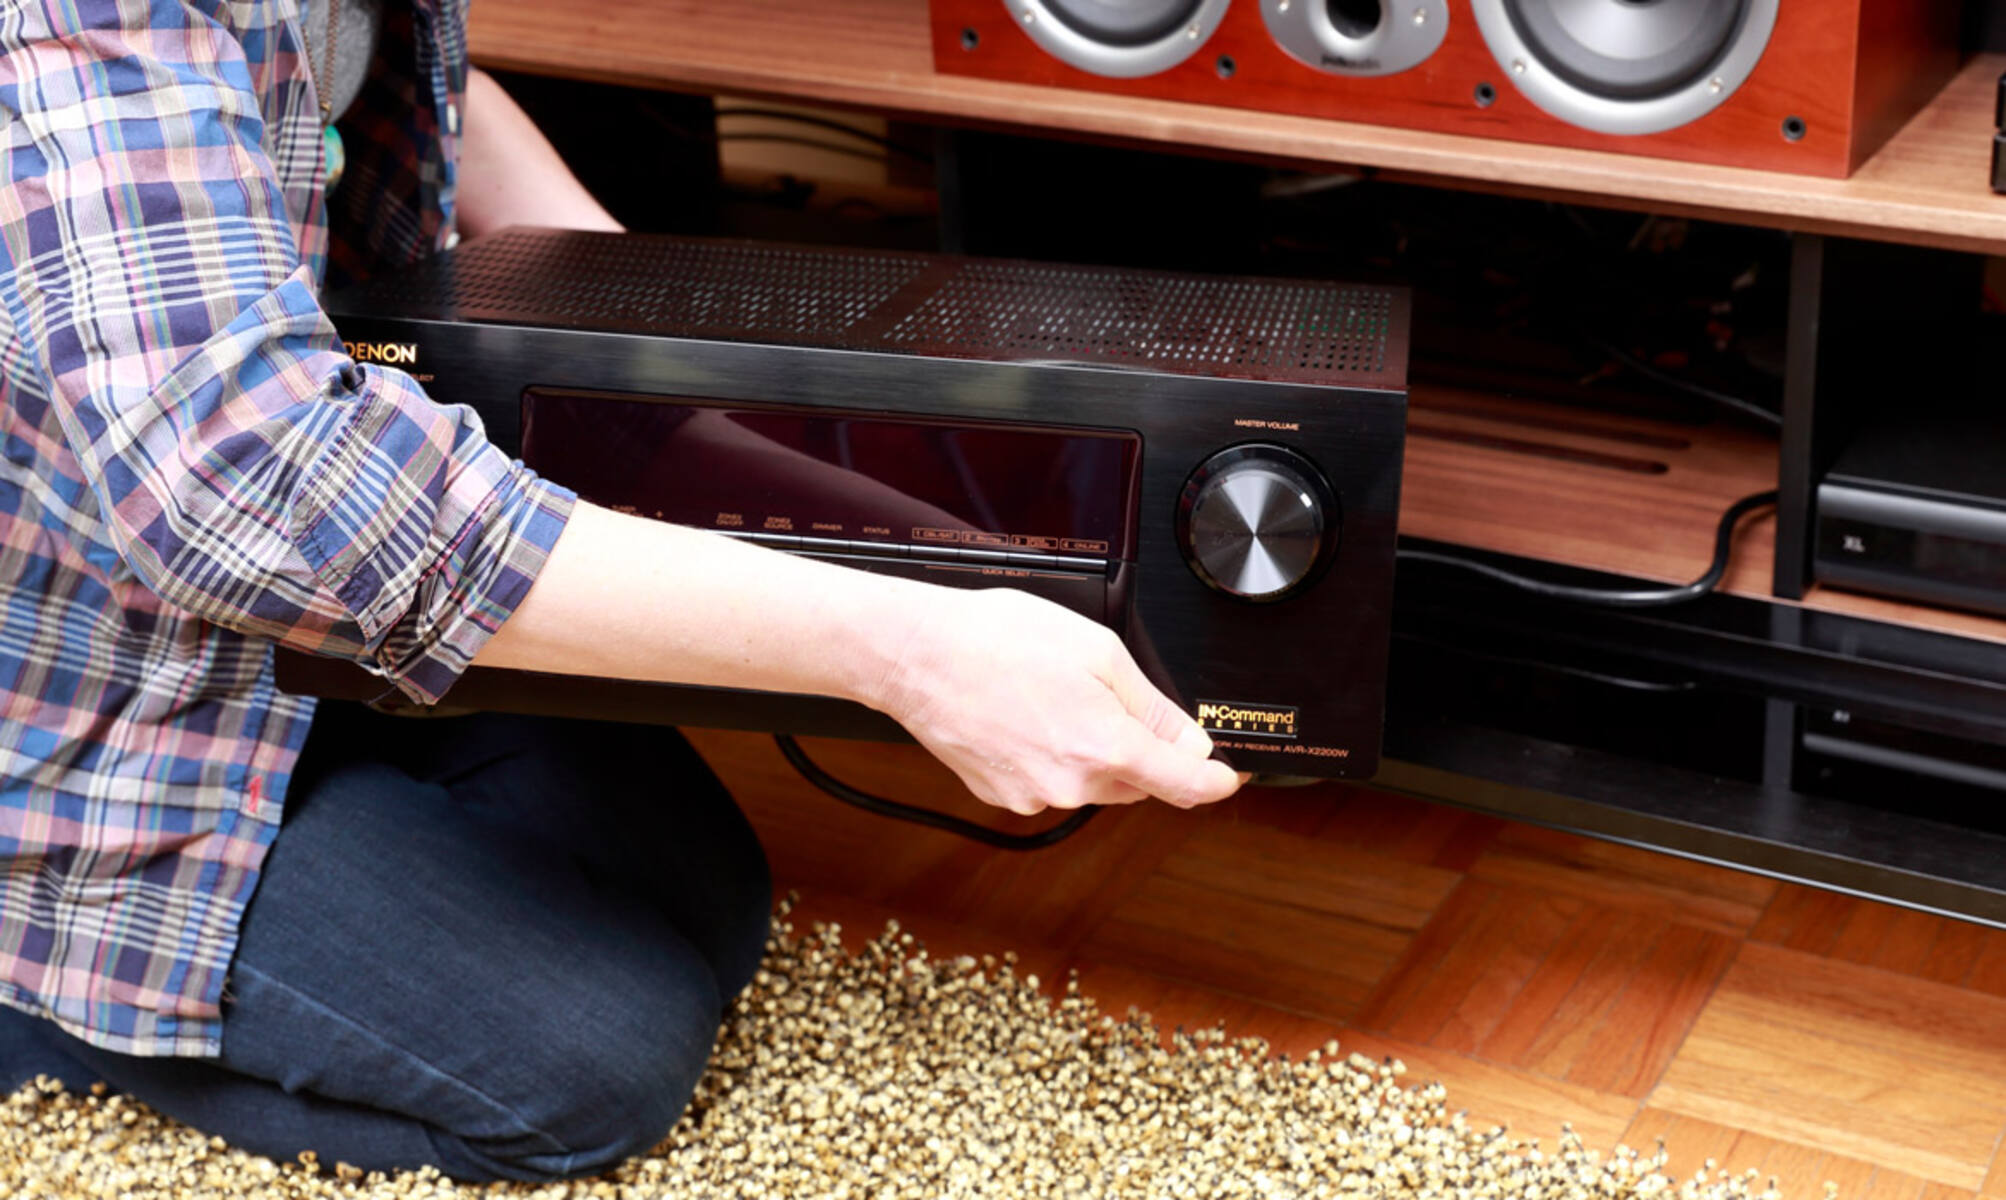
Step 3: Connecting the Soundbar to the TV
Now that you have unboxed the IV-11 Surround Sound System and are familiar with its components, it’s time to connect the soundbar to your TV. This step is crucial as it establishes the audio connection between the two devices.
Here’s how to connect the soundbar to your TV:
- Locate the HDMI or optical audio output port on your TV. These ports are usually labeled and can be found on the back or side panel of the TV.
- Take the HDMI or optical audio cable (depending on the available ports on your TV) and connect one end to the corresponding output port on the TV.
- Connect the other end of the cable to the HDMI or optical audio input port on the soundbar. These ports are also labeled and can usually be found on the back or bottom of the soundbar.
- Ensure that the cable is securely connected to both the TV and the soundbar to avoid any audio interruptions.
- Once the audio connection is established, power on both the TV and the soundbar.
- Using your TV’s remote control, navigate to the audio settings. Look for the option to select an external audio device or to enable HDMI or optical audio output.
- Select the appropriate audio output option that corresponds to the connection you made (HDMI or optical) and confirm the selection.
- Adjust the volume on the soundbar using its remote control to ensure that the audio is properly balanced and at a comfortable level.
With the soundbar successfully connected to your TV, you have completed a crucial step in setting up the IV-11 Surround Sound System. The next step involves plugging in the subwoofer and rear speakers to further enhance the audio experience.
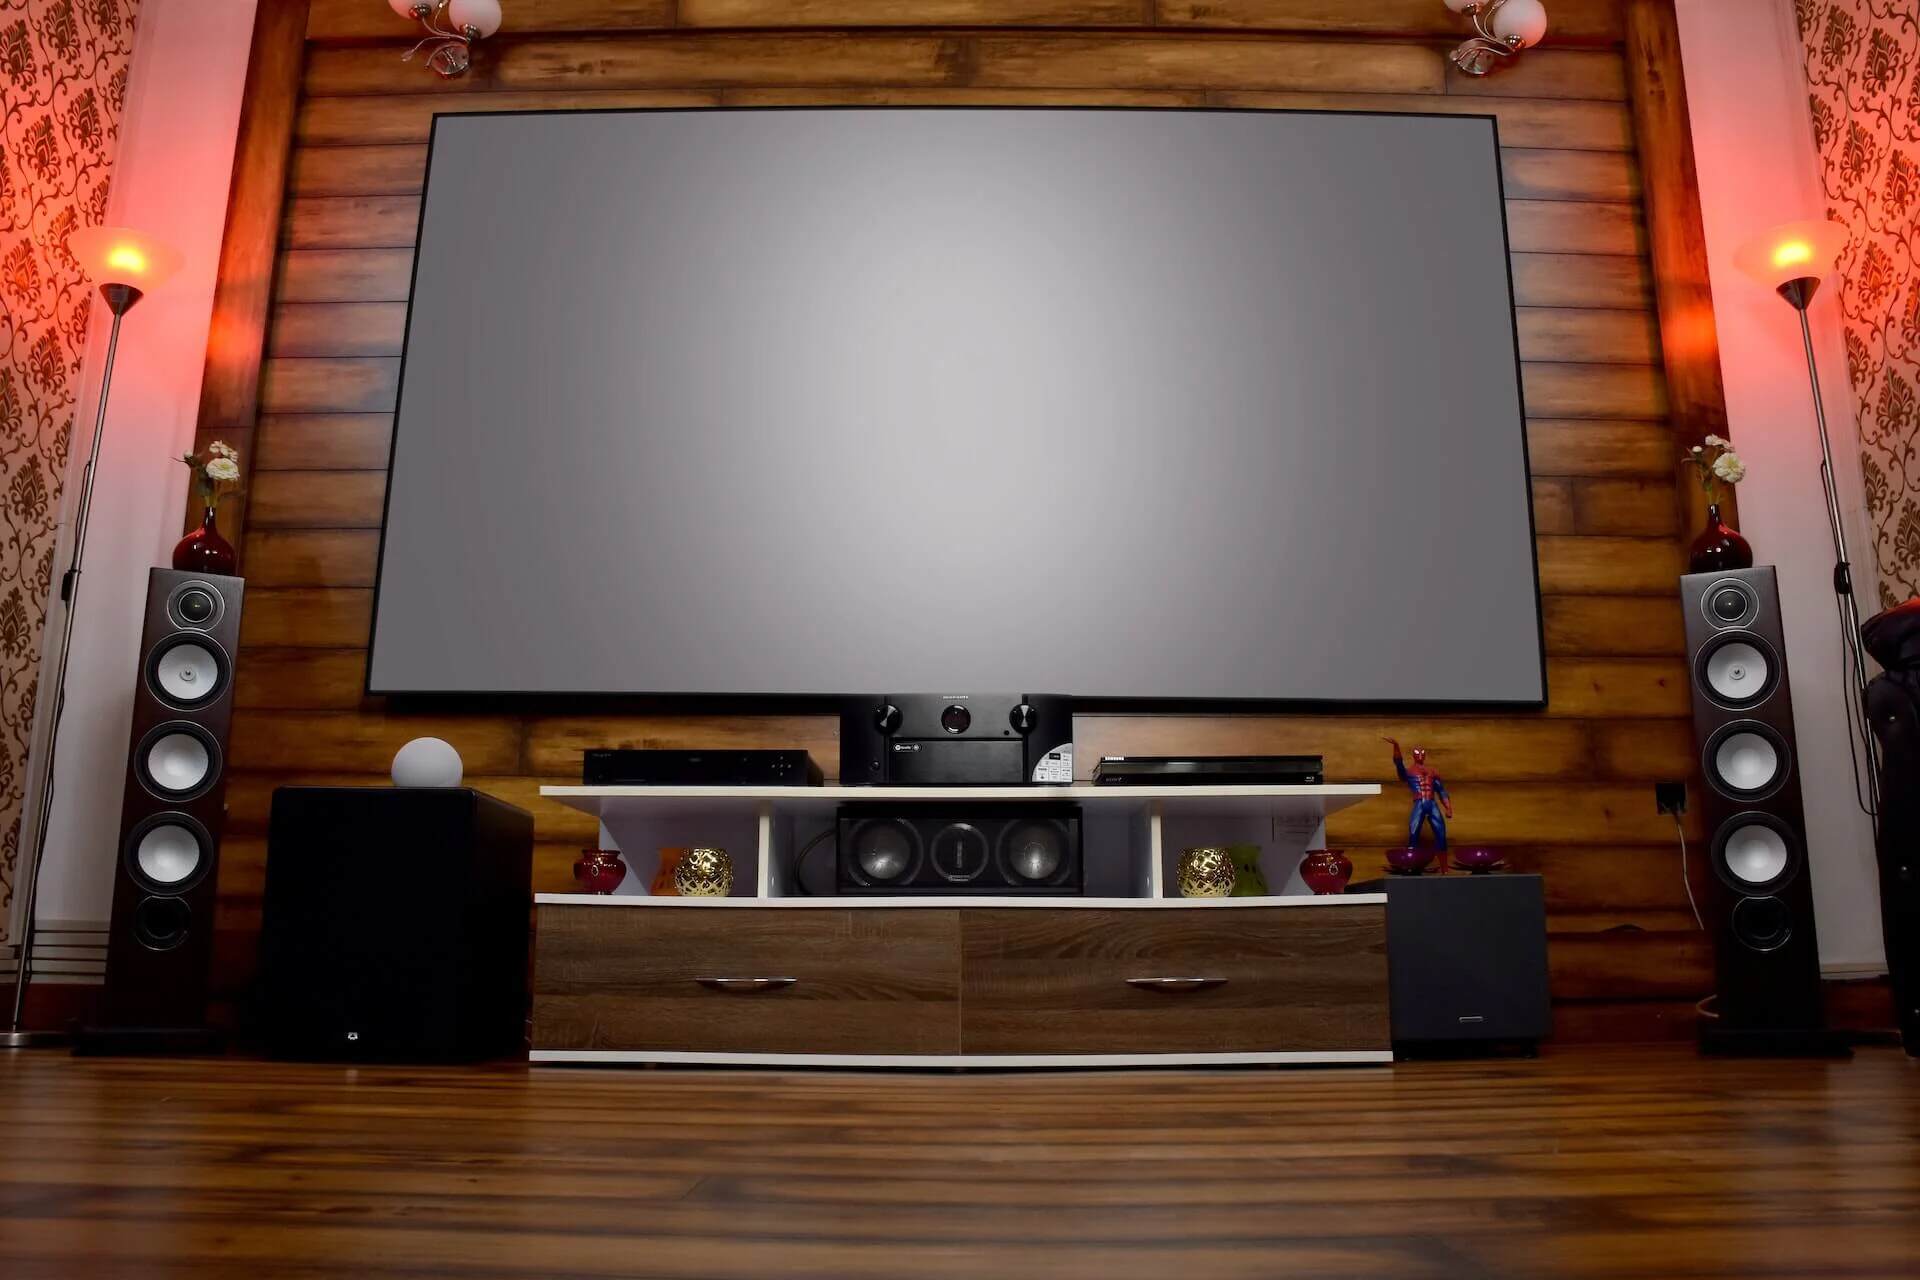
Step 4: Plugging in the Subwoofer and Rear Speakers
Now that your soundbar is connected to the TV, it’s time to enhance the audio experience by plugging in the subwoofer and rear speakers. These components work together to create a truly immersive surround sound effect.
Follow these steps to plug in the subwoofer and rear speakers:
- Find the power cord for the subwoofer and plug it into a power outlet or power strip.
- Connect the other end of the power cord to the power input on the subwoofer. Ensure a secure connection.
- Place the subwoofer in an appropriate location. It is best to position it on the floor near the soundbar for optimal audio distribution.
- Locate the power cord for the rear speakers and plug it into a power outlet or power strip.
- Connect the other end of the power cord to the power input on the rear speakers. Make sure the connection is secure.
- Position the rear speakers strategically behind your listening area. Ideally, place them on either side of the room, slightly behind and above ear level.
- Ensure that the distance between the soundbar, subwoofer, and rear speakers is balanced and allows for even audio distribution.
- Power on the subwoofer and rear speakers using their respective power buttons or switches.
- Check the LED indicators on each component to confirm that they are receiving power.
With the subwoofer and rear speakers properly plugged in and powered on, you have completed another essential step in setting up the IV-11 Surround Sound System. Congratulations! You are now ready to power on the entire system and configure the audio settings on your TV.
Step 5: Powering On the IV-11 Surround Sound System
With all the components connected and in their proper places, it’s time to power on the IV-11 Surround Sound System. This step will activate the speakers and allow you to start enjoying a rich and immersive audio experience.
Follow these steps to power on the IV-11 Surround Sound System:
- Locate the power button on the soundbar and press it to turn it on. The power button is usually located on the front or top panel of the soundbar.
- Ensure that the LED indicator on the soundbar turns on to indicate that it is powered up.
- Next, locate the power button on the subwoofer and press it to power it on. The power button is typically located on the back or side of the subwoofer.
- Check the LED indicator on the subwoofer to confirm that it is receiving power.
- Finally, power on the rear speakers using their respective power buttons or switches. Refer to the owner’s manual for specific instructions on powering on the rear speakers.
- Verify that the LED indicators on the rear speakers are illuminated, indicating that they are powered on.
Upon powering on the IV-11 Surround Sound System, you should notice enhanced audio and a more immersive sound experience. The combined effort of the soundbar, subwoofer, and rear speakers will create a surround sound effect that brings movies, TV shows, and games to life.
Now that your surround sound system is powered on, it’s time to proceed to the next step: configuring the audio settings on your TV.
Step 6: Configuring the Audio Settings on the TV
After powering on the IV-11 Surround Sound System, it’s important to configure the audio settings on your TV to ensure that the audio is properly routed through the soundbar and speakers. This step will optimize the audio performance and maximize your viewing experience.
Follow these steps to configure the audio settings on your TV:
- Using your TV’s remote control, navigate to the settings menu.
- Look for the audio or sound settings option and select it.
- Within the audio settings, locate the audio output option or similar settings that allow you to choose the audio device.
- Select the external audio device option or any option that indicates using an HDMI or optical output.
- Choose the corresponding audio output that corresponds to the connection you made in step 3 (HDMI or optical audio).
- Confirm the selection to save the changes.
- Explore other audio settings such as bass, treble, and sound mode options to customize your audio experience according to your preferences.
- Make any necessary adjustments to the volume levels on your TV to ensure compatibility with the IV-11 Surround Sound System.
By configuring the audio settings on your TV, you are directing the audio output to the IV-11 Surround Sound System, allowing it to deliver high-quality sound. This step ensures that the soundbar, subwoofer, and rear speakers work harmoniously, resulting in an immersive and cinematic audio experience.
Once you have completed configuring the audio settings on your TV, it’s time to test the surround sound system to ensure everything is functioning as expected.
Step 7: Testing the Surround Sound System
Now that you have set up and configured the IV-11 Surround Sound System, it’s time to put it to the test. This step allows you to ensure that all the speakers are functioning correctly and that you are experiencing the full impact of the surround sound effect.
Follow these steps to test the surround sound system:
- Play a movie, TV show, or any audio content that is known to have surround sound effects.
- Listen closely to the audio output and pay attention to the directionality and depth of the sound.
- Verify that the sound is coming from the front soundbar, creating a clear and centered audio experience.
- Pay attention to the subwoofer and ensure that it is producing deep bass tones that add richness and depth to the audio.
- As sound effects move from one side of the screen to the other, listen for the rear speakers to provide a seamless transition and create a surround sound effect.
- Adjust the volume and audio settings on the soundbar, subwoofer, and TV to further enhance the audio experience and ensure a proper balance.
- Test different audio sources to verify the consistency and quality of the surround sound effect.
During the testing phase, take note of any issues or abnormalities you may encounter. If you notice any sound inconsistencies or lack of surround sound effect, refer back to the setup guide and troubleshoot the specific issue.
By testing the IV-11 Surround Sound System, you can fully immerse yourself in a captivating audio experience and appreciate the true potential of the surround sound technology.
Enjoy the enhanced audio experience and make any necessary adjustments to the audio settings until you achieve the desired sound quality. Congratulations on successfully setting up and testing your IV-11 Surround Sound System!
Conclusion
Setting up the IV-11 Surround Sound System to your TV is a rewarding experience that elevates your entertainment to new heights. By following the step-by-step instructions outlined in this guide, you have successfully unboxed the system, connected the soundbar to your TV, plugged in the subwoofer and rear speakers, powered on the entire system, configured the audio settings on your TV, and tested the surround sound effect.
Now, you can truly immerse yourself in a cinematic audio experience from the comfort of your own home. The soundbar delivers crisp and clear audio, while the subwoofer adds deep bass tones for an added audio dimension. The rear speakers provide surround sound effects, enveloping you in an immersive and captivating audio environment.
Remember to consult the owner’s manual and setup guide for any additional features or troubleshooting steps specific to your IV-11 Surround Sound System. These resources will further enhance your audio experience and help you make the most out of your new surround sound system.
With the IV-11 Surround Sound System properly set up, you can sit back, relax, and enjoy your favorite movies, TV shows, and games with rich, immersive audio, stimulating your senses and enhancing your overall entertainment experience.
Now, kick back, grab some popcorn, and get ready to be blown away by the incredible audio quality and surround sound immersion of your IV-11 Surround Sound System!