Introduction
The iPhone 13 is a remarkable piece of technology, seamlessly integrating powerful features with a sleek design. One essential component of this device is the SIM (Subscriber Identity Module) card, which connects the iPhone to the cellular network and enables communication. Whether you're upgrading to a new device or simply need to access your SIM card, it's crucial to understand how to safely extract the SIM card from your iPhone 13. This guide will walk you through the step-by-step process, ensuring that you can complete this task with ease and confidence.
The SIM card holds valuable information, including your phone number, contacts, and cellular plan details. Therefore, it's important to handle it with care to avoid any damage or loss of data. By following the instructions provided in this article, you can effectively remove the SIM card from your iPhone 13 without encountering any issues.
Understanding the process of safely extracting the SIM card from your iPhone 13 will not only empower you to manage your device efficiently but also give you the confidence to handle similar tasks in the future. Whether you're switching to a new SIM card or troubleshooting connectivity issues, having this knowledge at your disposal can be incredibly beneficial.
Now, let's delve into the specific steps required to safely extract the SIM card from your iPhone 13, ensuring that you can carry out this task seamlessly and without any unnecessary stress or confusion.
Step 1: Power off the iPhone 13
Before embarking on the process of removing the SIM card from your iPhone 13, it's imperative to power off the device. This step is crucial to ensure the safety of both the device and the SIM card during the extraction process.
To power off your iPhone 13, simply press and hold the side button along with either volume button until the "slide to power off" slider appears on the screen. Then, slide the slider to turn off your device. It's important to wait for the device to completely power down before proceeding to the next step.
Powering off your iPhone 13 serves as a protective measure, preventing any potential damage to the SIM card or the device itself. By ensuring that the device is completely powered down, you minimize the risk of disrupting any ongoing processes or causing any interference that could impact the SIM card extraction process.
Additionally, powering off the iPhone 13 creates a stable environment for safely handling the SIM card and the SIM card tray. This step allows you to proceed with the extraction process without the concern of unexpected notifications, calls, or other interruptions that could potentially disrupt the task at hand.
By taking the time to power off your iPhone 13 before removing the SIM card, you demonstrate a proactive approach to device maintenance and care. This simple yet essential step sets the stage for a smooth and hassle-free SIM card extraction process, ensuring that both your iPhone 13 and the SIM card are handled with the utmost consideration and attention to detail.
With the iPhone 13 powered off and the stage set for the SIM card extraction process, you are now ready to proceed to the next step, which involves locating the SIM card tray within the device. This pivotal step will guide you through the precise location of the SIM card tray, setting the foundation for the subsequent stages of the extraction process.
Now that the iPhone 13 is powered off, let's move on to the next step and continue the journey of safely extracting the SIM card from your device.
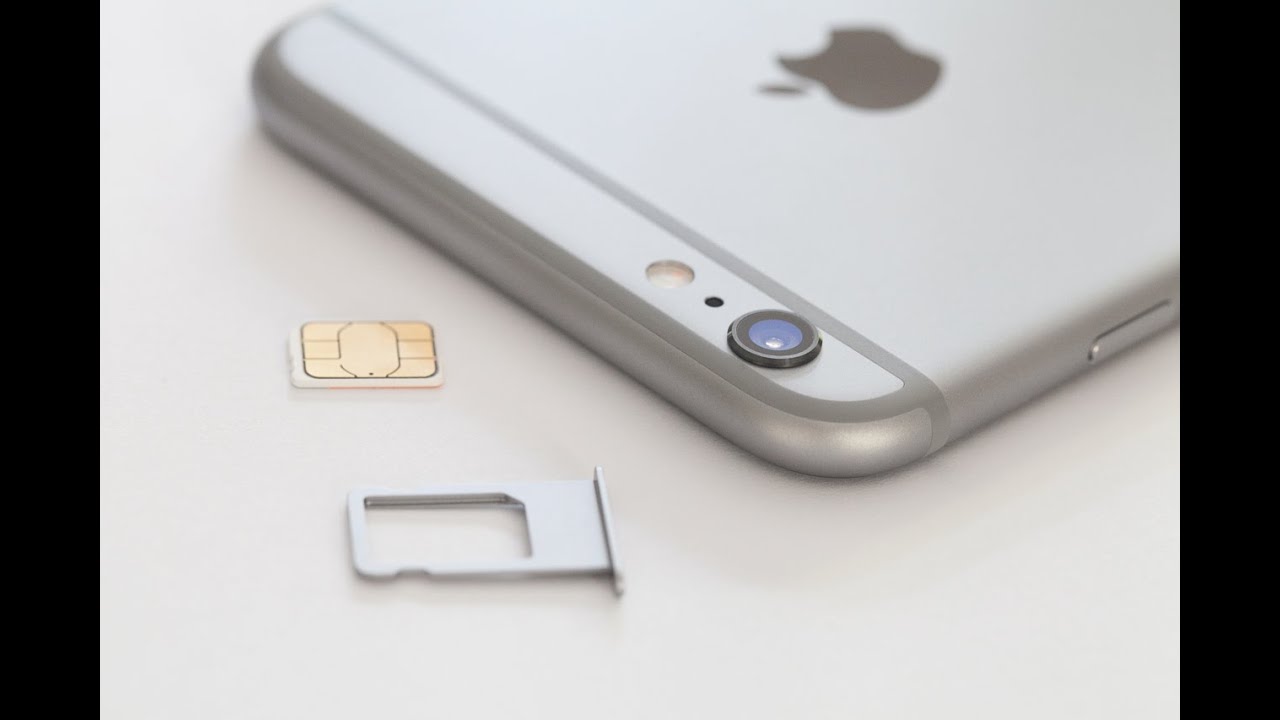
Step 2: Locate the SIM card tray
The next crucial step in safely extracting the SIM card from your iPhone 13 is to locate the SIM card tray. This small yet significant component plays a pivotal role in housing the SIM card within the device, and identifying its precise location is essential for a successful extraction process.
To locate the SIM card tray on your iPhone 13, you will need to identify the specific slot designed to accommodate the tray. The SIM card tray is typically positioned on the side of the device, and its exact placement may vary depending on the model of the iPhone 13. In most cases, you can find the SIM card tray on the right-hand side of the device, adjacent to the volume buttons.
Upon locating the SIM card tray, you will notice a small pinhole or indentation near the tray's compartment. This feature is designed to accommodate the SIM card eject tool, allowing you to access the tray with precision and ease. By familiarizing yourself with the physical appearance and location of the SIM card tray, you can effectively prepare for the subsequent steps of the extraction process.
As you identify the SIM card tray on your iPhone 13, take a moment to inspect the surrounding area and ensure that there are no obstructions or debris that could impede the extraction process. Maintaining a clean and unobstructed environment around the SIM card tray is essential for smoothly navigating the subsequent steps and minimizing the risk of any complications during the extraction process.
By successfully locating the SIM card tray on your iPhone 13, you have taken a significant stride towards safely extracting the SIM card from the device. This foundational step sets the stage for the subsequent actions required to access the SIM card tray and remove the SIM card with precision and care.
With the SIM card tray identified and its surroundings inspected, you are now prepared to proceed to the next step, which involves utilizing the SIM card eject tool to access the tray and initiate the extraction process. This critical phase will guide you through the precise actions required to access the SIM card tray and prepare for the safe removal of the SIM card from your iPhone 13.
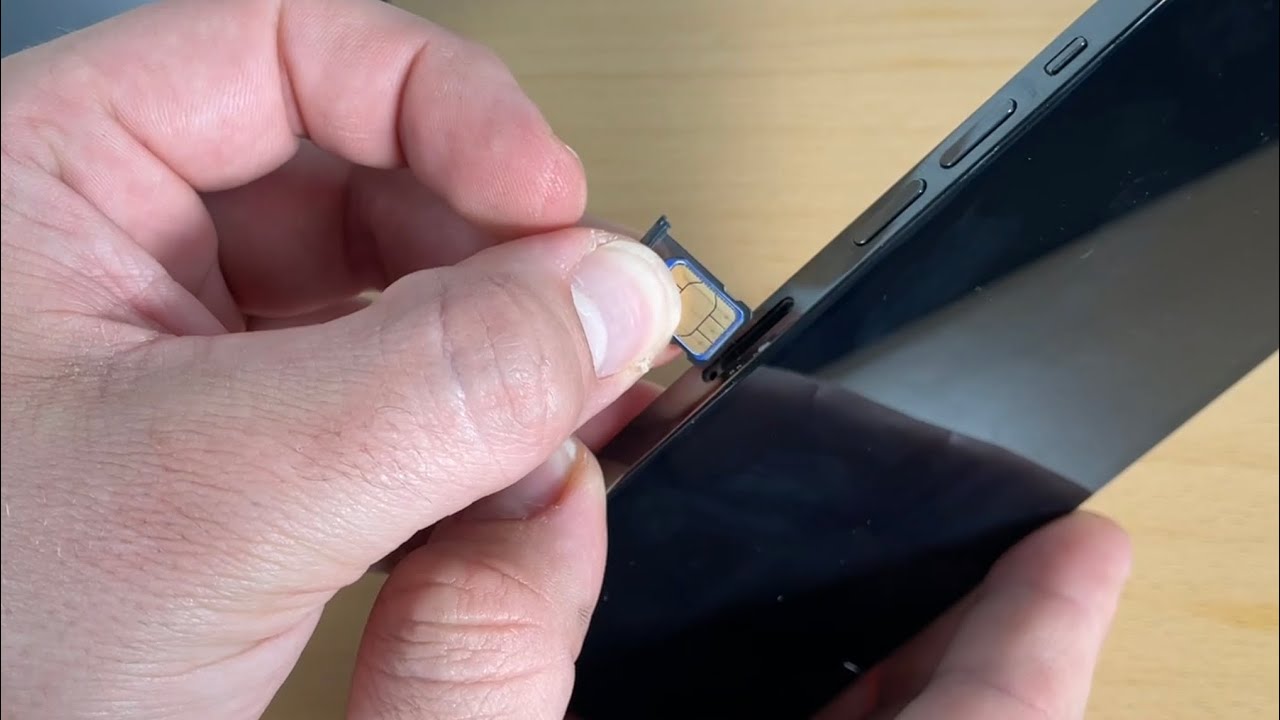
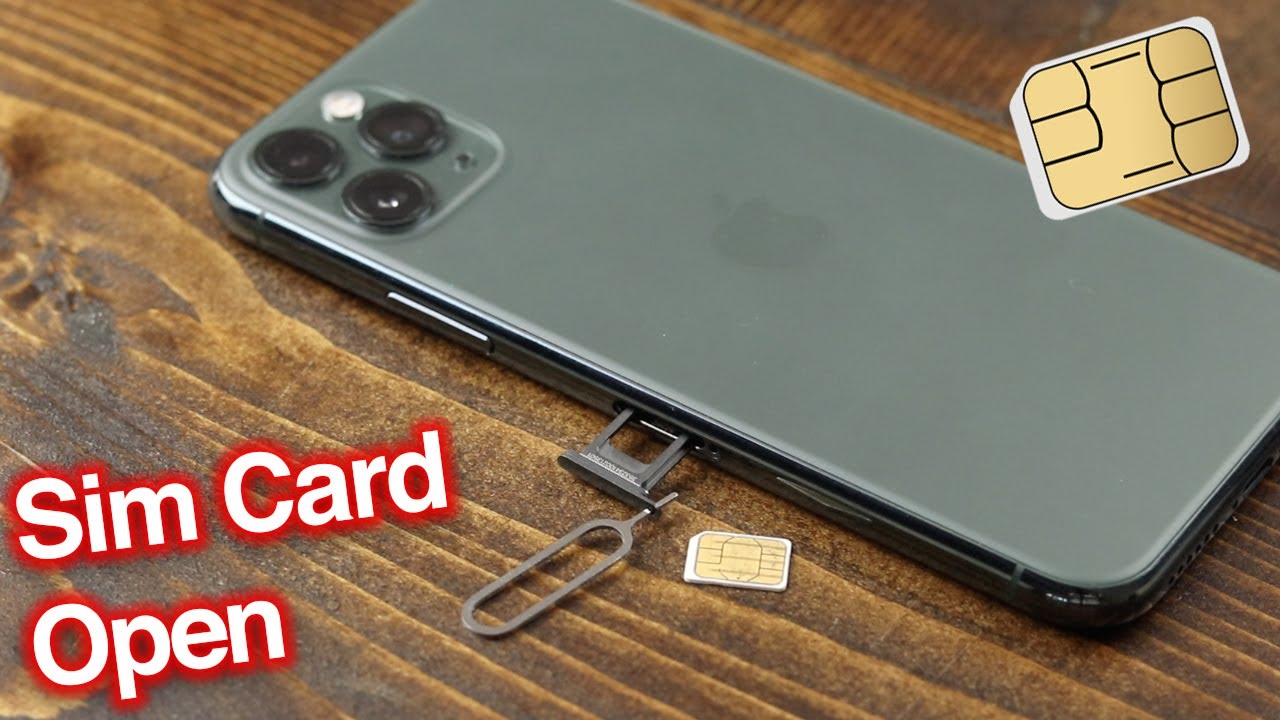
Step 3: Insert the SIM card eject tool
With the SIM card tray located, the next step in safely extracting the SIM card from your iPhone 13 involves the precise insertion of the SIM card eject tool. This small yet essential tool is designed to facilitate the seamless removal of the SIM card tray, allowing you to access the SIM card with precision and care.
The SIM card eject tool, often included in the original packaging of your iPhone 13, is a slender, metallic instrument with a narrow, pointed tip. Its purpose is to engage with the pinhole or indentation near the SIM card tray, enabling you to release the tray from its compartment without causing any damage to the device or the tray itself.
To begin this step, retrieve the SIM card eject tool from its storage location, ensuring that it is readily accessible for the subsequent actions. Holding the iPhone 13 securely in one hand, identify the small pinhole or indentation adjacent to the SIM card tray. This feature serves as the entry point for the SIM card eject tool and is essential for initiating the tray ejection process.
With the SIM card eject tool in hand and the pinhole or indentation clearly identified, gently but firmly insert the pointed tip of the tool into the designated opening. Apply steady and even pressure, ensuring that the tool is aligned with the pinhole to avoid any unnecessary resistance or misalignment.
As you insert the SIM card eject tool into the pinhole, you may feel a slight resistance, indicating that the tool has engaged with the internal mechanism responsible for releasing the SIM card tray. It's important to proceed with caution and avoid applying excessive force, as this could potentially lead to damage to the tool, the device, or the SIM card tray itself.
Upon successful insertion of the SIM card eject tool, you will sense a subtle give, signifying that the tool has effectively initiated the release mechanism within the device. At this point, maintain a steady grip on the tool and prepare to proceed to the subsequent step, which involves gently pushing to eject the SIM card tray from the iPhone 13.
With the SIM card eject tool securely in place and the release mechanism engaged, you are now poised to progress to the next pivotal stage of the extraction process. This critical phase will guide you through the precise actions required to initiate the ejection of the SIM card tray, marking a significant advancement towards safely accessing the SIM card within your iPhone 13.
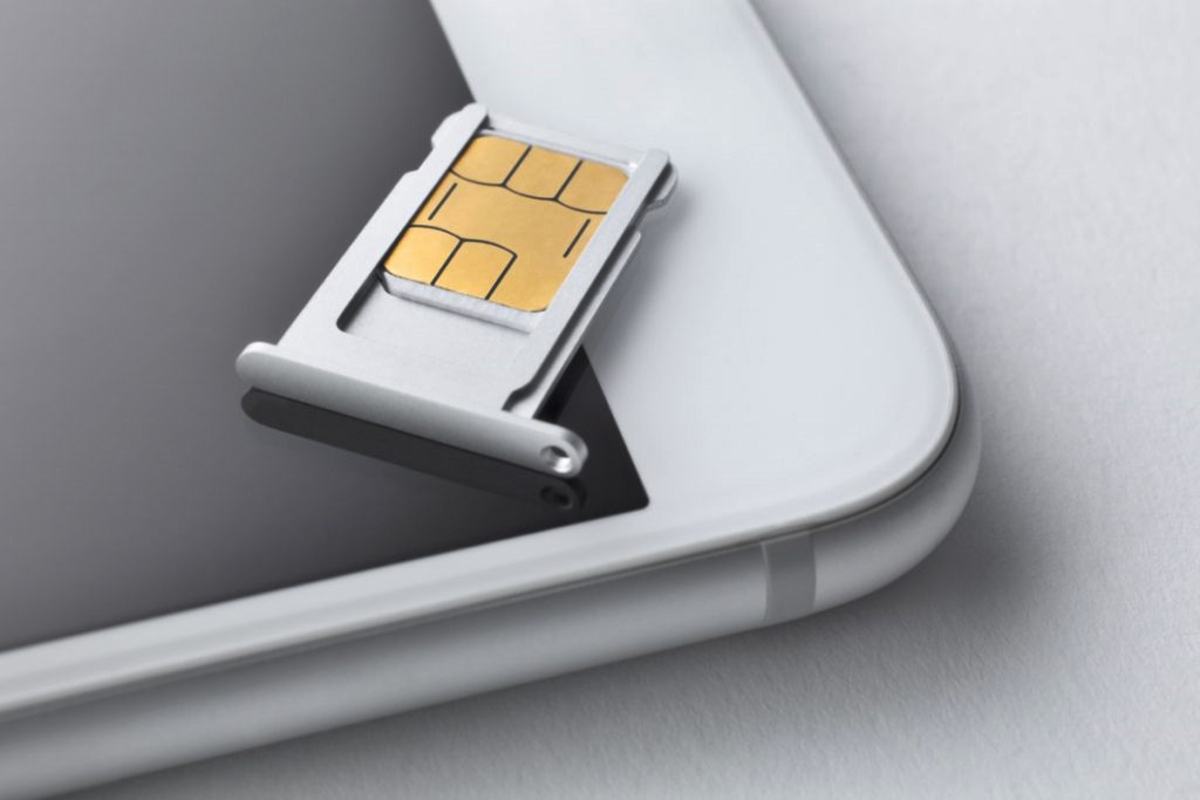
Step 4: Gently push to eject the SIM card tray
With the SIM card eject tool securely in place, the next crucial step in safely extracting the SIM card from your iPhone 13 involves gently pushing to eject the SIM card tray from its compartment. This delicate maneuver requires precision and attentiveness to ensure the smooth and seamless release of the tray without causing any disruption or damage to the device or the SIM card itself.
As you prepare to initiate the ejection process, maintain a firm yet gentle grip on the SIM card eject tool, ensuring that it remains securely inserted into the pinhole or indentation near the SIM card tray. With your free hand, carefully stabilize the iPhone 13, holding it in a position that allows for steady and controlled pressure to be applied to the tool.
Applying even pressure to the SIM card eject tool, gently push in the direction of the pinhole, utilizing a smooth and deliberate motion to prompt the release of the SIM card tray from the device. It's essential to exercise caution and avoid any abrupt or forceful actions, as this could potentially lead to unintended consequences such as damage to the tray or the device itself.
As you exert gentle pressure on the SIM card eject tool, you may feel a subtle movement within the device, indicating that the tray is gradually disengaging from its compartment. It's important to proceed with patience and attentiveness, allowing the ejection process to unfold naturally and without any unnecessary haste or force.
As the SIM card tray begins to emerge from the device, continue to apply controlled pressure to the SIM card eject tool, guiding the tray outwards with precision and care. Once the tray is fully ejected, carefully remove the SIM card eject tool from the pinhole, ensuring that it is done so in a smooth and deliberate manner.
With the SIM card tray now accessible, you have successfully completed the pivotal step of gently pushing to eject the tray from your iPhone 13. This accomplishment marks a significant advancement in the SIM card extraction process, setting the stage for the subsequent action of removing the SIM card from the tray with careful consideration and attention to detail.
Now that the SIM card tray has been safely ejected from the device, you are prepared to proceed to the next step, which involves delicately removing the SIM card from the tray and preparing for its secure reinsertion into the iPhone 13. This critical phase will guide you through the precise actions required to handle the SIM card with the utmost care and ensure its safe removal from the tray.
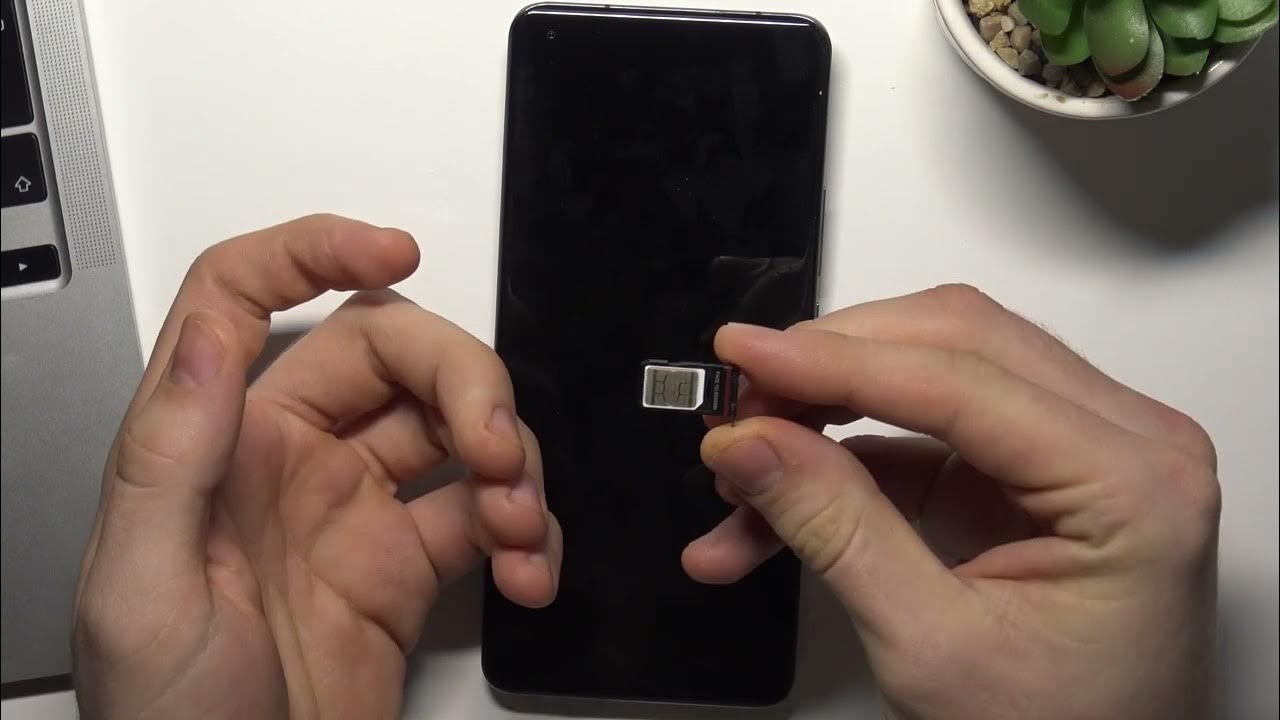
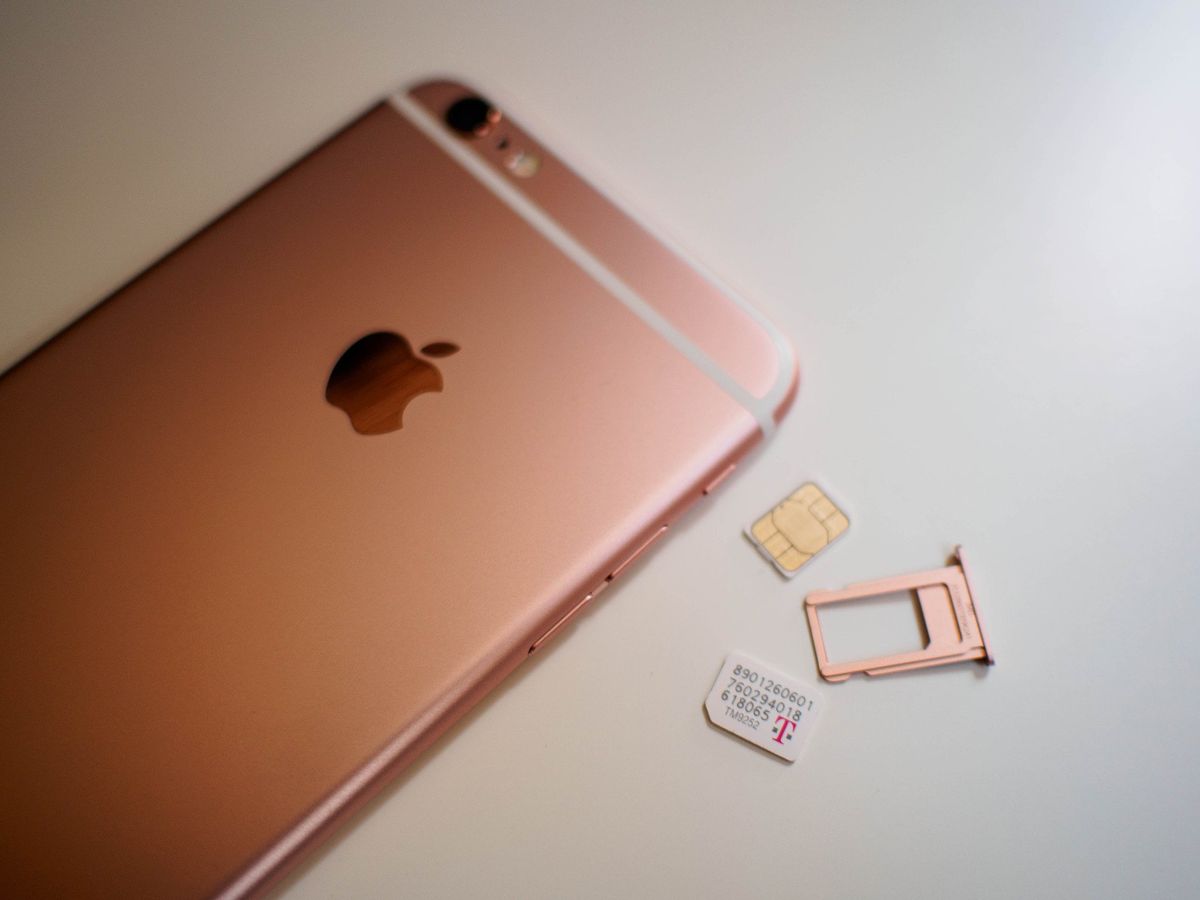
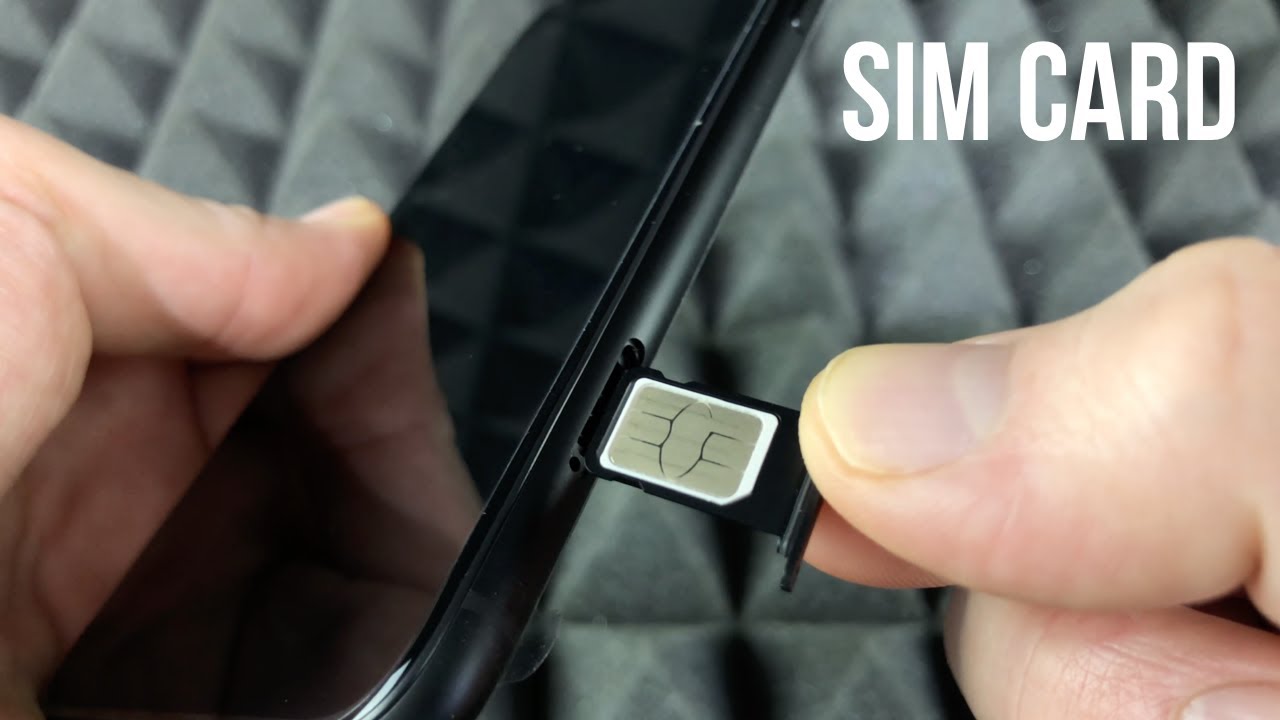
Step 5: Remove the SIM card from the tray
With the SIM card tray successfully ejected from your iPhone 13, the next essential step in safely extracting the SIM card involves delicately removing the SIM card from the tray. This meticulous process requires precision and care to ensure that the SIM card is handled with the utmost consideration, minimizing the risk of any damage or data loss.
Upon inspecting the SIM card tray, you will notice a small compartment designed to accommodate the SIM card. Gently examine the tray to locate the slot specifically designated for the SIM card, taking note of its size and positioning within the tray. It's important to approach this step with attentiveness and a steady hand, as the SIM card is a delicate component that warrants careful handling.
To remove the SIM card from the tray, delicately slide the card out of its slot, ensuring that you exert minimal pressure and maintain a controlled grip throughout the process. The SIM card is designed to fit securely within the tray, and as such, it may require gentle maneuvering to disengage it from its position. By exercising patience and attentiveness, you can effectively navigate this step and successfully remove the SIM card without encountering any complications.
As the SIM card is released from the tray, carefully inspect it to ensure that it remains free from any visible damage or debris. It's crucial to handle the SIM card with care, avoiding any bending or rough handling that could potentially compromise its functionality. By maintaining a gentle and controlled approach, you can safeguard the integrity of the SIM card and minimize the risk of any unintended harm during the extraction process.
Once the SIM card has been safely removed from the tray, take a moment to inspect both the card and the tray to ensure that they are free from any foreign objects or damage. This thorough examination serves as a proactive measure to verify the condition of the SIM card and the tray, providing assurance that both components remain intact and ready for the subsequent steps of the extraction process.
With the SIM card successfully removed from the tray, you have achieved a crucial milestone in the process of safely extracting the SIM card from your iPhone 13. This accomplishment sets the stage for the final step of reinserting the SIM card tray into the device, marking the culmination of a meticulous and attentive extraction process.
Now that the SIM card has been delicately removed from the tray, you are prepared to proceed to the next step, which involves securely reinserting the SIM card tray into your iPhone 13. This pivotal phase will guide you through the precise actions required to ensure the seamless integration of the SIM card back into the device, allowing you to resume connectivity and communication with confidence.
Step 6: Reinsert the SIM card tray into the iPhone 13
With the SIM card safely removed from the tray, the final step in the process of safely extracting the SIM card from your iPhone 13 involves securely reinserting the SIM card tray back into the device. This pivotal phase marks the culmination of a meticulous extraction process, ensuring that the SIM card is seamlessly integrated into the iPhone 13, ready to resume its essential role in facilitating communication and connectivity.
To begin the reinsertion process, carefully examine the SIM card tray to identify the orientation and positioning of the SIM card slot. The tray is designed to accommodate the SIM card in a specific configuration, and aligning the card correctly within the tray is crucial for its secure integration into the device.
With the SIM card tray in hand, delicately position the SIM card within the designated slot, ensuring that it fits snugly and aligns with the contours of the tray. It's important to approach this step with attentiveness and precision, verifying that the SIM card is inserted in a manner that promotes a secure and stable connection within the device.
As you guide the SIM card into its designated slot, maintain a steady and controlled grip on the tray, ensuring that the card remains properly aligned and seated within the tray. By exercising patience and attentiveness, you can effectively navigate this step and ensure that the SIM card is securely positioned for reintegration into the iPhone 13.
Once the SIM card is securely seated within the tray, carefully align the tray with the corresponding slot on the side of the iPhone 13. Gently maneuver the tray back into its original position, ensuring that it glides smoothly and seamlessly into the device without encountering any resistance or misalignment.
As the SIM card tray is reinserted into the iPhone 13, take a moment to verify that it sits flush with the device's exterior, indicating that it has been securely integrated. It's essential to conduct a visual inspection to confirm that the tray is properly seated, providing assurance that the SIM card is poised to resume its vital function within the device.
With the SIM card tray securely reinserted into the iPhone 13, you have successfully completed the final step of the extraction process, ensuring that the SIM card is seamlessly integrated and ready to facilitate communication and connectivity. This accomplishment reflects a meticulous and attentive approach to device maintenance, underscoring the importance of handling the SIM card with the utmost care and consideration.
By following the step-by-step guide outlined in this article, you have effectively navigated the process of safely extracting the SIM card from your iPhone 13, demonstrating a proactive and conscientious approach to device management. With the SIM card securely reinserted into the device, you can proceed with confidence, knowing that your iPhone 13 is ready to resume its essential functions, supported by a carefully handled and securely positioned SIM card.
Conclusion
In conclusion, the process of safely extracting the SIM card from your iPhone 13 is a fundamental aspect of device management that warrants careful attention and precision. By following the step-by-step guide outlined in this article, you have gained valuable insights into the essential steps required to navigate this task with confidence and proficiency.
Beginning with the crucial step of powering off the iPhone 13, you established a stable environment for the SIM card extraction process, ensuring that both the device and the SIM card were safeguarded from any potential disruptions or damage. This proactive approach set the stage for the subsequent actions, laying a strong foundation for the meticulous handling of the SIM card and the SIM card tray.
As you located the SIM card tray and skillfully utilized the SIM card eject tool to initiate the ejection process, you demonstrated a keen understanding of the device's components and a conscientious approach to device maintenance. The deliberate and controlled actions employed during the ejection and SIM card removal process underscored the importance of handling the SIM card with care and precision, minimizing the risk of any unintended harm or data loss.
The subsequent steps of gently pushing to eject the SIM card tray and delicately removing the SIM card from the tray highlighted your commitment to thoroughness and attentiveness, ensuring that the SIM card extraction process unfolded seamlessly and without any complications. By exercising patience and precision, you effectively safeguarded the integrity of the SIM card and the device, setting the stage for the secure reinsertion of the SIM card into the iPhone 13.
As you securely reinserted the SIM card tray into the device, aligning the SIM card with precision and care, you brought the extraction process to a successful conclusion. This final step underscored your dedication to device maintenance and your ability to navigate intricate tasks with confidence and proficiency.
In mastering the process of safely extracting the SIM card from your iPhone 13, you have not only enhanced your device management skills but also gained a deeper appreciation for the importance of meticulous handling and care. Your proactive and conscientious approach to this task reflects a commitment to device maintenance and a readiness to engage with essential device management processes with confidence and proficiency.
With the SIM card securely reinserted into the iPhone 13, you can proceed with the assurance that your device is equipped with a carefully handled and securely positioned SIM card, ready to support seamless connectivity and communication. By incorporating the knowledge and insights gained from this guide into your device management practices, you are well-prepared to navigate similar tasks with ease and precision, ensuring the optimal performance and longevity of your iPhone 13.