Introduction
Facebook Pay is a convenient and secure payment feature that allows users in Canada to make transactions within the Facebook platform. Whether you want to send money to friends, purchase products from businesses, or make donations, Facebook Pay provides a seamless and efficient way to handle your financial transactions. In this guide, we will walk you through the process of setting up Facebook Pay in Canada and show you how to make payments, send and receive money, as well as manage your transaction history.
With Facebook Pay, users no longer need to rely on external payment platforms or constantly switch between apps to complete transactions. By integrating this feature into the Facebook app, the company aims to make online shopping, fundraising, and other financial activities more convenient and secure for its users.
By using Facebook Pay, you can enjoy a hassle-free payment experience, knowing that your transactions are protected by advanced security measures. Facebook Pay utilizes encryption and other security technologies to safeguard your financial information, providing you with peace of mind while you connect, interact, and make transactions with others on the platform.
Whether you’re someone who frequently shops online, regularly donates to charitable causes, or simply wants to split a bill with friends, Facebook Pay offers a range of convenient payment options tailored to your needs. From debit and credit cards to PayPal and even local payment methods, you can link and manage multiple payment sources within the Facebook app.
In the following sections, we will guide you through the process of setting up Facebook Pay, adding payment methods, making payments, sending and receiving money, adjusting privacy and security settings, and managing your transaction history. By the end of this guide, you will be equipped with all the necessary knowledge to navigate the Facebook Pay feature with confidence.
Let’s get started on harnessing the power of Facebook Pay for your financial transactions in Canada.
Setting Up Facebook Pay in Canada
Getting started with Facebook Pay in Canada is a simple process. To begin, ensure that you have the latest version of the Facebook app installed on your mobile device. Follow the steps below to set up Facebook Pay:
- Launch the Facebook app and log in to your account.
- Tap on the three horizontal lines at the top right corner of the screen to open the menu.
- Scroll down and select “Settings & Privacy.”
- Tap on “Settings.”
- Scroll down and select “Facebook Pay.”
- Tap on “Add Payment Method.”
- Select the payment method that you wish to add. You can choose from debit or credit cards, PayPal, or other local payment methods available in your region.
- Follow the on-screen prompts to enter your payment method details and complete the setup process.
Once you have successfully added your payment method, you can now use Facebook Pay to make secure transactions within the platform. It is important to note that Facebook Pay supports multiple payment methods, allowing you to link and manage various sources of funds.
If you have multiple payment methods linked to your Facebook account, you can easily specify a preferred payment method for both your personal and business transactions. This flexibility ensures that you have more control over how you make payments and manage your finances on the platform.
It’s worth mentioning that Facebook Pay is designed to provide an extra layer of security for your financial transactions. Your payment information is encrypted and securely stored, protecting it from unauthorized access. Additionally, Facebook Pay allows you to add a PIN or enable biometric authentication (such as fingerprint or facial recognition) for added protection.
Now that you have set up Facebook Pay and added your preferred payment method, let’s explore how you can conveniently make payments, send and receive money, and manage your transactions within the platform.
Adding Payment Methods
Facebook Pay in Canada supports various payment methods, giving you the flexibility to choose the one that suits your needs. Whether you prefer using debit or credit cards, PayPal, or other local payment methods, you can easily link and manage these sources within the Facebook app. Here’s how to add payment methods to your Facebook Pay account:
- Open the Facebook app on your mobile device and log in to your account.
- Tap on the three horizontal lines at the top right corner of the screen to open the menu.
- Scroll down and select “Settings & Privacy.”
- Tap on “Settings.”
- Scroll down and select “Facebook Pay.”
- Tap on “Manage Payment Methods.”
- Select “Add New Payment Method.”
- Choose the type of payment method you would like to add from the available options.
- Follow the on-screen instructions to enter your payment method details, such as card information or PayPal credentials.
- Click “Add” or “Save” to link the payment method to your Facebook Pay account.
Once you have successfully added a payment method, you can easily manage it within the Facebook Pay settings. You can edit the details of a payment method, remove it if you no longer wish to use it, or set a preferred payment method for your transactions.
It is important to note that Facebook Pay takes your privacy and security seriously. When you add a payment method, your information is encrypted and stored securely. Facebook Pay does not share your payment details with sellers or other Facebook users without your consent.
By having multiple payment methods linked to your Facebook Pay account, you can enjoy the convenience of choosing the most suitable option for each transaction. Whether you prefer to use a specific card for online shopping, donate to a charitable cause using PayPal, or make in-app purchases with a local payment method, Facebook Pay has you covered.
With your payment methods added and ready to go, it’s time to explore how you can use Facebook Pay to make payments securely within the platform.
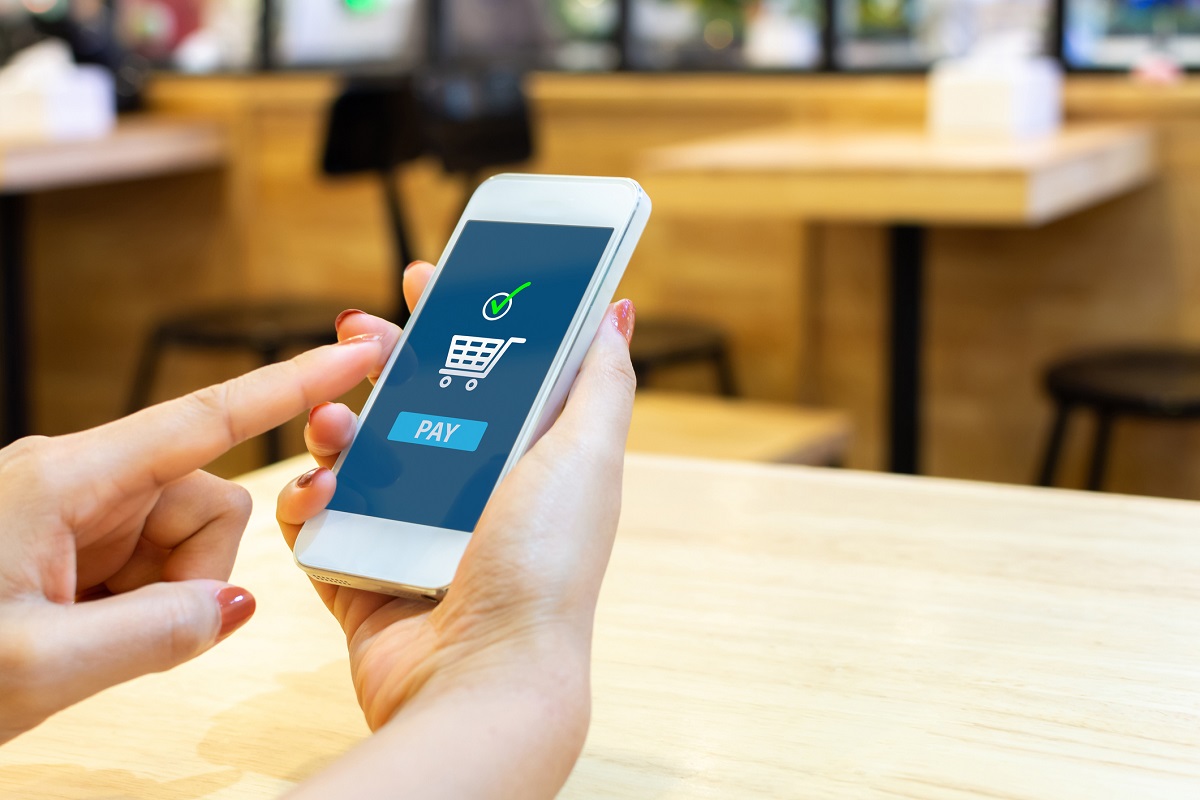
Making Payments
Facebook Pay in Canada makes it easy and convenient to make payments for various transactions directly within the Facebook platform. Whether you’re purchasing products from businesses, paying for services, or reimbursing a friend, Facebook Pay has got you covered. Here’s how to make payments using Facebook Pay:
- Open the Facebook app on your mobile device and log in to your account.
- Find the person or business you want to make a payment to.
- Tap on the “Pay” or “Buy” button, depending on the context of your transaction.
- Enter the amount you want to pay, along with any additional details required by the transaction.
- Select the payment method you want to use for this specific transaction.
- Review the payment details and tap on the “Confirm” or “Pay” button to complete the transaction.
- If prompted, enter your Facebook Pay PIN or use biometric authentication to authenticate the transaction.
- Once the payment is successful, you will receive a confirmation message.
Facebook Pay allows you to make payments to individuals as well as businesses. This means you can easily pay your friends back for a shared meal, split the bill for a group purchase, or make payments to businesses for products or services.
Additionally, Facebook Pay provides a seamless shopping experience within the Facebook app, allowing you to browse products and make purchases from businesses directly within the platform. With just a few taps, you can buy products, enter shipping information, and securely complete the payment process without leaving Facebook.
It’s important to note that Facebook Pay is designed with security in mind. Your payment information is encrypted and stored securely, ensuring the protection of your financial data. Facebook Pay also provides fraud detection and monitoring systems to safeguard against unauthorized transactions.
Now that you know how to make payments using Facebook Pay, let’s explore how you can send and receive money directly within the platform.
Sending and Receiving Money
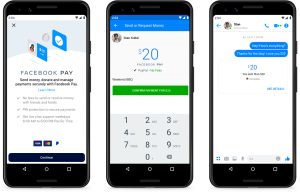
Facebook Pay in Canada not only allows you to make payments to businesses and individuals but also enables you to send and receive money directly within the platform. Whether you’re splitting a bill with friends, paying someone back, or receiving money for goods or services, Facebook Pay simplifies the process. Here’s how to send and receive money using Facebook Pay:
Sending Money:
- Open the Facebook app on your mobile device and log in to your account.
- Tap on the Messenger icon at the top right corner of the screen to open the messaging interface.
- Find the person you want to send money to and open a conversation with them.
- Tap on the dollar sign icon at the bottom of the screen to open the payments interface.
- Enter the amount you want to send and add a note describing the payment, if necessary.
- Select the payment method you want to use for this transaction.
- Review the payment details and tap on the “Pay” or “Send” button to complete the transaction.
- If prompted, enter your Facebook Pay PIN or use biometric authentication to authenticate the transaction.
- Once the payment is successful, the recipient will receive a notification and can access the funds.
Receiving Money:
- When someone sends you money through Facebook Pay, you will receive a notification.
- Open the notification or go to the Messenger interface to view the payment.
- Follow the on-screen instructions to accept the payment and add the funds to your Facebook Pay account.
- The funds can then be used for future transactions within the Facebook platform, or you can transfer the money to your linked bank account.
Facebook Pay makes sending and receiving money quick and convenient, ensuring that you can easily handle financial transactions without having to leave the Facebook app. It’s important to note that for security reasons, you can only send and receive money to and from friends who have Facebook Pay enabled.
When it comes to privacy and security, Facebook Pay protects your financial information by encrypting it and securely storing it. Additionally, Facebook Pay employs advanced fraud detection systems to help prevent unauthorized transactions.
Now that you know how to send and receive money using Facebook Pay, let’s delve into how you can set your privacy and security preferences to ensure a safe payment experience.
Setting Privacy and Security Preferences
Protecting your privacy and ensuring the security of your financial transactions is a top priority when using Facebook Pay in Canada. With Facebook Pay, you have control over your privacy and security settings, allowing you to customize your preferences according to your comfort level. Here’s how to set your privacy and security preferences:
- Open the Facebook app on your mobile device and log in to your account.
- Tap on the three horizontal lines at the top right corner of the screen to open the menu.
- Scroll down and select “Settings & Privacy.”
- Tap on “Settings.”
- Scroll down and select “Facebook Pay.”
- Tap on “Privacy and Security.”
- Here, you can adjust various settings, such as:
- Enabling or disabling biometric authentication (such as fingerprint or facial recognition) for transaction authentication.
- Setting a Facebook Pay PIN for additional transaction security.
- Choose whether to enable or disable the option to save card details for faster future transactions.
- Review and manage the permissions granted to Facebook Pay for accessing certain information and features on your device.
- Make sure to review and adjust these settings according to your preference and comfort level.
By customizing your privacy and security preferences, you can ensure that your financial transactions are conducted in a way that aligns with your personal needs and privacy concerns.
Facebook Pay utilizes encryption technology and other security measures to protect your payment information. The integration of biometric authentication and the option to set a PIN further enhances the security of your transactions, making it more challenging for unauthorized individuals to access your Facebook Pay account.
It’s important to regularly review your privacy and security settings to ensure that they meet your current preferences. By staying vigilant and keeping your settings up to date, you can have peace of mind knowing that your financial transactions on Facebook Pay are secure and protected.
Now that you’ve set your privacy and security preferences, let’s explore how you can manage your transactions and access your payment history within the Facebook app.
Managing Transactions and Payment History
Facebook Pay in Canada allows you to easily manage your transactions and access your payment history within the Facebook app. Whether you need to review a past transaction, track your expenses, or dispute a payment, Facebook Pay provides the necessary tools to help you stay organized. Here’s how to manage your transactions and access your payment history:
- Open the Facebook app on your mobile device and log in to your account.
- Tap on the three horizontal lines at the top right corner of the screen to open the menu.
- Scroll down and select “Settings & Privacy.”
- Tap on “Settings.”
- Scroll down and select “Facebook Pay.”
- Tap on “Manage Transactions” or “Payment History.”
- Here, you will find a list of your recent transactions.
- You can tap on a specific transaction to view more details, such as the recipient, date, and payment method used.
- If you need to dispute a transaction or require assistance, you can use the provided options to contact Facebook Pay support.
By accessing your payment history, you can keep track of your expenses, monitor your transactions, and identify any unfamiliar or unauthorized charges. This feature allows you to maintain transparency and take action if you notice any discrepancies or issues with your transactions.
In addition to managing your transactions within the Facebook app, you can also receive email notifications for each transaction, providing an extra layer of visibility and accountability for your financial activities.
Facebook Pay aims to make the management of your transactions and payment history as seamless as possible, ensuring that you have access to the information you need whenever you need it.
Now that you know how to manage your transactions and access your payment history using Facebook Pay, let’s address some common troubleshooting questions and provide answers to frequently asked questions.
Troubleshooting and FAQs
While Facebook Pay in Canada strives to provide a seamless payment experience, you may encounter certain issues or have questions about its usage. Here are some common troubleshooting questions and frequently asked questions about Facebook Pay:
1. Why isn’t my payment going through?
If you’re experiencing issues with a payment, ensure that you have a stable internet connection and that your payment method has sufficient funds. If the problem persists, check for any pending updates to the Facebook app and try clearing the app cache or reinstalling the app. If none of these steps resolve the issue, reach out to Facebook Pay support for further assistance.
2. How do I update or remove a payment method?
To update or remove a payment method, follow the steps outlined in the “Adding Payment Methods” section. Once you reach the “Manage Payment Methods” section, you can edit the details of an existing payment method or remove it if desired.
3. Can I use Facebook Pay for international transactions?
Currently, Facebook Pay is available for transactions within Canada only. You may not be able to use Facebook Pay for international transactions.
4. How do I dispute a transaction?
If you need to dispute a transaction or require assistance, access the “Manage Transactions” or “Payment History” section within the Facebook Pay settings. From there, you can utilize the provided options to contact Facebook Pay support and explain the issue you are facing.
5. Is my payment information safe with Facebook Pay?
Yes, Facebook Pay takes the security of your payment information seriously. It utilizes encryption and other security measures to protect your financial data. Your payment information is stored securely and is not shared with sellers or other Facebook users without your consent.
6. Can I link multiple payment methods to my Facebook Pay account?
Absolutely! Facebook Pay allows you to link and manage multiple payment methods, such as debit or credit cards, PayPal, or other local payment methods. This flexibility provides you with the convenience of choosing the most suitable payment source for each transaction.
7. Can I use Facebook Pay on desktop?
As of now, Facebook Pay is available for use on mobile devices only, through the Facebook app. Desktop support may be added in the future.
If you have any other questions or encounter specific issues while using Facebook Pay, it is recommended to visit the Facebook Help Center or contact Facebook Pay support directly for further assistance.
Now that we have addressed some common troubleshooting questions and FAQs, let’s wrap up this guide with a recap of the benefits and convenience of using Facebook Pay in Canada.
Conclusion
Facebook Pay in Canada offers a convenient and secure solution for handling your financial transactions within the Facebook platform. Whether you need to make payments to friends, businesses, or charitable organizations, Facebook Pay simplifies the process and enhances your overall payment experience.
Setting up Facebook Pay is a straightforward process that allows you to link and manage multiple payment methods, including debit and credit cards, PayPal, and other local payment options. With advanced security measures, such as encryption and biometric authentication, you can trust that your payment information is kept safe and secure.
Making payments and sending money through Facebook Pay is quick and seamless. Whether you’re paying for services, purchasing products, or splitting bills, Facebook Pay ensures that your transactions are processed smoothly within the platform.
By accessing your payment history and managing your transactions, you can stay organized and keep track of your expenses. If any issues arise, Facebook Pay support is available to provide assistance and address any concerns.
With Facebook Pay, you have control over your privacy and security preferences. You can customize settings such as biometric authentication and PIN requirements, ensuring that your financial information is protected according to your comfort level.
While Facebook Pay is a powerful tool for managing your financial transactions, it’s important to note that it currently supports transactions within Canada only. International transactions may not be available at this time.
As Facebook Pay continues to evolve and expand its features, it aims to further enhance the convenience and security of financial transactions on the platform. By staying informed and taking advantage of the available tools and features, you can enjoy a seamless and secure payment experience within the Facebook app.
Now that you have the knowledge and understanding of how to use Facebook Pay in Canada, it’s time to harness its capabilities and start enjoying the convenience and efficiency it provides for your financial transactions.