Introduction
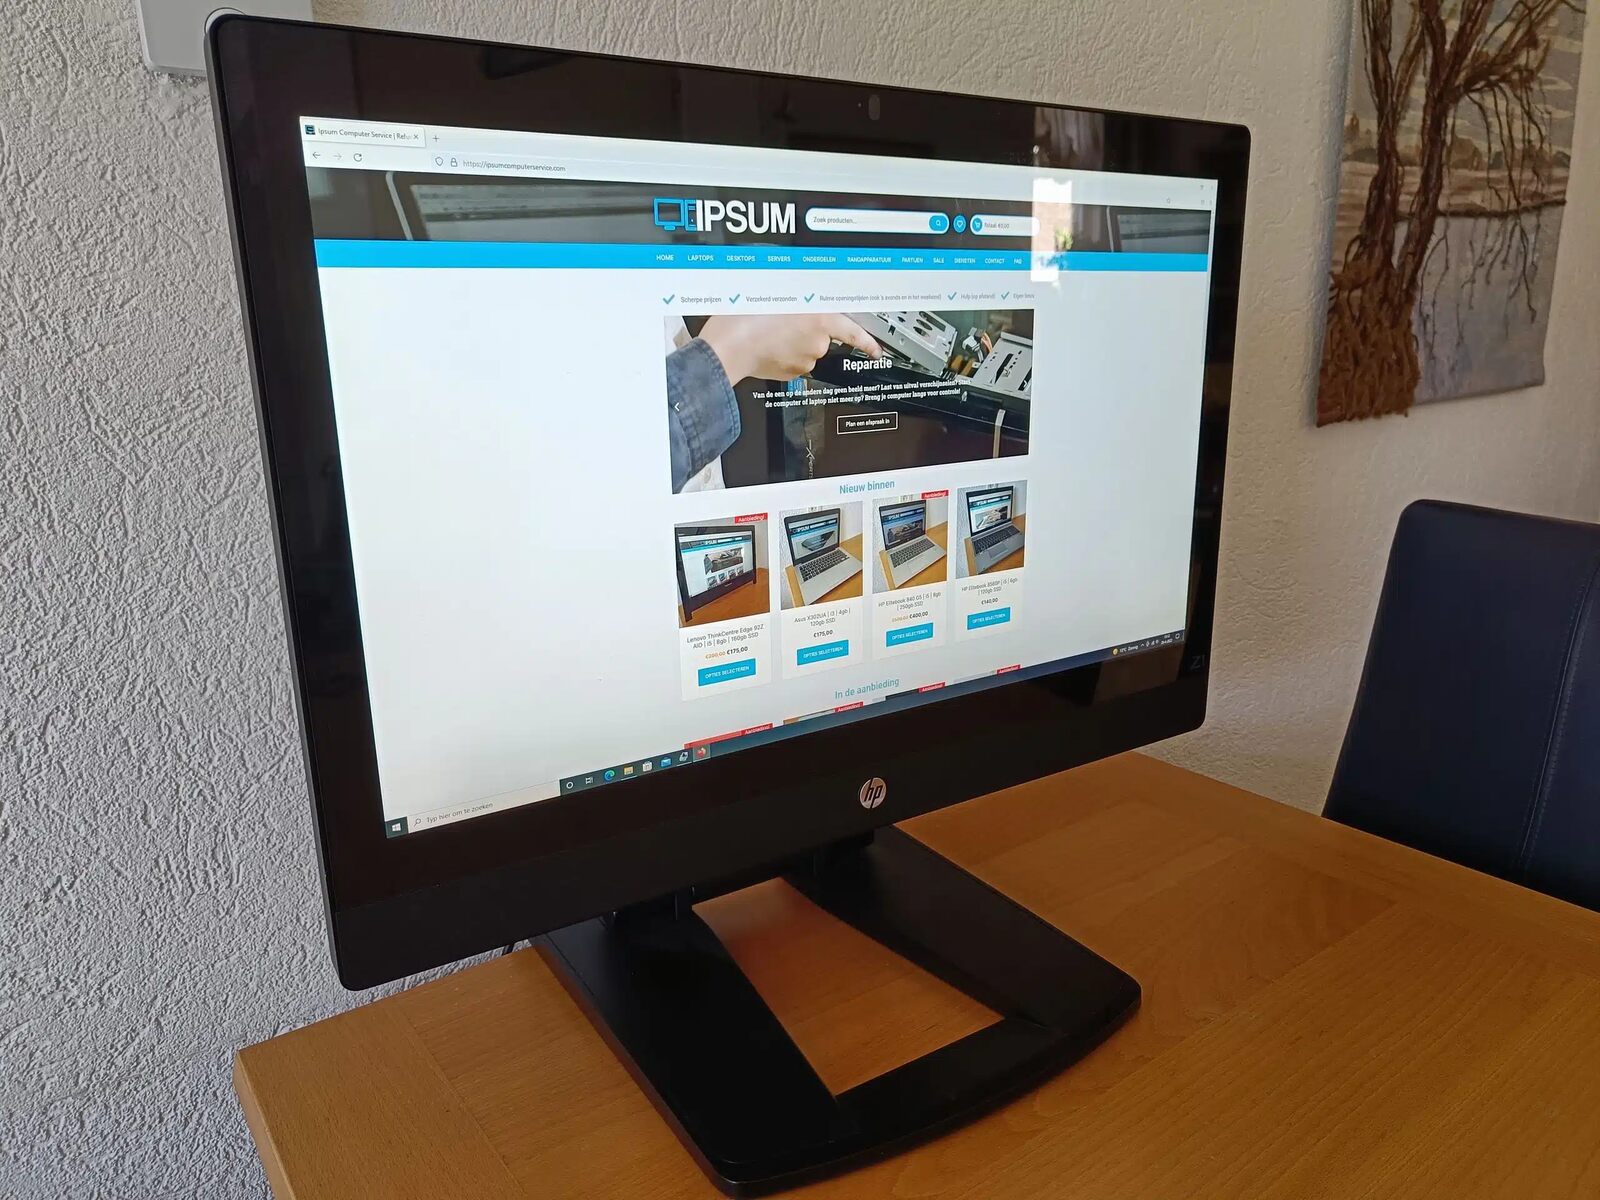
Welcome to the world of the HP Z1 Workstation, a powerful and versatile computing solution designed to meet the demanding needs of professionals across various industries. Whether you’re a graphic designer, architect, or data analyst, the HP Z1 Workstation offers incredible performance and reliability.
One crucial aspect of any computer system is the boot order. The boot order determines the sequence in which the hardware components are initialized when the computer starts up. It plays a vital role in ensuring that the operating system and software applications load properly, allowing you to get to work seamlessly.
In this article, we will delve into the importance of boot order and how it can affect your HP Z1 Workstation’s performance. We’ll also walk you through the default boot order settings and guide you on how to customize it to suit your specific requirements.
Whether you need to prioritize a particular storage drive, boot from a USB device, or access the BIOS settings to troubleshoot boot issues, this article has got you covered. So, let’s dive in and explore the world of boot order settings on the HP Z1 Workstation.
What is Boot Order?
Boot order refers to the sequence in which the various hardware components of a computer system are initialized during the startup process. When you turn on your HP Z1 Workstation, the system goes through a series of steps to load the operating system and other software applications.
The boot order determines the priority given to different devices and drives connected to your workstation. These devices can include the internal hard drive, solid-state drive (SSD), CD/DVD drive, USB devices, and network boot options. The boot order essentially dictates which device the system will attempt to boot from first, second, and so on.
Having the correct boot order ensures that the system boots up efficiently and quickly, allowing you to access your programs and data promptly. If the boot order is not properly configured, you may experience delays in startup, encounter boot errors, or fail to load the operating system altogether.
For example, if your HP Z1 Workstation is set to boot from a USB device as the first priority and there is a bootable USB drive connected, the system will search for an operating system on that USB drive before attempting to boot from other devices. This can be useful if you need to install an operating system or run a diagnostic tool from a USB device.
Understanding the boot order is essential, especially when troubleshooting startup issues or optimizing system performance. By customizing the boot order, you have the flexibility to prioritize specific devices or drives based on your requirements.
Now that we’ve covered the basics of boot order, let’s explore why it is important for the smooth functioning of your HP Z1 Workstation.
Why is Boot Order Important?
The boot order is a critical factor in ensuring the smooth operation and optimal performance of your HP Z1 Workstation. Here are several reasons why boot order is important:
Efficient Startup: Properly configuring the boot order allows your workstation to boot up quickly and efficiently. By specifying the correct boot device priority, such as the primary hard drive or SSD, the system can directly load the operating system and launch your applications without unnecessary delays.
Device Compatibility: Boot order enables your workstation to recognize and interact with different devices and drives. By setting the boot order correctly, you ensure that the system recognizes and communicates with devices such as USB drives, CD/DVD drives, or network boot options. This is particularly useful when you need to boot from specific devices for activities like data recovery or system diagnostics.
Flexibility: Customizing the boot order allows you to prioritize devices based on your needs. For example, if you frequently use a USB drive for data transfers or run multiple operating systems, you can set the USB device as a higher priority in the boot order. This way, you can quickly switch between different boot options without the need to physically disconnect or reconnect devices each time.
Troubleshooting: In case of boot issues or errors, understanding and modifying the boot order can be invaluable when troubleshooting the problem. By accessing the BIOS settings and adjusting the boot order, you can attempt to boot from alternative devices or drives to isolate the issue. This can help identify whether the problem lies with the primary hard drive, operating system, or other components.
Security: Boot order settings can also enhance system security. For example, you can set a BIOS password or enable secure boot options to prevent unauthorized modifications to the boot order or the installation of malicious software during startup.
By recognizing the importance of boot order and knowing how to configure it, you can ensure a smooth and efficient startup process for your HP Z1 Workstation. Next, let’s explore the default boot order settings in the HP Z1 Workstation.
Default Boot Order for HP Z1 Workstation
When you first set up your HP Z1 Workstation, it comes with a predefined boot order that determines the priority of devices during the startup process. The default boot order may vary depending on the specific model and configuration of your workstation, but in general, the following is a typical default boot order for the HP Z1 Workstation:
- Internal Hard Drive: The primary hard drive or solid-state drive (SSD) installed in your workstation is usually set as the first boot option. This allows the system to load the operating system and launch your applications directly from the internal storage.
- CD/DVD Drive: If you have a CD/DVD drive installed in your HP Z1 Workstation, it is typically set as the second boot option. This allows you to boot from a bootable CD or DVD, such as an operating system installation disc or a recovery tool.
- USB Device: The USB ports on your workstation allow you to connect various external devices, such as USB flash drives or external hard drives. By default, the boot order includes the USB devices as the third option, enabling you to boot from a bootable USB device if needed.
- Network Boot: Some HP Z1 Workstation models also include the option to boot from a network source, such as a network server. This allows you to perform network-based installations or access network resources during startup.
It’s important to note that the default boot order may not always align with your specific needs or preferences. For instance, if you frequently use a USB device for booting or want to prioritize a different storage drive, you will need to customize the boot order accordingly.
Next, we’ll explore how you can access the BIOS settings to modify the boot order on your HP Z1 Workstation.
Changing the Boot Order in HP Z1 Workstation
If you find that the default boot order of your HP Z1 Workstation doesn’t meet your requirements or preferences, you can easily modify it to suit your needs. To change the boot order, you need to access the BIOS (Basic Input/Output System) settings of your workstation. Here’s how you can do it:
Step 1: Restart your HP Z1 Workstation
First, ensure that all your work is saved and close any open applications. Then, click on the “Start” menu and select “Restart” to restart your workstation. Alternatively, you can use the Windows shortcut by holding down the Shift key while clicking on “Restart”.
Step 2: Access the BIOS Settings
During the startup process, you will see the HP logo. At this point, you need to press the appropriate key to access the BIOS setup utility. The key to enter the BIOS may vary depending on your workstation model, but common keys include Esc, F2, F10, or Del. Consult your workstation’s documentation or look for a message on the screen indicating the key to press.
Step 3: Navigate to Boot Order Settings
Once you are in the BIOS setup utility, look for the “Boot” or “Boot Order” section. The exact location and naming may differ depending on your workstation’s BIOS version. Use the arrow keys on your keyboard to navigate through the BIOS menus and find the boot order settings.
Step 4: Customize the Boot Order
Within the boot order settings, you will see a list of devices or drives that can be selected as boot options. Use the arrow keys to highlight the device you want to prioritize and press the appropriate key (usually F5 or F6) to move it up or down in the boot order. Repeat this step for each device until you have configured the desired boot order.
Step 5: Save and Exit BIOS Settings
After customizing the boot order, navigate to the “Exit” or “Save and Exit” section of the BIOS setup utility. Follow the on-screen instructions to save the changes you made to the boot order settings and exit the BIOS.
Once your HP Z1 Workstation restarts, it will now follow the modified boot order you set, allowing you to boot from the prioritized devices.
Now that you are familiar with changing the boot order in the HP Z1 Workstation, let’s move on to the next section and explore how to access the BIOS settings.
How to Access BIOS Settings
Accessing the BIOS (Basic Input/Output System) settings on your HP Z1 Workstation gives you the ability to modify important system configurations, including the boot order. Here’s how you can access the BIOS settings:
Step 1: Shut down your HP Z1 Workstation
Make sure to save your work and close any open applications. Then, click on the “Start” menu, select “Power,” and choose “Shut down” to power off your workstation completely.
Step 2: Power on your HP Z1 Workstation
Next, press the power button to turn on your workstation. As soon as you see the HP logo on the screen, start pressing the BIOS access key repeatedly. The specific key you need to press varies depending on the model and configuration of your workstation, but typical keys include Esc, F2, F10, or Del. Check your workstation’s documentation or look for a message on the screen to find the correct key.
Step 3: Enter the BIOS setup utility
If you press the correct key in time, you will enter the BIOS setup utility. This screen displays information about your workstation’s hardware and various settings that can be modified.
Step 4: Navigate through the BIOS menus
Use the arrow keys on your keyboard to navigate through the BIOS menus. Depending on the BIOS version, you may need to use different keys to scroll through the options, such as the arrow keys, Tab key, or Enter key. Read the instructions on the screen to guide you through the navigation process.
Step 5: Modify BIOS settings
To modify the boot order or any other settings, locate the corresponding section in the BIOS setup utility. The layout and naming of different BIOS versions may vary, but commonly, you will find the boot order settings under the “Boot” or “Boot Order” section. Use the arrow keys to highlight the desired option and follow the on-screen instructions to make the necessary changes.
Step 6: Save and exit BIOS
Once you have made the desired changes, navigate to the “Exit” section of the BIOS setup utility. Follow the on-screen instructions to save your modifications and exit the BIOS. Your workstation will then restart, applying the new settings.
By following these steps, you can successfully access the BIOS settings on your HP Z1 Workstation and make the necessary modifications, such as changing the boot order, to optimize its performance.
Now that you know how to access the BIOS settings, let’s move on to the next section and learn about the steps to change the boot order within the BIOS.
Steps to Change Boot Order in BIOS
Modifying the boot order in the BIOS (Basic Input/Output System) settings allows you to prioritize different devices during the startup process of your HP Z1 Workstation. Here are the steps to change the boot order in the BIOS:
Step 1: Access the BIOS settings
Power on your HP Z1 Workstation and press the appropriate BIOS access key repeatedly as soon as you see the HP logo on the screen. The specific key to press may vary depending on your workstation model, but common keys include Esc, F2, F10, or Del. Look for a message on the screen or consult your workstation’s documentation for the correct key.
Step 2: Navigate to the Boot section
Once you are in the BIOS setup utility, use the arrow keys on your keyboard to navigate through the menus. Locate the “Boot” or “Boot Order” section, which contains the settings related to the boot order of devices.
Step 3: Select the desired boot device
Within the Boot section, you will see a list of devices or drives that can be selected as boot options. Use the arrow keys to highlight the device that you want to prioritize and press the appropriate key (usually F5 or F6) to move it up or down in the boot order. Repeat this step for each device until you have configured the desired boot order.
Step 4: Save your changes
After customizing the boot order, navigate to the “Exit” or “Save and Exit” section of the BIOS setup utility. Follow the on-screen instructions to save the changes you made to the boot order settings.
Step 5: Exit the BIOS
Once you have saved your changes, the BIOS setup utility will give you the option to exit. Select the appropriate exit option to leave the BIOS. Your workstation will then restart, following the modified boot order settings.
It’s important to note that the exact steps and naming within the BIOS setup utility may vary depending on the version and configuration of your HP Z1 Workstation’s BIOS. Therefore, it is recommended to refer to the documentation provided with your workstation or consult the manufacturer if you encounter any difficulties while changing the boot order.
Now that you know the steps to change the boot order in the BIOS, you can customize it according to your specific requirements and optimize the startup process of your HP Z1 Workstation.
Saving and Exiting BIOS Settings
After making changes to the boot order or any other settings in the BIOS (Basic Input/Output System) of your HP Z1 Workstation, it is important to save your modifications and exit the BIOS properly. Here are the steps to save and exit BIOS settings:
Step 1: Review your changes
Before saving and exiting the BIOS, take a moment to review the changes you have made. Make sure that the boot order is configured according to your desired priority and any other settings you modified are correct.
Step 2: Save your changes
Once you are confident with your modifications, navigate to the “Exit” or “Save and Exit” section of the BIOS setup utility. Most BIOS versions have a dedicated section for saving changes before exiting. Use the arrow keys to select this option.
Step 3: Confirm saving changes
After selecting the “Save and Exit” option, you may be prompted to confirm your choice. Read the on-screen instructions carefully and make sure to save your changes. This action will write the modified settings to the system’s non-volatile memory, ensuring that they are applied upon startup.
Step 4: Exit the BIOS
Once you have saved your changes, you will need to exit the BIOS setup utility. Look for the appropriate exit option, which may be labeled “Exit,” “Exit Save Changes,” or something similar. Use the arrow keys to select the exit option and follow the on-screen instructions to leave the BIOS.
Step 5: Restart your HP Z1 Workstation
After exiting the BIOS, your workstation will automatically restart. The changes you made to the boot order or other settings will take effect, and the system will follow the updated configurations during startup.
It’s important to note that during the saving and exiting process, the computer may display a warning or confirmation message. Be sure to read and understand any instructions or prompts before proceeding, as some BIOS versions may have different steps or options.
Now that you know how to save and exit BIOS settings, you can confidently make changes to the boot order and other configurations on your HP Z1 Workstation, allowing for a customized and optimized startup process.
Troubleshooting Boot Order Issues
While configuring the boot order in the BIOS settings of your HP Z1 Workstation can improve startup performance, you may occasionally encounter issues that affect the boot process. Here are some troubleshooting steps to address common boot order issues:
Verify the boot order: Double-check that the boot order is correctly set in the BIOS. Ensure that the desired boot device, such as the primary hard drive or SSD, is listed first in the boot order sequence.
Check device connections: Ensure that all devices, such as USB drives or external hard drives, are properly connected to your workstation. Loose or faulty connections can cause boot errors or prevent the device from being recognized in the boot order.
Reset BIOS to default settings: If you have made extensive changes in the BIOS settings, it’s worth considering a reset to default settings. This can help resolve any conflicting configurations that might be causing boot issues. Look for an option within the BIOS setup utility to restore default settings, such as “Load Default BIOS Settings” or “Reset to Factory Defaults.”
Update BIOS firmware: It’s advisable to keep your workstation’s BIOS firmware up to date. Check the manufacturer’s website for any available BIOS updates specific to your workstation model. Updating the BIOS can address known issues and provide enhancements for compatibility and performance.
Disable unnecessary boot devices: If you have multiple boot devices listed in the boot order that you no longer use, consider disabling them. This can help streamline the boot process and reduce the chances of encountering errors or delays.
Reset CMOS: In rare cases, you may need to reset the CMOS (Complementary Metal-Oxide-Semiconductor) settings to resolve boot order issues. This involves clearing the CMOS memory, which stores BIOS configuration data. Refer to your workstation’s manual or contact the manufacturer for instructions on how to reset CMOS.
Seek professional assistance: If you have tried the above steps and are still experiencing persistent boot order issues, it may be best to reach out to technical support or an experienced professional for further assistance. They can provide specialized troubleshooting and guidance specific to your HP Z1 Workstation.
By following these troubleshooting steps, you can resolve common boot order issues and ensure a smooth startup process for your HP Z1 Workstation.
Conclusion
Understanding and configuring the boot order in your HP Z1 Workstation is crucial for ensuring efficient startup and optimal performance. By prioritizing the correct boot devices in the BIOS settings, you can minimize delays and ensure that the operating system and applications load smoothly.
In this article, we explored the importance of boot order and how it affects the way your workstation boots up. We discussed the default boot order settings for the HP Z1 Workstation, as well as the steps to customize the boot order to suit your specific needs.
We learned how to access the BIOS settings and navigate through the menus to modify the boot order effectively. We also covered the process of saving and exiting the BIOS to ensure that your changes take effect.
Furthermore, we discussed troubleshooting steps to address common boot order issues, such as verifying the boot order, checking device connections, resetting BIOS settings, updating firmware, disabling unnecessary boot devices, and resetting CMOS if necessary.
By familiarizing yourself with these concepts and implementing the appropriate modifications when needed, you can overcome boot order obstacles and enjoy a seamless and efficient startup experience on your HP Z1 Workstation.
Remember, if you encounter persistent boot order issues or require more specialized assistance, it’s always advisable to seek help from technical support or a professional who can provide tailored guidance for your specific situation.
Now that you have a comprehensive understanding of boot order and its importance on the HP Z1 Workstation, you are well-equipped to optimize your workstation’s startup process and ensure smooth operation for all your professional tasks.


