What Is A Good 3D Printing Speed?
When it comes to 3D printing, speed is a crucial factor to consider. It determines how quickly you can bring your ideas into tangible objects. However, determining what is considered a good 3D printing speed can be a bit subjective. It depends on various factors such as the complexity of the design, the type of material being used, and the desired print quality.
Generally, a good 3D printing speed is one that strikes the right balance between speed and print quality. It should allow you to achieve your desired results without compromising the integrity and accuracy of the printed object.
It’s important to note that different printers and materials have different speed capabilities. What may be considered a good printing speed for one printer may not be the same for another. Additionally, the printing speed will vary depending on the specific settings and parameters you choose for your print job.
In the next sections, we will explore the various factors that can affect 3D printing speed and help you determine what speed range might be considered good for your specific needs.
Introduction
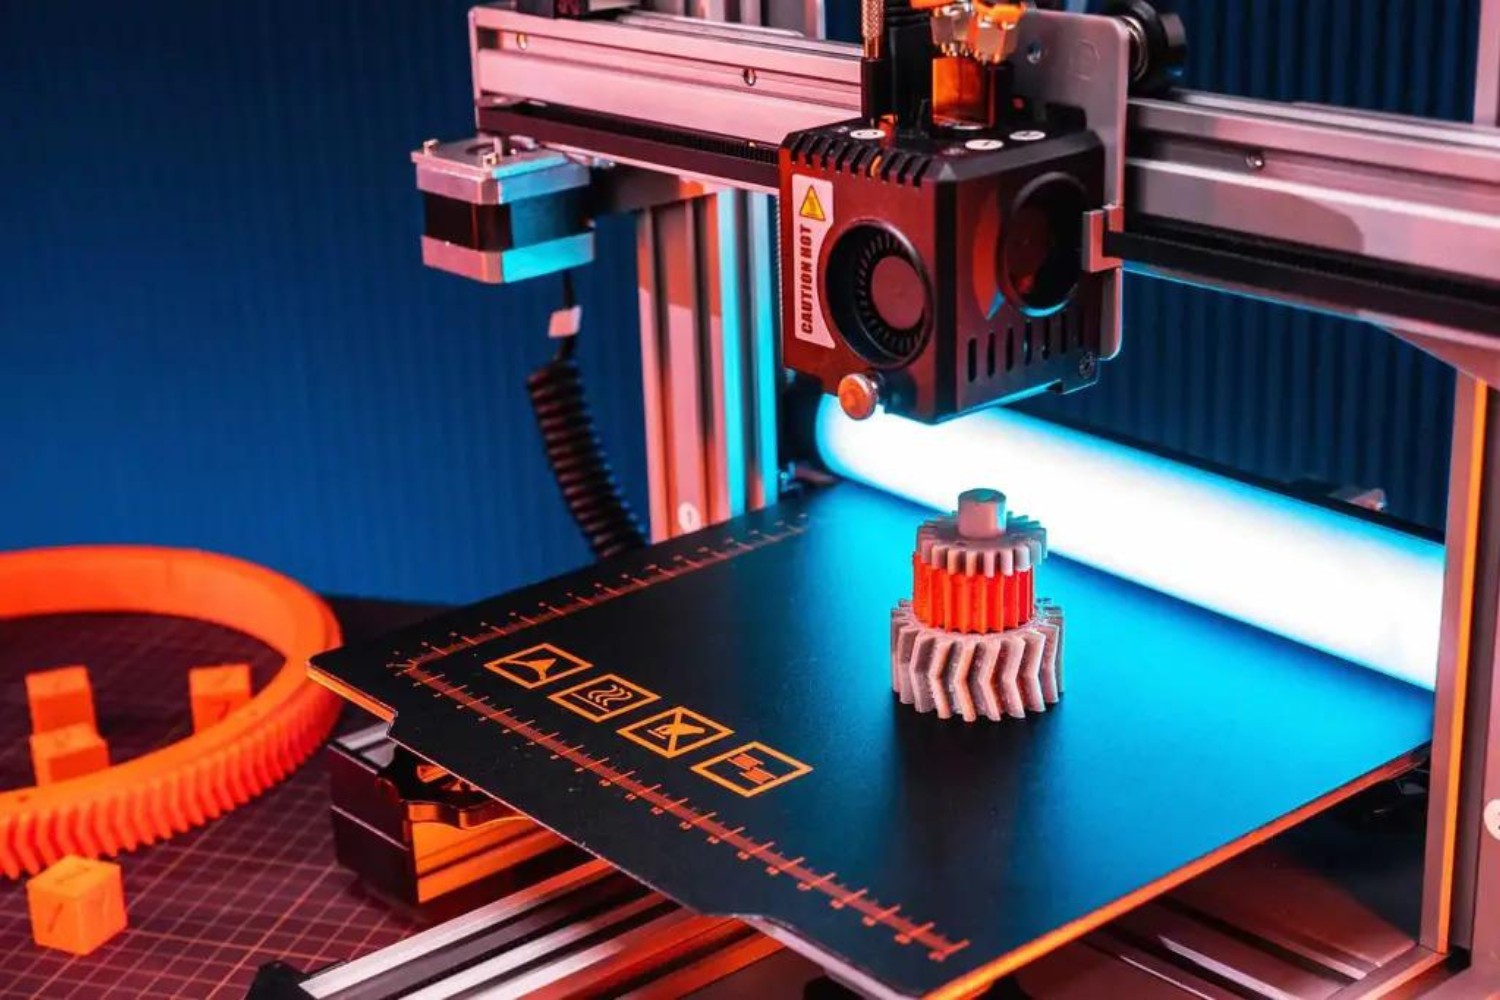
3D printing has revolutionized the way we create objects, allowing us to turn digital designs into physical prototypes or finished products. One of the key considerations in 3D printing is the speed at which the printer can produce these objects. The printing speed not only impacts the time it takes to complete a print job but also influences the overall efficiency and productivity of the printing process.
While it may be tempting to prioritize speed above all else, it’s important to find a balance between fast printing and maintaining print quality. Achieving a good 3D printing speed requires understanding the various factors that can affect it and making informed decisions based on your specific needs and preferences.
There are several factors that can influence the printing speed of a 3D printer. These include the layer height, print mode, printing temperature, print speed settings, the type of material used, nozzle size, and the complexity of the model being printed. Each of these factors plays a role in determining the ideal printing speed for a particular print job.
In this article, we will explore each of these factors in detail, discussing how they impact 3D printing speed and why they are important to consider. By understanding these factors, you will be able to optimize your printing settings and achieve the desired balance between speed and print quality.
Now, let’s dive into the details and explore how each of these factors can affect the speed of your 3D printing process.
Factors Affecting 3D Printing Speed
When it comes to 3D printing speed, there are several key factors that can significantly impact how quickly a printer can produce a print job. Understanding these factors will help you optimize your printing process and achieve the desired balance between speed and print quality.
One of the primary factors that affect 3D printing speed is the layer height. The layer height refers to the thickness of each layer that is deposited during the printing process. Printing thinner layers can result in finer details and smoother surfaces but may increase the print time. On the other hand, printing thicker layers can speed up the printing process but may sacrifice some level of detail and surface quality.
The print mode, also known as the infill density, is another factor to consider. The infill refers to the internal structure of the printed object. A higher infill density means more material is used, resulting in a stronger object but slower printing speed. Conversely, reducing the infill density can accelerate the printing process but may compromise the strength of the printed object.
The printing temperature is also an important factor affecting printing speed. Different materials require specific temperature ranges to achieve optimal printing results. Printing at higher temperatures can expedite the printing process, but it may affect the quality of the final print. It’s essential to find the right balance to ensure efficient printing without compromising print quality.
Adjusting the print speed settings is another way to control the printing speed. Increasing the print speed can significantly reduce print time, but it may lead to decreased print quality, especially with complex designs. It’s important to find the optimal speed that maintains print quality while minimizing the overall printing time.
The type of material being used also plays a critical role in determining the printing speed. Some materials have specific characteristics that require slower printing speeds to ensure proper adhesion and minimize the risk of warping. Others may allow for faster printing while still maintaining good print quality. It’s essential to understand the properties of the material being used and adjust the printing speed accordingly.
The nozzle size is another factor to consider. Nozzles with larger diameters can extrude more material at once, allowing for faster printing speeds. However, they may sacrifice print detail. Smaller nozzles can provide finer details but typically result in slower printing speeds. Choosing the appropriate nozzle size based on the desired print quality and speed is crucial.
The complexity of the model being printed is also a factor affecting printing speed. Intricate designs with many fine details and overhangs will generally take longer to print compared to simpler designs. Consider simplifying the design or adjusting the printing settings to improve the printing speed without compromising the overall quality of the print.
By understanding these key factors, you can make informed decisions about your printing settings and optimize the speed of your 3D printing process to achieve the desired balance between efficiency and print quality.
Layer Height
The layer height plays a crucial role in determining the speed and quality of a 3D printing job. Layer height refers to the thickness of each layer that is deposited during the printing process. It is typically measured in millimeters (mm), and lower layer heights result in finer details and smoother surfaces.
When it comes to 3D printing speed, there is a trade-off between layer height and printing time. The thinner the layers, the more layers need to be printed to complete the object, which increases the overall print time. Conversely, thicker layers can speed up the printing process but may sacrifice some level of detail and surface quality.
For example, if you are printing a complex model with a layer height of 0.1mm, it will take longer to print compared to the same model printed with a layer height of 0.3mm. However, the print with the lower layer height will exhibit finer details and smoother surfaces.
It’s important to consider the desired level of detail and surface quality when selecting the appropriate layer height. If speed is a priority and the printed object doesn’t require high levels of detail, opting for a thicker layer height can significantly reduce print time.
On the other hand, if achieving a high level of detail and surface quality is essential, using a thinner layer height is recommended. This is especially important for objects such as figurines, architectural models, or intricate designs.
Additionally, the layer height should be considered in conjunction with other factors like the nozzle size and print speed settings. Using a smaller nozzle size can allow for finer details, but it may also result in longer print times. Adjusting the print speed settings can help strike a balance between speed and print quality when combined with the appropriate layer height.
Overall, the layer height is a critical factor to consider when fine-tuning the speed and quality of a 3D printing job. The choice of layer height will depend on the specific requirements of your print project, balancing the need for speed with the desired level of detail and surface quality.
Print Mode
The print mode, also known as the infill density, is a key factor that can affect the speed and structural integrity of a 3D printed object. It refers to the internal structure of the printed object and determines the density of the material used to fill the object’s interior.
When it comes to 3D printing speed, the choice of print mode can significantly impact the time it takes to complete a print job. The print mode is often represented as a percentage, indicating the amount of material that will be filled inside the print. For example, a print mode of 100% means the entire interior of the object will be solid, while a lower percentage means there will be empty space or a less dense infill structure.
A higher infill density, such as 100%, will result in a stronger object with increased structural integrity. However, it will also require more time to complete the print job since the printer needs to deposit additional material to fill the interior. This can be suitable for functional parts that require strength but may not be necessary for objects that primarily serve an aesthetic purpose.
On the other hand, reducing the infill density can significantly speed up the printing process. By using a lower print mode, less material needs to be deposited, resulting in a faster print time. However, this can compromise the strength and structural integrity of the printed object, especially for load-bearing or functional parts.
It’s important to consider the intended use of the printed object when selecting the appropriate print mode. If strength and durability are important, a higher infill density may be required, even if it means a longer print time. However, for objects where structural integrity is less crucial, a lower infill density can significantly reduce print time without sacrificing the overall appearance or functionality.
Additionally, certain slicing software may offer different infill patterns that can further impact the balance between speed and structural integrity. Patterns like honeycomb, grid, or triangle infill structures can provide a good compromise between strength and print time.
Ultimately, the choice of print mode should align with the specific requirements of your print project. Carefully consider the desired strength, printing time, and structural integrity when deciding on the appropriate infill density for your 3D printed object.
Printing Temperature
The printing temperature is a critical factor that significantly affects both the speed and quality of a 3D printing job. Different materials have specific temperature ranges at which they perform optimally, and finding the right balance is essential for successful prints.
When it comes to 3D printing speed, the temperature setting directly impacts the time it takes for the material to melt and flow through the extruder. Higher printing temperatures can expedite the printing process by allowing the material to melt and flow more quickly. However, printing at excessively high temperatures can lead to issues such as stringing, oozing, or even damaging the print itself.
On the other hand, printing at lower temperatures can result in slower print speeds as the material takes longer to melt and flow through the nozzle. This can be advantageous for materials that require more precise control, such as those with low melting points or for prints with intricate details.
It’s important to consider the specific material being used and its recommended printing temperature range. Different materials have unique characteristics and properties that require specific temperature settings to achieve optimal results. Experimentation and adjusting the printing temperature within the recommended range can help find the right balance between print speed and quality.
Additionally, factors such as the ambient temperature of the printing environment and the cooling system of the printer can also influence the printing temperature. High ambient temperatures may require lower printing temperatures to prevent the print from deforming or warping. Likewise, printers with effective cooling mechanisms can handle higher printing temperatures more efficiently, reducing the risk of overheating or print quality issues.
It’s important to note that the printing temperature not only affects print speed but also impacts the overall print quality. Different materials may exhibit different properties and appearances when printed at higher or lower temperatures. Adjusting the printing temperature within the recommended range can help achieve the desired level of print quality while maintaining an efficient printing speed.
Overall, finding the optimal printing temperature is crucial for achieving a balance between speed and print quality. By understanding the properties of the material being used and experimenting with temperature settings, you can optimize the printing process and produce high-quality prints in a shorter amount of time.
Print Speed Settings
The print speed settings, or the speed at which the printer moves along the X, Y, and Z axes, directly impact the overall printing time. Adjusting these settings can significantly affect the speed and quality of a 3D printing job.
Printing at higher speeds can accelerate the printing process, allowing you to complete a print job in a shorter amount of time. However, it’s important to note that increasing the print speed can also introduce certain challenges and compromises.
Firstly, increasing the print speed can potentially lead to reduced print quality, especially for complex designs or intricate details. Higher speeds may cause imperfect layer adhesion, increase the chances of over-extrusion or under-extrusion, and result in a less precise print. It’s crucial to find the right balance between speed and print quality to ensure the desired level of accuracy and detail.
Secondly, faster print speeds can also put additional stress on the printer’s mechanical components, leading to a higher risk of mechanical issues. This includes the stepper motors, belts, and other moving parts. It’s important to consider the capabilities and limitations of your printer to avoid excessive wear and tear or potential damage.
When adjusting the print speed settings, it’s recommended to start with the default or manufacturer-recommended speeds and gradually increase them if needed. This allows you to assess the resulting print quality and identify any potential issues that may arise from higher speeds.
Additionally, different sections of a print may require varying speeds based on their complexity and detail. Most slicing software allows for the adjustment of speeds for specific layers or sections of a print, known as “variable layer height” or “adaptive layering.” This technique helps optimize the speed and quality for different parts of the print, providing a balance between the desired level of detail and overall printing time.
Overall, adjusting the print speed settings involves finding the right balance between speed and print quality. It’s essential to consider the complexity of the design, the capabilities of your printer, and the specific requirements of your print job. By carefully adjusting and fine-tuning the print speed settings, you can optimize the printing process and achieve the desired balance between efficiency and print quality.
Type of Material
The type of material being used in 3D printing is a crucial factor that directly affects the printing speed. Different materials have unique properties and characteristics that determine their printing behavior and speed.
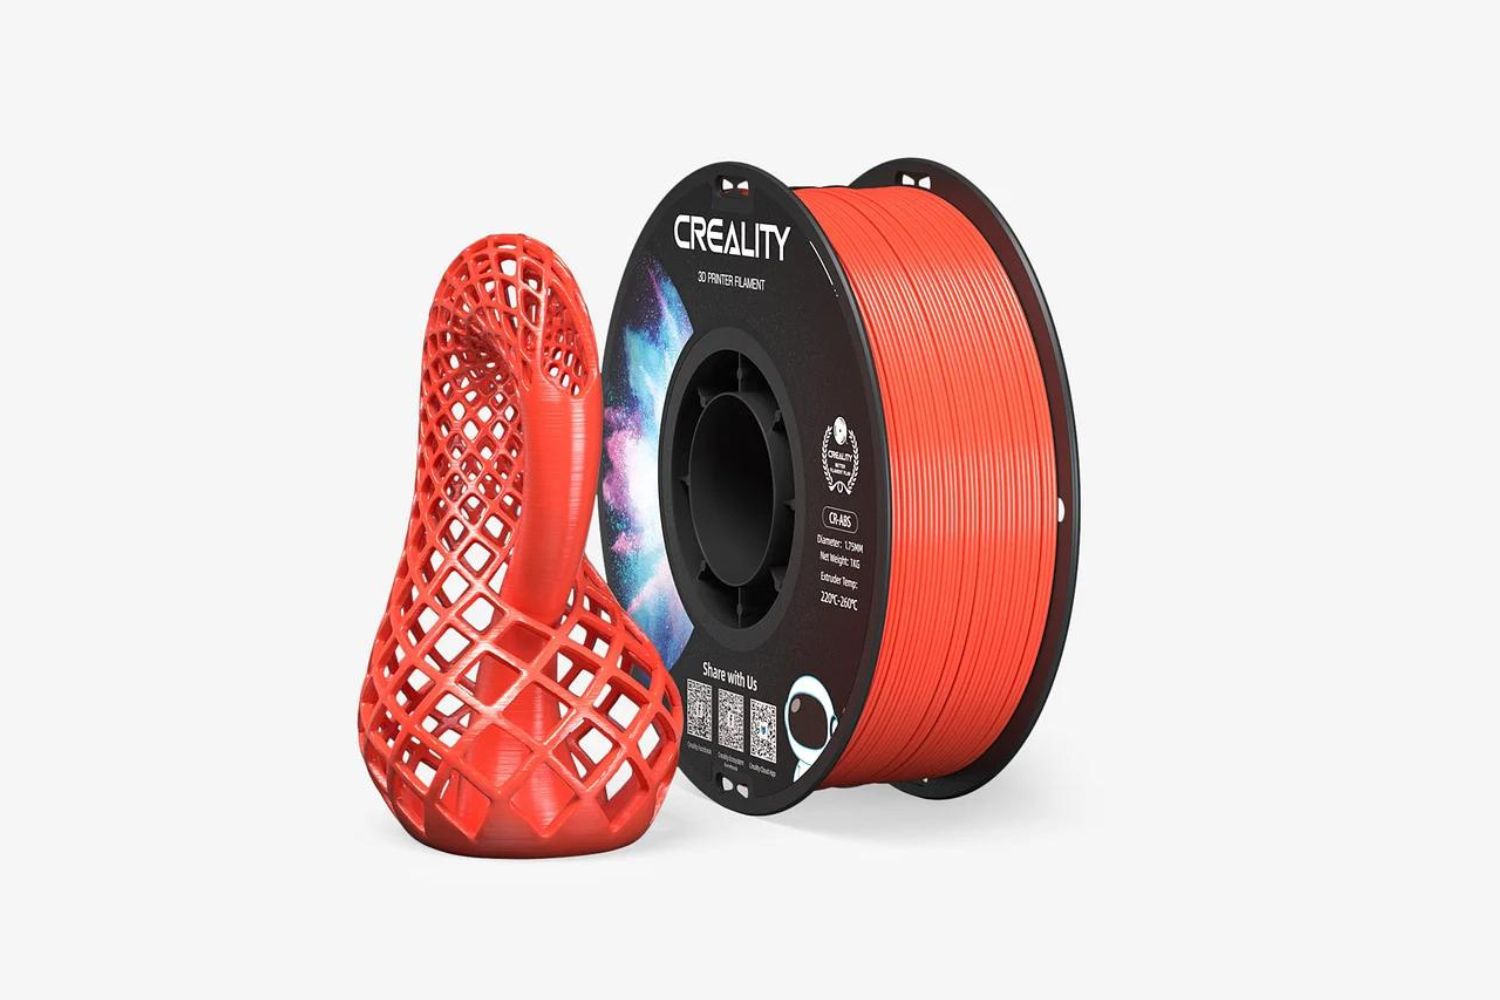
Some materials, such as PLA (polylactic acid), are known for their ease of printing and relatively fast printing speeds. PLA has a low melting point and excellent flow properties, allowing for faster extrusion and deposition. It is commonly used for quick prototyping and general-purpose prints.
Other materials, such as ABS (acrylonitrile butadiene styrene), may require slightly slower printing speeds. ABS has a higher melting point and can be prone to warping and cracking if printed too quickly. Slowing down the printing speed helps ensure optimal layer adhesion and reduce the risk of print quality issues.
Specialty materials like flexible filaments or high-temperature thermoplastics may also require specific considerations when it comes to printing speed. These materials often have unique characteristics that require slower print speeds to achieve better print quality and prevent extrusion issues.
It’s important to note that different brands or manufacturers may have their own recommendations for printing speeds for specific materials. These guidelines can provide a good starting point for finding the optimal printing speed for a particular material.
Additionally, the quality and consistency of the material can also impact printing speed. Lower-quality filaments may have inconsistencies or impurities that can affect flow and extrusion rates. Choosing high-quality materials from reputable manufacturers can help ensure more reliable and consistent printing speeds.
When printing with multiple materials in a single print job, it’s important to consider the characteristics and printing requirements of each material involved. This includes adjusting the speeds and settings accordingly for each material to achieve the best print quality and proper adhesion between different materials.
Experimentation and fine-tuning are key when determining the printing speed for different materials. It’s recommended to start with the manufacturer’s guidelines and gradually adjust the speeds based on the desired print quality and the specific behavior of the material.
Overall, the type of material being used in 3D printing plays a significant role in determining the optimal printing speed. By understanding the properties and characteristics of different materials, you can adjust the printing speed to achieve the desired print quality and optimize the overall printing process.
Nozzle Size
The nozzle size of a 3D printer is an important factor that can influence both the speed and quality of a print. The nozzle controls the amount of material that is extruded and deposited during the printing process.
Nozzle sizes typically range from 0.2mm to 1.0mm or higher. A smaller nozzle size allows for finer details and greater precision but may result in slower print speeds. This is because a smaller nozzle diameter requires more passes to cover the same area, increasing the overall print time.
On the other hand, a larger nozzle size can speed up the print process by extruding more material in a single pass. This helps to cover a larger area more quickly but may sacrifice some detail and surface quality in the process. It’s essential to find an ideal balance between nozzle size and print speed to achieve the desired level of detail and printing efficiency.
When selecting a nozzle size, consider the specific requirements of your print job. If you need high levels of detail, such as for intricate designs or small objects, a smaller nozzle size would be ideal. This ensures that thin lines and small features are accurately represented. However, keep in mind that the print time may increase due to the need for more passes to cover the same area.
Conversely, if speed is a priority and the design doesn’t require an exceptional level of detail, a larger nozzle size can significantly reduce printing time. This is especially useful for larger objects or functional prints where visual aesthetics are not the primary concern.
It’s important to note that changing the nozzle size may require adjustments to other print settings such as layer height, printing temperature, and print speed to achieve optimal performance and print quality. A larger nozzle size may require higher layer heights and print temperatures to ensure proper layer adhesion and material flow.
Experimentation and fine-tuning are key when working with different nozzle sizes. It’s recommended to start with the default nozzle size recommended by the printer manufacturer and gradually adjust the size based on the specific requirements of your print job and desired balance between detail and speed.
In summary, the choice of nozzle size is a trade-off between print speed and detail. By selecting the appropriate nozzle size and adjusting the print settings accordingly, you can optimize the printing speed and quality for your specific 3D printing needs.
Model Complexity
The complexity of the model being printed is a significant factor that can impact the speed of a 3D printing job. The level of detail, intricacy, and overall complexity of the design contribute to the time it takes to complete the print.
When printing complex models with intricate details, the printer needs to move more slowly and accurately to ensure precise layer alignment and deposition. This can significantly extend the print time compared to simpler, less intricate designs. The printer may need to spend additional time on each layer to accurately reproduce the fine details, resulting in a slower overall printing speed.
The complexity of a model also affects other factors such as the required supports. Complex designs often require support structures to be printed alongside the main model to prevent drooping or deformation during the printing process. These support structures add additional printing time as they need to be carefully placed, printed, and eventually removed or dissolved after the print is complete.
Furthermore, complex models may have challenging overhangs or bridging sections that require slower print speeds to ensure proper material deposition and adhesion. Slowing down the print speed in these areas helps prevent issues such as sagging or stringing, ensuring a more accurate and visually appealing print.
It’s important to consider the specific requirements of your print project and the intended purpose of the printed object. If print speed is a priority and the complexity of the model is not crucial, opting for simpler designs can significantly reduce the overall printing time.
However, if achieving a high level of detail and accuracy is paramount, complex models are necessary. In these cases, patience is required as the increased print time is justified by the faithful reproduction of intricate details and complex features.
Optimizing the print settings and using slicing software with advanced features can also help improve the printing speed without sacrificing too much detail. Some software solutions offer options like adaptive layering or variable layer heights that optimize printing speeds based on the complexity of different sections of the model.
Ultimately, the complexity of the model being printed can significantly influence the printing speed. Tailoring the design complexity to your specific needs, adjusting print settings, and utilizing advanced slicing features can help strike a balance between speed and detail, optimizing the overall printing process.
Print Quality vs Print Speed Trade-off
When it comes to 3D printing, there is often a trade-off between print quality and print speed. Balancing these two factors is crucial in achieving the desired results within a reasonable timeframe. While faster print speeds can shorten the overall printing time, they may come at the expense of print quality. On the other hand, prioritizing print quality often results in longer print times.
Print quality encompasses various aspects such as surface finish, detail resolution, dimensional accuracy, and overall aesthetics of the printed object. Achieving high print quality requires slower print speeds as it allows for finer details, improved layer adhesion, and better overall accuracy.
However, slowing down the print speed can significantly extend the printing time. This is particularly noticeable for complex designs, intricate details, or large prints. As the print head moves more slowly, spending additional time on each layer to ensure accuracy, the overall print time can increase substantially.
On the other hand, faster print speeds reduce the time it takes to complete a print job. This is advantageous for large-scale production or when time is a critical factor. While faster speeds can expedite the printing process, they may compromise certain aspects of print quality. This can manifest as reduced detail resolution, rougher surface finishes, or even distorted dimensions in some cases.
It’s important to find the right balance between print quality and print speed based on the specific requirements of your print job. Consider the intended use of the printed object, material properties, complexity of the design, and any time constraints when making decisions about print speed and quality.
Fortunately, there are techniques to strike a balance between speed and quality. Experimenting with optimal print settings such as layer height, infill density, printing temperature, nozzle size, and adaptive layering can help optimize the print quality while still achieving reasonable printing speeds.
Ultimately, finding the right balance between print quality and print speed requires a thoughtful approach. It’s important to understand the capabilities and limitations of your 3D printer, the specific requirements of your print project, and to iterate and fine-tune the settings to achieve the best possible results while optimizing the overall printing time.
Conclusion
When it comes to 3D printing speed, finding the right balance between efficiency and print quality is crucial. Various factors, such as layer height, print mode, printing temperature, print speed settings, type of material, nozzle size, and model complexity, impact the speed at which a 3D printer can produce objects.
Understanding these factors allows for optimization of the printing process and the achievement of the desired results. Lower layer heights and higher print modes result in finer details but longer print times, while higher printing temperatures and faster print speed settings can expedite the printing process at the risk of compromising print quality. The type of material and its associated printing requirements play a significant role in determining the optimal printing speed.
Nozzle size selection requires consideration of the desired level of detail versus print speed, as smaller nozzles enable finer details but can prolong print times. Meanwhile, complex models demand slower print speeds to ensure accuracy, while simpler designs can significantly reduce overall printing time.
Striking a balance between print quality and speed requires careful evaluation of the specific requirements of each print project. It’s necessary to consider factors such as the intended use of the printed object, the available time, and the printer’s capabilities. Adjusting print settings based on these considerations can help achieve optimal results.
In conclusion, there is no definitive answer to what constitutes a “good” 3D printing speed as it depends on individual needs and priorities. It is a delicate balance between efficiency and print quality, and each factor we explored contributes in its own way. Understanding the impact of each factor and making informed decisions allows for efficient and successful 3D printing projects.