Introduction
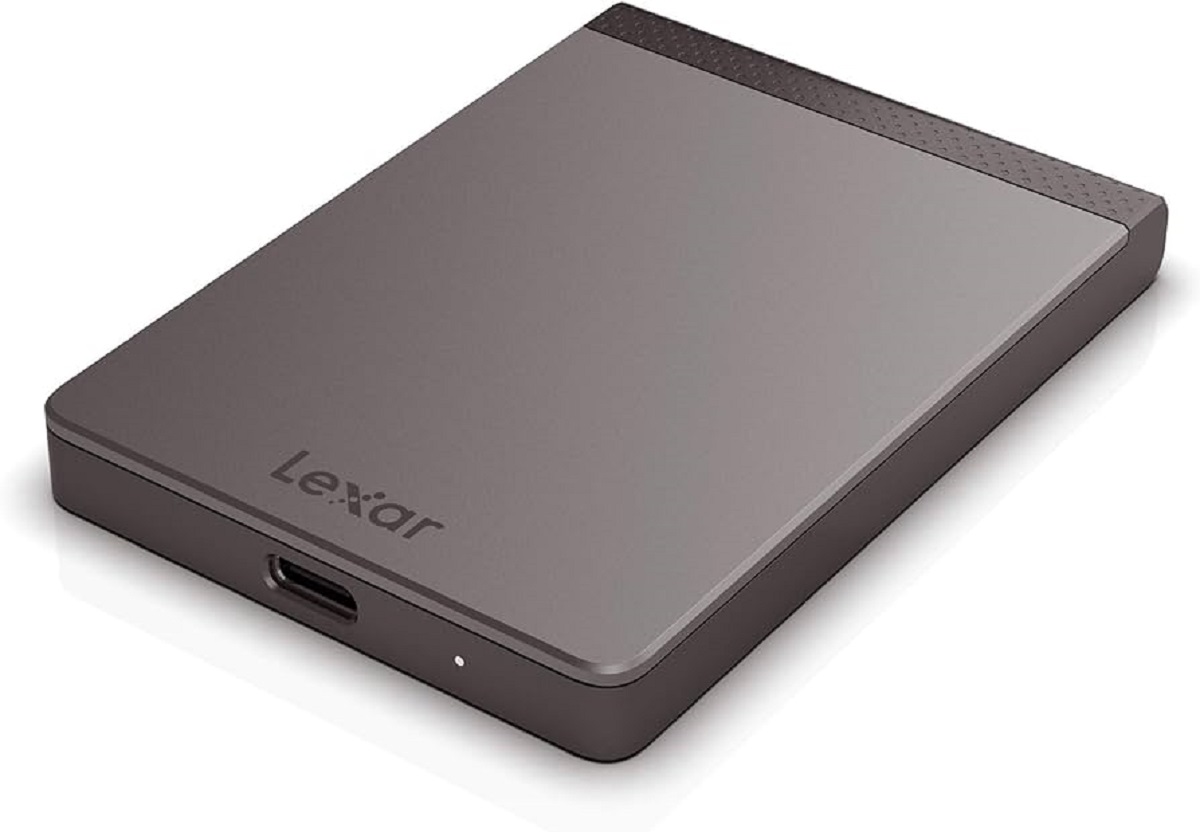
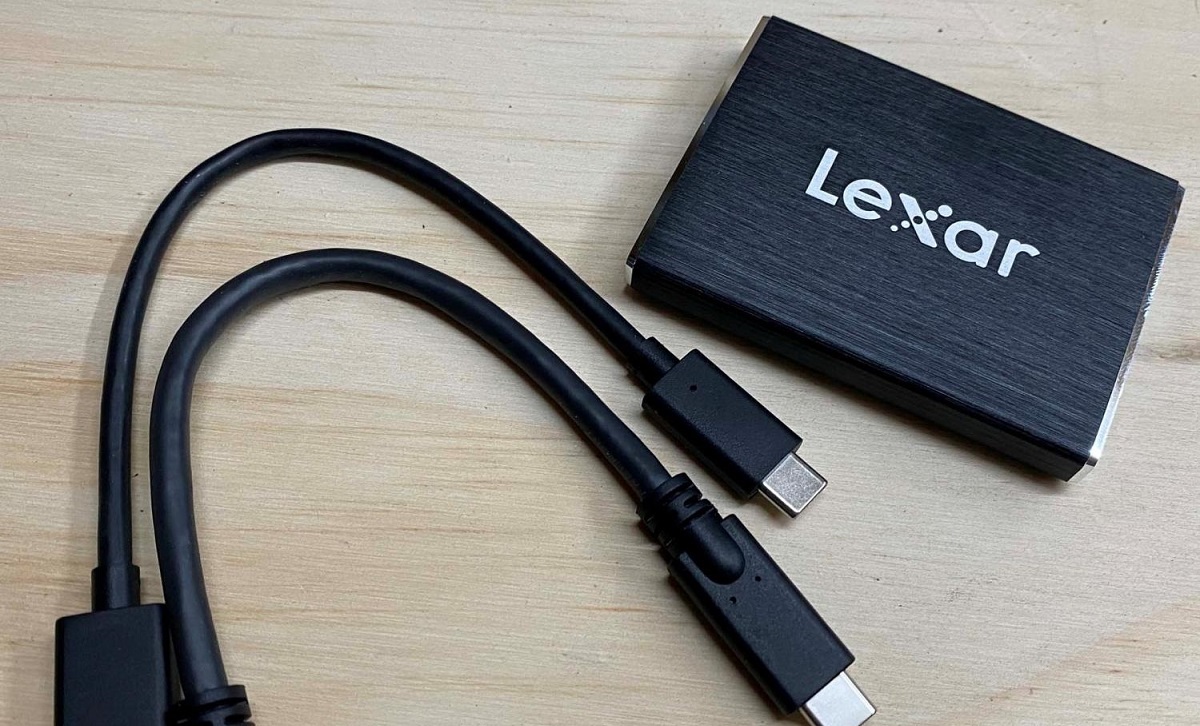
Welcome to the world of portable storage with the Lexar SL100 Portable SSD. With its sleek design and impressive performance, this portable solid-state drive (SSD) offers a reliable and convenient solution for storing and transferring your files on the go. Whether you’re a student, professional, or a casual user, the SL100 Portable SSD is the perfect companion for managing your data efficiently and securely.
In today’s digital age, we constantly generate and accumulate large amounts of data, from documents and photos to videos and music. Traditional storage solutions like hard drives can be bulky and slow, while cloud storage may not always be accessible or secure. The Lexar SL100 Portable SSD bridges this gap, providing a lightweight and compact storage solution with lightning-fast transfer speeds.
Designed with convenience in mind, the Lexar SL100 Portable SSD is compatible with both PC and Mac systems, offering a universal solution for all users. Its pocket-sized form factor makes it easy to carry around, allowing you to access your files whenever and wherever you need them. Whether you’re a student transferring assignments, a photographer storing high-resolution images, or a business professional needing to transport sensitive documents, the SL100 Portable SSD has got you covered.
Equipped with high-speed USB 3.1 technology, the SL100 Portable SSD delivers blazing-fast read and write speeds, ensuring quick access to your files and efficient data transfers. Its solid-state storage technology eliminates the moving parts found in traditional hard drives, making it more reliable and durable, even in rugged conditions. Say goodbye to slow loading times and hello to instant access to your data.
In the following sections, we will explore how to make the most out of your Lexar SL100 Portable SSD. From setting it up to transferring files, managing folders, and troubleshooting common issues, you’ll discover the ins and outs of this powerful storage device. So, without further ado, let’s dive in and discover the world of seamless portable storage with the Lexar SL100 Portable SSD.
Overview of the Lexar SL100 Portable SSD
The Lexar SL100 Portable SSD is a cutting-edge storage device that offers impressive performance and enhanced portability. With storage capacity options ranging from 250GB to 1TB, this SSD provides ample space to accommodate your files, whether it’s documents, photos, videos, or music.
The SL100 Portable SSD features a sleek and compact design, making it easy to slip into your pocket or bag. Measuring just a few inches in length and weighing only a few ounces, it’s a lightweight and travel-friendly storage solution for those on the move.
One of the key advantages of the SL100 Portable SSD is its use of solid-state storage technology. Unlike traditional hard drives that rely on spinning disks and mechanical parts, the SL100 utilizes flash memory chips, making it more resistant to physical shocks and vibrations. This durability ensures that your data remains safe, even during rough handling or accidental drops.
In terms of performance, the SL100 Portable SSD shines with its high-speed USB 3.1 interface. This enables lightning-fast data transfers, allowing you to backup or transfer large files in a matter of seconds. With read speeds of up to 550MB/s and write speeds of up to 400MB/s, you can say goodbye to long waiting times associated with traditional storage devices.
Another notable feature of the SL100 Portable SSD is its compatibility with both PC and Mac systems. Whether you’re using a Windows computer or a Macbook, you can easily connect and use the SL100 without any additional software or drivers. This versatility ensures that the SSD seamlessly integrates into your existing workflow, regardless of your operating system preference.
Furthermore, the SL100 Portable SSD maximizes user convenience with its simple plug-and-play functionality. There’s no need to go through complicated setup procedures or install any software. Just connect the SSD to your computer’s USB port, and it’s ready to use. This makes it an ideal choice for users of all levels of technical expertise.
With its impressive storage capacity, compact design, speedy performance, and hassle-free usability, the Lexar SL100 Portable SSD offers an excellent solution for individuals who require reliable and portable storage. In the following sections, we will delve deeper into the various aspects of using this SSD, from connecting it to your computer to managing files and troubleshooting common issues. So, let’s proceed and explore the incredible features of the Lexar SL100 Portable SSD.
Getting Started with the Lexar SL100 Portable SSD
Setting up and getting started with the Lexar SL100 Portable SSD is a straightforward process that requires minimal effort. Whether you’re a tech-savvy individual or someone who’s new to using external storage devices, this section will guide you through the initial steps of getting your SL100 up and running.
The first step is to unpack your SL100 Portable SSD from its packaging. Take a moment to inspect the device for any visible damage. If everything looks good, you’re ready to proceed.
Next, locate the USB cable that came with your SL100. Connect one end of the cable to the USB Type-C port on the SSD and the other end to an available USB port on your computer. Note that if your computer doesn’t have a USB Type-C port, you may need to use an adapter or cable that supports your specific USB port type.
Once the SL100 is connected, you’ll notice that the LED indicator on the SSD will illuminate, indicating that the device is powered on and connected to your computer. It’s important to note that the SL100 is a plug-and-play device, which means that no additional drivers or software installation is required.
Now that your SL100 Portable SSD is connected, your computer should recognize it as a new storage device. This allows you to access and manage the files stored on the SSD, just like you would with any other external storage device.
If you’re using a Windows computer, you can access the SL100 by opening the File Explorer and navigating to “This PC” or “My Computer.” Here, you should see the SL100 listed as a removable drive. Simply double-click on the SL100 icon to access your files.
For Mac users, the SL100 will appear as an external drive on your desktop or in the Finder. Simply click on the SL100 icon to open it and access your files.
It’s worth noting that if you’re using the SL100 Portable SSD for the first time, it may not have any files or folders on it. You can start by creating new folders to organize your data or simply drag and drop files onto the SSD to transfer them from your computer.
With the initial setup steps completed, you’re now ready to utilize the full capabilities of the Lexar SL100 Portable SSD. In the following sections, we will delve deeper into specific tasks such as formatting the SSD, transferring files, managing folders, and troubleshooting common issues. So, let’s proceed and make the most out of your SL100 Portable SSD.
Connecting the Lexar SL100 Portable SSD to Your Computer
Connecting the Lexar SL100 Portable SSD to your computer is a simple process that allows you to access and manage your files quickly and conveniently. This section will walk you through the steps of connecting your SL100 to different types of computers and platforms.
To connect your SL100 Portable SSD to a computer, you will need the included USB cable. The SL100 features a USB Type-C port, so if your computer has a USB Type-C port as well, you can connect the SSD directly using the USB cable.
If your computer does not have a USB Type-C port, you can still use the SL100 by using an appropriate adapter or cable. For example, if your computer has a USB Type-A port (the traditional rectangular USB port), you can use a USB Type-C to Type-A cable or adapter.
Once you have the necessary cable or adapter, follow these steps to connect your SL100 Portable SSD:
- Plug one end of the USB cable into the USB Type-C port on the SL100.
- Connect the other end of the cable into an available USB port on your computer.
After connecting the SL100 to your computer, you will notice that the LED indicator on the SSD lights up. This indicates that the SSD is receiving power and is properly connected to the computer.
Depending on your operating system, the SL100 may be automatically recognized and mounted as a new storage device. In most cases, you can access the SL100 Portable SSD through your computer’s file manager or explorer.
If you are using a Windows computer, open the File Explorer and navigate to “This PC” or “My Computer”. The SL100 should appear as a removable drive. You can double-click on the SL100 icon to access its contents and start transferring files.
For Mac users, the SL100 will typically appear as an external drive on your desktop or in the Finder. Simply click on the SL100 icon to access its files and folders.
It’s important to note that the first time you connect your SL100 to a computer, you may need to format it to ensure compatibility with your operating system. Formatting erases all data on the SSD, so make sure to back up any important files before proceeding with the formatting process.
With the SL100 Portable SSD successfully connected to your computer, you can now take advantage of its high-speed performance and portable storage capabilities. In the following sections, we will explore how to format the SL100, transfer files, manage folders, and troubleshoot common issues. So, let’s make the most out of your Lexar SL100 Portable SSD!
Formatting the Lexar SL100 Portable SSD
Formatting the Lexar SL100 Portable SSD is an important step that ensures compatibility with your computer’s operating system and allows optimal performance. This section will guide you through the process of formatting your SL100, whether you’re using a Windows or Mac computer.
Before proceeding with the formatting, make sure to back up any important files that are stored on the SL100. Formatting will erase all data on the SSD, so it is essential to create a backup to prevent data loss.
Formatting the SL100 on a Windows Computer:
1. Open the File Explorer by clicking on the folder icon in the taskbar or pressing the Windows key + E.
2. Locate and right-click on the SL100 Portable SSD, which should be listed as a removable drive.
3. From the context menu, select “Format”.
4. In the Format window, specify the desired file system (usually NTFS for Windows) and allocation unit size.
5. Optionally, you can give the drive a new name in the “Volume label” field.
6. Finally, click on “Start” to begin the formatting process. Be aware that formatting may take several minutes to complete.
7. Once the formatting is finished, you will receive a notification. Your Lexar SL100 Portable SSD is now ready to use on your Windows computer.
Formatting the SL100 on a Mac Computer:
1. Connect the SL100 Portable SSD to your Mac computer using the appropriate USB cable or adapter.
2. Open the Finder by clicking on the smiley face icon in the dock.
3. Click on “Go” in the menu bar and select “Utilities”.
4. Double-click on “Disk Utility” to launch the application.
5. In the Disk Utility window, you will see a list of drives on your Mac. Locate and select the SL100 SSD.
6. Click on the “Erase” button located on the toolbar.
7. In the Erase window, choose the desired format (typically Mac OS Extended or APFS for modern macOS versions) and provide a new name for the drive if desired.
8. Click on “Erase” to begin the formatting process. Depending on the size of the SSD, formatting may take some time.
9. Once the formatting is complete, you will receive a notification. Your Lexar SL100 Portable SSD is now ready to use on your Mac computer.
By formatting the SL100, you have prepared it for optimal performance and compatibility with your operating system. Now you can start using it to store and transfer your files with ease.
In the following sections, we will explore how to transfer files to and from the SL100, manage files and folders, as well as troubleshoot common issues that may arise. So, let’s continue to make the most out of your Lexar SL100 Portable SSD!
Transferring Files to and from the Lexar SL100 Portable SSD
The Lexar SL100 Portable SSD is designed to provide fast and reliable storage for your files, making it easy to transfer data between your computer and the SSD. Whether you want to offload large files, backup important documents, or carry your media library on the go, this section will guide you on how to efficiently transfer files to and from the SL100.
Transferring Files to the SL100:
1. Connect the SL100 Portable SSD to your computer using the provided USB cable or adapter.
2. Once the SSD is connected, it should be recognized as a removable drive by your computer’s operating system.
3. Open the file manager or explorer on your computer and navigate to the location where the files you want to transfer are located.
4. Select the files or folders you wish to transfer to the SL100. You can hold down the Ctrl key (Command key on Mac) and click on individual files to select multiple files, or use Ctrl+A (Command+A on Mac) to select all files in a folder.
5. Right-click on the selected files and choose “Copy” or “Cut”. Alternatively, you can use the keyboard shortcuts Ctrl+C (Command+C on Mac) for copying or Ctrl+X (Command+X on Mac) for cutting.
6. Navigate to the SL100 Portable SSD in your file manager or explorer and open the location where you want to transfer the files.
7. Right-click on an empty space in the destination folder and choose “Paste”. Alternatively, you can use the keyboard shortcut Ctrl+V (Command+V on Mac) to paste the files.
8. The selected files will now be transferred to the SL100 Portable SSD. The time taken will depend on the size and number of files being transferred. Make sure not to disconnect the SSD during the transfer process.
Transferring Files from the SL100 to Your Computer:
1. Connect the SL100 Portable SSD to your computer using the provided USB cable or adapter.
2. Open the file manager or explorer on your computer and navigate to the SL100’s location.
3. Select the files or folders you wish to transfer from the SL100. Use the same file selection methods described earlier.
4. Right-click on the selected files and choose “Copy” or “Cut”. Alternatively, you can use the keyboard shortcuts Ctrl+C (Command+C on Mac) for copying or Ctrl+X (Command+X on Mac) for cutting.
5. Navigate to the destination folder on your computer where you want to transfer the files.
6. Right-click on an empty space in the destination folder and choose “Paste”. Alternatively, you can use the keyboard shortcut Ctrl+V (Command+V on Mac) to paste the files.
7. The selected files will now be transferred from the SL100 Portable SSD to your computer. The time taken will depend on the size and number of files being transferred. Again, ensure that the SSD remains connected until the transfer process is complete.
With these straightforward steps, you can easily transfer files to and from the Lexar SL100 Portable SSD. Whether you’re backing up important documents, organizing your media library, or transferring large files, the SL100 provides a reliable and efficient storage solution.
In the following sections, we will delve into managing files and folders on the SL100, as well as troubleshooting common issues that may arise. So, let’s continue the journey of unlocking the full potential of your Lexar SL100 Portable SSD!
Managing Files and Folders on the Lexar SL100 Portable SSD
The Lexar SL100 Portable SSD not only provides ample storage space but also allows you to efficiently manage your files and folders. With its user-friendly interface and simple file management options, organizing and accessing your data becomes a breeze. In this section, we will explore some essential tips and techniques for effectively managing files and folders on the SL100.
Creating New Folders:
To organize your files on the SL100, you can create new folders to categorize and group similar files together. Follow these steps to create a new folder:
- Navigate to the location on the SL100 where you want to create the new folder.
- Right-click on an empty space and select “New Folder”.
- Give the folder a descriptive name and press Enter or click outside the folder name field to save the name.
Renaming Files or Folders:
If you need to change the name of a file or folder on the SL100, simply follow these steps:
- Locate the file or folder on the SL100 that you want to rename.
- Right-click on it and select “Rename”.
- Type in the new name and press Enter or click outside the name field to save the new name.
Moving or Copying Files and Folders:
If you want to reorganize your files or make copies of specific files or folders on the SL100, follow these steps:
- Select the files or folders you want to move or copy.
- Right-click on the selected files or folders and choose “Cut” to move them or “Copy” to make copies.
- Navigate to the destination folder on the SL100 or your computer where you want to move or copy the files or folders.
- Right-click on an empty space in the destination folder and choose “Paste”.
Deleting Files or Folders:
If you no longer need certain files or folders on the SL100, you can easily delete them by following these steps:
- Select the files or folders you want to delete.
- Press the Delete key on your keyboard or right-click on the selected files or folders and choose “Delete”.
- Confirm the deletion when prompted.
It’s important to note that when deleting files or folders on the SL100, the action is permanent and cannot be undone. Ensure that you have proper backups in place before deleting any important files.
By utilizing these simple file management techniques, you can keep your files organized, easily locate specific data, and optimize the space on your Lexar SL100 Portable SSD.
In the following sections, we will delve into additional features of the SL100, including safely ejecting the SSD and troubleshooting common issues. So, let’s continue our journey of harnessing the full potential of your Lexar SL100 Portable SSD!
Safely Ejecting the Lexar SL100 Portable SSD
Before disconnecting the Lexar SL100 Portable SSD from your computer, it is essential to safely eject the device to prevent data loss or potential damage. Safely ejecting the SSD ensures that all pending read and write operations are completed and that the file system is properly closed. In this section, we will guide you through the process of safely ejecting the SL100 from your computer.
Safely Ejecting the SL100 on a Windows Computer:
1. Locate the “Safely Remove Hardware” icon in the system tray, which is typically located in the bottom-right corner of the taskbar.
2. Click on the “Safely Remove Hardware” icon to open the list of connected devices.
3. Find the Lexar SL100 Portable SSD in the list and click on it to select it.
4. Click on the “Eject” or “Safely Remove” option next to the Lexar SL100. You will receive a notification when it is safe to disconnect the SSD from your computer.
5. Once you receive the notification, you can safely disconnect the SL100 Portable SSD from your computer by unplugging the USB cable or adapter.
Safely Ejecting the SL100 on a Mac Computer:
1. Locate the SL100 Portable SSD icon on your desktop or in the Finder sidebar.
2. Click on the SL100 icon to select it.
3. With the SL100 icon selected, click on the “File” option in the menu bar at the top of the screen. If you don’t see the menu bar, move your cursor to the top of the screen to reveal it.
4. From the drop-down menu, choose “Eject [Name of the SL100 Portable SSD]”. Alternatively, you can also right-click on the SL100 icon and select “Eject” from the contextual menu.
5. Once you receive a notification confirming that it is safe to disconnect the SL100, you can proceed to disconnect the SSD from your computer by unplugging the USB cable or adapter.
By safely ejecting the Lexar SL100 Portable SSD, you ensure that all data has been written to the SSD and that the file system is closed properly. This helps safeguard your data and prolong the lifespan of the SSD.
In the following section, we will address some common issues that you may encounter while using the Lexar SL100 Portable SSD and provide troubleshooting tips to resolve them. Let’s continue our journey of optimizing the usage of your Lexar SL100 Portable SSD!
Troubleshooting Common Issues with the Lexar SL100 Portable SSD
While the Lexar SL100 Portable SSD is a reliable storage device, you may encounter occasional issues that may interfere with its optimal functioning. In this section, we will address some common issues that users may experience with the SL100 and provide troubleshooting tips to help you resolve them.
Issue 1: The SL100 is not recognized by the computer.
Solution: Try the following steps to troubleshoot this issue:
- Ensure that the SL100 is properly connected to your computer via the USB cable or adapter. Try using a different cable or port.
- Restart your computer and reconnect the SL100 to see if it is recognized.
- Check the Device Manager (Windows) or System Information (Mac) to see if the SL100 is listed. If it appears with an exclamation mark or error message, try updating the drivers or restarting the computer.
- Test the SL100 on a different computer to determine if the issue is specific to your computer.
Issue 2: Slow transfer speeds.
Solution: Slow transfer speeds can be caused by various factors, such as USB port limitations or system performance. Try the following steps to improve transfer speeds:
- Ensure that you are using a USB port that supports USB 3.0 or higher for faster transfer speeds.
- Close any unnecessary applications or processes that may be utilizing system resources.
- Try transferring files in smaller batches rather than all at once to reduce the burden on the system.
- Consider updating your computer’s USB drivers or firmware for optimal compatibility.
Issue 3: The SL100 is not recognized after formatting.
Solution: If the SL100 is not recognized after formatting, try the following steps:
- Verify that you have properly formatted the SL100 using the appropriate file system for your operating system (e.g., NTFS for Windows or APFS for Mac).
- Double-check that you have completed the formatting process without any errors.
- Try connecting the SL100 to a different computer to determine if the issue is specific to your computer.
- If all else fails, consider contacting Lexar’s customer support for further assistance or warranty coverage.
These are just a few examples of common issues that you may encounter while using the Lexar SL100 Portable SSD. If you experience other problems or require additional assistance, it is recommended to refer to the SL100 user manual or contact Lexar’s customer support for further guidance.
By following the troubleshooting tips outlined above, you should be able to resolve most common issues and ensure smooth operation of your Lexar SL100 Portable SSD.
Now that we have discussed troubleshooting, let’s conclude our exploration of the Lexar SL100 Portable SSD in the next section.
Conclusion
With its sleek design, fast performance, and versatile compatibility, the Lexar SL100 Portable SSD is a reliable and convenient storage solution for users of all levels. Whether you’re a student, a professional, or a casual user, the SL100 offers a portable and efficient way to store and transfer your files.
In this guide, we explored the various aspects of using the Lexar SL100 Portable SSD, starting from the initial setup and connection process to transferring files, managing folders, and troubleshooting common issues. We learned how to connect the SL100 to different types of computers, format it for optimal compatibility, and safely eject it to protect our data.
The SL100’s compatibility with both PC and Mac systems, USB 3.1 technology, and solid-state storage make it a versatile and reliable choice. Its compact size and durability make it ideal for users on the go, allowing you to carry and access your files anytime, anywhere.
By following the tips and techniques outlined in this guide, you can make the most of your Lexar SL100 Portable SSD. Whether you’re a student organizing assignments, a photographer backing up high-resolution images, or a business professional transporting sensitive documents, the SL100 has the capacity and performance to meet your needs.
We hope that this guide has provided you with the necessary information to fully utilize and enjoy the features of your Lexar SL100 Portable SSD. Should you encounter any issues or have further questions, don’t hesitate to refer to the user manual or reach out to Lexar’s customer support for assistance.
Thank you for choosing the Lexar SL100 Portable SSD as your reliable storage companion. Enjoy the convenience, speed, and reliability that this device offers, and make your digital life a seamless experience!