Introduction
Welcome to the world of delicious homemade ice cream with the Cuisinart 2 Qt Ice Cream Maker. There’s nothing quite like the satisfaction of creating your own frozen treats from scratch, tailored to your personal taste preferences. With this user-friendly ice cream maker, you can unleash your inner chef and delight your family and friends with creamy and flavorful desserts that are sure to impress.
Whether you’re a seasoned ice cream aficionado or a novice in the kitchen, the Cuisinart 2 Qt Ice Cream Maker is designed to make the ice cream-making process simple and enjoyable. Get ready to embark on a culinary adventure as we guide you through the step-by-step process of using your new ice cream maker to create delectable frozen delights.
Why settle for store-bought ice cream that’s loaded with artificial ingredients and preservatives when you can make your own mouthwatering creations right at home? The Cuisinart 2 Qt Ice Cream Maker allows you to take control of your dessert-making experience, allowing you to use fresh, high-quality ingredients and experiment with flavors to create the perfect scoop every time.
With its sleek and compact design, the Cuisinart 2 Qt Ice Cream Maker will be a stylish addition to your kitchen counter. Its sturdy construction and reliable performance ensure that you’ll be able to enjoy homemade ice cream for years to come.
So, let’s dive in and discover the ins and outs of this fantastic ice cream maker. From prepping the machine to adding mix-ins and cleaning up, we’ll cover everything you need to know to make the most of your Cuisinart 2 Qt Ice Cream Maker. Get ready to indulge in creamy, dreamy, homemade frozen treats that will leave you craving for more!
Getting to Know the Cuisinart 2 Qt Ice Cream Maker
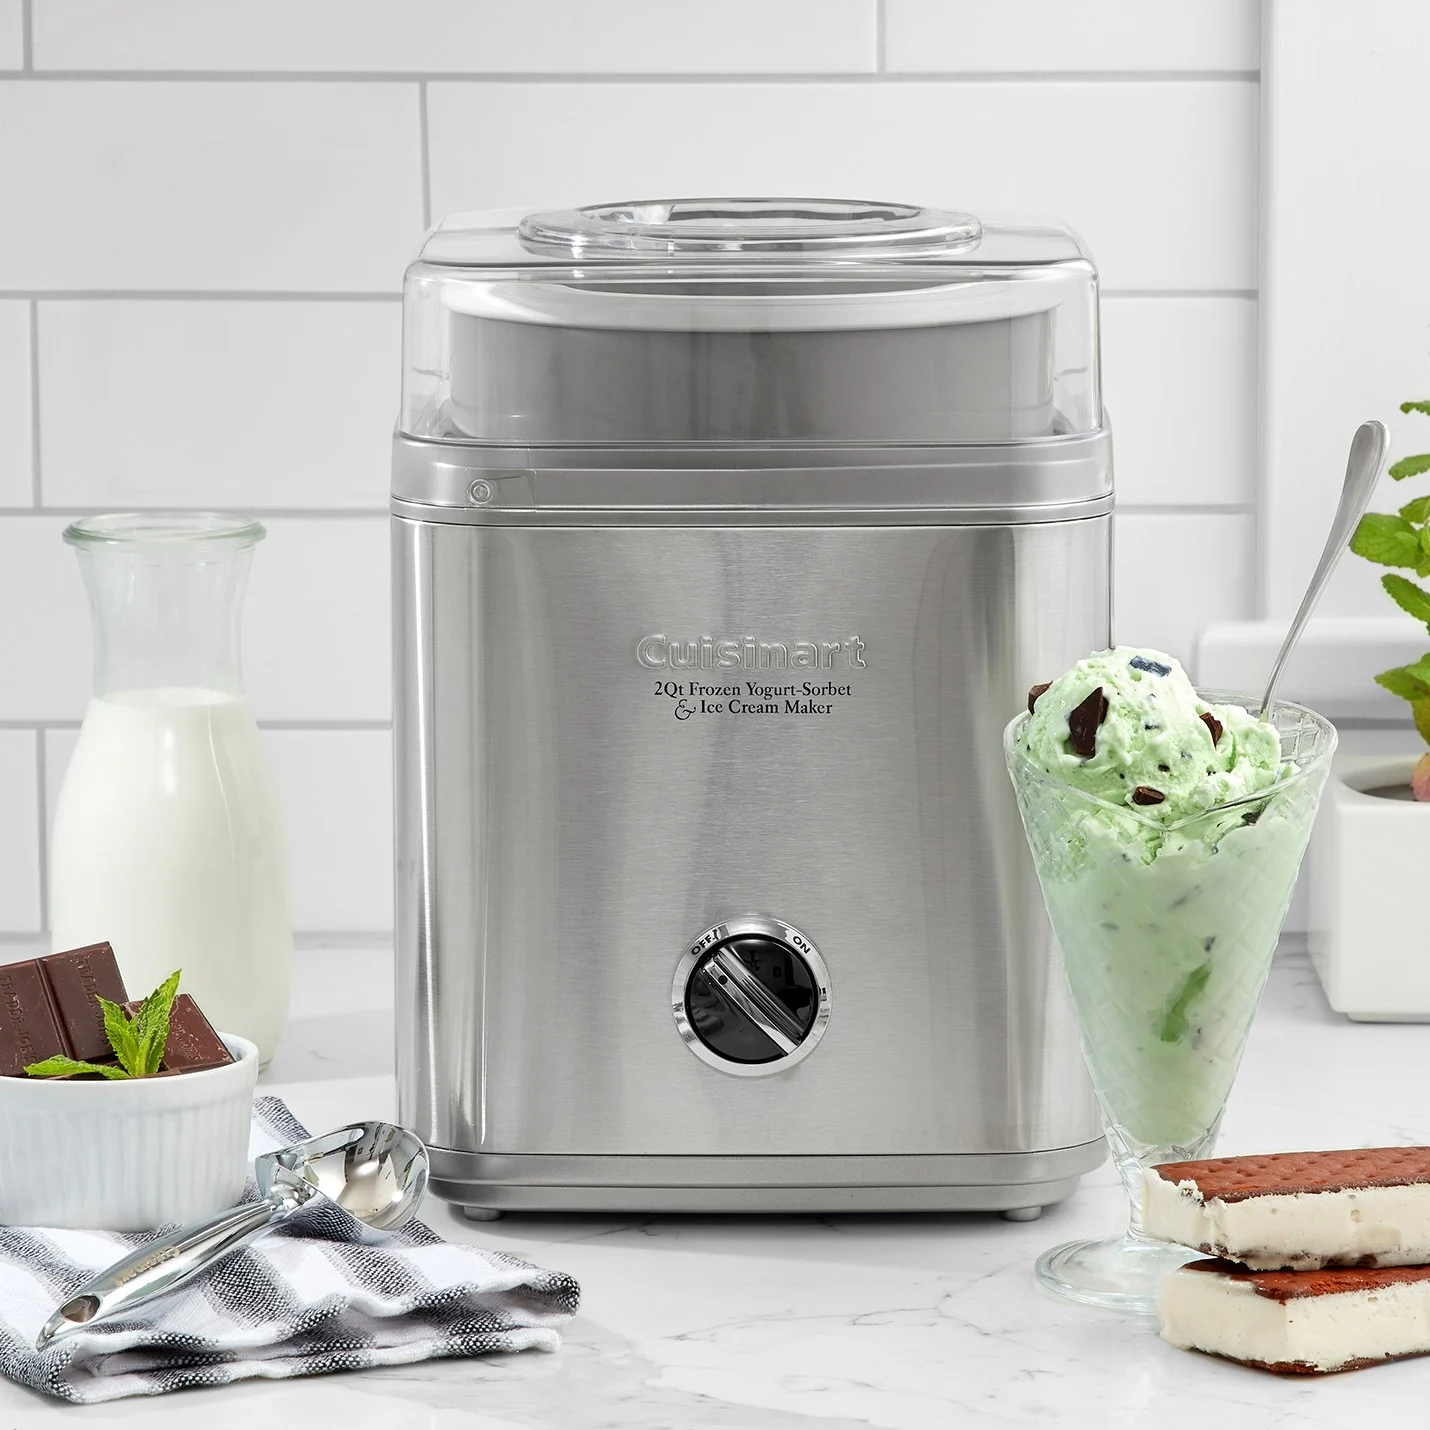
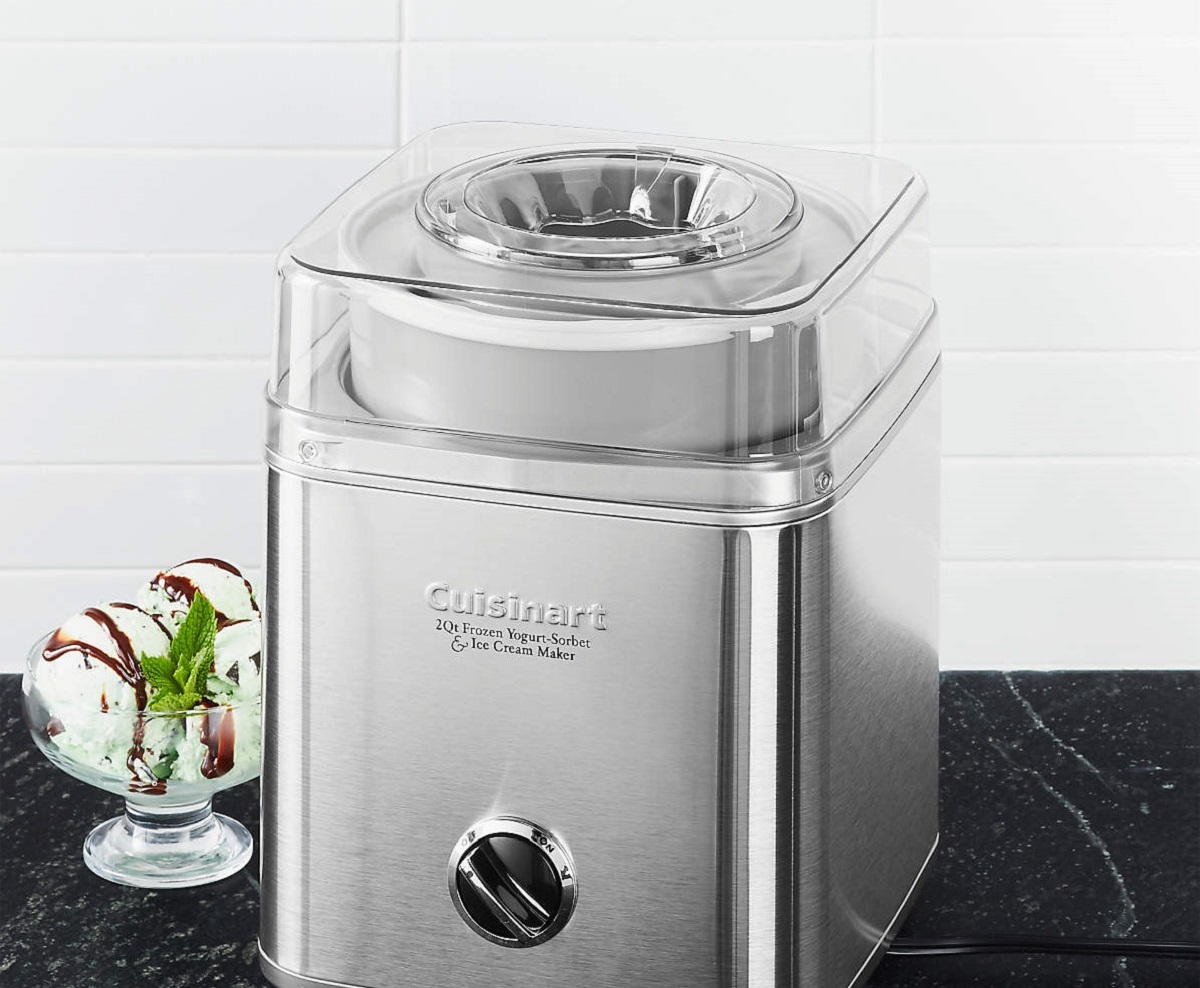
Before you dive into making delicious ice cream, it’s important to familiarize yourself with the Cuisinart 2 Qt Ice Cream Maker and its key features. Understanding how the machine works will ensure that you can make the most out of your ice cream-making venture.
The Cuisinart 2 Qt Ice Cream Maker features a compact and user-friendly design. Its sleek exterior houses a powerful motor and a double-insulated freezer bowl, which is the key component for freezing your ice cream mixture. The 2-quart capacity allows you to make enough ice cream to serve a small gathering or simply stock up for indulgent treats throughout the week.
The control panel on the front of the machine offers simple and intuitive operation. With just a few buttons, you’ll be able to start, stop, and monitor the freezing process effortlessly. The built-in timer ensures that your ice cream is perfectly frozen, eliminating the need for guesswork.
One of the standout features of the Cuisinart 2 Qt Ice Cream Maker is its versatility. Not only can you make traditional ice cream, but the machine is also capable of creating sorbets, frozen yogurt, and even gelato. This allows you to explore an array of delicious frozen treats and cater to different dietary preferences.
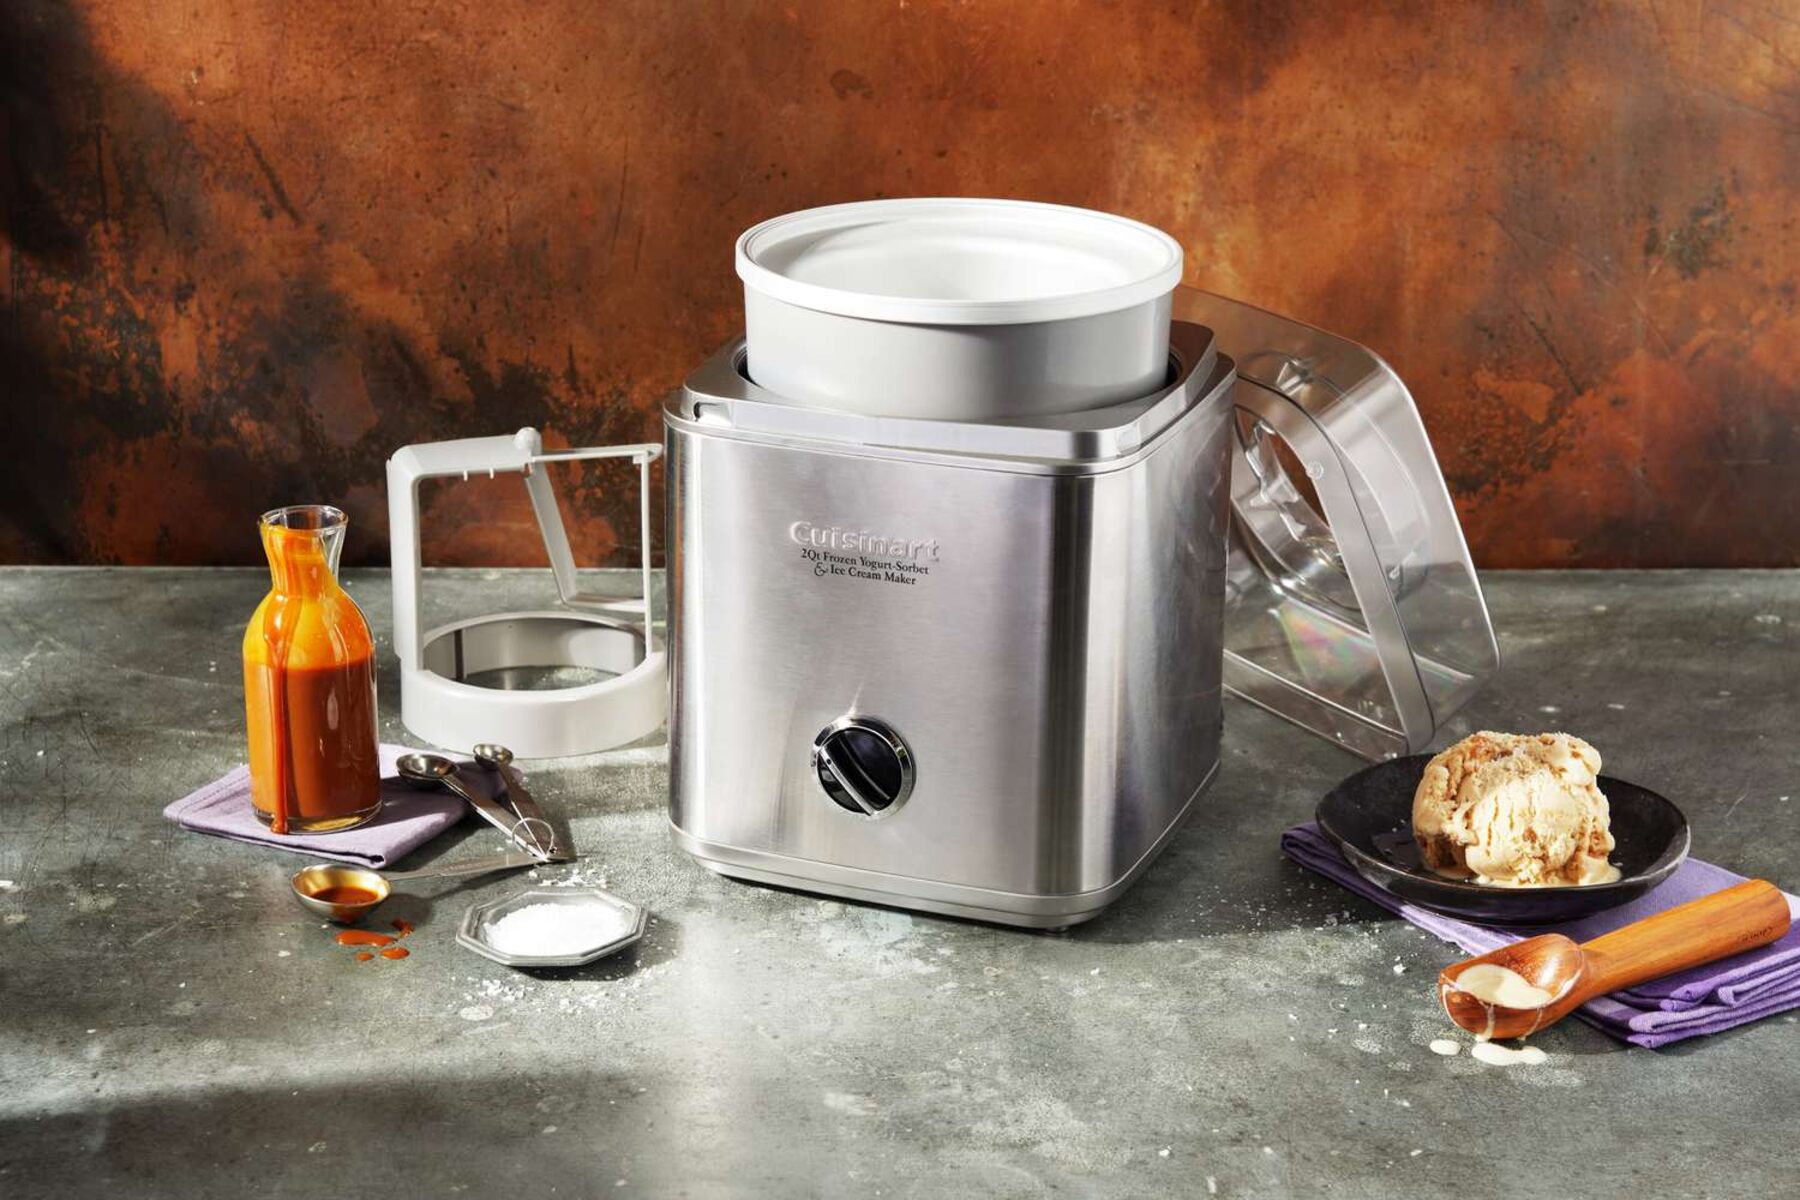
The freezer bowl, made from heavy-duty plastic, has a double-insulated design that helps maintain a consistent temperature throughout the freezing process. It’s important to note that the freezer bowl needs to be pre-frozen before you can start making ice cream. This step ensures that the bowl is chilled enough to freeze the mixture effectively.
Included with the Cuisinart 2 Qt Ice Cream Maker is a mixing paddle that is specifically designed to fit the machine’s bowl. The paddle rotates slowly, incorporating air into the mixture to create a smooth and creamy texture.
Now that you’re acquainted with the Cuisinart 2 Qt Ice Cream Maker and all its features, it’s time to prepare the machine for your ice cream-making adventure. Stay tuned for the next section, where we’ll guide you through the process of setting up the ice cream maker and getting it ready for use.
Step 1: Preparing the Ice Cream Maker
Before you can start churning out delicious homemade ice cream, it’s important to properly prepare your Cuisinart 2 Qt Ice Cream Maker. The preparation process involves a few simple steps that ensure optimum performance and frozen dessert perfection.
The first step in preparing your ice cream maker is to ensure that the freezer bowl is thoroughly frozen. It’s recommended to freeze the bowl for around 16-24 hours before making your ice cream. Simply place the freezer bowl in the coldest part of your freezer, ensuring that it is set on a flat surface to prevent any uneven freezing.
While the bowl is freezing, take the time to gather all the necessary ingredients for your ice cream mixture. This can include milk, cream, sugar, eggs, and any desired flavorings or mix-ins. Having everything ready and at hand will make the process smoother once you’re ready to start.
Once the freezer bowl is properly frozen, it’s time to assemble the ice cream maker. Start by removing the bowl from the freezer and inserting the mixing paddle into the center of the bowl. Ensure that the paddle is fitted securely and has a snug fit.
Next, place the assembled bowl and paddle onto the base of the Cuisinart 2 Qt Ice Cream Maker. Make sure it is aligned properly and firmly in place. The motor is located in the base, and it is responsible for rotating the mixing paddle during the freezing process.
Before moving on to preparing the ice cream mixture, take a moment to clean the freezer bowl and mixing paddle. Wash them with warm soapy water, rinse thoroughly, and dry completely. This will ensure that your ice cream doesn’t pick up any unwanted flavors or residue from previous use.
Now that your Cuisinart 2 Qt Ice Cream Maker is properly prepared, the freezer bowl is frozen, and the mixing paddle is securely in place, you’re ready to move on to the next step – preparing the ice cream mixture. Stay tuned for the upcoming section, where we will guide you through the process of creating the perfect base for your homemade ice cream.
Step 2: Assembling the Ice Cream Maker
Now that you have prepared your Cuisinart 2 Qt Ice Cream Maker, it’s time to assemble it for the ice cream-making process. Assembling the machine is a simple and straightforward process that will have you ready to start creating delicious frozen treats in no time.
Start by placing the base unit of the ice cream maker on a clean and dry surface. This is the main component that houses the motor and controls the rotation of the mixing paddle. Make sure the base is stable and level to ensure proper operation.
Next, take the frozen freezer bowl out of the freezer and remove any protective packaging or wrapping. Handle the bowl carefully as it will be very cold to the touch. Place the freezer bowl on top of the base unit, ensuring that the alignment arrows on the bowl and base are matched up and correctly aligned. The bowl should fit securely into the base unit.
Once the freezer bowl is properly seated, it’s time to insert the mixing paddle. Take the mixing paddle and insert it into the opening in the center of the freezer bowl. Push it down firmly until it is snugly in place. The paddle should rotate freely without any obstruction.
Before moving on, take a moment to ensure that all the components are properly assembled and secured. Check that the freezer bowl is firmly inserted into the base unit and the mixing paddle is correctly in place. This will prevent any mishaps or accidents during the ice cream-making process.
Now that the Cuisinart 2 Qt Ice Cream Maker is fully assembled, you are ready to move on to the next step of the ice cream-making process. In the upcoming section, we will guide you through the process of pre-freezing the ice cream bowl, an essential step for achieving creamy and perfectly frozen ice cream. So, let’s get started and continue the journey towards delicious homemade ice cream!
Step 3: Pre-Freezing the Ice Cream Bowl
Before you can begin making your homemade ice cream, it is crucial to pre-freeze the freezer bowl of your Cuisinart 2 Qt Ice Cream Maker. This step ensures that the bowl is chilled enough to freeze the ice cream mixture properly and produce a creamy and smooth texture.
Start by carefully removing the freezer bowl from the assembled ice cream maker. Make sure to handle it with care as it will be very cold. It’s recommended to use oven mitts or a towel to protect your hands from freezing temperatures.
Once you have removed the bowl, check to ensure that it is dry and free from any moisture. Any moisture left on the bowl can cause ice crystals to form during the freezing process, resulting in a less desirable texture for your ice cream.
Next, place the freezer bowl in the coldest part of your freezer. Make sure it is set on a flat surface to ensure even freezing. It’s recommended to pre-freeze the bowl for a minimum of 16-24 hours before making your ice cream.
Pre-freezing the bowl for an extended period allows it to reach the optimum temperature required for freezing the ice cream mixture. A properly frozen bowl will ensure that the mixture freezes evenly and produces a smooth and creamy consistency.
While the freezer bowl is pre-freezing, it’s a good idea to gather all the ingredients for your ice cream mixture and have them ready. This will save you time when you are ready to start the next step of the process.
Once the pre-freezing time has elapsed and the freezer bowl is thoroughly frozen, you are ready to move on to the next step – preparing the ice cream mixture. In the following section, we will guide you through the process of creating the perfect ice cream base. So, get ready to unleash your creativity and make a delectable frozen treat!
Step 4: Preparing the Ice Cream Mixture
Now that you have pre-frozen the freezer bowl of your Cuisinart 2 Qt Ice Cream Maker, it’s time to prepare the ice cream mixture. This step involves combining all the necessary ingredients to create a rich and flavorful base that will become your delicious homemade ice cream.
Start by gathering all your ingredients. The basic ice cream mixture typically consists of milk, cream, sugar, eggs (optional), and any desired flavorings or mix-ins. Be sure to measure the ingredients accurately to ensure the best results.
In a large mixing bowl, combine the milk and cream. The ratio of milk to cream can vary depending on your desired richness. For a lighter ice cream, use a higher proportion of milk. If you prefer a creamier and richer texture, increase the amount of cream.
Next, add the sugar to the milk and cream mixture. The amount of sugar can be adjusted according to your taste preferences. Start with a recommended amount and adjust as needed. Whisk the mixture well until the sugar is fully dissolved.
Optional: If you prefer to add eggs to your ice cream mixture for a custard-like texture, you can proceed to the next step. In a separate bowl, whisk the eggs until they are well beaten. Gradually add about a cup of the milk and sugar mixture to the beaten eggs, whisking continuously. This process is called tempering and helps to avoid any curdling or scrambling of the eggs. Once the mixture is combined, pour it back into the main bowl containing the rest of the milk, cream, and sugar mixture.
Now it’s time to add your chosen flavorings. Whether you’re in the mood for classic vanilla, indulgent chocolate, fruity strawberry, or any other flavor, add the necessary extracts, powders, or ingredients to the mixture. Adjust the amount of flavorings to suit your taste.
Whisk the mixture thoroughly to ensure that all the ingredients are well combined and the flavors are evenly distributed. At this stage, you can also fold in any mix-ins such as chocolate chips, crushed cookies, or chopped nuts to add extra texture and flavor to your ice cream.
Once your ice cream mixture is well combined and ready, cover the bowl with plastic wrap or a lid and place it in the refrigerator to chill for at least 2 hours. Chilling the mixture allows the flavors to meld together and gives the ice cream a smoother texture when frozen.
With your ice cream mixture prepared and chilling, you’re one step closer to enjoying your homemade frozen treat. In the next section, we will guide you through the process of pouring the mixture into the ice cream maker and starting the freezing process. Get ready to savor the sweet rewards of your efforts!
Step 5: Pouring the Mixture into the Ice Cream Maker
Now that you have prepared the ice cream mixture and let it chill, it’s time to pour it into the Cuisinart 2 Qt Ice Cream Maker and begin the freezing process. This step brings your delectable ice cream creation one step closer to reality.
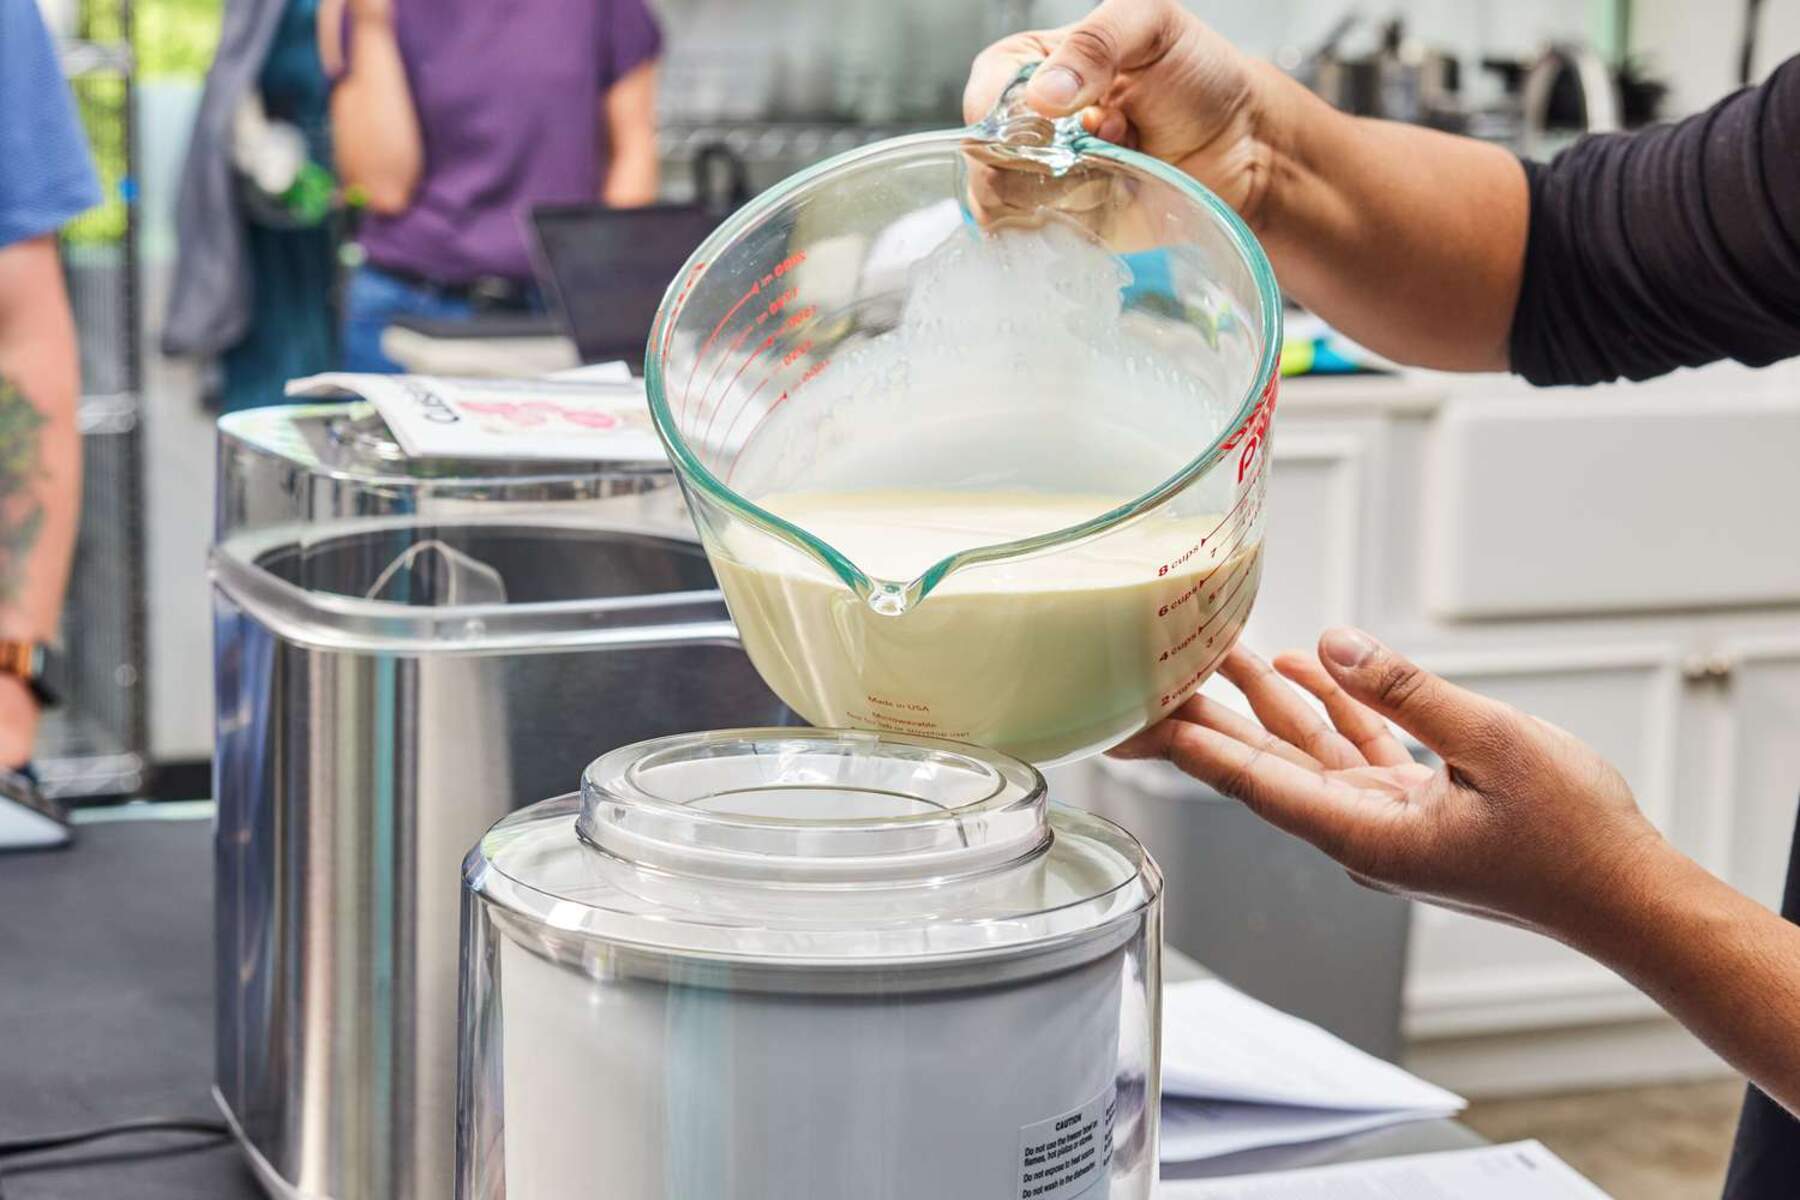
Start by removing the pre-frozen freezer bowl from the freezer. Retrieve the chilled ice cream mixture from the refrigerator. Give the mixture a quick stir to ensure that it is well mixed and any settled ingredients are evenly distributed.
Take the freezer bowl and place it securely on the base unit of the Cuisinart 2 Qt Ice Cream Maker. Ensure that the bowl is correctly aligned with the component on the base unit and that it fits snugly.
Next, remove the mixing paddle from the freezer bowl. This will make it easier to pour the ice cream mixture into the bowl without any obstruction.
Now, slowly pour the prepared ice cream mixture into the freezer bowl. Be cautious not to overfill the bowl, as the mixture will expand as it freezes. Leave approximately 1/2 inch of space at the top to allow for expansion.
As you pour the mixture, you may notice that it has thickened slightly during the chilling process. This is normal and will help in achieving a creamy texture as the mixture freezes.
Once the mixture is in the bowl, place the mixing paddle back into the center of the freezer bowl. Make sure it is fitted securely and can rotate freely.
Close the lid of the ice cream maker if it has one. The lid will help to maintain the temperature inside the machine and prevent any ice crystals from forming on the surface of your ice cream.
With the ice cream mixture poured into the freezer bowl and the mixing paddle in place, it’s time to start the freezing process. In the next section, we will guide you through the operation of the Cuisinart 2 Qt Ice Cream Maker and the steps to freeze your ice cream to perfection. Get ready to witness the magic of transformation as your liquid mixture turns into a frozen delight!
Step 6: Operating the Ice Cream Maker
Now that you have poured the ice cream mixture into the Cuisinart 2 Qt Ice Cream Maker, it’s time to operate the machine and begin the freezing process. The simple and intuitive controls of the ice cream maker make it easy to create smooth and creamy homemade ice cream.
Start by ensuring that the freezer bowl is properly assembled on the base unit and the mixing paddle is securely in place.
Next, plug in the ice cream maker and locate the power switch or button. Turn the machine on to begin the freezing process. You may hear a gentle humming sound as the motor starts to rotate the mixing paddle.
As the machine starts, you will notice the mixture beginning to thicken and freeze around the edges of the freezer bowl. The mixing paddle will continuously scrape the frozen mixture from the edges, allowing for even freezing and incorporating air to create a creamy texture.
The freezing process typically takes around 20-30 minutes, depending on the temperature of your mixture and the desired consistency. It’s important to note that the freezing time can vary, so it’s recommended to refer to the instruction manual for specific guidelines.
During the freezing process, it’s important to avoid overfilling the freezer bowl or adding additional ingredients. This can prevent the proper freezing and affect the texture of your ice cream.
While the ice cream maker is operating, you can take the opportunity to prepare any desired toppings or mix-ins to enhance the flavor and texture of your ice cream.
In order to achieve the best results, it’s important not to rush the freezing process by increasing the time or temperature. Allow the ice cream maker to do its job and maintain a consistent freezing temperature.
As the ice cream mixture continues to freeze, you may notice that it expands and rises to the top of the freezer bowl. Don’t worry, this is normal and a result of the air being incorporated into the mixture during the freezing process.
Once the freezing time is complete, the machine will automatically stop or you can turn it off manually. The ice cream should have a soft-serve consistency at this point.
Now that you’ve successfully operated the Cuisinart 2 Qt Ice Cream Maker, it’s time to proceed to the next step – monitoring the ice cream freezing process to achieve your desired consistency. Get ready to enjoy the sweet rewards of your homemade ice cream-making adventure!
Step 7: Monitoring the Ice Cream Freezing Process
Now that you have started the freezing process in your Cuisinart 2 Qt Ice Cream Maker, it’s important to monitor the ice cream as it freezes to achieve the perfect consistency. By keeping an eye on the freezing process, you can ensure that your ice cream turns out smooth, creamy, and just the way you like it.
As the ice cream maker operates, you will notice the mixture gradually thickening and freezing around the edges of the freezer bowl. This is a sign that the freezing process is underway. The mixing paddle will continue to rotate, scraping the frozen mixture from the sides and incorporating air to create a light and fluffy texture.
During the freezing process, it’s essential to resist the temptation to open the lid or remove the freezer bowl to check on the progress too frequently. Opening the machine can cause a loss of cold air, which may affect the freezing process and result in icy texture.
Instead, periodically check on the ice cream through the transparent lid or window, if available. Observe the consistency and texture of the ice cream as it churns. As the freezing time elapses, the ice cream will gradually thicken, becoming more solid and scoopable.
The exact freezing time can vary depending on factors such as the temperature of the mixture and the ambient temperature in your kitchen. It’s recommended to follow the guidelines provided in the instruction manual for the best results.
To test the readiness of your ice cream, gently remove the lid and take a peek inside the freezer bowl. Use a spoon or spatula to check the consistency by taking a small scoop. The ice cream should be soft but not runny, with a slightly firm and smooth texture.
If the ice cream is still too soft for your liking, continue the freezing process for a few more minutes, checking the consistency intermittently until you achieve the desired texture. Avoid over-freezing, as this can lead to ice crystals forming and affect the overall quality of your ice cream.
Remember that the ice cream will firm up further when transferred to a freezer-safe container and placed in the freezer for a few hours for hardening. The initial soft-serve consistency achieved in the ice cream maker is ideal for adding mix-ins or enjoying it right away.
By carefully monitoring the freezing process and ensuring the ice cream reaches your desired consistency, you are now one step closer to enjoying your homemade frozen treat. In the next section, we will guide you through the process of adding mix-ins to take your ice cream to the next level of flavor and texture. Get ready to unleash your creativity and make an ice cream creation that’s uniquely yours!
Step 8: Adding Mix-ins to the Ice Cream
Adding mix-ins to your homemade ice cream can elevate the flavor and texture, taking it to a whole new level of deliciousness. Whether you prefer chocolate chips, cookie dough, fruit chunks, or nuts, this step allows you to customize your ice cream and create a unique flavor combination that suits your taste buds.
Once the ice cream has reached your desired consistency in the Cuisinart 2 Qt Ice Cream Maker, it’s time to add your chosen mix-ins. Open the lid of the machine and pause the operation to prevent the mixing paddle from rotating.
Start by preparing your mix-ins. If you’re using solid ingredients such as chocolate chips or nuts, ensure that they are chopped or small enough to be easily incorporated into the ice cream. If you’re using ingredients that require some preparation, like cookie dough or brownie chunks, have them ready to go.
Remove the freezer bowl with the ice cream mixture from the machine. Using a spatula or mixing spoon, gently fold in the mix-ins into the ice cream. Be careful not to overmix or stir too vigorously, as this can cause the ice cream to melt or lose its desired texture.
Ensure that the mix-ins are evenly distributed throughout the ice cream. Take your time to fold them in gently, giving each scoop of ice cream an equal chance to incorporate the delicious add-ins.
If you’re adding mix-ins that require some swirling or a ripple effect, such as caramel or fudge sauce, pour the sauce onto the partially churned ice cream and use a spoon or knife to create swirls or ripples by gently stirring or dragging the sauce through the mixture.
Once the mix-ins are fully incorporated, transfer the ice cream back into the freezer bowl of the machine. Secure the lid and resume the freezing process for another minute or two to further firm up the ice cream and ensure the mix-ins are evenly distributed.
After this additional freezing time, the ice cream is ready to be enjoyed right away or transferred to a freezer-safe container for further hardening in the freezer. This will allow the ice cream to reach a firmer consistency before serving.
Remember to label your ice cream container with the flavor and date to keep track of your homemade creations. Store the ice cream in the freezer for a few hours before serving to achieve the perfect scoopability.
By adding mix-ins to your homemade ice cream, you can truly make it your own and create a delightful treat that’s bursting with flavor and texture. In the next step, we will guide you through the process of removing the ice cream bowl and transferring your frozen creation to a storage container. Get ready to indulge in your delicious homemade ice cream!
Step 9: Removing the Ice Cream Bowl and Ice Cream
Now that your homemade ice cream is ready, it’s time to remove the ice cream bowl from the Cuisinart 2 Qt Ice Cream Maker and transfer the frozen delight into a separate storage container. This step allows you to free up the machine for future use and ensures that your ice cream remains fresh and accessible.
Start by turning off the ice cream maker and unplugging it from the power source. This ensures your safety and prevents any accidental activation of the machine while handling the bowl and ice cream.
Gently lift the lid of the ice cream maker to access the frozen ice cream bowl. You may notice a layer of frost on the lid and around the edges, which is normal and can be wiped away later.
Using oven mitts or a towel, carefully remove the freezer bowl from the base unit. Place it on a stable and flat surface, ensuring that it doesn’t tip over or spill.
Next, use a rubber spatula or spoon to scoop out the frozen ice cream from the freezer bowl into a separate storage container. Choose a container that is freezer-safe and has a tight-fitting lid to maintain the freshness and prevent any unwanted flavors from seeping in.
Transfer the ice cream from the bowl to the storage container in small batches, alternating between layers of ice cream and any desired additional mix-ins. Gently press down each layer to remove any air pockets and ensure a smoother texture.
Smooth the top of the ice cream with the back of a spoon or spatula to create an even surface. This will allow for easy scooping once the ice cream hardens further in the freezer.
Once the ice cream is in the storage container, securely close the lid to prevent any air or moisture from getting in. Make sure the container is sealed tightly to maintain the freshness and quality of your homemade ice cream.
Label the storage container with the flavor and date of preparation. This will help you keep track of your ice cream creations and ensure that you enjoy them at their best quality.
Finally, place the storage container in the freezer and let the ice cream harden for a few more hours or overnight. This will give the ice cream a firmer consistency, making it easier to scoop and enjoy.
With the ice cream safely transferred to the storage container and ready to freeze further, you have successfully completed the process of removing the ice cream bowl and ice cream from the Cuisinart 2 Qt Ice Cream Maker. In the last step, we will cover the essential cleaning and storing instructions for your ice cream maker, ensuring its longevity and maintaining the quality of your homemade frozen treats.
Step 10: Cleaning and Storing the Ice Cream Maker
After enjoying your homemade ice cream, it’s important to properly clean and store the Cuisinart 2 Qt Ice Cream Maker to ensure its longevity and keep it ready for your next frozen creation. Proper maintenance will also prevent any residual flavors or odors from affecting the quality of your ice cream.
Start by unplugging the ice cream maker and disassembling it. Remove the freezer bowl, mixing paddle, and any other removable parts.
Rinse the freezer bowl, mixing paddle, and other removable parts with warm water to remove any remaining ice cream or residue. Avoid using abrasive cleaners or scouring pads that can scratch the surfaces. Do not submerge the motor base or expose it to water.
Use a mild dish soap and a non-abrasive sponge or cloth to gently clean the parts. Pay attention to nooks and crevices where residue may accumulate.
Rinse the parts thoroughly with warm water to ensure that all soap residue is removed.
Dry the parts completely before reassembling or storing them. You can either air-dry them or use a clean, dry cloth to speed up the drying process.
Once dry, reassemble the ice cream maker by placing the freezer bowl back onto the base unit and securing the mixing paddle.
Wipe the exterior of the ice cream maker with a damp cloth to remove any dirt or spills. For stubborn stains or residue, you can use a mild cleaner or a solution of water and vinegar.
When the ice cream maker and its parts are clean and dry, find a designated storage area in your kitchen or pantry to keep it. Make sure the storage area is clean and free from excessive heat or moisture.
To keep the pieces organized and prevent them from getting lost, consider storing them together or using a dedicated storage container for the ice cream maker and its accessories.
If the freezer bowl is not going to be used immediately, dry it thoroughly and place it in a plastic bag before storing it in the freezer. This will help keep the bowl clean and prevent any odors or flavors from permeating it.
Regularly check the ice cream maker and its parts for any signs of wear or damage. If any component is cracked, broken, or malfunctioning, contact the manufacturer for assistance or replacement.
By following these cleaning and storage practices, you can keep your Cuisinart 2 Qt Ice Cream Maker in excellent condition and ready to use whenever you’re in the mood for homemade ice cream. Now, you’re fully equipped to enjoy endless batches of delightful frozen treats in the comfort of your own home!
Conclusion
Congratulations on mastering the art of using the Cuisinart 2 Qt Ice Cream Maker to create your own delectable homemade ice cream! With this user-friendly machine, you have the power to indulge in endless flavor combinations and delight your taste buds with smooth and creamy frozen treats.
By following the step-by-step guide outlined in this article, you’ve learned how to properly prepare the ice cream maker, assemble it, and pre-freeze the freezer bowl. You’ve also discovered the process of preparing the ice cream mixture, pouring it into the ice cream maker, and monitoring the freezing process. You’ve become an expert at adding mix-ins to elevate the flavor and texture of your ice cream. Lastly, you’ve learned how to remove the ice cream bowl, transfer the ice cream to a storage container, and clean and store the ice cream maker for future use.
With your newfound knowledge, you can experiment with various combinations of ingredients, flavors, and mix-ins to create unique and delightful ice cream creations. Share your homemade treats with loved ones, host ice cream socials, or simply indulge in sweet moments of self-care.
Remember to unleash your creativity and try new and exciting recipes. From classic flavors like vanilla and chocolate to more adventurous options like salted caramel or mint chocolate chip, the possibilities are endless.
The satisfaction of creating your own customized ice cream, free from artificial additives and preservatives, is truly unparalleled. The Cuisinart 2 Qt Ice Cream Maker has allowed you to take control of your frozen dessert experience and create memorable moments with family and friends.
So, dust off your ice cream maker, gather your ingredients, and let your imagination run wild. Get ready to embark on a journey of frozen delights and enjoy the sweet rewards of your homemade ice cream creations. Happy scooping!