Introduction
Upgrading to a solid state drive (SSD) can breathe new life into your computer, boosting its performance and improving overall user experience. Unlike traditional hard disk drives (HDDs), SSDs use flash memory to store data, resulting in faster read and write speeds, reduced boot times, and snappier application launches. In this article, we will explore the numerous benefits of upgrading to an SSD and guide you through the process of choosing, installing, and transferring data to your new drive.
Whether you’re a casual user looking to speed up your laptop or a power user in need of more storage and performance, upgrading to an SSD can make a significant difference. Don’t let the technical jargon intimidate you – this guide will break down the steps in a straightforward manner so that anyone, regardless of their technical prowess, can easily upgrade to an SSD.
By replacing your old magnetic hard drive with a solid state drive, you can experience faster boot times, quicker file transfers, and smoother multitasking. Programs and games will load in a blink of an eye, and your entire computer will feel more responsive and snappy. No more waiting for minutes for your computer to start up or documents to open – an SSD can dramatically reduce these waiting times and improve your productivity.
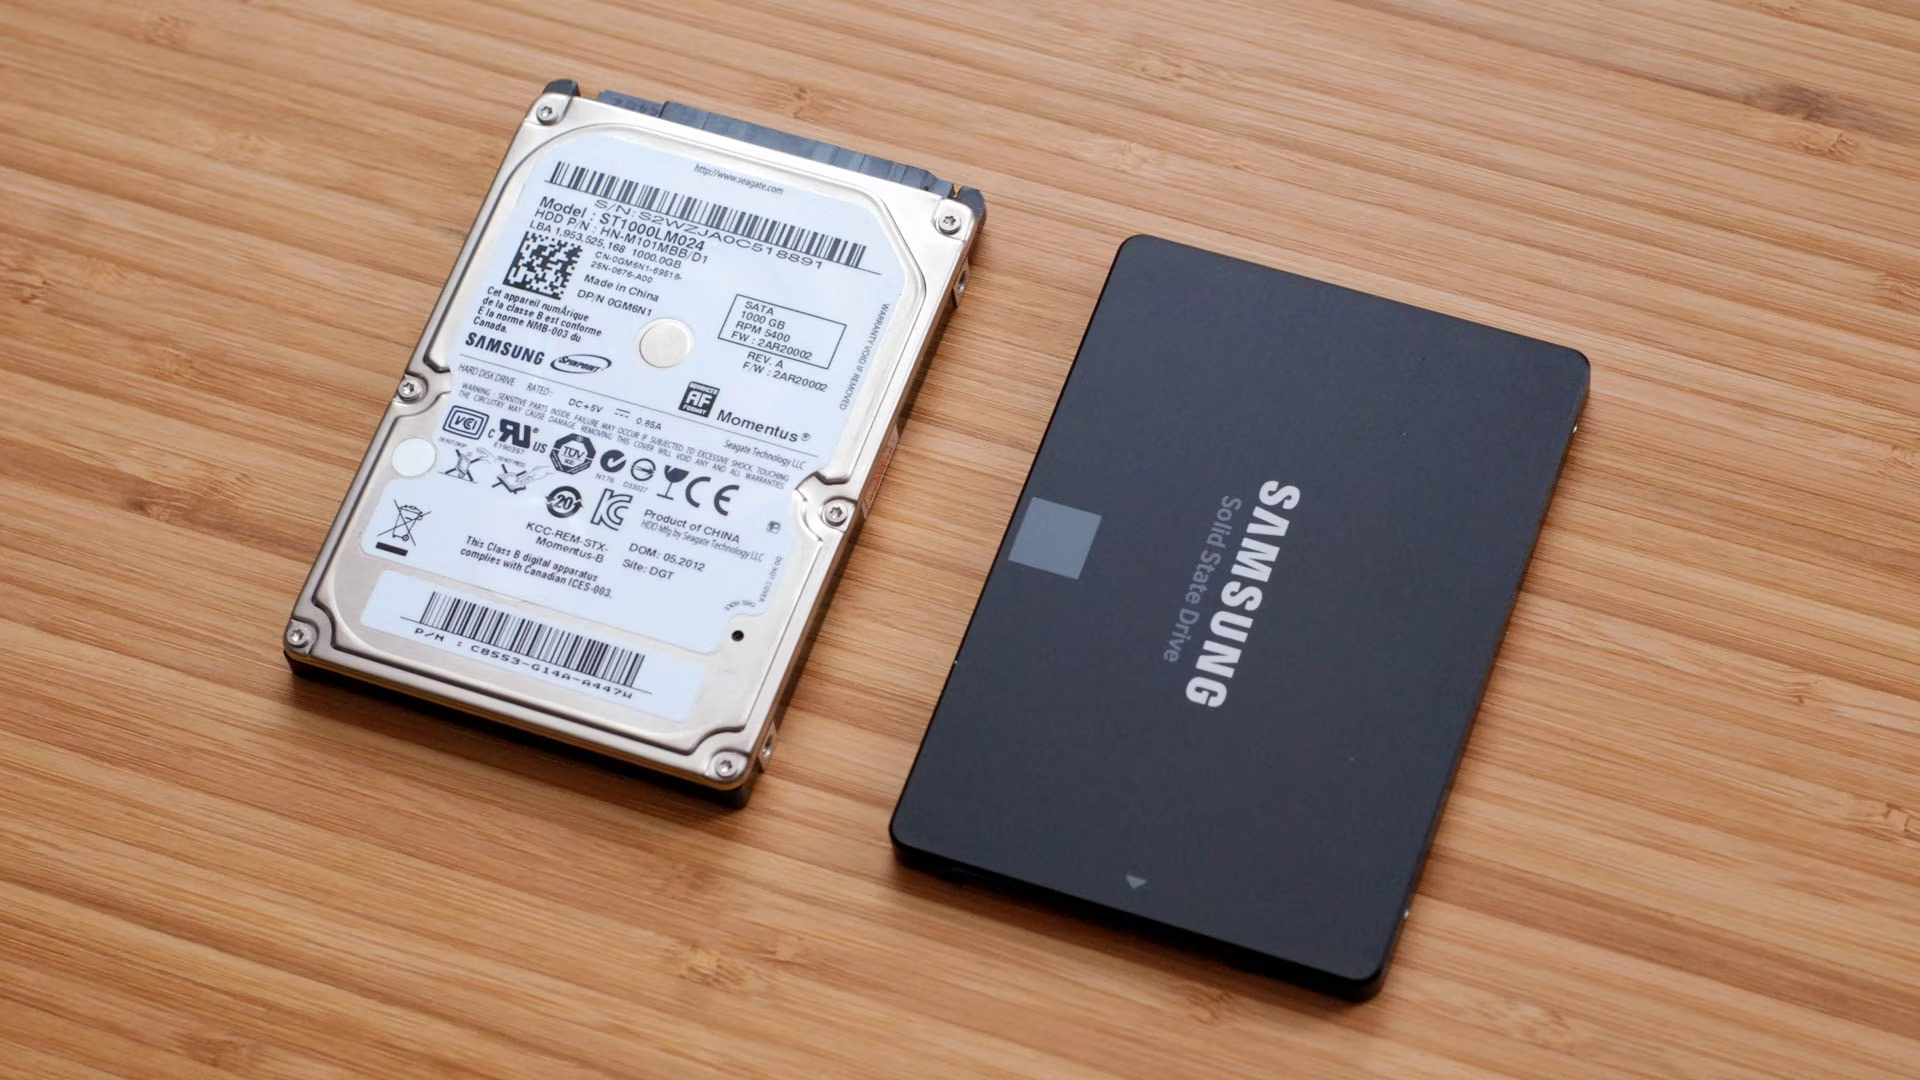
Not only will an SSD enhance your computer’s performance, but it will also provide a more reliable storage solution. Traditional hard drives consist of spinning disks and delicate moving parts, which can lead to mechanical failures and data loss over time. SSDs, on the other hand, have no moving parts, making them more resistant to shock and vibrations, ultimately ensuring your precious files are kept safe.
With the increasing demand for faster storage solutions and advancements in technology, solid state drives have become more affordable and accessible than ever before. Whether you have a desktop or laptop, an SSD upgrade can be a cost-effective way to extend the lifespan of your device and bring it up to modern standards.
In the following sections, we will delve deeper into the benefits of upgrading to an SSD, provide guidance on choosing the right drive for your needs, detail the necessary steps for backing up and cloning your data, and guide you through the physical installation and setup of your new solid state drive. Without further ado, let’s begin the journey to a faster and more efficient computer!
Benefits of Upgrading to a Solid State Drive
Upgrading to a solid state drive (SSD) can provide a multitude of benefits that will transform your computing experience. Here are some of the key advantages you can expect:
1. Improved Performance: One of the most significant advantages of an SSD is its superior performance compared to traditional hard disk drives (HDDs). With faster read and write speeds, you’ll experience snappier boot times, reduced application loading times, and improved overall system responsiveness. Complex tasks such as video editing, gaming, and running demanding applications will also benefit from the increased speed and efficiency provided by an SSD.
2. Enhanced Productivity: The increased responsiveness of an SSD allows you to accomplish tasks more efficiently. Whether you’re opening multiple applications, multitasking between projects, or transferring large files, an SSD will significantly reduce wait times and improve your productivity. You’ll no longer waste precious time waiting for your computer to catch up with you, allowing you to focus on your work and complete tasks faster.
3. Energy Efficiency: SSDs consume less power compared to HDDs, which can have a positive impact on your laptop’s battery life. By upgrading to an SSD, you’ll benefit from a longer-lasting battery and extended usage time, making it ideal for on-the-go professionals or students who rely on their laptops throughout the day.
4. Silent Operation: Unlike HDDs that produce mechanical noise due to spinning disks and moving parts, SSDs operate silently. This feature not only creates a peaceful working environment but also prolongs the lifespan of your device since there is less wear and tear from mechanical components.
5. Improved Reliability and Durability: As opposed to HDDs, SSDs have no moving parts, making them more resistant to mechanical failures caused by shock, vibrations, or accidental drops. The absence of moving parts also contributes to a longer lifespan for your storage drive, reducing the likelihood of unexpected data loss and the need for frequent replacements.
6. Compact and Lightweight: SSDs are generally more compact and lightweight than traditional hard drives, making them an excellent choice for laptops and portable devices. The slim profile of an SSD allows for more flexibility when it comes to design, promoting thinner and lighter laptops while still providing ample storage space.
7. Data Security: With an SSD, you can benefit from improved data security. Advanced encryption algorithms can be implemented by the drive’s firmware or operating system to protect your sensitive information. This feature is particularly crucial for professionals who deal with confidential data, ensuring that your files are safeguarded from unauthorized access.
Overall, upgrading to an SSD delivers a substantial performance boost, increases productivity, reduces power consumption, extends battery life, provides silent operation, enhances reliability, and improves data security. These benefits make upgrading to an SSD a worthwhile investment that will significantly enhance your computing experience.
Choosing the Right Solid State Drive
When it comes to choosing the right solid state drive (SSD) for your needs, there are a few factors you should consider to ensure you make the best decision. Here are some essential factors to keep in mind:
1. Storage Capacity: Determine how much storage space you require for your needs. SSDs are available in various capacities, ranging from 128GB to several terabytes. Consider the types of files you regularly work with, such as documents, photos, videos, or games, and ensure that the chosen capacity provides ample room for your data, with some extra space for future growth.
2. Performance: Pay attention to the performance specifications of SSDs, such as the read and write speeds, measured in megabytes per second (MB/s). Higher speeds indicate faster data transfer, resulting in snappier file access and improved system responsiveness. Consider the type of tasks you will be performing, such as gaming or content creation, and choose an SSD with performance specifications that align with your requirements.
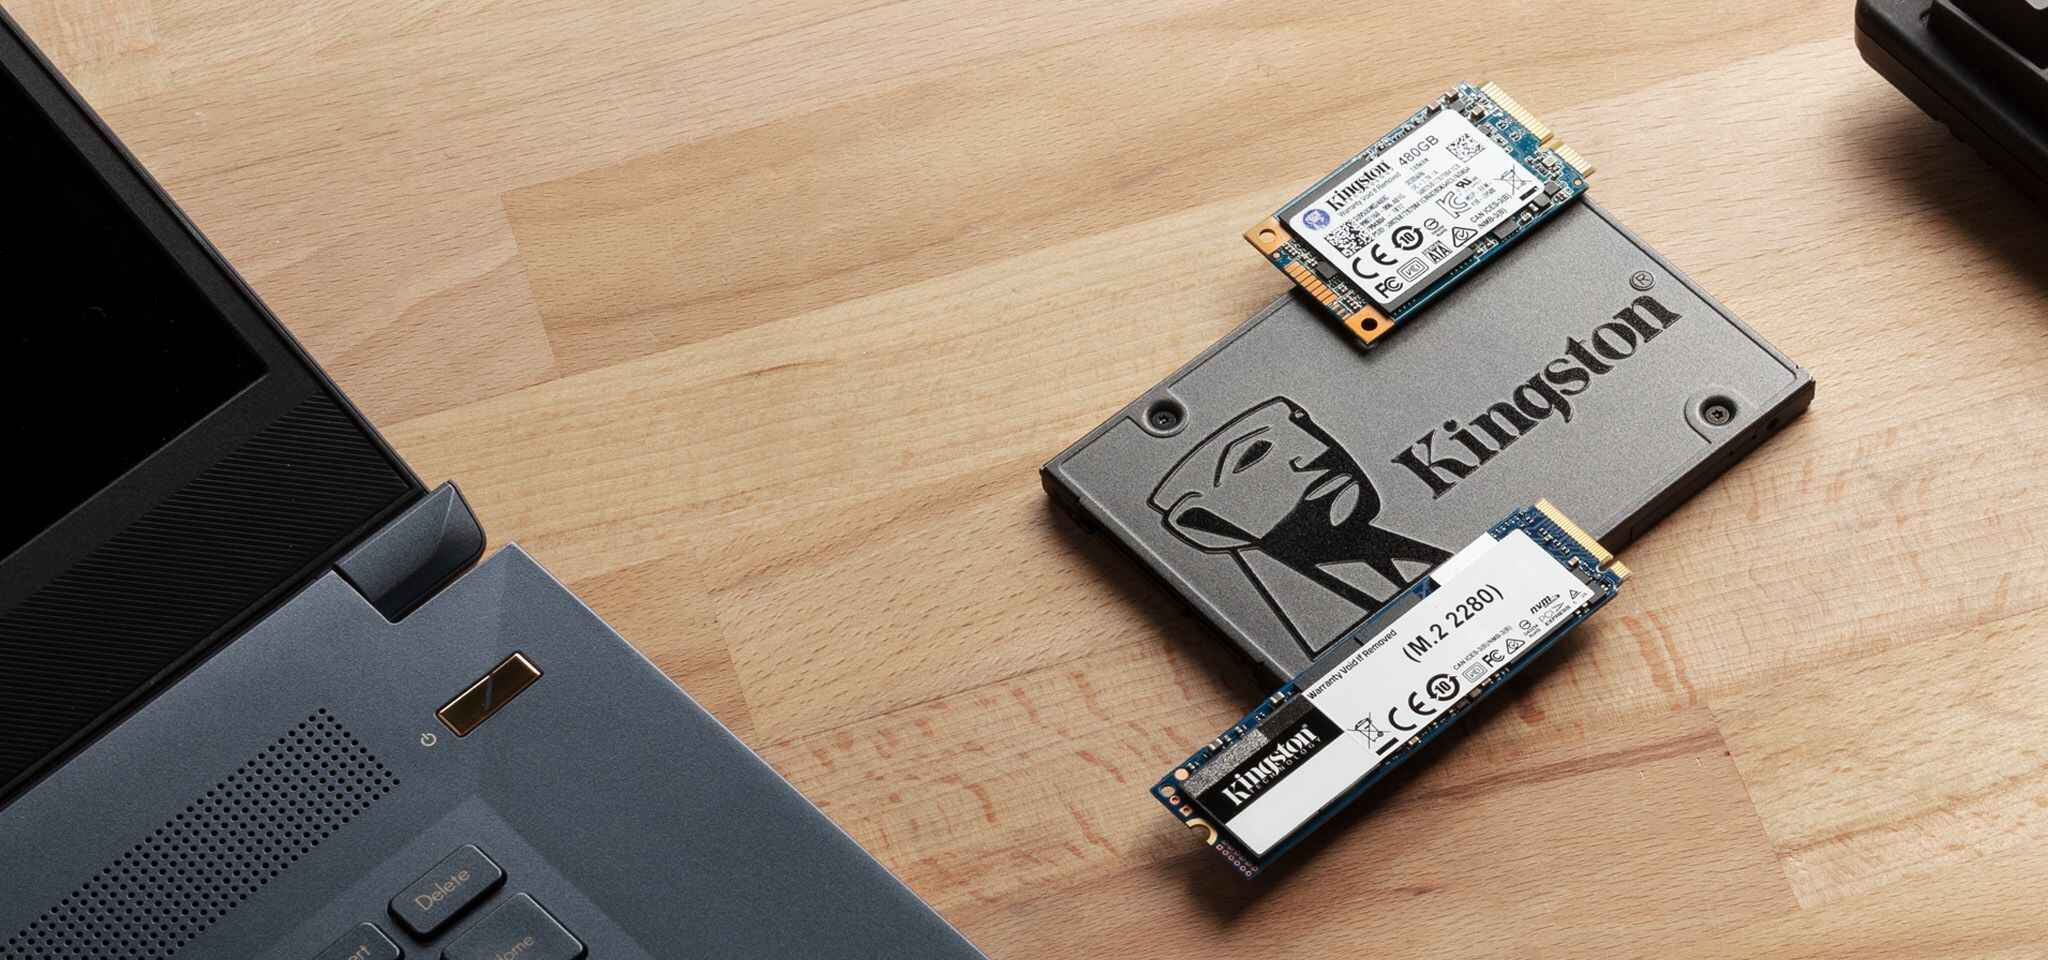
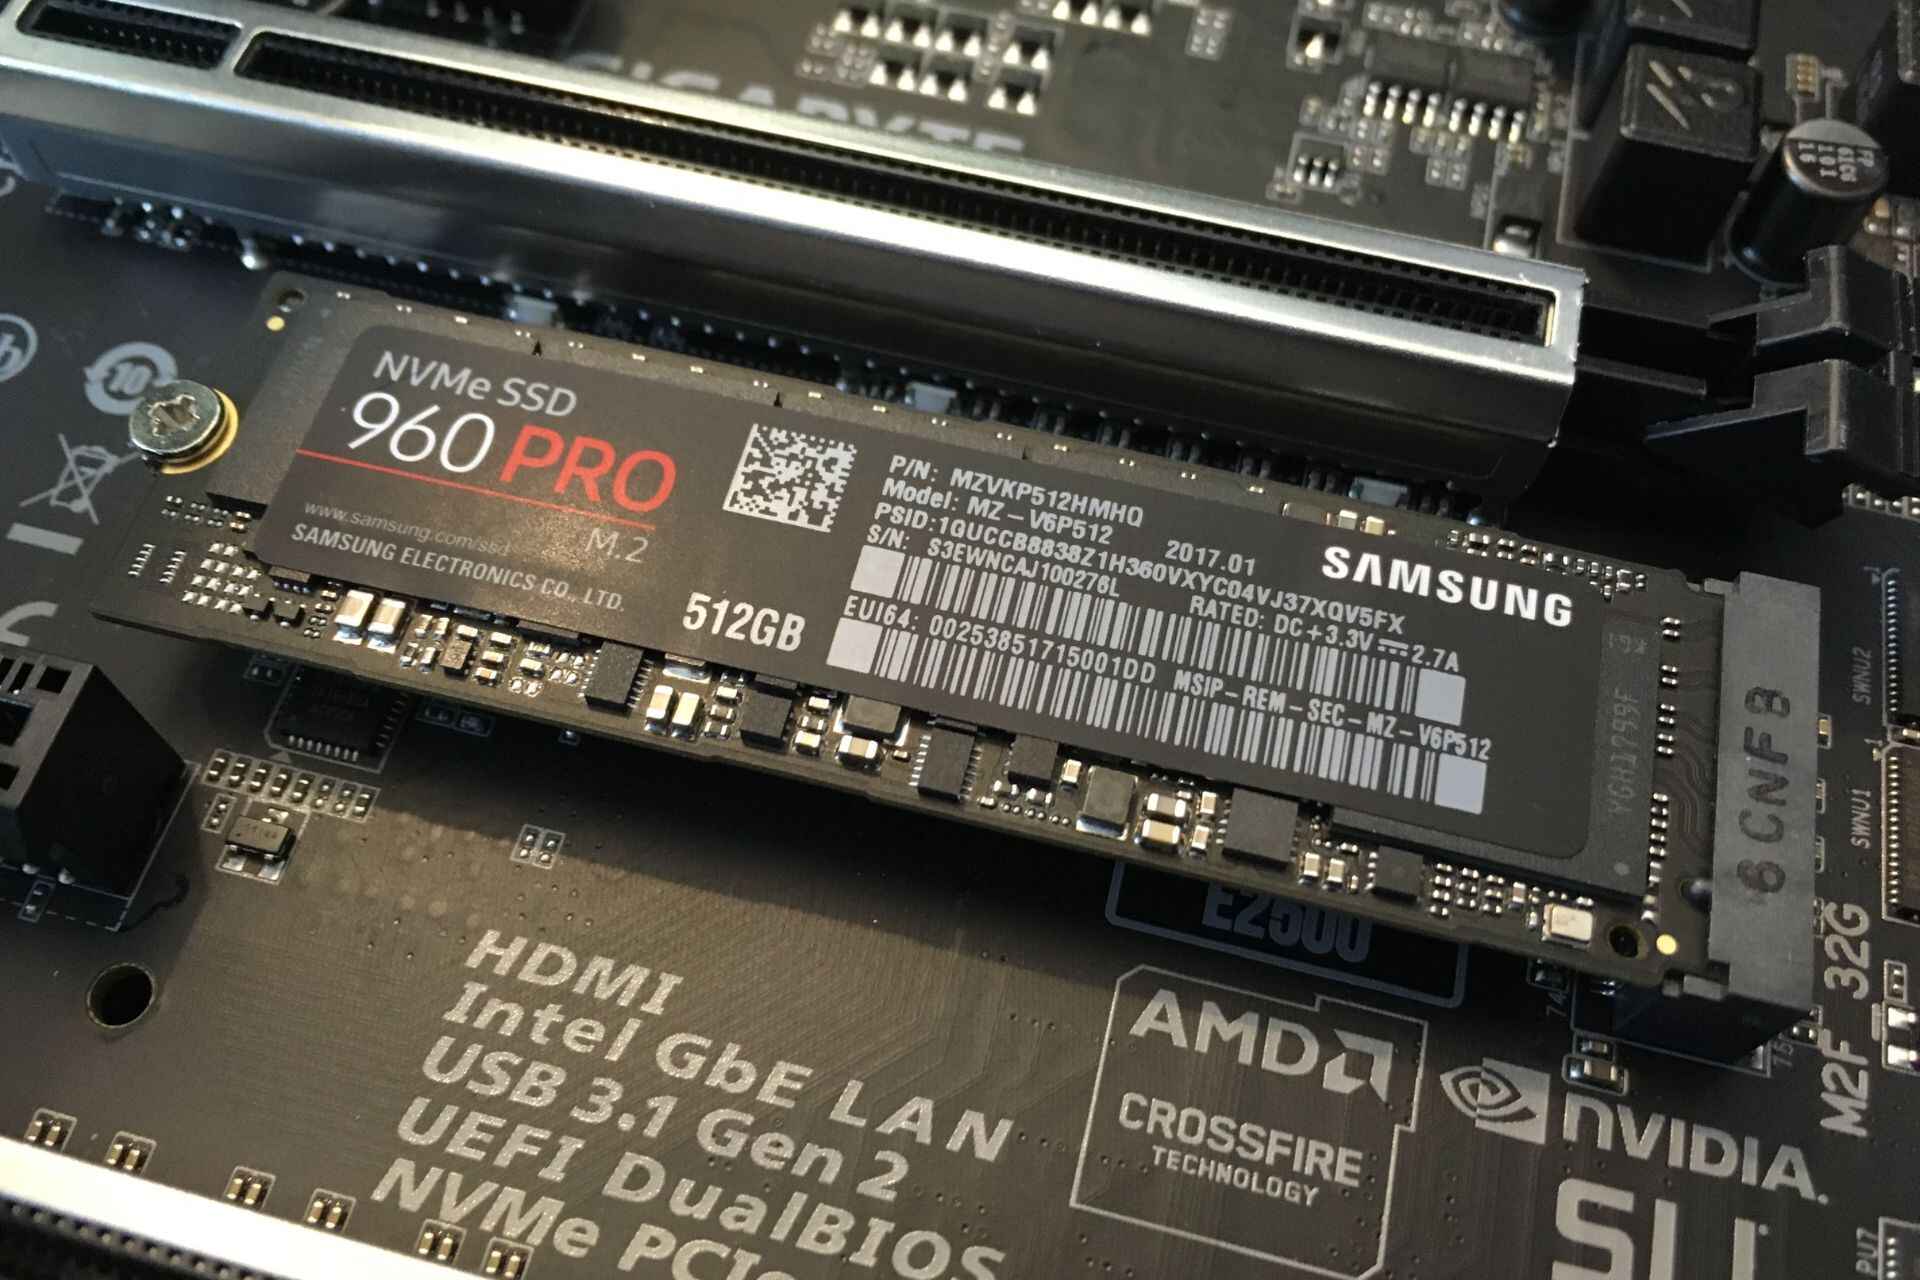
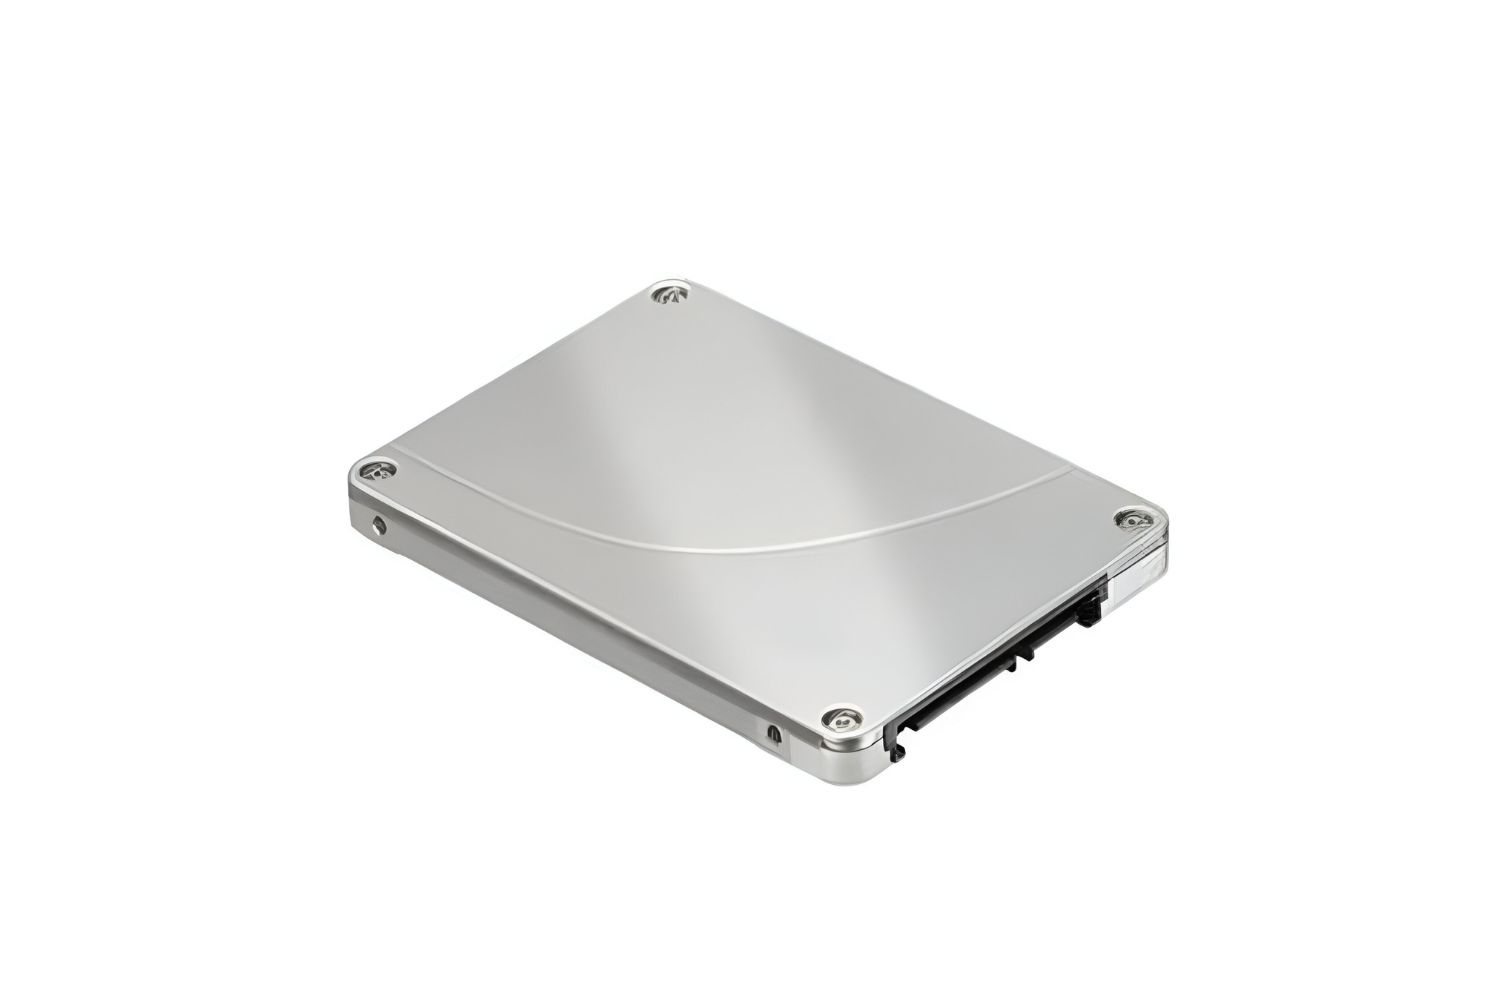
3. Interface and Form Factor: SSDs come in different interface types, such as SATA, PCIe, or M.2. Ensure that your computer’s motherboard or laptop supports the chosen interface. Additionally, consider the form factor of the SSD, as it should fit into the available drive bay or slot in your computer. Common form factors include 2.5-inch drives for desktops and laptops, as well as smaller M.2 drives for ultra-thin laptops and compact systems.
4. Endurance and Lifespan: Look for SSDs with a higher endurance rating, which indicates the number of program/erase (P/E) cycles the drive can endure. This is particularly important if you will be performing intensive read/write operations or using the SSD for professional purposes. A higher endurance rating will ensure that the SSD lasts longer and retains its performance over time.
5. Price and Brand Reputation: Compare prices from different manufacturers and consider the overall reputation of the brand. While it’s tempting to opt for the cheapest option, it’s important to balance price with quality. Reliable and well-established brands often offer better customer support and warranty services, ensuring a more satisfactory experience should any issues arise with your SSD.
6. Read Reviews and Recommendations: Before making a final decision, take the time to read reviews and recommendations from both professional reviewers and other users. This will provide valuable insights and real-world experiences with the SSDs you are considering, helping you make an informed decision.
By carefully considering these factors, you can select the right solid state drive that meets your specific needs. It’s crucial to strike a balance between storage capacity, performance, compatibility, endurance, price, and brand reputation to ensure a satisfying upgrade experience that will provide optimal performance and reliability for years to come.
Backing Up Your Data
Before embarking on the process of upgrading to a solid state drive (SSD), it is crucial to back up your data to prevent any potential loss or corruption during the transition. Here are some essential steps to follow when backing up your data:
1. Identify Important Data: Take some time to assess the data stored on your current storage drive and identify the files, folders, and applications that are essential to you. This may include personal documents, photos, videos, music, and any other irreplaceable files.
2. Choose a Backup Method: There are several backup methods to choose from, depending on your preferences and available resources. You can opt for external hard drives, network attached storage (NAS), cloud storage services, or even a combination of these methods for added redundancy.
3. Backup Tools and Software: Determine the backup tools or software you will be using to facilitate the data backup process. There are numerous options available, both free and paid, that offer easy-to-use interfaces and automated backup schedules.
4. Create a Backup Schedule: Establish a regular backup schedule to ensure that your data is continuously safeguarded. It’s recommended to perform regular backups, especially for frequently changing files, so you always have an up-to-date copy of your important data.
5. Organize and Consolidate Data: Before initiating the backup process, take the opportunity to organize and consolidate your data. Clean up any unnecessary files, merge duplicate folders, and ensure that your important files are stored in specific directories for easy locating and restoration later on.
6. Verify Backup Integrity: After completing the backup process, it’s crucial to verify the integrity of your backups. This involves checking that the files and folders are properly copied and can be accessed without any issues. Perform sample tests to confirm that the backed-up data is intact and ready for restoration if needed.
7. Keep Multiple Copies: To ensure maximum data protection, it’s recommended to keep multiple copies of your backups in different locations. This can include storing backups on external hard drives that you keep in separate physical locations or utilizing cloud storage services that offer redundancy and remote accessibility.
8. Test Restorability: Periodically test the restorability of your backups by performing a mock restoration of your data to ensure that the process is smooth and successful. This step provides peace of mind, knowing that your backups are reliable and can be restored in case of data loss.
Backing up your data is a crucial step in the SSD upgrade process. By implementing a solid backup strategy, you can protect your valuable files and ensure a seamless transition to your new solid-state drive. Remember to follow these steps to safeguard your data and minimize the risk of any unexpected data loss during the upgrade process.
Cloning Your Hard Drive
Cloning your hard drive is an efficient and convenient method to transfer all your data, applications, and operating system from your existing drive to the new solid state drive (SSD). This process ensures that your new SSD is an exact replica of your old hard drive, saving you time and effort in reinstalling and setting up everything from scratch. Here’s a step-by-step guide on how to clone your hard drive:
1. Prepare Your Cloning Software: Choose a reliable disk cloning software that supports SSD cloning. There are various options available, both free and paid, such as Clonezilla, Macrium Reflect, and Acronis True Image. Download and install the chosen software onto your computer.
2. Connect Your New SSD: Connect your new SSD to your computer using an external enclosure, docking station, or an available internal SATA port. Ensure that your computer recognizes the SSD and assign it an appropriate drive letter.
3. Run the Cloning Software: Launch the cloning software and follow the provided instructions to initiate the cloning process. Typically, you’ll be prompted to select the source drive (your existing hard drive) and the destination drive (the new SSD).
4. Customize the Cloning Settings: Depending on the cloning software, you may have options to adjust the partition size, alignment, and migration settings. Review these settings and ensure they align with your preferences and requirements. Most users can proceed with the default settings.
5. Start the Cloning Process: Double-check that you have selected the correct source and destination drives, as the cloning process will overwrite the destination drive. Once verified, proceed to start the cloning process. The duration may vary depending on the size of your hard drive and the speed of your computer.
6. Verify the Cloned Drive: Once the cloning process is complete, ensure that the cloned SSD is an exact replica of your old hard drive. You can compare the file structure, the number of partitions, and the data size to confirm the successful cloning.
7. Modify the Boot Order (If Necessary): If your newly cloned SSD is not set as the boot drive, you may need to modify the boot order in your computer’s BIOS or UEFI settings. Access the BIOS/UEFI menu by restarting your computer and pressing the designated key (e.g., F2, Del, Esc) during startup. Set the SSD as the primary boot device to ensure your system boots from the newly cloned drive.
8. Test the Cloned Drive: Restart your computer and ensure that it successfully boots from the cloned SSD. Test various applications, open files, and perform essential tasks to ensure that everything functions as expected. If any issues arise, consult the support documentation for your cloning software or seek assistance from online forums or technical experts.
Cloning your hard drive is an efficient method to transfer all your data and settings to a new solid state drive without the hassle of reinstalling everything. By following these steps carefully, you can complete the cloning process successfully and enjoy the benefits of your upgraded SSD without disruptions.
Physically Installing the Solid State Drive
Once you have successfully cloned your hard drive onto the new solid state drive (SSD), the next step is to physically install the SSD into your computer. Here’s a step-by-step guide on how to install the SSD:
1. Power Off and Unplug: Before working on your computer’s internal components, ensure that it is powered off completely and unplugged from the power source. This will prevent any risk of electric shock or damage to your hardware.
2. Locate the Drive Bays: Identify the drive bays in your computer where you can install the new SSD. In most desktop computers, the drive bays are located at the front of the case. In laptops, the SSD may be installed in a designated space within the device.
3. Remove the Side Panel: For desktop computers, remove the side panel of your computer case. This is usually done by loosening the screws on the back of the case and sliding the panel off. Some cases may have a latch or release mechanism instead of screws.
4. Ground Yourself: To prevent any static electricity from damaging the components, it is recommended to ground yourself before handling the SSD. You can do this by touching a metal part of the computer case.
5. Mount the SSD: If you have an available drive bay, insert the SSD into the bay carefully. Align the screw holes on the side or bottom of the SSD with the holes on the drive bay. Secure the SSD in place using the screws provided or any other appropriate mounting mechanism provided by your computer case.
6. Connect the Data and Power Cables: Connect the SATA data cable to the SSD by plugging one end into the SSD and the other end into an available SATA port on the motherboard. Connect the power cable to the SSD by plugging one end into the SSD and the other end into an available power cable coming from the power supply unit (PSU).
7. Replace the Side Panel: For desktop computers, carefully slide the side panel back into place and secure it by tightening the screws or engaging the latch. Ensure that the side panel aligns properly so that it doesn’t interfere with any internal components.
8. Power On and Configure: Once the SSD is physically installed, reconnect the power cable and any other cables you may have disconnected. Power on your computer and enter the BIOS/UEFI settings to verify that the system recognizes the newly installed SSD. In most cases, the SSD will be detected automatically.
9. Formatting and Partitioning (If Necessary): Depending on your specific circumstances, you may need to format and partition the new SSD. This can be done using disk management tools within your operating system. Follow the prompts to format the SSD and create any necessary partitions. Be cautious and ensure that you are working with the correct drive to avoid data loss.
By following these steps, you can physically install the solid state drive into your computer and prepare it for use. Once the installation is complete, you are ready to experience the improved speed, performance, and reliability that the SSD brings to your computing experience.
Updating Your System Firmware
Before fully utilizing your newly installed solid state drive (SSD), it is essential to ensure that your computer’s firmware, including the system BIOS or UEFI, is up to date. Updating your system firmware can provide compatibility improvements, bug fixes, and performance optimizations. Here is a step-by-step guide on how to update your system firmware:
1. Identify Your Computer’s Manufacturer: Determine the manufacturer of your computer or motherboard, as firmware updates are typically provided by the manufacturer. Consult the manufacturer’s website or support documentation to find the latest firmware updates for your specific model.
2. Download the Firmware Update: Locate and download the appropriate firmware update for your computer or motherboard from the manufacturer’s website. Ensure that you download the correct version compatible with your specific model and operating system.
3. Read the Instructions: Carefully read the instructions provided by the manufacturer to understand the firmware update process. It may involve creating a bootable USB drive, running an executable file, or using a dedicated firmware update utility.
4. Prepare for the Update: Before proceeding with the firmware update, ensure that you have closed any open applications and saved all necessary files. It is also advisable to disconnect any external devices, except for the USB drive required for the update.
5. Execute the Firmware Update: Follow the manufacturer’s instructions to execute the firmware update process. This may involve running an executable file, booting from a USB drive, or accessing the firmware update utility within the BIOS/UEFI settings. Pay close attention to any specific prompts or warnings provided during the update process.
6. Allow the Update to Complete: During the firmware update, your computer may restart multiple times. It is crucial to let the update process complete without interruption. Avoid turning off or restarting your computer unless explicitly instructed by the firmware update utility.
7. Verify Successful Update: After the firmware update is complete, restart your computer and enter the BIOS/UEFI settings to verify that the firmware version has been updated to the latest version. Ensure that no error messages or warnings are displayed during startup.
8. Test System Functionality: Once the firmware update is successful, thoroughly test the functionality of your computer. Check if all the devices are recognized, including the newly installed SSD. Test various applications and peripherals to ensure that everything is functioning as expected.
9. Repeat for Other Firmware Components: In addition to updating the system BIOS or UEFI, it is recommended to check for firmware updates for other components such as your SSD, graphics card, and other hardware devices. Consult the respective manufacturer’s websites for instructions on updating firmware for these components.
Updating your system firmware is an important step in ensuring optimal performance, compatibility, and stability when using a new solid state drive. By following these steps and keeping your firmware up to date, you can maximize the benefits of your new SSD and enhance your overall computing experience.
Transferring Data to the New Solid State Drive
Now that you have installed and updated your solid state drive (SSD), it’s time to transfer your data from the old storage device to the new SSD. There are several methods you can use to accomplish this, depending on your preferences and the tools available to you. Here’s a guide on how to transfer your data to the new SSD:
1. Using Disk Cloning Software: If you have previously cloned your hard drive to the SSD, you can simply connect the SSD to your computer and boot from it. This will allow you to access all your data and settings exactly as they were on the original drive. Ensure that the SSD is set as the primary boot device in your BIOS or UEFI settings.
2. Manual Data Transfer: If you haven’t cloned your hard drive, you can manually transfer your data to the new SSD. Start by connecting both the old storage device and the SSD to your computer. Once connected, you can manually copy and paste your important files and folders from the old drive to the SSD. Be sure to prioritize your most crucial data to avoid running out of available space on the SSD. Also, remember to transfer application data and settings to maintain continuity between your old system and the new SSD.
3. Using Backup and Restore: Another option is to use a backup and restore method to transfer your data. This involves creating a backup of your old drive using backup software or built-in backup tools. After creating the backup, connect the new SSD to your computer, and use the restore feature to transfer the backup data to the SSD. This method ensures a seamless transfer of all your files, settings, and applications.
4. Cloud-Based Services: If you have a reliable and fast internet connection, you can utilize cloud-based services to transfer your data to the new SSD. Upload your files, documents, and other important data to cloud storage services such as Google Drive, Dropbox, or OneDrive. Once the data is uploaded, you can access and download it onto the new SSD. This method is convenient and can save time, especially for large amounts of data.
5. Reinstalling Applications: In some cases, it may be necessary to reinstall your applications on the new SSD. While the data files can be transferred, application settings and registry entries may need to be reconfigured. Make a list of the applications you use and ensure that you have the necessary installation files or access to software repositories to reinstall them on the new SSD.
6. Verifying Data Integrity: After transferring your data, it’s crucial to verify the integrity and accessibility of the transferred files. Check for any errors or missing files, and ensure that all your important data is intact and accessible on the new SSD. Take the time to open and test various files and applications to ensure everything is working as expected.
By following these methods, you can successfully transfer your data to the new solid state drive. Remember to prioritize your most critical data, perform necessary backups, and verify the integrity of the transferred files. With your data safely transferred, you can now fully enjoy the speed and performance benefits of your new SSD.
Testing and Verifying the Upgrade
After completing the installation and data transfer process, it is crucial to test and verify the success of your upgrade to a solid state drive (SSD). Testing ensures that both the hardware and software components function as intended and that you can fully enjoy the benefits of your new SSD. Here are some steps to help you test and verify the upgrade:
1. System Boot Time: One of the most noticeable improvements with an SSD is the reduction in boot time. Restart your computer and observe the time it takes for your system to boot up. Compare this boot time to the previous boot time with your old hard drive. You should notice a significant improvement in speed, with your computer starting up much faster.
2. Application Launch Time: Launch various applications that you frequently use and compare their launch times to when you had your old hard drive. Applications should launch faster and respond more quickly to your commands. Pay attention to resource-intensive applications such as video editing programs, graphic design software, or games, as these will benefit the most from the improved speed of an SSD.
3. File Transfer Speed: Copy a large file from one location to another on your new SSD or between different drives to test the file transfer speed. SSDs offer significantly faster read and write speeds compared to traditional hard drives, resulting in much shorter transfer times. Compare the transfer speed with your previous hard drive to notice the difference in performance.
4. Multitasking Performance: Open multiple applications simultaneously and perform tasks such as web browsing, document editing, and media playback. Observe how your computer handles these tasks and if there is any slowdown or lag. With an SSD, you should experience smoother multitasking and faster application response times, even when running several resource-intensive applications at once.
5. System Responsiveness: Use your computer as you normally would, paying attention to any delays or unresponsiveness. With an SSD, you should notice a significant improvement in system responsiveness, with faster response times to commands such as opening files, switching between applications, and accessing folders. Your overall computing experience should feel snappier and more fluid.
6. Check System and Drive Health: Use built-in system utilities or third-party tools to check the health and performance of your new SSD. These tools provide valuable information such as drive temperature, wear leveling status, and available drive space. Regularly monitor these metrics to ensure that your SSD is functioning optimally and to anticipate any potential issues that may arise in the future.
7. Backup and Recovery Tests: Perform backup and recovery tests to ensure that your data is safely protected and recoverable in case of a system failure or data loss. Practice restoring files from a backup to verify that your backup solution is working correctly and that you can recover your important data when needed.
8. Test External Connectivity: If you have any external devices such as USB drives, printers, or external monitors, test their connectivity and functionality with your new SSD. Ensure that the proper drivers are installed and that the devices are recognized and working seamlessly.
By conducting these tests and verifications, you can confirm the success of your SSD upgrade and ensure that it delivers the expected performance benefits. If you encounter any issues during testing, consult the manufacturer’s documentation, online forums, or seek assistance from technical experts to troubleshoot and resolve the problems. With a well-tested and verified system, you can enjoy the enhanced speed, responsiveness, and reliability that an SSD brings to your computing experience.
Conclusion
Upgrading to a solid state drive (SSD) can significantly improve the performance, speed, and overall user experience of your computer. With faster boot times, snappier application launches, and quicker file transfers, an SSD breathes new life into your device. Throughout this article, we have explored the various benefits of upgrading to an SSD and provided step-by-step guidance on choosing the right drive, backing up data, cloning the hard drive, physically installing the SSD, updating system firmware, transferring data, and testing the upgrade.
By selecting the appropriate SSD for your needs and transferring your data properly, you can seamlessly transition to your new drive without losing any important files or settings. Additionally, updating your system firmware ensures compatibility and optimizes performance.
With the installation complete, you’ll notice an immediate difference in your computer’s performance. Applications will launch in a blink of an eye, multitasking will become smoother, and file transfers will be lightning-fast. Not only does an SSD enhance productivity, but it also provides a more reliable and durable storage solution. With no moving parts, SSDs are less susceptible to mechanical failures and offer improved data security.
Remember to periodically check for firmware updates and monitor the health of your SSD to maintain optimal performance and longevity. Additionally, regularly back up your data to safeguard against any unexpected loss.
Upgrading to an SSD is a worthwhile investment that extends the life of your computer and enhances productivity. With the comprehensive guide provided here, you have all the information necessary to successfully upgrade to an SSD and reap the benefits of improved speed, reliability, and performance.