Introduction
Are you looking to uninstall Norton Antivirus from your computer? Whether you want to switch to a different security software or no longer need the protection, the process of uninstalling Norton Antivirus is straightforward. In this article, we will guide you through the steps to safely and completely remove Norton Antivirus from your system.
Norton Antivirus is a popular security software that provides protection against malware, viruses, and other online threats. While it offers robust security features, there may be instances where you need to uninstall the software. This could be due to compatibility issues with other software, performance concerns, or simply the need to switch to a different antivirus solution.
Before we delve into the uninstallation process, it’s essential to note that removing Norton Antivirus requires administrative privileges on your computer. Ensure that you have the necessary permissions before proceeding with the steps outlined in this guide.
In the following sections, we will provide a comprehensive step-by-step guide on how to uninstall Norton Antivirus from your system. We will also discuss the importance of using the Norton Removal Tool to ensure a complete removal of all associated files and registry entries.
It’s crucial to properly uninstall Norton Antivirus to avoid any potential conflicts or issues that may arise during the removal process. By following the steps outlined in this guide, you can confidently remove Norton Antivirus from your computer while ensuring the integrity and stability of your system.
Now, let’s take a closer look at the steps involved in uninstalling Norton Antivirus and the subsequent cleanup using the Norton Removal Tool.
Step 1: Open the Control Panel
The first step in uninstalling Norton Antivirus is to open the Control Panel on your Windows computer. The Control Panel provides access to various system settings, including the ability to uninstall programs. Here’s how you can open the Control Panel:
- Click on the “Start” menu located in the bottom-left corner of your screen.
- Scroll through the list of programs and locate the “Control Panel” option. Click on it to open the Control Panel.
- If you are using the Windows 10 operating system, you can also access the Control Panel by typing “Control Panel” in the search bar located next to the Start menu.
- Once the Control Panel opens, you will see a variety of settings and options categorized into different sections.
By opening the Control Panel, you gain access to the necessary tools to manage and customize your computer’s settings. This includes the ability to uninstall programs, such as Norton Antivirus.
Now that you have successfully opened the Control Panel, you are ready to move on to the next step, which involves uninstalling Norton Antivirus from your computer.
Step 2: Uninstall Norton Antivirus
Now that you have opened the Control Panel, you can proceed with uninstalling Norton Antivirus from your computer. Follow these steps to remove the software:
- Within the Control Panel, locate the “Programs” or “Programs and Features” option. Click on it to open the list of installed programs on your computer.
- Scroll through the list of installed programs and find “Norton Antivirus.”
- Once you locate Norton Antivirus, right-click on it and select “Uninstall” from the context menu. Alternatively, you can also select Norton Antivirus and click on the “Uninstall” button at the top of the program list.
- A confirmation prompt will appear, asking if you are sure you want to uninstall Norton Antivirus. Click “Yes” to proceed.
- The uninstallation process will now begin. Follow any additional on-screen prompts or instructions that may appear.
- Wait for the uninstallation process to complete. This may take a few moments, depending on the speed of your computer.
- Once the uninstallation is finished, you may be prompted to restart your computer. If prompted, save any open files and close all applications, then click “Restart” to reboot your system.
After following these steps, Norton Antivirus will be successfully uninstalled from your computer. However, it’s important to note that the uninstallation process may vary slightly depending on the version of Windows you are using. If you encounter any difficulties or face unexpected issues during the uninstallation process, you can refer to the Norton support website or contact their customer support for further assistance.
Now that you have successfully uninstalled Norton Antivirus, it’s important to ensure a complete removal of all associated files and registry entries. In the next step, we will guide you through the process of downloading and running the Norton Removal Tool.
Step 3: Download Norton Removal Tool
After uninstalling Norton Antivirus from your computer, it is recommended to use the Norton Removal Tool to ensure a thorough cleanup of any leftover files and registry entries. The Norton Removal Tool is a specialized utility provided by Norton that can help remove all traces of their security software. To download the Norton Removal Tool, follow these steps:
- Open your preferred web browser and navigate to the official Norton website.
- In the search bar on the website, type “Norton Removal Tool” and press Enter.
- Find the official Norton Removal Tool page and click on it to access the download page.
- On the download page, you may be prompted to enter your Norton account credentials. If you have an existing Norton account, enter your login information. Otherwise, create a new account to proceed.
- Once you have logged in or created a new account, you will be able to download the Norton Removal Tool. Look for the download button or link on the page. Click on it to initiate the download.
- The Norton Removal Tool will be downloaded to your computer as an executable file.
It is essential to download the Norton Removal Tool directly from the official Norton website to ensure that it is a legitimate and trustworthy tool.
Once the download is complete, you are ready to move on to the next step, which involves running the Norton Removal Tool to complete the cleanup process.
Step 4: Run Norton Removal Tool
Now that you have downloaded the Norton Removal Tool, it’s time to run the tool and remove any remaining traces of Norton Antivirus on your computer. Follow these steps to run the Norton Removal Tool:
- Locate the downloaded Norton Removal Tool executable file on your computer. It is usually located in your Downloads folder or the location where you saved the file.
- Double-click on the Norton Removal Tool executable file to launch the tool.
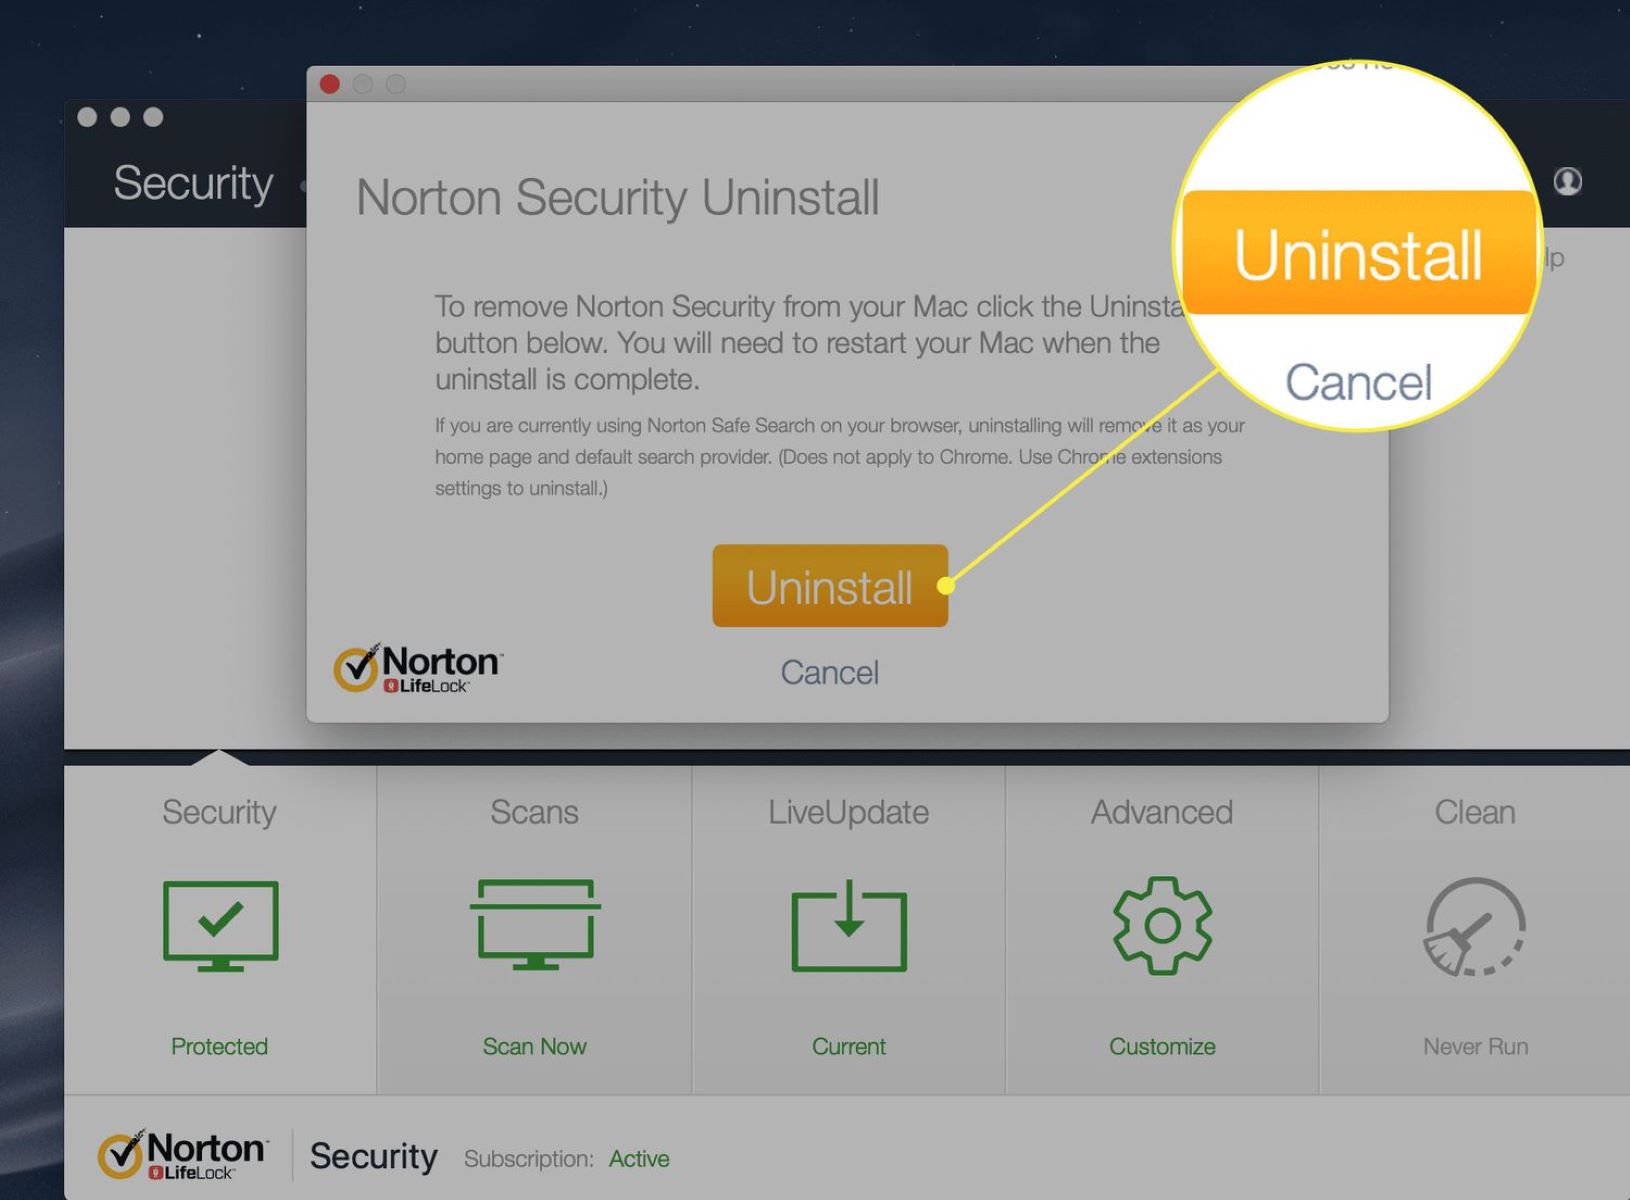
- The Norton Removal Tool will open and display a user interface with several options.
- Read the information and instructions provided on the tool’s interface to familiarize yourself with the process.
- Click on the “Remove & Reinstall” option to initiate the removal process.
- Read and accept the user agreement or terms of service if prompted.
- The Norton Removal Tool will begin scanning your computer for any remaining Norton Antivirus files and registry entries.
- Wait for the removal process to complete. This may take some time, depending on the size and complexity of your system.
- Once the removal process is finished, you may be prompted to restart your computer. If prompted, save any open files and close all applications, then click “Restart” to reboot your system.
Running the Norton Removal Tool ensures that all remnants of Norton Antivirus are completely removed from your computer, minimizing the chances of any conflicts or issues with other software.
Now that you have successfully run the Norton Removal Tool, you are ready to move on to the final step, which involves restarting your computer.
Step 5: Restart your Computer
After running the Norton Removal Tool and completing the removal process, it is crucial to restart your computer. Restarting your computer helps ensure that all changes made during the uninstallation and cleanup process take effect. Follow these steps to restart your computer:
- Save any open files and close all applications currently running on your computer.
- Click on the “Start” menu located in the bottom-left corner of your screen.
- From the Start menu, click on the power icon, which is usually represented by a circular arrow or the word “Restart.”
- A confirmation prompt will appear, asking if you are sure you want to restart your computer. Click on “Restart” to proceed.
- Your computer will now begin the restart process. During this time, your system will shut down and then start up again.
- Once the restart process is complete, your computer will be up and running, ready for use.
Restarting your computer after uninstalling Norton Antivirus and running the Norton Removal Tool ensures that any lingering effects from the uninstallation process are resolved. It also allows your system to start fresh and free from any leftover traces of Norton Antivirus.
Now that you have successfully restarted your computer, you have completed the process of uninstalling Norton Antivirus and ensuring a thorough cleanup. Congratulations!
It’s important to note that after removing Norton Antivirus, you may want to consider installing an alternative security software to protect your computer from online threats. There are numerous reputable antivirus programs available that offer excellent protection.
Remember to update your new antivirus program regularly and perform regular system scans to keep your computer secure and protected.
Conclusion
Uninstalling Norton Antivirus from your computer may become necessary for various reasons, such as switching to a different antivirus solution or resolving performance conflicts. By following the steps outlined in this guide, you can successfully remove Norton Antivirus from your system and ensure a thorough cleanup.
In summary, the steps to uninstall Norton Antivirus are as follows:
- Open the Control Panel on your computer.
- Locate Norton Antivirus in the list of installed programs and uninstall it.
- Download the Norton Removal Tool from the official Norton website.
- Run the Norton Removal Tool to remove any remaining traces of Norton Antivirus.
- Restart your computer to complete the uninstallation process.
It is important to note that the software removal process may slightly vary depending on the version of Windows you are using. If you encounter any difficulties or unexpected issues, it is recommended to consult the Norton support website or contact their customer support for further assistance.
After successfully uninstalling Norton Antivirus, consider installing an alternative security software to ensure continued protection against malware and online threats. Regularly update and scan your computer with your new antivirus program to maintain a secure and protected system.
By following the steps mentioned in this guide, you can confidently remove Norton Antivirus from your computer and maintain a clean and efficient system.
Thank you for using this guide, and we hope it has been helpful in assisting you with uninstalling Norton Antivirus.