Introduction
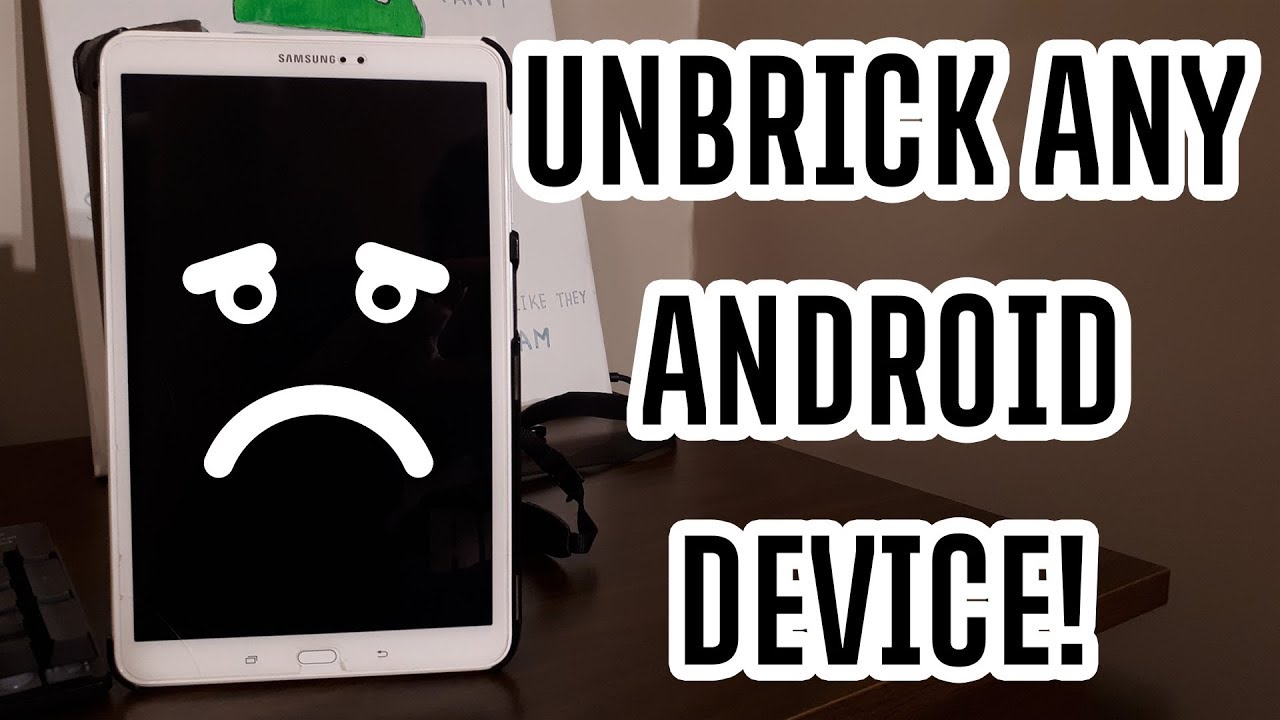
Welcome to our guide on how to unbrick an Android tablet. If you’ve ever encountered the frustrating situation where your tablet becomes unresponsive and essentially turns into a “brick,” then you’ve come to the right place. In this article, we will explore the common causes of bricking an Android tablet, as well as provide you with valuable tips on prevention to keep your device in optimal condition.
Before we dive into the unbricking process, let’s clarify what it means to “brick” an Android tablet. When a device is bricked, it essentially becomes unusable, like a lifeless brick. This can happen due to various reasons, such as software glitches, failed updates or installations, hardware malfunctions, or even user error. Regardless of the cause, dealing with a bricked tablet can be incredibly frustrating and may leave you feeling helpless.
Fortunately, there are steps you can take to unbrick your Android tablet and bring it back to life. However, it’s important to note that unbricking a tablet can be a complex process and may require technical knowledge or professional assistance. With that said, our step-by-step guide will provide you with some troubleshooting methods that you can try before seeking professional help.
Throughout this guide, we’ll cover the most common causes of tablet bricking and provide valuable tips on prevention. We’ll also walk you through the process of identifying the problem, performing soft resets and force restarts, checking for software updates, using the manufacturer’s software recovery tool, and when it’s time to consider seeking professional assistance.
So, whether you’re dealing with a bricked tablet or simply want to be prepared for any future issues, let’s get started on the journey of unbricking your Android tablet and restoring it to its full functionality.
What does it mean to “brick” an Android tablet?
If you’re unfamiliar with the term, “bricking” an Android tablet refers to a state where your device becomes completely unresponsive, rendering it as useful as a brick. Essentially, it becomes impossible to use or access any of the tablet’s functions. When your tablet is bricked, it may not turn on or respond to any commands or inputs.
There are two main types of bricking: soft brick and hard brick. A soft brick is a relatively less severe form of bricking, where the tablet is still recoverable, and the issue can be resolved through software solutions. In contrast, a hard brick is a more serious condition where the tablet’s hardware is damaged or irreparably malfunctioning. In most cases, hard bricked tablets require professional assistance or, in extreme situations, hardware replacements.
Soft bricks usually occur due to software-related issues, such as failed system updates, incompatible or corrupt apps, or incorrect modifications made to the operating system. These issues can cause the tablet to boot into an endless loop, freeze on the manufacturer’s logo, or display error messages. While a soft brick is frustrating, the good news is that it can often be fixed through troubleshooting methods without losing your data.
On the other hand, a hard brick is typically caused by severe hardware damage or malfunction that prevents the tablet from functioning properly. This could result from physical damage, water exposure, or manufacturer defects. Hard bricked tablets often require professional repair or replacement of hardware components to restore functionality.
It’s important to note that attempting to modify your tablet’s firmware, such as installing custom ROMs or incompatible software, increases the risk of bricking your device. While customization can enhance the functionality and performance of your tablet, it’s crucial to exercise caution and ensure compatibility with your tablet’s hardware specifications.
Now that you have a better understanding of what it means to “brick” an Android tablet and the difference between soft and hard bricks, it’s time to explore the common causes of bricking and learn how to prevent such incidents in the future.
Common causes of bricking an Android tablet
Bricking an Android tablet can happen due to various reasons, ranging from software-related issues to hardware malfunctions. Understanding the common causes can help you take preventive measures and minimize the risk of encountering a bricked tablet. Let’s explore some of the primary factors that can lead to tablet bricking.
- Failed system updates: One of the most common causes of tablet bricking is a failed system update. If the update process is interrupted or encounters an error, it can leave the device in an unstable state, leading to a soft brick.
- Incompatible or malicious apps: Installing incompatible or malicious apps can also result in bricking your tablet. Some apps may conflict with the operating system or contain malware that disrupts the device’s functionality.
- Unofficial software modifications: Customizing your tablet’s firmware by installing custom ROMs or modifying system files can be risky. If these modifications are not performed correctly or are incompatible, they can cause a soft or hard brick.
- Hardware malfunctions: Hardware issues can contribute to tablet bricking, especially in the case of hard bricks. Physical damage, water exposure, or manufacturing defects can lead to severe hardware malfunctions that render the device inoperable.
- Power or battery-related problems: Sudden power outages or improper charging can interrupt essential processes during system updates, resulting in a soft brick. Additionally, using incompatible chargers or faulty batteries can lead to hardware issues that may result in bricking.
- Overheating: Tablets that overheat due to prolonged use or exposure to high temperatures can experience software crashes or irreversible hardware damage, leading to bricking.
By being aware of these common causes, you can take proactive steps to minimize the risk of bricking your Android tablet. These steps include avoiding unauthorized modifications, regularly updating your system and apps from trusted sources, using compatible and reputable accessories, and maintaining proper care and handling of your tablet.
In the next section, we will provide valuable tips on how to prevent tablet bricking and ensure the longevity and reliability of your Android device.
How to prevent bricking your Android tablet
Prevention is key when it comes to maintaining the health and functionality of your Android tablet. While it’s impossible to guarantee that you will never encounter a bricking issue, following these preventive measures can significantly reduce the risk. Let’s explore some essential steps you can take to prevent bricking your Android tablet:
- Regularly backup your data: By regularly backing up your data, you can protect your important files, settings, and apps. This way, even if your tablet becomes bricked, you can restore your data to a new device without losing anything valuable.
- Be cautious with system updates: When a system update is available for your tablet, it’s important to approach it with caution. Before updating, ensure that your tablet is fully charged, connected to a reliable power source, and has sufficient storage space. Avoid interrupting the update process and make sure to install updates from reputable sources only.
- Avoid unauthorized modifications: While customizing your tablet can be tempting, it’s important to be mindful of the risks involved. Unauthorized modifications such as rooting, installing custom ROMs, or modifying system files can lead to bricking. Proceed with caution and only make modifications if you are confident in your technical skills and have thoroughly researched the process.
- Install apps from trusted sources: Stick to downloading and installing apps from reputable sources, such as the Google Play Store. Be cautious of third-party app stores or websites that may host malicious or incompatible apps that can potentially brick your tablet.
- Keep your tablet and apps updated: Regularly updating your tablet’s operating system and apps is crucial for maintaining security and stability. Software updates often include bug fixes, performance improvements, and security patches that can help prevent bricking issues.
- Use compatible accessories: Using incompatible chargers or accessories can cause power-related issues that may lead to bricking. Always use accessories recommended by the tablet’s manufacturer and avoid using third-party or counterfeit products.
- Monitor your tablet’s temperature: Overheating can put stress on your tablet’s hardware components, potentially leading to bricking. Avoid exposing your tablet to extreme temperatures and give it breaks when performing resource-intensive tasks.
By following these preventive measures, you can significantly reduce the chances of encountering a bricking issue with your Android tablet. However, it’s important to remember that accidents can still happen. In the next section, we will provide you with a step-by-step guide to unbrick your tablet in case you find yourself in this unfortunate situation.
Step-by-step guide to unbrick an Android tablet
Dealing with a bricked Android tablet can be frustrating, but there are steps you can take to potentially restore your device to working order. Please note that this guide provides general troubleshooting methods and may not work for all tablet models or situations. Here’s a step-by-step guide to help you unbrick your Android tablet:
- Identify the problem: Before attempting any troubleshooting steps, it’s important to identify the specific issue with your tablet. Determine if it’s a soft brick or a hard brick by observing the tablet’s behavior and any error messages that appear.
- Perform a soft reset: A soft reset can help resolve minor software glitches. To perform a soft reset, press and hold the power button for about 10-15 seconds until the tablet restarts. This process may vary slightly depending on your tablet model.
- Try a force restart: If a soft reset doesn’t work, you can try a force restart. To do this, press and hold the power button and volume down button simultaneously for about 10-15 seconds until the tablet restarts. Again, the button combination may vary based on your tablet model.
- Check for software updates: Ensure that your tablet is running the latest available software update. Go to the Settings menu, select “About tablet,” and then tap on “Software updates” or a similar option. If an update is available, follow the on-screen instructions to install it.
- Use the manufacturer’s software recovery tool: Many tablet manufacturers provide software recovery tools that can help restore a bricked device. Visit the manufacturer’s official website and search for a tool specific to your tablet model. Follow the instructions provided by the manufacturer to use the software recovery tool correctly.
- Consider professional help: If none of the previous steps work, or if you have a hard-bricked tablet, it may be time to seek professional assistance. Contact the tablet’s manufacturer or a reputable repair service to inquire about your options for repair or replacement.
Remember that attempting to unbrick a tablet can be complex, and any wrong steps could potentially worsen the situation. If you’re unsure or uncomfortable with the troubleshooting process, it’s best to seek professional help to avoid causing further damage to your device.
By following these steps, you may be able to unbrick your Android tablet and regain its functionality. However, prevention is always better than dealing with a bricked device. In the next section, we’ll provide a brief summary and some concluding thoughts to wrap up this guide.
Identify the problem
When confronted with a bricked Android tablet, the first and crucial step in the unbricking process is to identify the specific problem. Understanding whether you are dealing with a soft brick or a hard brick will help determine the appropriate course of action. Here’s how you can identify the problem with your tablet:
1.1 Observe tablet behavior: Take note of how the tablet is behaving when you try to turn it on or perform any actions. Is the screen completely blank? Does it display any error messages? Does it freeze on the manufacturer’s logo? These observations will help you determine the severity of the brick.
1.2 Search for error messages: If your tablet displays any error messages, take note of them. Search online using the error message as a keyword along with the model name of your tablet. This can provide you with valuable insights and potential solutions specific to your tablet’s issue.
1.3 Consult the tablet’s manual or support resources: Refer to the tablet’s user manual or visit the manufacturer’s website for any troubleshooting guidance specific to your tablet model. They may have documented common issues and solutions or provide instructions for identifying and resolving bricking problems.
By carefully observing the tablet’s behavior, searching for error messages, and consulting the tablet’s manual or support resources, you can gain a better understanding of the problem. This identification will guide you towards the appropriate next steps to unbrick your Android tablet.
In the next section, we will explore the second step in the unbricking process, which is performing a soft reset.
Perform a soft reset
A soft reset is a simple yet effective troubleshooting step that can help resolve minor software glitches and potentially unbrick your Android tablet. Here’s how you can perform a soft reset:
2.1 Locate the power button: On your tablet, locate the power button. The position of the power button may vary based on the tablet’s make and model.
2.2 Press and hold the power button: Press and hold the power button for about 10-15 seconds. You may need to use a bit of force and maintain the pressure throughout the entire duration.
2.3 Wait for the tablet to restart: After holding the power button, wait for the tablet to restart. This can take a few seconds, and you may see the screen go blank before it starts booting up again.
If your tablet was experiencing a temporary software glitch or freeze, a soft reset can often resolve the issue and unbrick the device. After the soft reset, check if the tablet functions normally and no longer exhibits any signs of being bricked. However, if the tablet remains unresponsive or still displays signs of bricking, proceed to the next step in the unbricking process.
In the following section, we will cover the next troubleshooting step: attempting a force restart.
Try a force restart
A force restart is a more powerful version of a soft reset and can help address more stubborn software issues that may be causing your Android tablet to remain bricked. Here’s how you can perform a force restart on your tablet:
3.1 Locate the power button and volume down button: Find the power button and volume down button on your tablet. The placement of these buttons may vary depending on the tablet’s make and model.
3.2 Press and hold the power and volume down buttons simultaneously: Press and hold the power button and volume down button simultaneously for about 10-15 seconds. Make sure to press and hold both buttons at the same time and maintain the pressure.
3.3 Release the buttons: After holding the buttons for the specified duration, release both the power button and volume down button.
3.4 Wait for the tablet to restart: Give your tablet a few moments to restart. You may notice the screen going blank for a moment before the tablet begins to boot up again.
A force restart can help forcibly terminate any frozen processes or resolve more persistent software issues that might be causing your tablet to remain bricked. After performing a force restart, check to see if the tablet has responded and if the bricking symptoms have resolved. If the tablet is still unresponsive or exhibiting signs of bricking, continue to the next step in the unbricking process.
In the following section, we will cover the importance of checking for software updates to potentially address the bricking issue.
Check for software updates
Checking for software updates is an essential step when trying to unbrick your Android tablet. Software updates often include bug fixes, performance improvements, and stability enhancements that can potentially resolve the bricking issue. Here’s how you can check for software updates:
4.1 Go to the Settings menu: On your tablet, navigate to the Settings menu. The location and appearance of the Settings menu may vary based on your tablet’s make and model.
4.2 Select “About tablet”: Look for an option called “About tablet,” “System,” or a similar category in the Settings menu. Tap on it to access the system information.
4.3 Check for software updates: Within the “About tablet” or “System” section, there should be an option labeled “Software updates” or similar. Tap on it to check for any available updates for your tablet’s operating system.
4.4 Install updates (if available): If there are any software updates available, follow the on-screen instructions to download and install them. Ensure that your tablet is connected to a stable Wi-Fi network and has sufficient battery power before initiating the update process.
Installing the latest software updates can potentially address software-related issues that may be causing the bricking problem on your tablet. After the update is complete, restart your tablet and check if the bricking symptoms have disappeared. However, if the tablet remains bricked or still displays signs of being unresponsive, proceed to the next step in the unbricking process.
In the following section, we will explore the option of using the manufacturer’s software recovery tool to further troubleshoot and potentially resolve the bricking issue.
Use the manufacturer’s software recovery tool
If your Android tablet is still bricked after attempting the previous troubleshooting steps, you can try using the manufacturer’s software recovery tool. Most tablet manufacturers provide specialized software that can help recover and restore the device to its working state. Here’s how you can use the manufacturer’s software recovery tool:
5.1 Visit the manufacturer’s website: Go to the official website of your tablet’s manufacturer and navigate to the support or downloads section.
5.2 Search for the software recovery tool: Look for the software recovery tool specific to your tablet model. It may be referred to as a “firmware update tool,” “recovery software,” or something similar.
5.3 Download and install the software: Follow the instructions provided on the manufacturer’s website to download and install the software recovery tool on your computer.
5.4 Connect your tablet to the computer: Use a USB cable to connect your tablet to the computer. Ensure that the tablet is recognized by the computer and the software recovery tool.
5.5 Follow the tool’s instructions: Launch the software recovery tool on your computer and carefully follow the on-screen instructions. The tool will guide you through the necessary steps to restore your tablet. This may include selecting the correct firmware version, initiating the recovery process, and patiently waiting for it to complete.
Using the manufacturer’s software recovery tool can often resolve extensive software issues and unbrick your tablet. However, it’s important to note that this process may erase all data on your tablet. Therefore, it’s crucial to have a recent backup of your data before proceeding with the recovery tool.
If the manufacturer’s software recovery tool does not resolve the bricking issue, or if you’re not comfortable performing the recovery process yourself, it’s recommended to seek professional help or contact the manufacturer’s support team for further assistance.
In the next and final section, we will discuss when it may be necessary to consider professional help for unbricking your Android tablet.
Consider professional help
If you have followed the previous troubleshooting steps and your Android tablet remains bricked, it may be time to consider seeking professional help. While the steps outlined in this guide are meant to address common software-related bricking issues, there are situations where more complex hardware or software problems require the expertise of professionals. Here are a few scenarios where professional help may be necessary:
6.1 Hard brick: If your tablet is hard-bricked, meaning there is severe hardware damage or malfunction that prevents it from functioning at all, professional assistance is highly recommended. Hard bricks often require specialized tools and knowledge to diagnose and repair the hardware components.
6.2 No access to recovery tools: If you are unable to access the manufacturer’s software recovery tool or are unfamiliar with the recovery process, seeking professional help can provide reassurance that the correct methods will be employed to unbrick your tablet.
6.3 Unsuccessful attempts: If you have attempted all the troubleshooting steps outlined in this guide and have not been successful in unbricking your tablet, reaching out to professionals who have experience with tablet repairs can increase the chances of a successful resolution.
6.4 Warranty or service coverage: If your tablet is still within its warranty period or if you have service coverage, it’s advisable to contact the tablet’s manufacturer or an authorized service center. They can provide expert assistance and potentially repair or replace the tablet at no additional cost.
Remember to provide the professionals with thorough and accurate information about the bricking issue and the steps you have already taken to troubleshoot. This will assist them in diagnosing the problem more efficiently and resolving it effectively.
Keep in mind that seeking professional help may come with additional costs and potential downtime. However, it can be a worthwhile investment to revive your tablet and ensure its proper functionality without the risk of causing further damage.
With professional assistance, you can gain peace of mind and have your tablet back in working order, allowing you to resume using it for your desired purposes.
After exploring all the available options and considering professional help, you will be well-equipped to make an informed decision on the best course of action for unbricking your Android tablet.
Conclusion
Dealing with a bricked Android tablet can be a frustrating and alarming experience, but it’s essential to remain calm and approach the situation systematically. With the knowledge and steps outlined in this guide, you have a solid foundation for unbricking your tablet and restoring it to full functionality.
Starting with the identification of the problem, through soft resets, force restarts, and checking for software updates, you have learned various troubleshooting methods to address common software-related bricking issues. Additionally, the use of the manufacturer’s software recovery tool and the consideration of professional help provide you with further options to explore.
Remember that prevention is always better than a cure. Taking preventive measures such as regular data backup, cautious system updates, and avoiding unauthorized modifications can significantly reduce the risk of encountering a bricked tablet.
However, if you find yourself facing a bricking issue, don’t panic. Start by identifying the problem and then follow the step-by-step guide provided in this article. Be patient and thorough in your troubleshooting attempts. If necessary, reach out to professionals who possess the expertise and tools to assist you in resolving the bricking problem.
By combining your understanding of the causes and prevention of tablet bricking with the troubleshooting methods outlined in this guide, you can increase your chances of successfully unbricking your Android tablet.
Remember, each tablet model and situation may present unique challenges, so flexibility and adaptability are key. Stay informed, be cautious, and don’t hesitate to seek additional support when needed.
With determination and the right approach, you can overcome the bricking issue and regain full functionality of your Android tablet.