Introduction
Welcome to the world of technology, where staying connected is a necessity. Whether you’re at home, in the office, or on the go, having access to wireless internet, also known as Wi-Fi, can greatly enhance your productivity and entertainment options.
If you’re a Windows 10 user and are unsure how to turn on the Wi-Fi feature or are experiencing connectivity issues, you’ve come to the right place. In this article, we will guide you through the process of enabling Wi-Fi on your Windows 10 device and provide troubleshooting tips to address any potential connectivity problems.
Wi-Fi enables you to connect your devices to the internet without the need for any physical cables. It utilizes radio waves to transmit data between your device and the Wi-Fi router or access point. With Wi-Fi, you can access the internet, stream videos, download files, and connect with other devices, all without the limitations of wired connections.
Windows 10 offers multiple methods to turn on or enable Wi-Fi. You can access the Wi-Fi settings either through the system settings or the quick actions menu, depending on your preference and convenience. We will explore both methods in detail to ensure you have a comprehensive understanding.
Before diving into the steps, it’s important to note that the availability and appearance of certain options may vary based on your device model or the version of Windows 10 you are using. However, the core principles and instructions remain consistent across all Windows 10 devices.
Now that we’ve covered the basics, let’s proceed to the next section, where we’ll explore how to check the status of your Wi-Fi connection on Windows 10.
Checking Wi-Fi Status
Before attempting to enable Wi-Fi on your Windows 10 device, it’s important to check the current status of your Wi-Fi connection. This will help you determine whether Wi-Fi is already enabled or disabled.
To check the Wi-Fi status on Windows 10, follow these steps:
- Click on the Start button located on the taskbar, typically in the bottom-left corner of the screen.
- In the Start menu, click on the Settings icon, which resembles a gear.
- Within the Settings window, locate and click on the Network & Internet option.
- In the Network & Internet settings, select the Wi-Fi tab from the left-hand menu.
- On the Wi-Fi tab, you will see the current status of your Wi-Fi connection. It will display whether Wi-Fi is turned on or off.
If the Wi-Fi status shows that it is turned off, you can proceed to the next sections of this article to learn how to enable Wi-Fi on Windows 10. However, if the status shows as turned on and you are still experiencing connectivity issues, refer to the troubleshooting section later in this article for tips to resolve the problem.
Now that you are familiar with how to check the Wi-Fi status on Windows 10, let’s move on to the next sections, where we will explore different methods to enable Wi-Fi on your Windows 10 device.
Enabling Wi-Fi through Settings
If you’ve determined that Wi-Fi is currently disabled on your Windows 10 device, you can easily enable it through the system settings. Follow these steps to enable Wi-Fi through the settings:
- Click on the Start button from the taskbar, located in the bottom-left corner of the screen.
- Click on the Settings icon, resembling a gear, in the Start menu.
- In the Settings window, select Network & Internet.
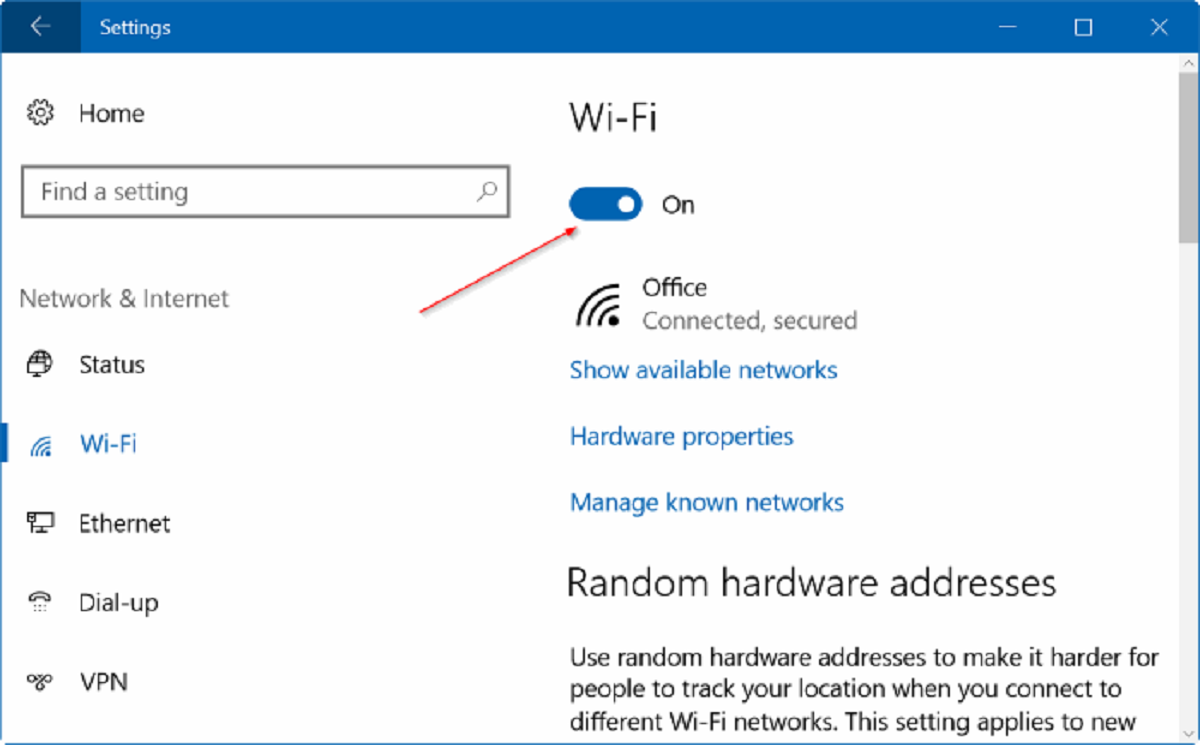
- On the left-hand side of the Network & Internet settings, click on Wi-Fi.
- Under the Wi-Fi settings, you will find a toggle switch labeled Wi-Fi. Click on the switch to turn it on. When the toggle switch is turned on, it will display as blue.
Once you have followed these steps, the Wi-Fi feature on your Windows 10 device will be enabled, allowing you to connect to available Wi-Fi networks.
It’s important to note that enabling Wi-Fi through settings may require administrative privileges on your device. If prompted, enter your administrator password or confirm the action to make the necessary changes.
Now that you have successfully enabled Wi-Fi through the system settings, let’s explore an alternative method to quickly enable Wi-Fi using the quick actions menu. This method provides a convenient way to toggle Wi-Fi on or off with just a few clicks.
Enabling Wi-Fi through Quick Actions
In addition to the system settings, Windows 10 also offers a quick and handy way to enable Wi-Fi through the Quick Actions menu. The Quick Actions menu allows you to access frequently used system settings easily. Here’s how to enable Wi-Fi through Quick Actions:
- In the bottom-right corner of the taskbar, click on the Action Center icon. It resembles a speech bubble.
- The Action Center will appear as a panel on the right side of the screen. Look for the Wi-Fi tile, which resembles a Wi-Fi symbol.
- Click on the Wi-Fi tile to toggle the Wi-Fi feature on or off. When the tile is highlighted, it indicates that Wi-Fi is enabled.
By utilizing the Quick Actions menu, you can quickly enable or disable Wi-Fi without navigating through multiple settings windows. This feature is especially useful when you need to toggle Wi-Fi on or off frequently, such as when switching between home and office networks or conserving battery life on a laptop or portable device.
Now that you have learned how to enable Wi-Fi through both the system settings and the Quick Actions menu, let’s move on to the troubleshooting section, where we will address potential Wi-Fi connectivity issues and provide tips to resolve them.
Troubleshooting Wi-Fi Connectivity Issues
Despite enabling Wi-Fi on your Windows 10 device, there may be instances where you encounter connectivity issues. If you’re experiencing difficulties connecting to a Wi-Fi network or are facing intermittent connection problems, here are a few troubleshooting steps to consider:
- Restart your device and the Wi-Fi router: Sometimes, simply restarting your device and the Wi-Fi router can resolve temporary connectivity issues. Turn off your device, unplug the power cable from the router, wait for a few seconds, and then plug it back in. Power on your device and check if the Wi-Fi connection is restored.
- Verify the Wi-Fi network name and password: Double-check that you’re trying to connect to the correct Wi-Fi network. Ensure that you’ve entered the Wi-Fi password correctly to establish a successful connection.
- Move closer to the Wi-Fi router: If you’re experiencing weak Wi-Fi signal strength, try moving closer to the Wi-Fi router. Distance and obstacles can affect the strength and stability of the connection.
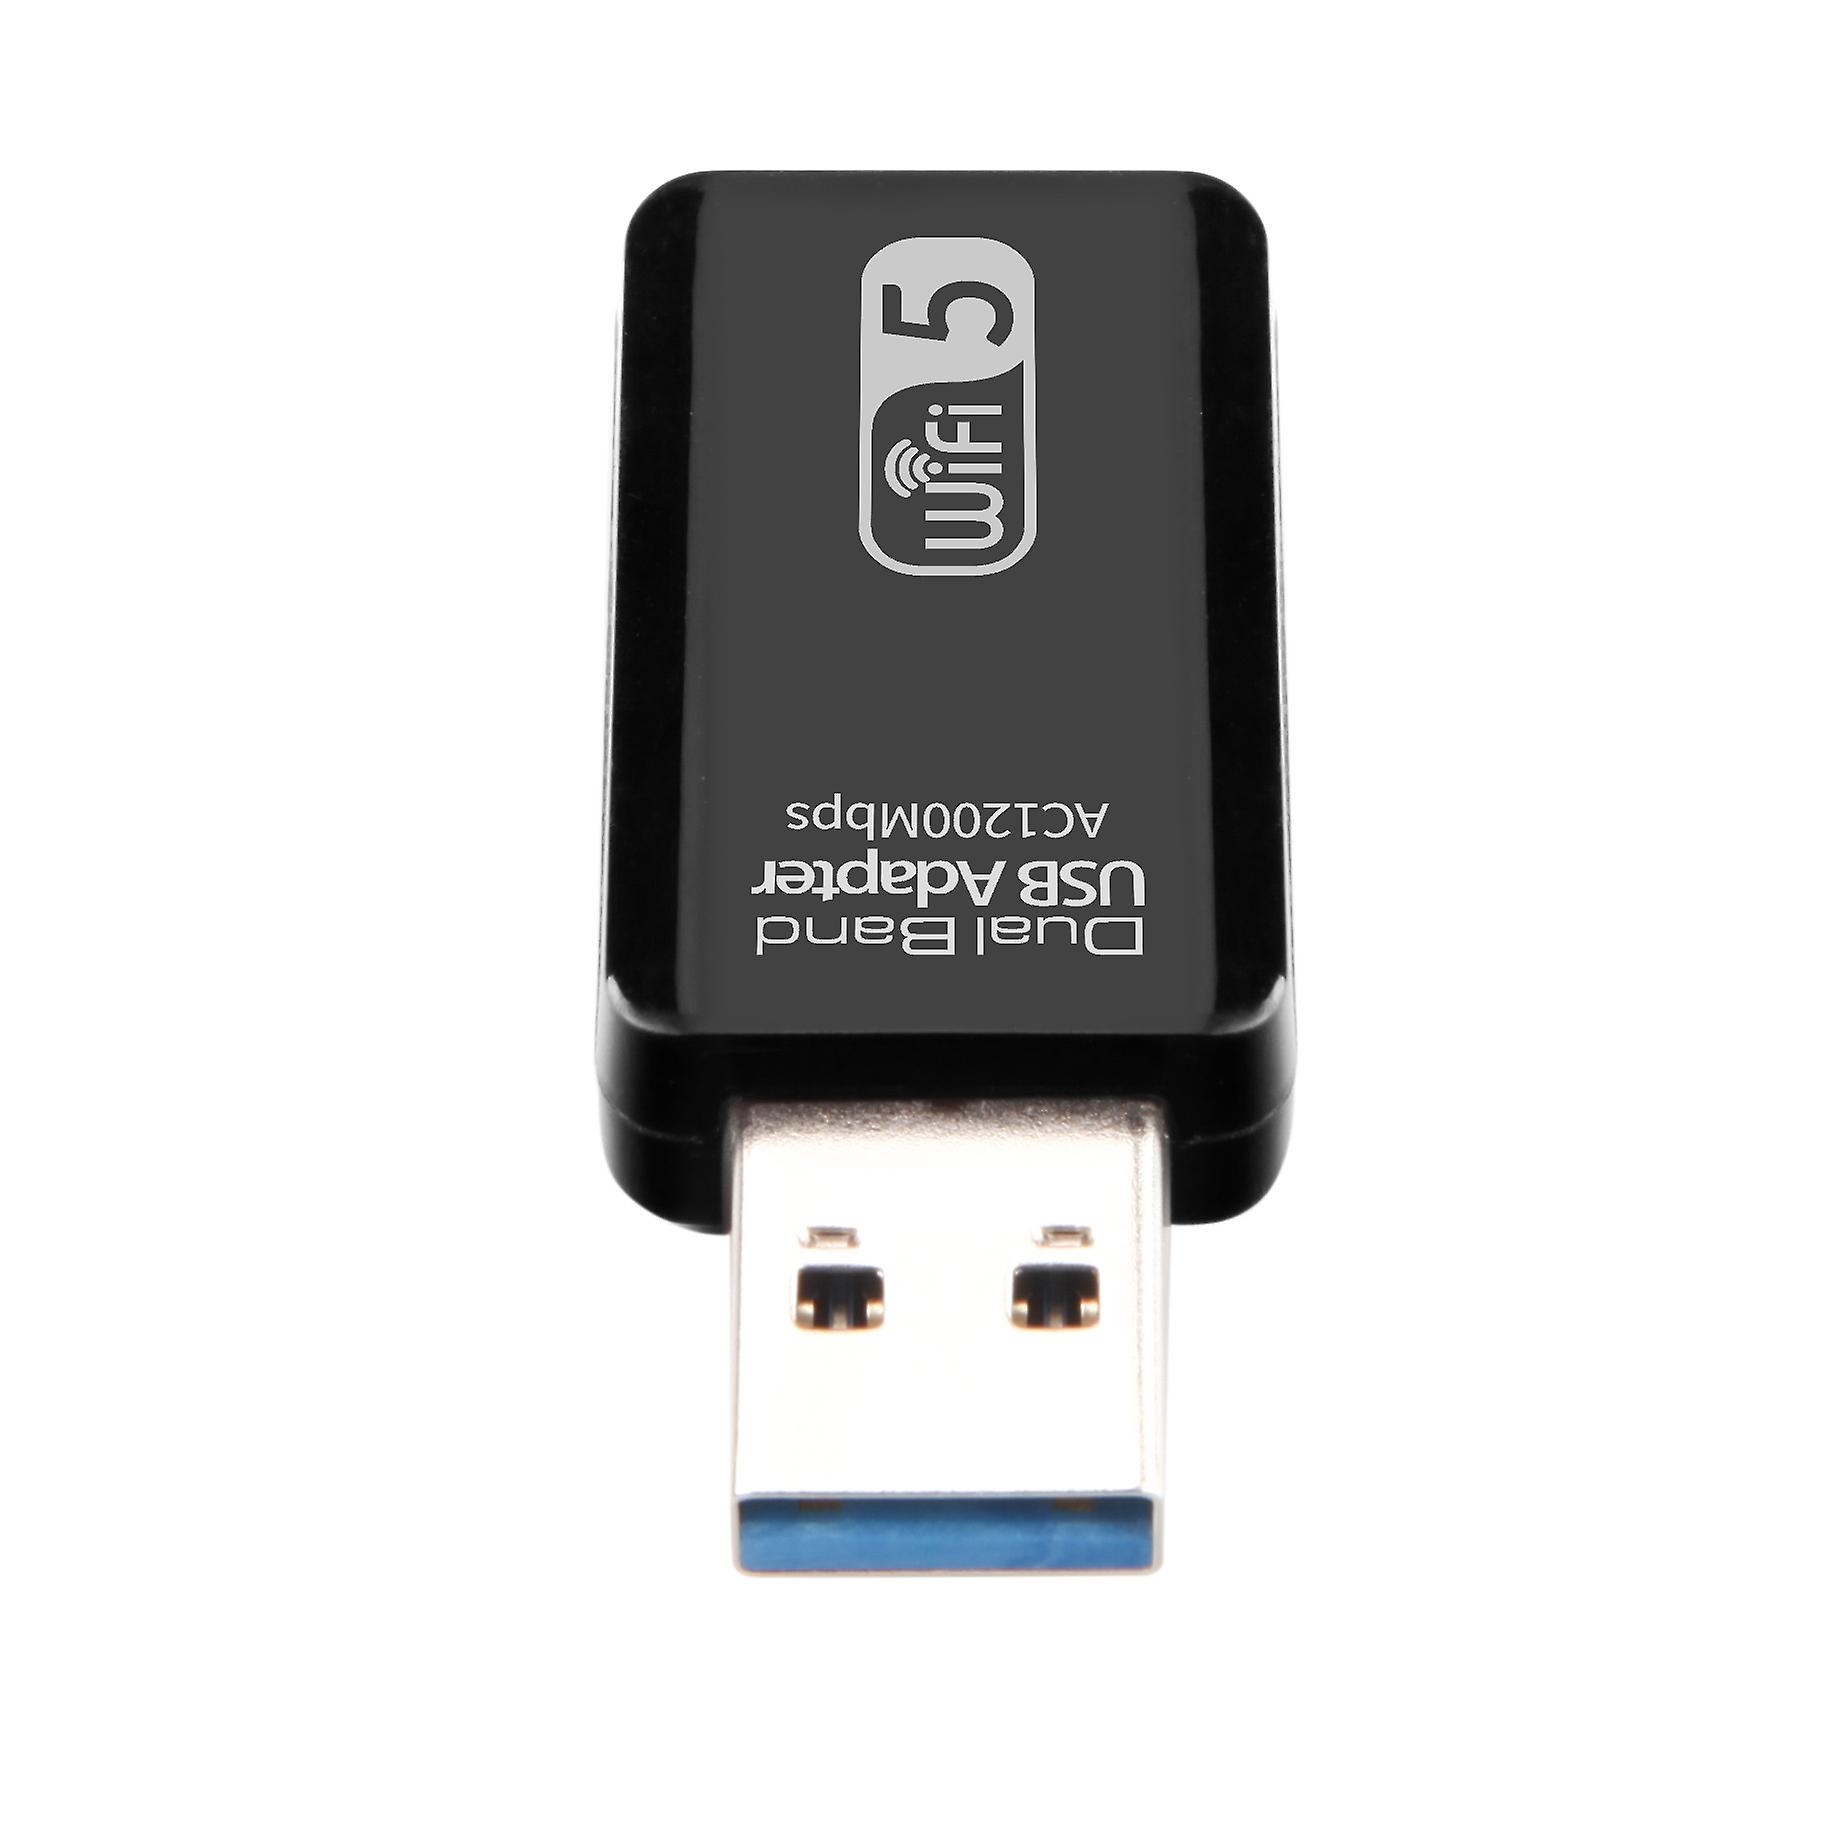
- Update Wi-Fi drivers: Outdated or corrupted Wi-Fi drivers can cause connectivity issues. Visit the manufacturer’s website or use Windows Update to check for and install any available driver updates for your Wi-Fi adapter.
- Reset network settings: Resetting your network settings can help resolve any configuration or software conflicts that may be affecting the Wi-Fi connectivity. To reset network settings, open the Settings app, go to Network & Internet, click on Status, and then select Network reset.
- Disable power-saving mode for Wi-Fi: Power-saving settings can sometimes affect Wi-Fi performance. Disable power-saving mode for your Wi-Fi adapter by going to the Device Manager, locating your Wi-Fi adapter under Network adapters, right-clicking on it, selecting Properties, and then navigating to the Power Management tab.
- Contact your ISP or network administrator: If none of the above steps resolve the issue, there may be a problem with your internet service provider (ISP). Reach out to your ISP or network administrator for further assistance.
By following these troubleshooting steps, you should be able to diagnose and resolve most Wi-Fi connectivity issues on your Windows 10 device. Remember to test the Wi-Fi connection after each step to determine if the issue has been resolved.
Now that we have covered various methods to enable Wi-Fi and troubleshoot connectivity issues, let’s summarize the information we have discussed so far in the next section.
Conclusion
Wi-Fi is an essential feature that allows you to stay connected and access the internet wirelessly on your Windows 10 device. By following the steps outlined in this article, you can easily enable Wi-Fi through both the system settings and the Quick Actions menu.
Remember to check the Wi-Fi status on your device before attempting to enable it. If you’re experiencing any issues, the troubleshooting steps provided can help you diagnose and resolve common Wi-Fi connectivity problems.
Whether you’re at home, in the office, or on the go, having a stable and reliable Wi-Fi connection is crucial. It enhances your productivity and allows you to enjoy various online activities such as streaming, browsing, and connecting with others.
Keep in mind that the user interface and options may vary slightly depending on your Windows 10 version and device model. However, the fundamental principles discussed in this article apply to most Windows 10 devices.
We hope this guide has been helpful in enabling Wi-Fi and troubleshooting connectivity issues on your Windows 10 device. If you have any further questions or need additional assistance, don’t hesitate to consult the Windows 10 support resources or reach out to your internet service provider for further guidance.
Stay connected and enjoy the convenience of Wi-Fi on your Windows 10 device!