Introduction
Noise cancellation has become an increasingly popular feature in modern smartphones, including those running on the Android operating system. This advanced technology allows users to block out unwanted background noise for a more immersive and enjoyable audio experience. However, there may be instances when you wish to turn off noise cancellation on your Android device. Whether it’s to conserve battery life, improve audio quality in certain situations, or simply to have more control over your device’s audio settings, disabling noise cancellation can be a valuable option to explore.
In this article, we will explore several methods that you can use to turn off noise cancellation on your Android device. We will guide you through the steps of disabling noise cancellation in the device settings, using third-party applications, tweaking the Developer Options, and even adjusting noise cancellation settings on specific apps. By following these methods, you can regain control over your audio experience and make adjustments based on your specific needs and preferences.
Before diving into the different methods, it’s important to note that the availability of noise cancellation settings may vary depending on your Android device’s manufacturer and operating system version. Some devices may not have a built-in noise cancellation feature, while others may offer more advanced customization options. Regardless, we will cover a range of methods that should suit different Android devices and software versions.
So, whether you want to disable noise cancellation temporarily or permanently, let’s explore these methods to help you achieve the desired audio experience on your Android device.
Why Turn Off Noise Cancellation?
Noise cancellation may be a useful feature for many users, but there are several reasons why you might want to turn it off in certain situations. Here are a few key reasons why you might choose to disable noise cancellation on your Android device:
- Battery Life: Noise cancellation technology can be power-intensive, especially in devices without dedicated noise cancellation hardware. If you’re concerned about preserving your device’s battery life, disabling noise cancellation can help extend usage time.
- Audio Quality: While noise cancellation is designed to block out background noise, it can sometimes affect the audio quality itself. You may find that turning off noise cancellation improves the clarity and overall sound experience, especially while listening to music or watching videos.
- Amplified Ambient Noise: In certain situations, such as during a phone call or while recording audio, you may want to allow ambient noise to be captured. Noise cancellation can dampen or eliminate ambient sounds, which may result in a less natural-sounding conversation or recording.
- Compatibility Issues: In some cases, noise cancellation can interfere with certain audio apps or accessories. Turning off noise cancellation can help resolve compatibility issues and ensure that you can use external microphones, headphones, or other audio devices seamlessly.
- Environmental Awareness: Noise cancellation technology can create a sense of isolation by blocking out sounds from your surroundings. Turning off noise cancellation allows you to stay alert and aware of your environment, which can be particularly important in situations where safety is a concern.
By understanding the reasons for disabling noise cancellation, you can make an informed decision based on your specific needs and preferences. Whether it’s for conserving battery life, improving audio quality, ensuring compatibility, or maintaining environmental awareness, turning off noise cancellation can provide you with more control over your audio experience on your Android device.
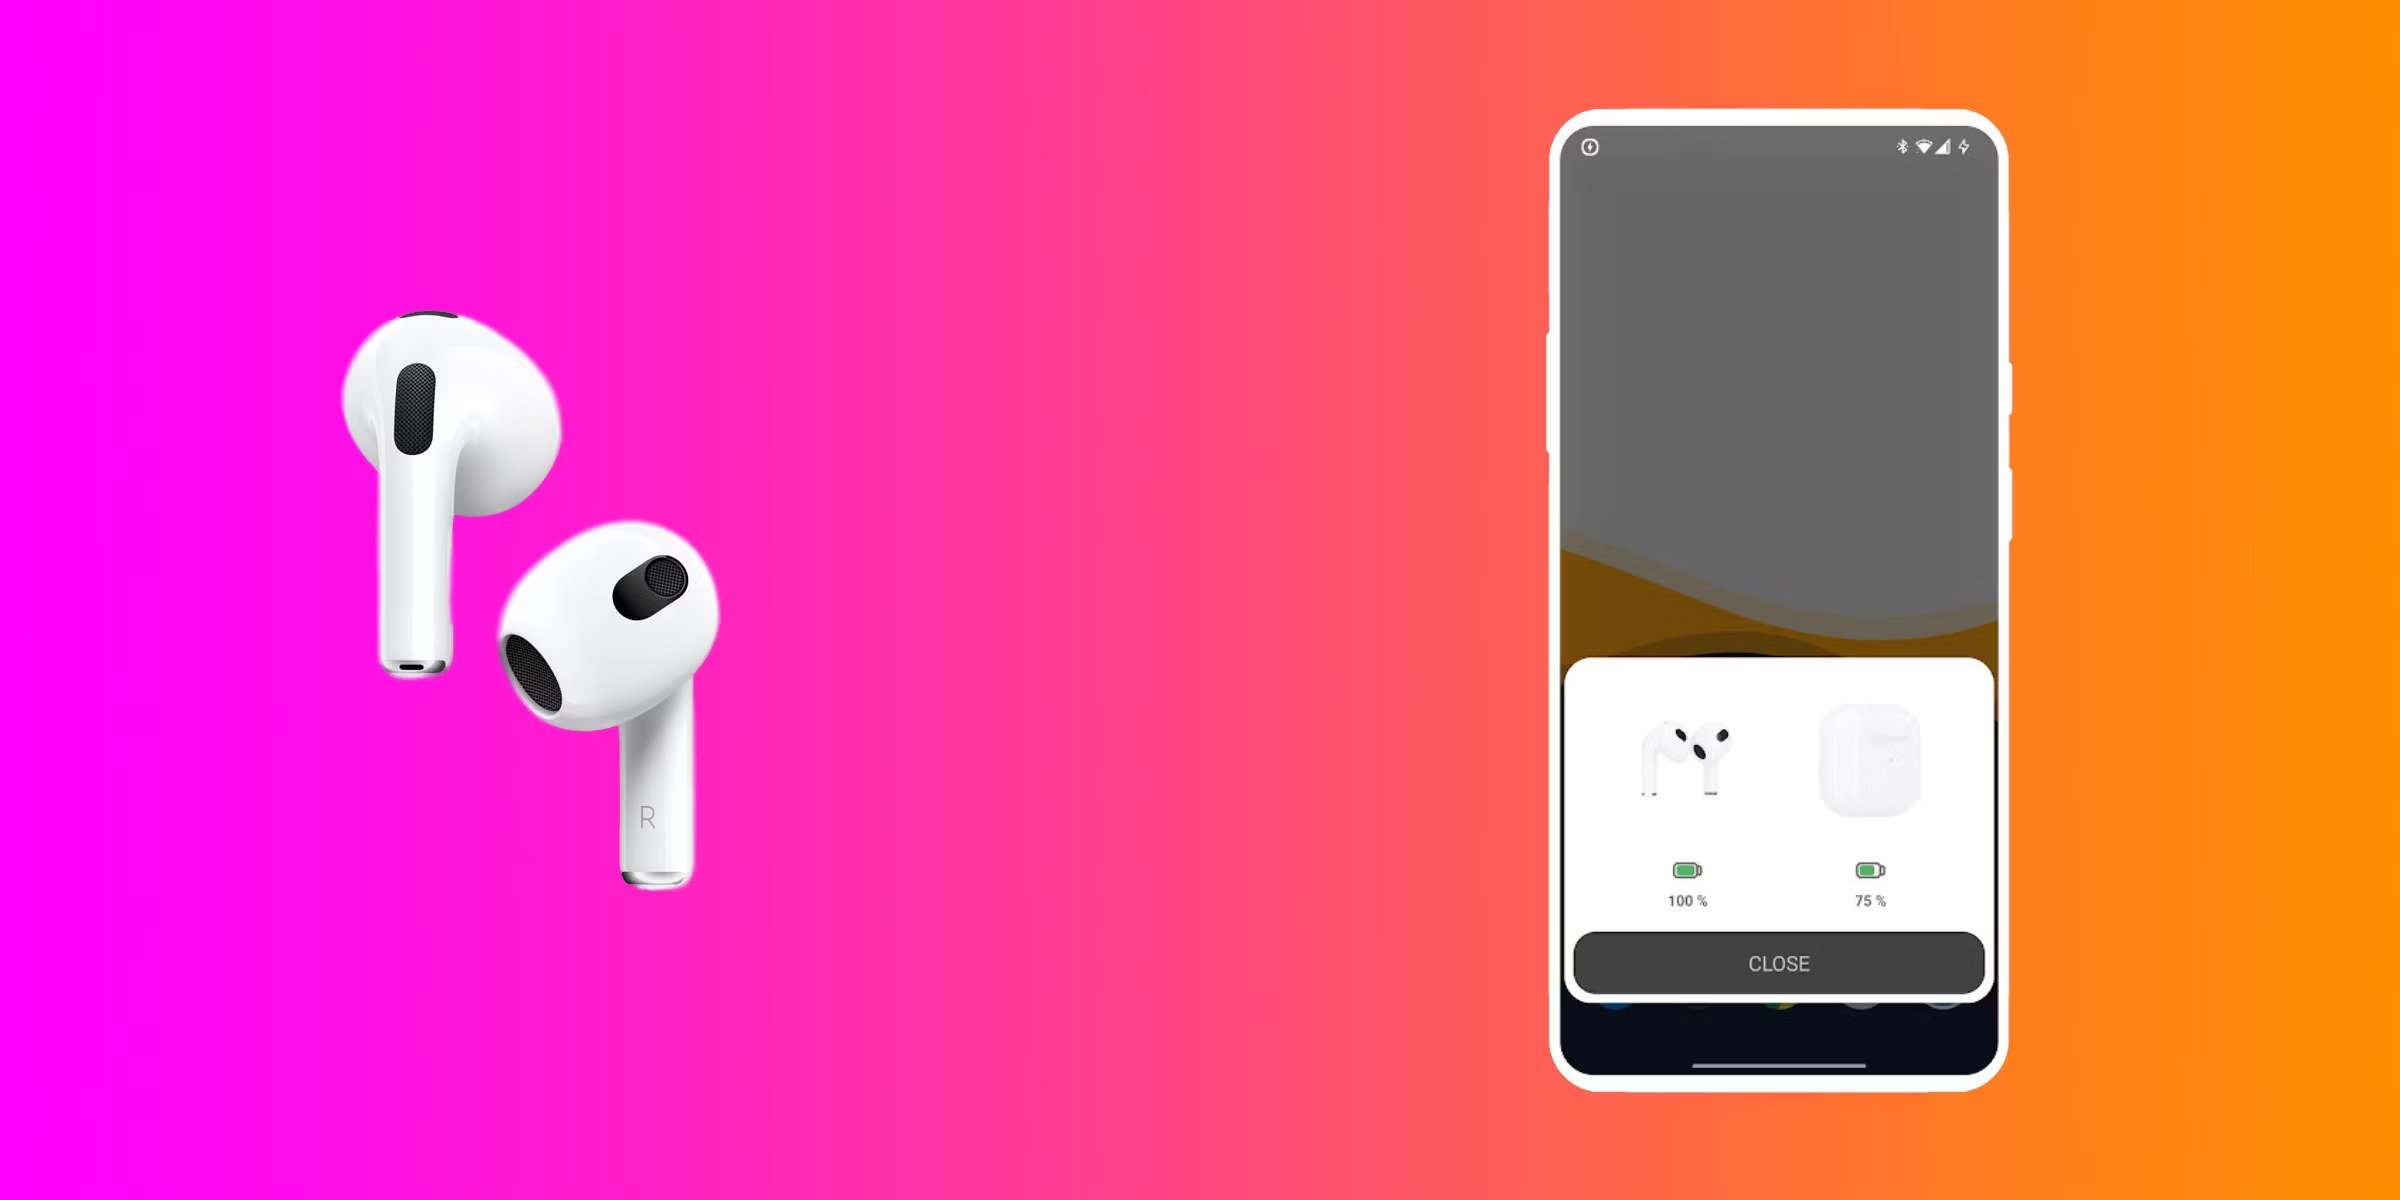
Method 1: Turning Off Noise Cancellation in Settings
The first method to turn off noise cancellation on your Android device is through the device settings. The steps may vary slightly depending on your device model and Android version, but the general process remains the same. Here’s how to disable noise cancellation in the settings:
- Open the “Settings” app on your Android device. You can usually find it in the app drawer or by swiping down from the top of the screen and tapping the gear icon.
- Scroll down and locate the “Sound” or “Sound & Vibrations” option. Tap on it to access the sound settings.
- Look for the “Noise cancellation” or “Noise reduction” option. This may be located under a subcategory like “Audio settings” or “Advanced settings.”
- Toggle the switch or checkbox next to the noise cancellation option to turn it off. The exact wording and appearance may differ based on your device.
- Once disabled, you can exit the settings and test the audio to ensure the noise cancellation has been turned off.
It’s worth noting that not all Android devices have built-in noise cancellation settings in their system preferences. If you can’t find a noise cancellation option in the sound settings, it’s likely that your device doesn’t support this feature or has it enabled by default without the option to disable it.
If your device does offer a noise cancellation setting, turning it off in the settings will provide a straightforward way to disable this feature. However, if you don’t have access to the noise cancellation option or need more advanced customization, you can explore alternative methods, which we will discuss in the following sections.
Method 2: Using Third-Party Apps to Disable Noise Cancellation
If your Android device doesn’t have a built-in option to disable noise cancellation or you want more control over the feature, you can turn to third-party apps. There are several apps available on the Google Play Store that allow you to adjust or disable noise cancellation settings. Here’s how you can use third-party apps to disable noise cancellation on your Android device:
- Open the Google Play Store on your Android device.
- Search for “noise cancellation” or “audio control” apps using the search bar.
- Browse through the search results and read the reviews and descriptions to find an app that offers the desired noise cancellation control.
- Select an app that suits your needs and tap on the “Install” button to download and install it on your device.
- Once the app is installed, open it, and navigate to the noise cancellation settings or audio control options.
- Adjust the settings to turn off or customize the noise cancellation feature according to your preferences.
- Exit the app and test the audio to ensure that the noise cancellation has been successfully disabled.
It’s essential to note that third-party apps may have varying levels of compatibility and effectiveness across different Android devices. Some apps may require specific system permissions or device features to function correctly. Additionally, there are both free and paid apps available, so consider your budget and personal preferences when selecting an app. Reading user reviews and researching the app’s developer reputation can also help you make an informed choice.
Using third-party apps can provide you with more flexibility and control over noise cancellation settings on your Android device. However, keep in mind that installing and using apps from unknown or untrusted sources can pose security risks. Stick to reputable apps from the Google Play Store or trusted developers to minimize any potential issues.
Method 3: Tweaking Developer Options to Disable Noise Cancellation
If you are comfortable with accessing and modifying developer options on your Android device, you can use this method to disable noise cancellation. The developer options menu provides more advanced settings and customization options, including the ability to disable specific features like noise cancellation. Here’s how you can tweak the developer options to turn off noise cancellation:
- Go to the “Settings” app on your Android device.
- Scroll down and tap on “About phone” or “About device.”
- Look for the “Build number” or “Build version” and tap on it several times, typically around seven times, until you see a message indicating that you have enabled developer options.
- Go back to the main settings menu and you should now see “Developer options” listed.
- Tap on “Developer options” to access the advanced settings menu.
- Scroll down and find the “Disable USB audio routing” option or a similar setting related to audio controls.
- Toggle the switch or checkbox next to the audio control option to disable it. This should turn off noise cancellation as well.
- Exit the settings and test the audio to confirm that the noise cancellation has been successfully deactivated.
Note that the exact location and wording of the audio control option may vary depending on your device and Android version. If you can’t find the specific option mentioned above, explore the developer options menu for other audio-related settings that may allow you to disable noise cancellation.
Enabling the developer options menu provides access to various advanced settings on your Android device. It’s important to exercise caution and avoid making changes to settings that you are unsure of or that may impact the normal functioning of your device. If you’re not comfortable or familiar with developer options, it’s best to explore other methods mentioned in this article to disable noise cancellation on your Android device.
Method 4: Disabling or Adjusting Noise Cancellation on Specific Apps
If you only want to disable noise cancellation for certain apps rather than system-wide, you can explore this method. Android gives you the ability to control individual app settings, and some apps may have their own noise cancellation options. Here is how you can disable or adjust noise cancellation on specific apps:
- Open the “Settings” app on your Android device.
- Scroll down and tap on “Apps” or “Applications.”
- Select the specific app for which you want to disable or adjust noise cancellation.
- Tap on “App info” or a similar option to access the specific app’s settings.
- Look for an option related to audio settings or noise cancellation within the app’s settings.
- If available, disable or adjust the noise cancellation settings according to your preference.
- Exit the app’s settings and test the audio within the app to ensure that the noise cancellation has been disabled or adjusted as desired.
It’s important to note that not all apps have noise cancellation settings or options. The availability of this feature within individual apps may depend on the app’s developer and its specific purpose. Additionally, the wording and location of audio-related settings within each app’s settings menu may differ.
By disabling noise cancellation on specific apps, you can have more control over the audio experiences within those apps. This can be particularly useful if you use specific apps for certain activities where noise cancellation might hinder the desired audio quality or listening experience.
If you want to re-enable noise cancellation for a specific app in the future, you can follow the same steps outlined above and enable the noise cancellation or adjust the settings as necessary.
Conclusion
Turning off noise cancellation on your Android device can be beneficial in various scenarios, such as conserving battery life, improving audio quality, resolving compatibility issues, or maintaining environmental awareness. Throughout this article, we explored four different methods to disable noise cancellation on your Android device:
- By turning off noise cancellation in the device settings, you can quickly disable this feature if it is available.
- Using third-party apps can provide more advanced customization options and control over noise cancellation settings.
- Tweaking the developer options menu allows access to more advanced settings and the ability to disable noise cancellation.
- Disabling or adjusting noise cancellation on specific apps gives you more control over the audio experience within those apps.
It’s essential to note that the availability of noise cancellation settings may vary depending on your Android device’s manufacturer and software version. In some cases, certain devices may not have a built-in noise cancellation feature or an option to disable it. However, by exploring these methods, you can find the most suitable approach for your specific device and needs.
Remember to consider the potential impact on battery life, audio quality, and compatibility when disabling noise cancellation. It’s also important to exercise caution when modifying settings or installing third-party apps from untrusted sources. Stick to reputable apps and make informed decisions based on user reviews and app descriptions.
By taking advantage of the methods shared in this article, you can regain control over your Android device’s audio settings, enabling you to enjoy a customized audio experience that suits your preferences and specific requirements.