Introduction
Welcome to this step-by-step guide on how to transfer photos from your iPhone to a Seagate external hard drive. If you’re running out of storage space on your iPhone or simply want to create a backup of your precious memories, using an external hard drive can be a convenient and reliable solution. By transferring your photos to a Seagate external hard drive, you can free up space on your iPhone and ensure that your memories are safely stored.
With the increasing quality and resolution of smartphone cameras, it’s no surprise that our photo libraries quickly fill up. Transferring photos to an external hard drive not only saves storage space but also provides an extra layer of protection against potential data loss. Seagate external hard drives are known for their durability, performance, and large storage capacities, making them an ideal choice for backing up your photos.
In this guide, we will walk you through the process of transferring photos from your iPhone to a Seagate external hard drive. We will provide you with simple, step-by-step instructions to ensure a smooth and hassle-free experience. Whether you’re a beginner or have some experience with technology, this guide will help you navigate the process effortlessly.
Before we begin, make sure you have your iPhone and Seagate external hard drive ready. Ensure that both devices are fully charged and have enough available storage space. Additionally, you may need to download and install the appropriate apps or software on your devices. Once everything is set, let’s dive into the steps to transfer your precious photos to your Seagate external hard drive!
Step 1: Connect your iPhone to the Seagate External Hard Drive
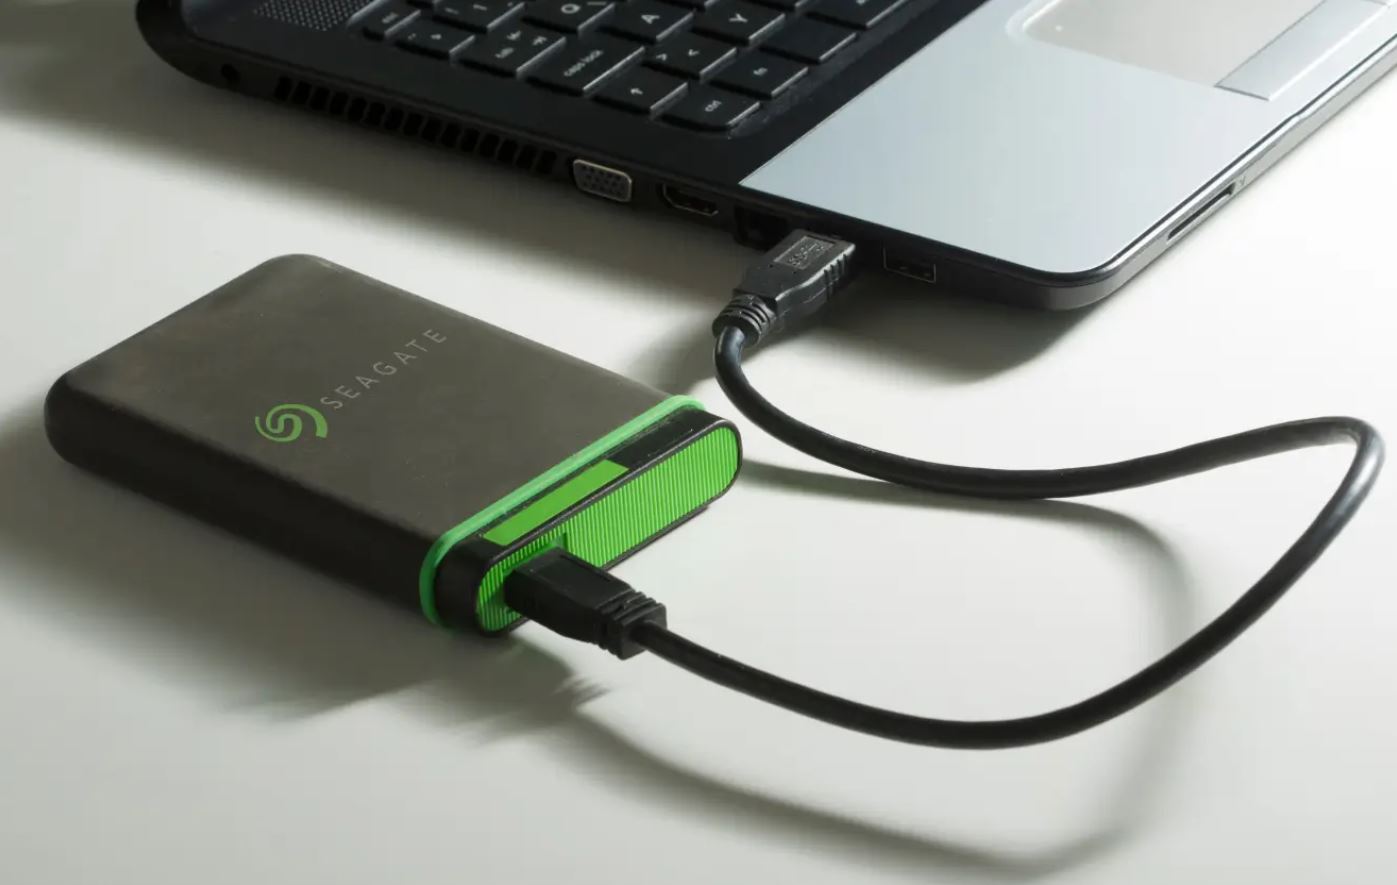
The first step in transferring photos from your iPhone to a Seagate external hard drive is to establish a physical connection between the two devices. Depending on your iPhone model and the type of Seagate external hard drive you have, you may need to use different cables or adapters. Here’s how you can proceed:
- Locate the appropriate cable or adapter to connect your iPhone to the Seagate external hard drive. iPhones typically use either a Lightning connector or a USB-C connector, while Seagate external hard drives may have USB-A, USB-C, or Thunderbolt ports.
- Connect one end of the cable to the charging port of your iPhone. If you’re using a USB-C to Lightning or USB-A to Lightning cable, you can directly insert the USB-C or USB-A end into the corresponding port of your iPhone.
- Connect the other end of the cable to the appropriate port on your Seagate external hard drive. Ensure that you insert it securely to establish a stable connection.
- If required, power on your Seagate external hard drive using the provided power supply or by plugging it into a power source.
- Once the physical connection is established, your iPhone and Seagate external hard drive should be ready to communicate with each other.
Please note that the specific steps and cables may vary depending on your devices. Refer to the user manuals or documentation provided with your iPhone and Seagate external hard drive for more detailed instructions. Once you’ve successfully connected your iPhone to the Seagate external hard drive, you’re ready to move on to the next step.
Step 2: Open the Files app on your iPhone
Now that your iPhone is connected to the Seagate external hard drive, it’s time to access the Files app on your iPhone. The Files app is a built-in file management tool introduced in iOS 11 that allows you to organize and browse your files from various locations, including your iCloud Drive, local storage, and external devices such as the Seagate external hard drive.
To open the Files app on your iPhone, follow these simple steps:
- Unlock your iPhone by entering your passcode or using Face ID or Touch ID.
- Locate the Files app on your home screen. The icon resembles a blue folder with a white document inside it.
- Tap on the Files app to launch it. You will now be presented with the Files app interface.
Once the Files app is open, you will have access to various file locations and folders. You can browse through your iCloud Drive, recently accessed files, and other connected external devices such as the Seagate external hard drive.
If you don’t see the Seagate external hard drive listed in the Files app, don’t worry. In some cases, you may need to grant permissions or enable certain settings to make it visible. To do this, follow these additional steps:
- Tap on the “Browse” tab at the bottom of the Files app interface.
- Scroll down to the “Locations” section and tap on “Edit” at the top-right corner.
- Toggle the switch next to the Seagate external hard drive to enable it.
- Tap “Done” to save the changes.
Now, the Seagate external hard drive should appear in the “Locations” section of the Files app, allowing you to access and transfer files conveniently. With the Files app open and the Seagate external hard drive accessible, you’re ready to proceed to the next step.
Step 3: Select the photos you want to transfer
With the Files app open on your iPhone and the Seagate external hard drive visible, it’s time to choose the photos you want to transfer. The Files app provides a user-friendly interface that allows you to navigate through your files and select specific items for transfer. Here’s how you can do it:
- Navigate to the location where your photos are stored. This can be your Camera Roll, Photo Library, or any other album on your iPhone.
- Tap on the respective album or folder to open it.
- Browse through the photos to find the ones you want to transfer. You can swipe up or down to scroll through the photos.
- To select a single photo, tap on it once. A blue checkmark will appear on the selected photo.
- If you want to select multiple photos, tap and hold on one photo until it is highlighted. You can then continue tapping on other photos to select them as well.
- If you want to select all the photos in the album or folder, tap on the “Select” button located at the top-right corner. This will automatically select all the photos in that location.
Keep in mind that you can select as many photos as you want, depending on the available storage space on your Seagate external hard drive. If you have a large number of photos to transfer, it may be more efficient to transfer them in batches rather than all at once.
Once you have selected the desired photos, you will see a blue checkmark next to each selected photo. This indicates that the photos are ready to be transferred to the Seagate external hard drive. With the photos selected, let’s continue to the next step to initiate the transfer process.
Step 4: Tap the Share button
After selecting the photos you want to transfer to your Seagate external hard drive, the next step is to use the Share button in the Files app to initiate the transfer process. The Share button allows you to share or transfer files to various destinations, including external devices. Here’s how you can proceed:
- Tap on the Share button, which is represented by a square box with an upward arrow. You can find this button at the bottom-left corner of the Files app interface.
- Upon tapping the Share button, a menu of sharing options will appear.
- From the sharing options menu, scroll through the available apps and functions until you find the option to “Save to Files” or “Save to Seagate”. This option may vary depending on your specific setup and installed apps.
- Select the “Save to Files” or “Save to Seagate” option. This will prompt you to choose a destination folder for the transferred files.
- If you have multiple folders on your Seagate external hard drive, select the appropriate folder where you want the photos to be saved. You can tap on the folder to open it and then tap “Choose” to confirm the selection.
Once you have chosen the destination folder, the Files app will start the process of transferring the selected photos from your iPhone to the Seagate external hard drive. The speed of the transfer will depend on various factors such as the size of the photos and the connection speed between your iPhone and the external hard drive. It’s recommended to keep your iPhone connected to a power source during the transfer process to ensure uninterrupted operation.
Now that you have tapped the Share button and chosen the destination folder, let’s move on to the next step to monitor the transfer progress and ensure a successful transfer of your photos.
Step 5: Choose the Seagate External Hard Drive as the destination
Selecting the Seagate external hard drive as the destination for your transferred photos is crucial to ensure that the files are saved in the correct location. In this step, we will guide you through choosing the Seagate external hard drive as the destination in the Files app.
- After tapping the Share button in the previous step, the sharing options menu will appear in the Files app.
- Scroll through the available options until you locate the Seagate external hard drive. It may be labeled as “Seagate” or display the specific model name of your external hard drive.
- Tap on the Seagate external hard drive option to select it as the destination for your transferred photos.
By choosing the Seagate external hard drive as the destination, you ensure that the photos will be stored securely on the external device rather than your iPhone. This not only saves storage space on your iPhone but also provides an additional backup of your valuable photos.
Note that if you have multiple partitions or storage options on your Seagate external hard drive, the sharing options menu may display them as separate choices. Simply select the desired partition or storage location on the external hard drive where you want the photos to be saved.
Once you have successfully chosen the Seagate external hard drive as the destination, you are now ready to proceed to the next step to start the transfer process.
Step 6: Start the transfer process
Now that you have selected the Seagate external hard drive as the destination for your transferred photos, it’s time to initiate the transfer process. This step involves starting the actual transfer of your selected photos from your iPhone to the external hard drive. Here’s how you can get started:
- On the sharing options menu in the Files app, double-check that the Seagate external hard drive is selected as the destination.
- Once you have confirmed the selection, look for a button or option that says “Transfer” or “Save.” This option may vary depending on your specific setup and installed apps.
- Tap the “Transfer” or “Save” button to begin the transfer process.
After initiating the transfer, the Files app will start copying and saving your selected photos onto the Seagate external hard drive. The time required for the transfer will depend on factors such as the number and size of the photos as well as the speed of the connection between your iPhone and the external hard drive.
During the transfer process, it is important to keep your iPhone connected to a power source and avoid interrupting the process by disconnecting any cables. This ensures a smooth and successful transfer without any data loss or corruption. You may also want to monitor the progress of the transfer, which we will cover in the next step.
Now that you have started the transfer process, let’s proceed to the next step to learn how to monitor the progress of the transfer and ensure that all your photos are successfully transferred to the Seagate external hard drive.
Step 7: Monitor the transfer progress
Monitoring the transfer progress is crucial to ensure that all your selected photos are successfully transferred from your iPhone to the Seagate external hard drive. While the Files app will automatically handle the transfer process, it’s always a good idea to keep an eye on the progress to ensure a smooth and efficient transfer. Here’s how you can monitor the transfer progress:
- In the Files app, navigate to the folder or location on the Seagate external hard drive where you initiated the transfer.
- Look for a progress indicator, typically depicted as a horizontal bar or a circle with a percentage value.
- Monitor the progress indicator to track the transfer. Depending on the size of the photos and the speed of the connection, the transfer may take a few minutes or longer.
- If the Files app provides an estimated time remaining for the transfer, keep an eye on it to gauge the remaining duration.
While the transfer is in progress, it’s important to avoid interrupting or disconnecting any cables to ensure a successful transfer. You may put your device to sleep or continue to use it for other tasks while the transfer is ongoing, but keep in mind that using resource-intensive apps or actions may affect the transfer speed.
Once the transfer progress reaches 100% or the progress indicator disappears, it indicates that all your selected photos have been successfully transferred to the Seagate external hard drive. At this point, you can proceed to the final step to safely disconnect your iPhone and the Seagate external hard drive.
Now that you know how to monitor the transfer progress, let’s move on to the last step to ensure a safe disconnection of your devices.
Step 8: Safely disconnect your iPhone and Seagate External Hard Drive
Once the transfer of your photos to the Seagate external hard drive is complete, it is important to safely disconnect your iPhone and the external hard drive to avoid any potential data loss or corruption. Follow these steps to safely disconnect your devices:
- In the Files app, close any open folders or locations related to the Seagate external hard drive.
- Ensure that the transfer progress indicator, if present, has reached 100% or has disappeared.
- Check that all files have been successfully transferred and are visible on the Seagate external hard drive.
- On your iPhone, navigate to the Home screen by pressing the Home button or using the appropriate gesture for your device.
- Disconnect the cable connecting your iPhone to the Seagate external hard drive by gently removing it from both devices.
- On your iPhone, swipe up from the bottom of the screen (or from the top-right corner for iPhones with Face ID) to access the Control Center.
- Tap on the “Wi-Fi” or “Cellular Data” icon to disable any wireless connections that may be active.
- After ensuring that no active connections are present, you can safely power off your Seagate external hard drive by following the manufacturer’s instructions.
It is important to follow these steps to ensure that the files on the Seagate external hard drive are not compromised. By safely disconnecting your devices, you reduce the risk of accidental file corruption or damage.
With your iPhone safely disconnected and the Seagate external hard drive powered off, you have successfully completed the process of transferring your photos. Your precious memories are now securely stored on the external hard drive, freeing up space on your iPhone and providing an extra layer of backup.
Remember to store your Seagate external hard drive in a safe and secure location, and consider creating a backup of your files on a separate storage device for added peace of mind.
Conclusion
Congratulations! You have successfully learned how to transfer photos from your iPhone to a Seagate external hard drive. By following the step-by-step guide outlined in this article, you can now free up valuable storage space on your iPhone while ensuring the safety and preservation of your cherished memories.
Throughout the process, you learned how to connect your iPhone to the Seagate external hard drive, access the Files app on your iPhone, select the photos you want to transfer, tap the Share button to initiate the transfer, choose the Seagate external hard drive as the destination, monitor the transfer progress, and finally, safely disconnect your devices once the transfer is complete.
Remember that regularly backing up your photos and files is essential to safeguarding your valuable data. By using an external hard drive like Seagate, you can rest assured knowing that your memories are securely stored in a separate location.
Now that you have mastered the process of transferring photos from your iPhone to a Seagate external hard drive, you can confidently manage and organize your photo library without worrying about running out of space.
Continue exploring the capabilities of your Seagate external hard drive and make the most of its storage capacity for other files and documents. Whether it’s backing up videos, documents, or music, you can rely on your Seagate external hard drive as a reliable and convenient storage solution.
Thank you for following this guide, and we hope that it has been helpful in enhancing your digital storage experience. Enjoy the extra space on your iPhone and the peace of mind that comes with knowing your photos are safely backed up on the Seagate external hard drive!