Introduction
Welcome to the world of 3D printing, where the possibilities are endless and creativity knows no bounds. If you’re new to the world of 3D printing or looking to upgrade your current printer, the Wanhao 3D printer is a fantastic choice. Designed with precision and versatility in mind, this printer allows you to bring your ideas to life in the form of three-dimensional objects.
With its user-friendly interface and powerful capabilities, the Wanhao 3D printer is suitable for both beginners and experienced users. Whether you want to create intricate prototypes, personalized gifts, or functional parts, this printer can handle it all.
In this guide, we will walk you through the process of setting up your Wanhao 3D printer, step by step. From unboxing and assembly to software installation and troubleshooting, we’ve got you covered. By the end of this guide, you’ll have the knowledge and confidence to start printing your very own 3D designs.
Before we dive into the nitty-gritty details, let’s take a closer look at what exactly a Wanhao 3D printer is and why it’s a popular choice among enthusiasts and professionals alike.
The Wanhao 3D printer is a high-quality, durable, and affordable printer that uses the fused deposition modeling (FDM) technology. FDM works by extruding a thin layer of melted filament onto a build platform, layer by layer, until the object is complete. This technology allows for great precision and detail, making it ideal for a wide range of applications.
One of the key advantages of the Wanhao 3D printer is its versatility. With a large build volume and compatibility with various types of filaments, including PLA, ABS, PETG, and more, you can bring your ideas to life using the material that best suits your needs.
Whether you’re a hobbyist, an artist, an engineer, or an educator, the Wanhao 3D printer offers the tools and capabilities to turn your visions into reality. So, let’s get started on setting up your new printer and unlocking the world of 3D printing!
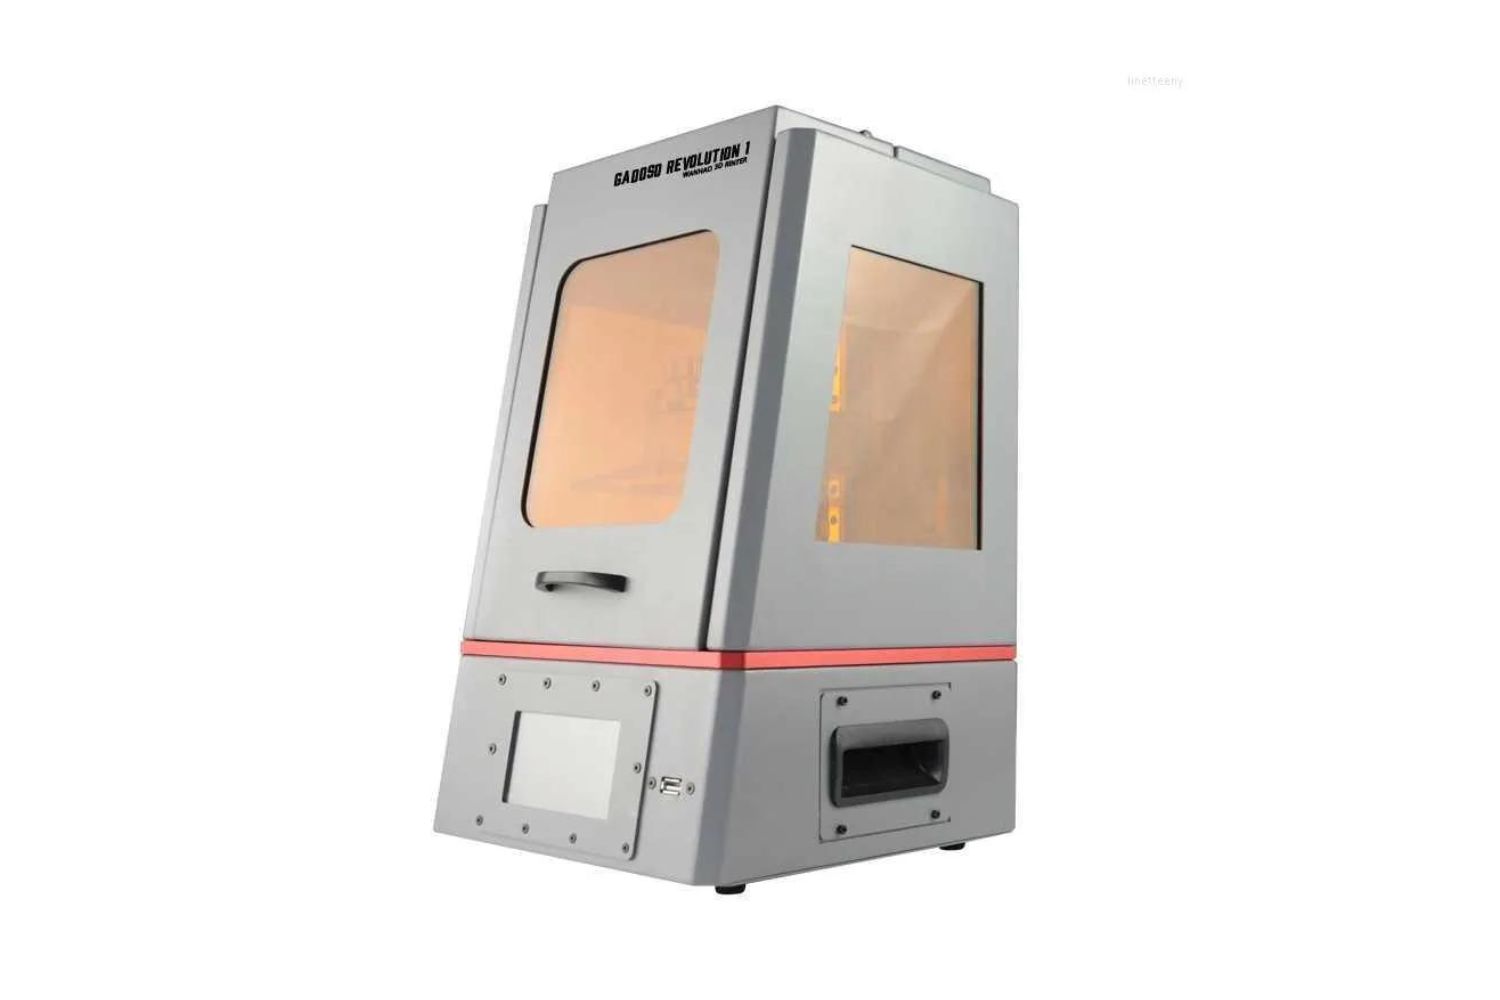
What is a Wanhao 3D printer?
A Wanhao 3D printer is a cutting-edge device that allows you to transform digital designs into physical objects through the process of 3D printing. Utilizing advanced technology and precision engineering, the Wanhao 3D printer has made this once exclusive technology accessible to individuals, hobbyists, and professionals alike.
With its sleek design and intuitive interface, the Wanhao 3D printer brings the power of additive manufacturing into your own home or workspace. It operates on the principle of fused deposition modeling (FDM), where a filament material is melted and extruded layer by layer to create a three-dimensional object.
The capabilities of the Wanhao 3D printer extend beyond personal use. The printer has become a valuable tool in a wide range of industries, including engineering, architecture, healthcare, education, and manufacturing. Its ability to prototype designs, create functional parts, and produce customized products has revolutionized the way these industries operate.
One of the key advantages of the Wanhao 3D printer is its versatility. It is compatible with a variety of filament materials, including PLA, ABS, PETG, and more. This allows you to choose the material that best suits your project’s requirements and desired end result. Whether you’re looking for strong and durable parts or colorful and intricate models, the Wanhao 3D printer can handle it all.
The Wanhao 3D printer is equipped with a sturdy build platform and a heated bed, ensuring optimal adhesion and reducing the chances of warping or lifting during the printing process. Additionally, it boasts a high resolution, which allows for intricate details and smooth finishes in your prints.
Furthermore, the Wanhao 3D printer is known for its user-friendly interface and intuitive controls. Even if you’re new to 3D printing, you can easily navigate through the printer’s settings and functions to achieve the desired results.
Overall, a Wanhao 3D printer is a reliable, efficient, and accessible device that opens up a world of endless possibilities for creators, makers, and innovators. Whether you’re a hobbyist looking to explore your creative side or a professional seeking to streamline your workflow, the Wanhao 3D printer is the perfect tool to bring your ideas to life in stunning three-dimensional form.
Unboxing the Wanhao 3D printer
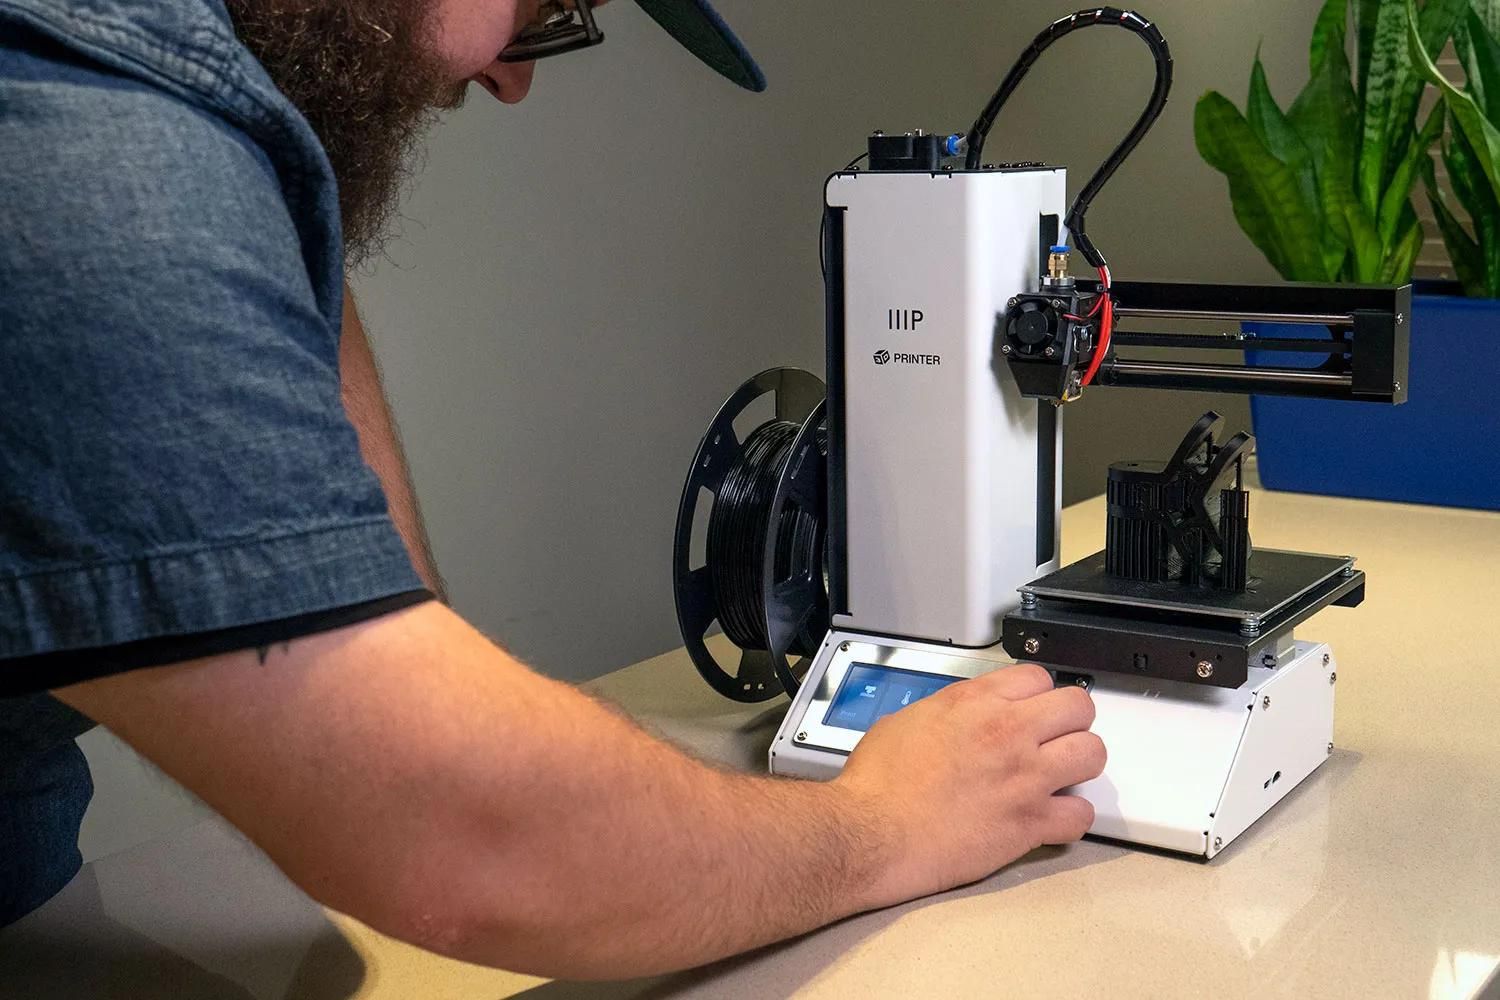
The moment has arrived! You’ve just received your brand new Wanhao 3D printer and you can’t wait to start printing. But before you dive into the world of 3D printing, let’s take a moment to unbox and familiarize ourselves with your new machine.
Start by carefully removing the packaging material and lifting the lid of the box. Inside, you’ll find your Wanhao 3D printer securely nestled in foam or protective padding. Gently lift the printer out of the box, ensuring you have a firm grip on it to avoid any accidents.
Next, remove any remaining packaging material such as tapes, zip ties, or foam inserts. These are placed to secure the different components of the printer during transportation. Take your time to check each corner and crevice to ensure all packaging materials are removed.
Once you’ve removed the packaging, you’ll be able to see the different components of the Wanhao 3D printer. These typically include the main printer body, the print bed, the spool holder, the power cable, and any additional accessories or tools that come with your specific model.
Inspect each component to ensure there are no visible defects or damages. If you notice any issues, it’s important to contact the seller or manufacturer for assistance. It’s always better to address any concerns right away to avoid any delays in your 3D printing journey.
Now that you’ve inspected the components, it’s time to prepare the printer for assembly. Gather all the necessary parts and refer to the user manual or assembly guide that comes with your Wanhao 3D printer. These guides provide detailed instructions and illustrations to help you navigate through the assembly process.
Follow the step-by-step instructions to assemble your Wanhao 3D printer. This typically involves securing the print bed onto the printer, attaching the spool holder for the filament, and connecting any cables or wires as required. Take your time and double-check each step to ensure everything is properly aligned and connected.
Once you’ve completed the assembly process, congratulate yourself on successfully unboxing and assembling your Wanhao 3D printer! You’re one step closer to entering the fascinating world of 3D printing. Now it’s time to dive into the next section to learn how to set up and connect your printer to your computer.
Assembly and Initial Setup
Now that you’ve unboxed your Wanhao 3D printer, it’s time to move on to the essential step of assembly and initial setup. This process will ensure that your printer is properly configured and ready to start printing your 3D designs.
The assembly process may vary slightly depending on the specific model of your Wanhao 3D printer, so it’s crucial to consult the user manual or assembly guide provided with your printer. These guides offer detailed instructions and illustrations to help you navigate through the assembly process with ease.
Start by placing the print bed onto the printer’s base. Make sure it is properly aligned and securely attached, following the instructions provided. The print bed should be level and free from any debris or obstructions that could affect the quality of your prints.
Next, attach the filament spool holder to the designated area on the printer. This holder will secure the filament spool and ensure smooth and consistent feeding during the printing process. Make sure the holder is securely fastened to prevent any wobbling or movement.
Now, carefully connect the necessary cables and wires to their respective ports on the printer. This typically includes the power cable, USB cable for connecting to your computer, and any other accessories specific to your model. Again, refer to the instructions provided to ensure proper connections.
After completing the physical assembly, it’s time to power up your Wanhao 3D printer. Connect the power cable to a reliable power source, and then turn on the printer using the power switch. The printer’s display screen should light up, indicating that it is ready for the next steps of the setup process.
Now, it’s crucial to navigate through the printer’s settings and configure them according to your preferences. This may include adjusting language settings, temperature settings, and other parameters specific to your printing needs. Refer to the user manual or online resources for guidance on configuring the settings of your particular model.
Finally, it’s important to perform a visual inspection of the printer to check for any loose or misaligned components. Ensure that all screws and fasteners are tightened properly, and that there are no obstructions or debris that could interfere with the printing process.
With the assembly and initial setup complete, you are now ready to move on to the next steps of connecting your Wanhao 3D printer to your computer and installing the necessary software. These steps will be covered in the upcoming sections of this guide.
Remember, taking the time to properly assemble and set up your Wanhao 3D printer ensures optimal printing performance and reliability. So, double-check your work and enjoy the exciting journey of 3D printing that awaits you!
Connecting the Wanhao 3D printer to your computer
Once you have completed the assembly and initial setup of your Wanhao 3D printer, the next step is to establish a connection between your printer and your computer. This connection is essential for transferring your 3D models and commands to the printer, allowing you to start printing.
The most common method of connecting the Wanhao 3D printer to your computer is through a USB cable. Begin by locating the USB port on the printer, usually located on the side or back of the machine. Plug one end of the USB cable into the printer’s USB port, and the other end into an available USB port on your computer.
It is important to ensure that the USB cable is securely connected on both ends to ensure a stable and reliable connection. Once the cable is connected, your computer should recognize the Wanhao 3D printer as a new device and automatically install any necessary drivers. If prompted, follow the on-screen instructions to complete the driver installation.
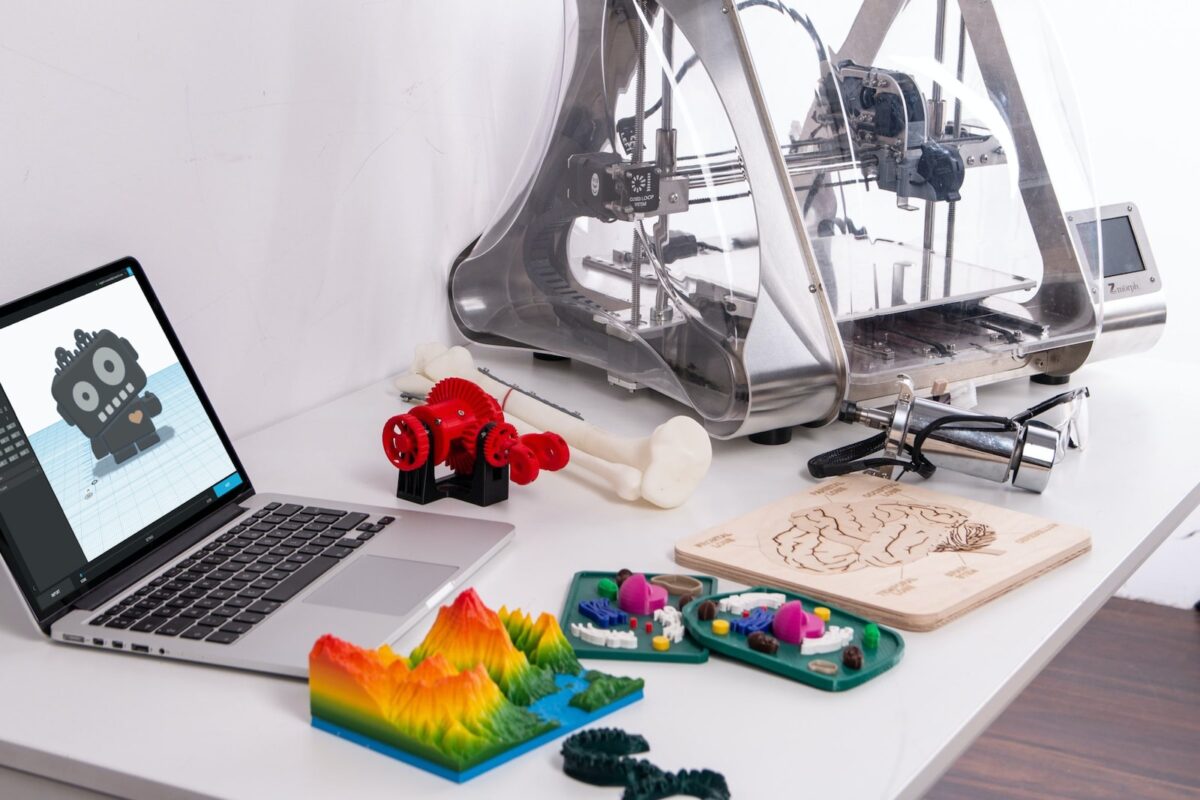
Once the printer is connected to your computer, you can begin to communicate with it using a 3D printing software. There are several popular software options available, such as Cura, Simplify3D, or the software provided specifically for your Wanhao 3D printer model.
If you haven’t already, download and install the 3D printing software of your choice onto your computer. Open the software and navigate to the settings or preferences section to select your Wanhao 3D printer as the default printer. This ensures that the software recognizes and communicates with your printer correctly.
Now it’s time to start creating your 3D models or importing existing models into the software. Once your design is ready, you can use the software to slice the model. Slicing involves dividing the 3D model into layers and generating the instructions that the printer will follow to create your physical object.
Once the slicing process is complete, you can send the sliced file, often in the form of a .gcode file, to the Wanhao 3D printer. The software should provide an option to send or transfer the file directly to the printer. Select the file and click the print button to start the printing process.
Keep in mind that the speed and quality of the printing process can be influenced by various software settings, such as layer height, printing temperature, and print speed. Experimenting with these settings will allow you to optimize your prints and achieve the desired results.
With the Wanhao 3D printer successfully connected to your computer and the software properly configured, you are now ready to transform your digital designs into physical objects. In the next section, we will guide you through the installation process of the necessary software for your Wanhao 3D printer.
Installing the Necessary Software
Before you can start printing with your Wanhao 3D printer, you’ll need to install the necessary software onto your computer. This software acts as the interface between your computer and the printer, allowing you to control and send commands to the printer for your 3D printing projects.
There are several software options available for Wanhao 3D printers, depending on your specific model and personal preferences. One popular choice is the Cura software, which is a free and open-source slicing software that works well with Wanhao printers.
Begin by visiting the official website of the software you have chosen. Look for the download section and select the version appropriate for your operating system (Windows, Mac, or Linux). Once the download is complete, open the installer file and follow the on-screen instructions to install the software.
During the installation process, you may be prompted to customize certain settings or select specific options. It is recommended to choose the default settings for a hassle-free installation. However, you can always customize the settings later according to your specific requirements.
Once the installation is complete, launch the software. You’ll be greeted with a welcome screen or a blank workspace. Take a moment to explore the different features and settings available in the software. Familiarize yourself with the layout and options to get a better understanding of how to navigate through the software.
Next, you need to configure the software to work with your Wanhao 3D printer. Navigate to the “Preferences” or “Settings” section of the software, and look for an option to add a new printer. Follow the instructions provided to add your specific Wanhao model to the software.
In this step, you may need to specify the printer’s specifications such as the build volume, nozzle diameter, and other relevant settings. These specifications can usually be found in the user manual or documentation that came with your Wanhao 3D printer.
Once you have added your Wanhao printer, you’re ready to start using the software to prepare your 3D models for printing. Import or create your desired 3D model within the software, and then use the slicing functionality to generate the instructions that the printer will follow.
Take some time to familiarize yourself with the different slicing options and settings available in the software. These include layer height, print speed, infill density, and other parameters that can affect the quality and print time of your objects. Experimenting with these settings will help you achieve the desired results for your prints.
With the software installed and properly configured, along with your Wanhao 3D printer connected to your computer, you’re now equipped with the tools to unleash your creativity and embark on your 3D printing journey. In the next section, we will guide you through the process of calibrating your Wanhao printer to ensure optimal printing results.
Calibrating the Wanhao 3D Printer
Calibrating your Wanhao 3D printer is a crucial step to ensure optimal printing results. Proper calibration ensures that the printer’s components, such as the print bed, nozzle height, and extrusion rate, are correctly aligned and calibrated to achieve accurate and consistent prints.
The first aspect of calibration is bed leveling. A leveled bed ensures that the print surface is perfectly parallel to the movement of the printer’s extruder. This prevents issues such as uneven layers or poor adhesion. Most Wanhao printers offer manual bed leveling, where you adjust the corners or specific points of the bed to achieve a level surface. Follow the instructions in your printer’s manual or consult online guides for the specific steps to level the bed.
Next, you need to calibrate the nozzle height. The nozzle height should be set to the correct distance from the print bed to ensure proper filament flow and adhesion. This distance, known as the “Z-offset,” can typically be adjusted in the printer’s firmware or in the software you are using to control the printer. Follow the instructions provided by your printer’s manufacturer or software to set the correct nozzle height.
After calibrating the nozzle height, it’s essential to check and adjust the extrusion rate. This ensures that the printer is extruding the correct amount of filament for each layer. You can perform a simple extrusion test by printing a calibration object, such as a single-layer cube or a hollow cylinder. Measure the thickness of the printed walls and compare it to your desired value. If the walls are too thin or too thick, you may need to adjust the extrusion multiplier or flow rate in your printer’s settings. Make incremental adjustments and retest until you achieve the desired results.
Additionally, it is recommended to check the temperature settings for your filament material. Each type of filament requires a specific temperature range to melt and flow properly. Consult the documentation for your filament or refer to online resources for the recommended temperature settings. If your prints are experiencing issues such as stringing or poor layer adhesion, you may need to fine-tune the temperature settings accordingly.
It’s important to note that calibration is an iterative process. It may require some experimentation and adjustment to achieve optimal results for your specific printer and filament combinations. Take the time to test and fine-tune the settings until you are satisfied with the quality of your prints.
Regularly check and re-calibrate your Wanhao 3D printer as needed. Over time, components may shift or wear, affecting the printer’s performance. By maintaining proper calibration, you can ensure consistent and accurate prints.
Now that your Wanhao 3D printer is calibrated and ready to go, it’s time to load filament into the printer and start your first 3D print. We’ll guide you through the filament loading process in the next section of this guide.
Loading Filament into the Printer
Now that your Wanhao 3D printer is calibrated, it’s time to load filament into the printer’s extruder. Proper filament loading ensures a smooth and uninterrupted flow of material, allowing you to create high-quality prints.
Begin by preparing your filament. Ensure that it is free from any knots or tangles that may impede the feeding process. If the filament is on a spool, place it on the filament spool holder attached to your Wanhao printer for easy access.
Next, locate the extruder assembly on your printer. This is where the filament will be inserted. The location of the extruder assembly may vary depending on your specific printer model, so consult the user manual or documentation provided with your Wanhao 3D printer for guidance.
With the extruder assembly in view, locate the filament guide tube or entrance. This is where the filament will be inserted to feed through to the extruder. Make sure the guide tube is free from obstructions and debris.
Grab the end of your filament and insert it into the filament guide tube, applying gentle pressure to ensure it is properly seated in the tube. Slowly feed the filament through the guide tube, pushing it in until you feel resistance.
While feeding the filament, keep an eye on the extruder assembly. You should see the filament start to emerge from the nozzle. If the filament does not start extruding, gently push it further into the tube until it does.
Once the filament is properly loaded, you can begin to heat up the printer. Use the control panel or software interface to set the nozzle temperature to the appropriate temperature for your filament material. Wait for the printer to reach the desired temperature, ensuring that the filament is melting and flowing smoothly through the nozzle.
When the printer has heated up and the filament is extruding smoothly, you can start your first test print. Choose a simple model or a calibration file to ensure that the filament is properly flowing and that the printer is functioning as expected.
Throughout the printing process, it’s important to monitor the feeding of the filament. Keep an eye out for any signs of filament jams or clogs. If you encounter any issues, such as filament not extruding, uneven extrusion, or grinding noises, stop the print and troubleshoot the problem before proceeding.
Remember to always retract the filament from the printer when you’re finished printing or switching to a different filament material. This prevents the filament from melting and clogging the nozzle and ensures a smooth loading process for future prints.
With the filament properly loaded and your first test print underway, you’re well on your way to exploring the possibilities of 3D printing. In the next section, we’ll provide you with essential tips and tricks to achieve optimal results with your Wanhao 3D printer.
Starting Your First 3D Print
Now that your Wanhao 3D printer is calibrated and filament is loaded, it’s time to embark on your first 3D printing journey. Starting a print may seem daunting at first, but with the right settings and a bit of practice, you’ll be creating stunning 3D objects in no time.
The first step in starting a 3D print is to choose or create a digital design file. There are various options available, including downloading pre-designed models from online repositories or designing your own using modeling software. Make sure the design file is in a compatible format (such as .stl or .obj) and saved on your computer.
Next, open your chosen 3D printing software, such as Cura or Simplify3D, and import the design file. The software will allow you to position, scale, and orient the design to fit your desired specifications. Take the time to adjust any necessary settings, such as layer height, printing speed, or infill density, to achieve the desired outcome.
Once you have finalized the settings, it’s time to slice the design. Slicing is the process of transforming the 3D model into layers and generating the necessary toolpaths for the printer to follow. Use your 3D printing software to slice the model according to your selected settings. This will result in a printable file, typically in .gcode format.
With the sliced file ready, transfer it to your Wanhao 3D printer. This can typically be done by saving the sliced file onto an SD card or using the USB connection between your printer and computer to transfer the file directly. Follow the instructions specific to your printer model to load the file into the printer’s memory.
Before starting the print, it’s advisable to perform a final check of your printer’s settings, such as temperature and bed leveling. Ensure that the print bed is clean and adequately preheated to prevent any issues with adhesion. Double-check that the extruder nozzle is at the correct height from the print bed to avoid any filament scraping or poor print quality.
Once your printer is ready, initiate the print through the printer’s control panel or the software interface. You will typically have the option to select the desired file and initiate the printing process. The printer will begin to heat up, and once the target temperature is reached, it will start extruding the filament layer by layer, gradually creating your 3D object.
While the print is in progress, it’s important to monitor the process periodically. Ensure that the layers are adhering properly and that there are no signs of filament issues, such as clogs or thread breaks. If any issues arise, pause the print and address the problem before continuing.
Once the print is complete, allow the object to cool on the print bed before attempting to remove it. Use caution when removing the object to avoid any damage or warping. Depending on the design and support structures, you may need to use a small spatula or other tools to gently pry the object off the print bed.
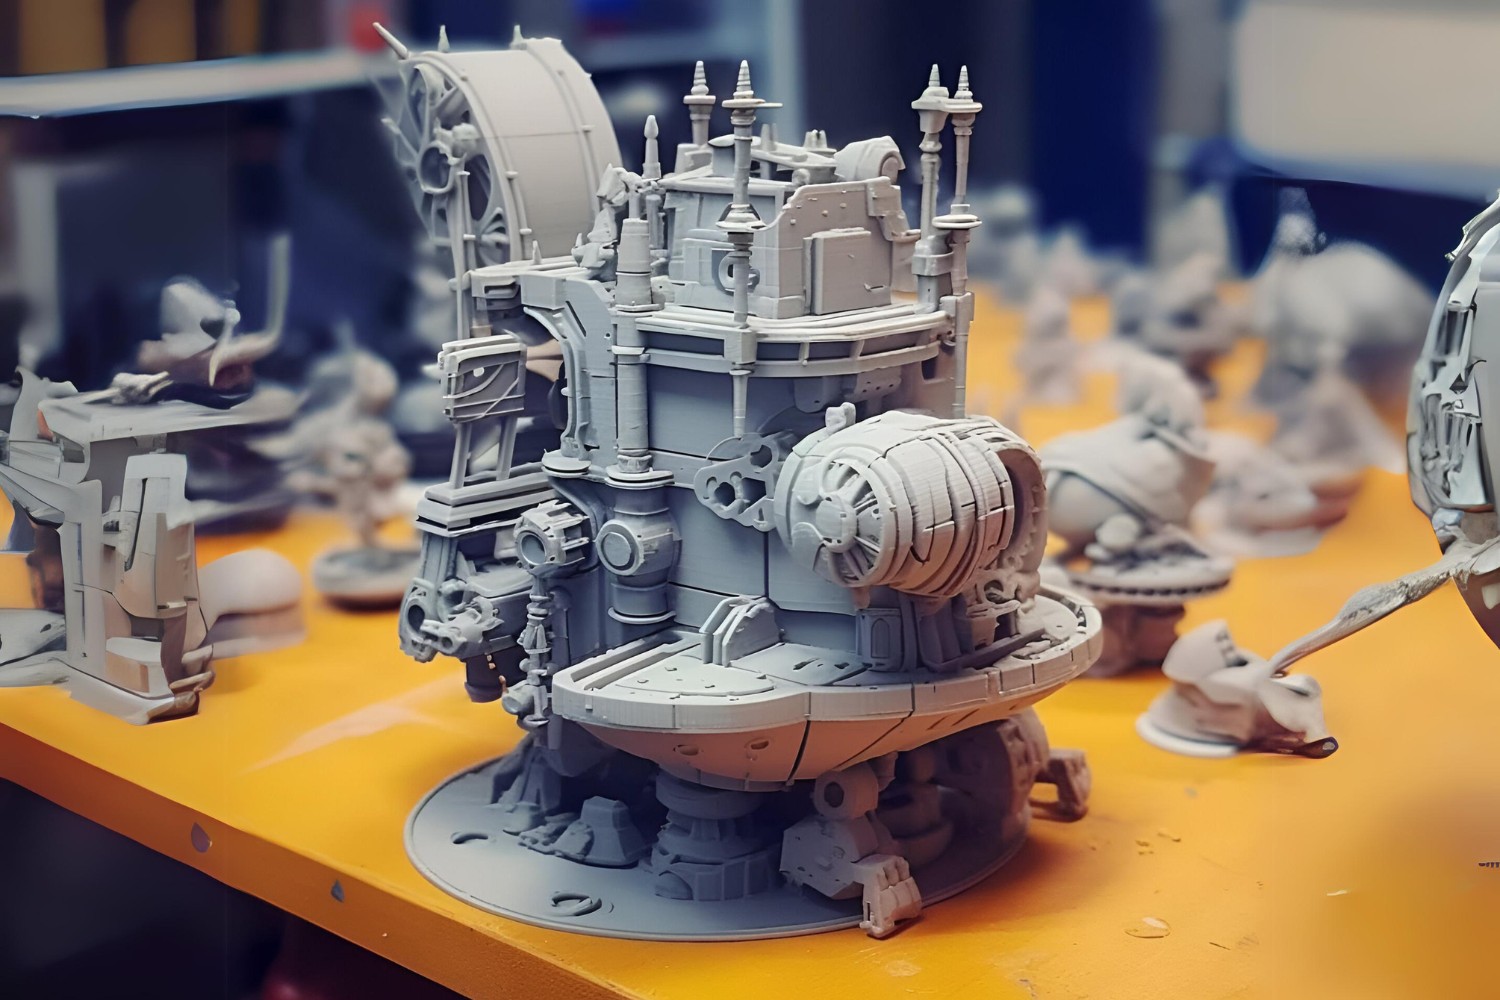
Congratulations! You’ve successfully completed your first 3D print using your Wanhao 3D printer. Take the time to admire your creation and assess the quality of the print. Evaluate the results and make note of any adjustments that may be necessary for future prints.
Now that you have a solid understanding of the process, you’re ready to take on more complex designs and push the boundaries of your creativity. Don’t be afraid to experiment and explore different materials and settings to achieve astonishing 3D prints with your Wanhao printer.
Troubleshooting Common Issues
While 3D printing with your Wanhao printer can be a rewarding experience, you may encounter some common issues along the way. Don’t worry – most of these issues can be easily resolved with a bit of troubleshooting. Here are some common issues and their potential solutions:
1. Poor adhesion or warping: If your prints are not sticking properly to the print bed or are warping, ensure that the bed is properly leveled. Additionally, consider using adhesion aids such as a heated bed or a bed surface coating such as painters tape or a specialized printing surface like BuildTak. Adjusting the print bed temperature and filament flow rate may also help improve adhesion.
2. Filament jams or clogs: If filament is not extruding properly or getting stuck, check for any obstructions in the filament pathway or nozzle. Clean out any debris using a tweezer or small brush. Adjust the nozzle height to ensure proper filament flow. If the issue persists, consider increasing the print temperature slightly or inspecting the quality and type of filament being used.
3. Stringing or oozing: Stringy, wispy threads of filament between printed parts can be a common issue. To minimize this, reduce the print temperature, increase retraction settings, or adjust the print speed. Experimenting with these parameters can help reduce stringing and oozing during printing.
4. Layer shifting: If your prints have shifted layers or are misaligned, check to ensure that all belts and gears are properly tightened. Check for any obstructions or resistance in the movement of the printer components. Also, verify that the stepper drivers are correctly calibrated. Adjusting these mechanical settings can help resolve layer shifting issues.
5. Under-extrusion or over-extrusion: If your prints show signs of inconsistent extrusion, ensure that the nozzle is not clogged and that the filament is properly loaded. Check the extrusion multiplier or flow rate settings in your software and adjust them accordingly. Also, consider calibrating the extruder steps per millimeter to ensure accurate filament feeding.
6. Rough or uneven surface finish: If your prints have a rough or uneven surface, consider adjusting the print speed, layer height, or nozzle temperature. Lowering the print speed, decreasing the layer height, or increasing the nozzle temperature can help achieve a smoother surface finish.
7. Print artifacts or anomalies: If you notice unusual artifacts or inconsistencies in your prints, such as blobs, zits, or layer shifts, check for mechanical issues like loose belts or misaligned components. Inspect the filament for any impurities or inconsistencies that could be causing the anomalies. Adjusting print settings, such as retraction distance or temperature, can also help eliminate extrusion-related artifacts.
8. Insufficient infill or excessive material usage: If the amount of infill in your prints is not satisfactory or if you’re using an excessive amount of material, adjust the infill percentage or density settings in your slicing software. Additionally, consider adjusting the wall thickness and top/bottom layer settings to achieve the desired balance between strength and material usage.
Remember to consult your printer’s user manual and online resources for specific troubleshooting guidance tailored to your Wanhao 3D printer model. Additionally, reaching out to online communities and forums dedicated to 3D printing can provide valuable insights and assistance.
By troubleshooting these common issues and experimenting with the settings and variables, you’ll gain the knowledge and experience needed to overcome any challenges and achieve high-quality prints with your Wanhao 3D printer.
Tips and Tricks for Optimal Printing Results
To achieve the best possible results with your Wanhao 3D printer, consider implementing these tips and tricks:
1. Use high-quality filament: Opt for high-quality filament from reputable manufacturers. Inferior filament can lead to printing issues, such as clogs, inconsistent flow, or poor layer adhesion.
2. Fine-tune your settings: Take the time to experiment and adjust settings in your slicing software, such as layer height, print speed, and temperature. Make incremental changes and analyze the results to achieve the optimal printing conditions for your specific model and filament.
3. Practice good bed adhesion: Ensure that the print bed is clean and level before each print. Consider applying adhesion aids like glue stick, hairspray, or specialized bed surfaces to improve adhesion and reduce warping.
4. Optimize cooling and fan settings: Cooling is essential to prevent overheating and ensure proper layer bonding. Adjust the fan speed and cooling settings to achieve the optimal balance between cooling and print quality, especially for overhangs and intricate designs.
5. Use support structures when needed: For complex designs or overhangs, enable support structures to provide stability and prevent drooping or collapsing during printing. Remove these supports carefully after printing is complete.
6. Experiment with infill patterns: Vary the infill pattern to achieve the desired strength and material usage for your prints. Different patterns, such as grid, honeycomb, or gyroid, offer different benefits in terms of strength, flexibility, and material consumption.
7. Regularly maintain your printer: Clean the printer components, such as the print bed, nozzle, and guide rods, regularly to prevent buildup and ensure smooth operation. Lubricate moving parts as recommended by the manufacturer to reduce friction and improve overall performance.
8. Learn from others and join online communities: Engage with the 3D printing community to learn from the experiences of others. Online forums and communities provide valuable insights, troubleshooting advice, and recommendations for specific Wanhao printer models.
9. Practice patience and iterate: 3D printing is both an art and a science. Don’t be discouraged by initial failed prints or subpar results. Embrace it as a learning process and continue to refine your techniques through experimentation and iteration.
10. Keep safety in mind: Always prioritize safety when using your Wanhao 3D printer. Ensure that your workspace is well-ventilated and fire-safe. Never leave the printer unattended during operation and familiarize yourself with emergency procedures.
By implementing these tips and tricks, you’ll be able to optimize your prints and unlock the full potential of your Wanhao 3D printer. Remember, each print is an opportunity to learn and improve, so enjoy the journey of creating incredible 3D objects!
Maintenance and Cleaning of the Wanhao 3D Printer
To ensure the longevity and optimal performance of your Wanhao 3D printer, regular maintenance and cleaning are essential. Here are some key maintenance practices to keep in mind:
1. Regularly clean the print bed: After each print, carefully remove any leftover filament or debris from the print bed. This can be done using a scraper or a soft cloth. Ensure that the bed surface is clean and free from any obstructions that could affect print quality and adhesion.
2. Clean the nozzle and hotend: Depending on the frequency of printing and the materials used, filament residue can accumulate inside the nozzle and hotend. To clean them, heat the nozzle to its recommended temperature and use a soft brush or a specialized nozzle cleaning tool to remove any residual filament. Be cautious and avoid touching the hot components.
3. Check and tighten hardware: Periodically inspect all the nuts, bolts, and screws on your printer to ensure they are properly tightened. Over time, vibrations and use can cause these fasteners to loosen. A loose component can affect print quality and even lead to mechanical issues, so tightening the hardware regularly is crucial for printer stability.
4. Lubricate moving parts: Refer to your printer’s user manual for any recommended lubrication points. Applying lubricant, such as machine oil or grease, to the appropriate moving parts, such as the guide rods or linear bearings, can help reduce friction and improve the smoothness of the printer’s movements.
5. Keep the filament storage in optimal conditions: Ensure that your filament spools are stored in a cool and dry environment to prevent moisture absorption, which can negatively impact print quality. Consider using airtight filament storage containers or desiccant packs to maintain the filament’s integrity.
6. Update firmware and software: Stay up to date with the latest firmware and software updates provided by Wanhao or the specific software you use. These updates often include bug fixes, performance enhancements, and new features that can improve your printing experience. Follow the instructions provided to safely update your printer’s firmware.
7. Perform regular calibration and maintenance tasks: Calibrate the print bed level and nozzle height regularly to ensure accurate prints. Check the belts for tension and proper alignment. Regularly inspect the wiring and cables for any signs of wear or damage, and replace them if needed. Consult your printer’s user manual or online resources for specific maintenance tasks and intervals.
8. Keep your work area clean: A clean and organized workspace ensures easy access to your printer and minimizes the risk of accidents or damage. Keep the area free from dust, debris, and any potential hazards. It’s also a good practice to properly store tools, unused filament, and other accessories to keep them well-maintained.
By following these maintenance and cleaning practices, you can keep your Wanhao 3D printer in optimal condition, prolong its lifespan, and minimize the risk of unexpected issues during printing. Regular maintenance ensures that your printer consistently delivers high-quality prints and maintains reliable performance over time.
Conclusion
Congratulations on completing the setup and learning about the various aspects of your Wanhao 3D printer! You’ve gained the knowledge and skills to confidently embark on your 3D printing journey. By following the steps outlined in this guide, you should be well-prepared to create amazing 3D prints with your Wanhao printer.
Remember that 3D printing is a continuous learning process. As you gain experience, you’ll discover new techniques, tips, and tricks to further enhance your prints. Don’t be discouraged by initial challenges or setbacks; instead, see them as opportunities to learn and improve.
Continue to explore the capabilities of your Wanhao 3D printer and experiment with different materials, settings, and designs. Engage with online communities and forums dedicated to 3D printing to learn from others and share your experiences. These communities are an excellent resource for troubleshooting, design ideas, and discovering new possibilities.
Maintaining your printer and regularly calibrating it will ensure consistent and reliable performance. Stay updated with firmware and software releases to take advantage of new features and improvements. By practicing good maintenance and cleaning habits, you’ll keep your printer in top shape and extend its lifespan.
As you gain proficiency, don’t forget to share your 3D prints with others. Display them proudly or give them as unique and personalized gifts. The joy and satisfaction of turning digital designs into tangible objects is truly rewarding.
Thank you for choosing the Wanhao 3D printer and for allowing this guide to be part of your 3D printing journey. We hope it has provided you with valuable insights and guidance to make the most of your printing experience. Embrace your creativity, explore new possibilities, and enjoy the fascinating world of 3D printing!