Introduction
Welcome to the wonderful world of robot vacuums – the futuristic solution to keeping your floors clean with minimal effort. Gone are the days of lugging around heavy vacuum cleaners or spending hours pushing a broom. Now, you can sit back, relax, and let a robot do the work for you.
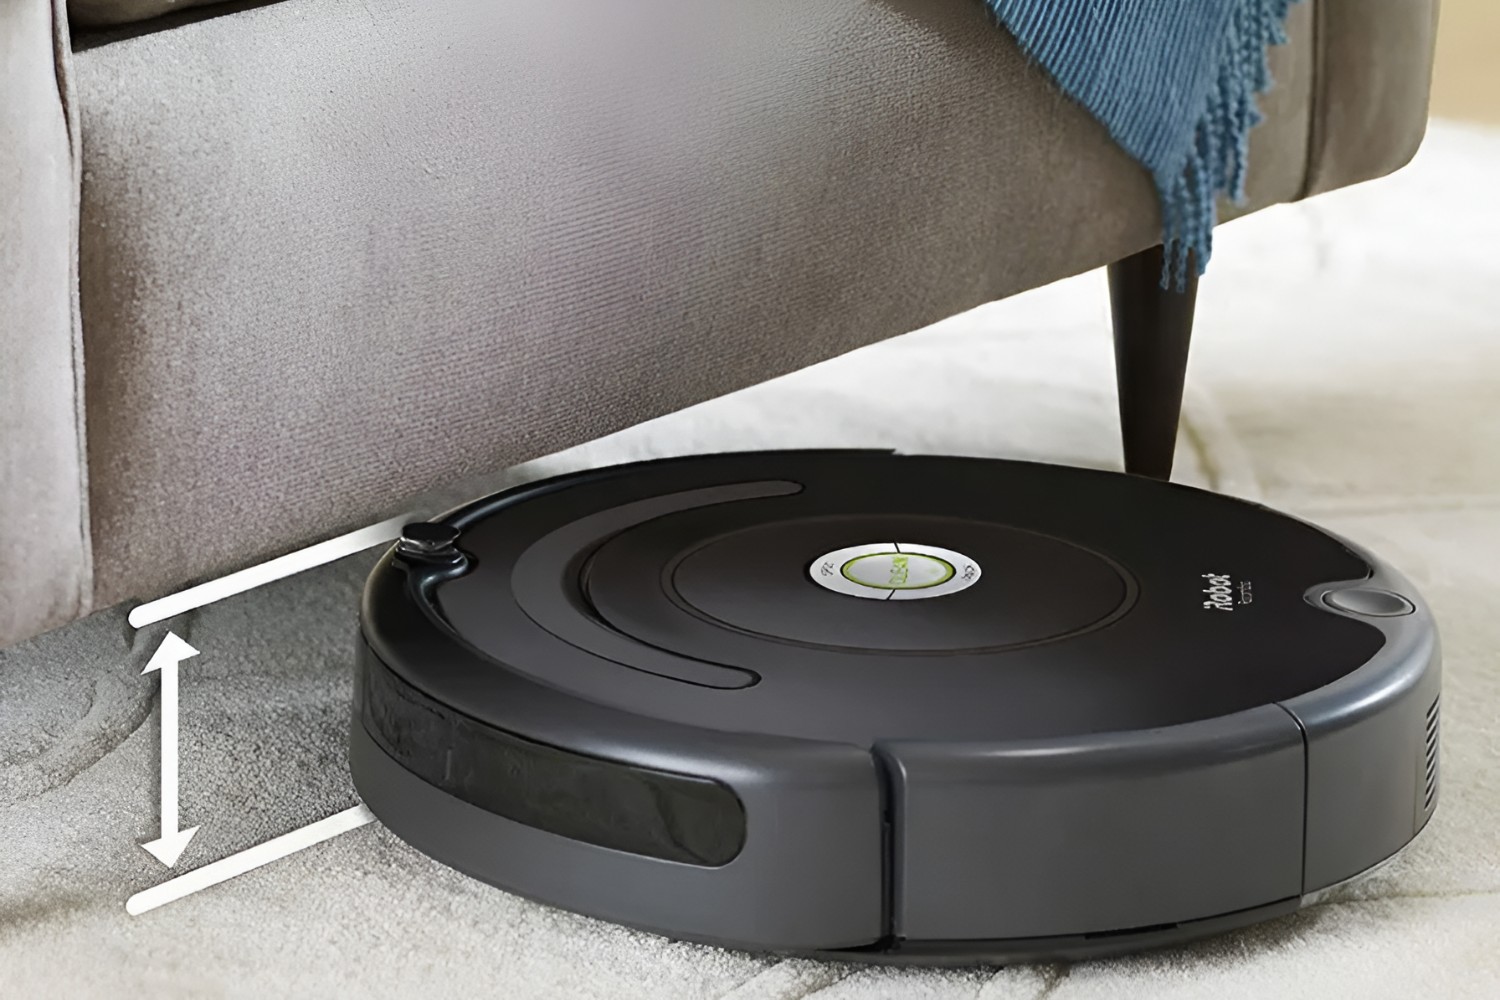
Robot vacuums have become increasingly popular in recent years, thanks to their convenience and efficiency. These compact, intelligent devices use sensors to navigate and clean your floors autonomously. They can easily maneuver around furniture and obstacles, reaching those hard-to-reach areas that often get neglected.
But before you embark on your robot vacuum journey, it’s important to understand the key considerations and steps involved in setting up your new cleaning companion. In this guide, we’ll walk you through the process, from choosing the right robot vacuum for your needs to preparing your home and configuring the cleaning schedule.
Whether you’re a busy professional looking to save time on cleaning or simply want to embrace the latest technology, setting up a robot vacuum can revolutionize your cleaning routine. So, let’s dive in and discover how to set up your very own robot vacuum.
Choosing the Right Robot Vacuum
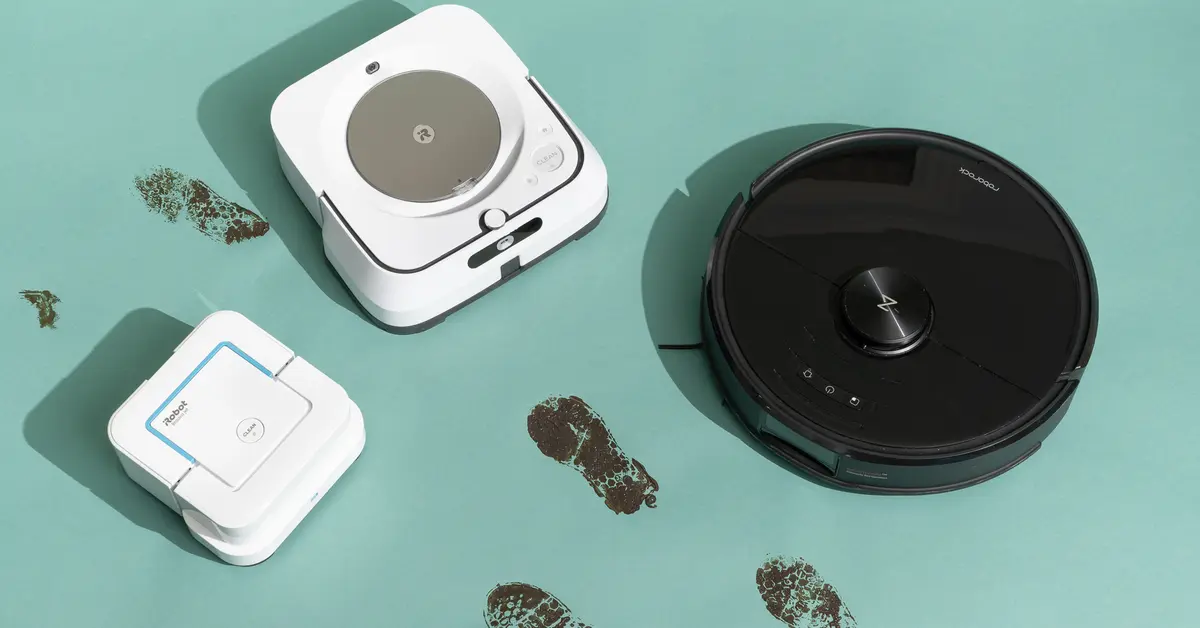
With so many robot vacuum models on the market, it can be overwhelming to choose the right one for your specific needs. Here are some key factors to consider when making your decision:
- Floor Type: Different robot vacuums perform better on specific floor types. If you have mainly carpeted floors, look for a model with strong suction and brush agitation. For hard floors, prioritize models with effective edge-cleaning brushes.
- Battery Life: Battery life determines how long the robot vacuum can clean before needing to recharge. Consider the size of your home and how long the robot vacuum can clean on a single charge. Look for models with a battery life of at least 90 minutes.
- Navigation and Mapping: Advanced robot vacuums use mapping technology and sensors to navigate efficiently and avoid obstacles. Look for models with mapping features that allow you to customize cleaning zones and avoid specific areas.
- Dustbin Capacity: The size of the dustbin determines how often you need to empty it. If you have a large home or more frequent cleaning needs, opt for a model with a larger dustbin capacity.
- Smart Connectivity: Consider whether you want your robot vacuum to be compatible with voice assistants or smartphone apps. Smart connectivity allows you to control and schedule cleaning sessions remotely, even when you’re not at home.
- Reviews and Ratings: Read customer reviews and ratings to gain insights into the performance and reliability of various robot vacuum models. Look for a model with positive reviews and a good track record.
By considering these factors, you can narrow down your choices and find the robot vacuum that best suits your needs and budget. Remember, investing in a high-quality robot vacuum now will save you time and effort in the long run.
Preparing Your Home for the Robot Vacuum
Before you unleash your robot vacuum to tidy up your home, there are a few steps you should take to ensure its optimal performance and safety. Here’s how to prepare your home for the robot vacuum:
- Remove Clutter: Clear any clutter or small objects from the floor, such as shoes, toys, or loose cables. This will help prevent the robot vacuum from getting stuck or damaging any items in its path.
- Secure Loose Rugs and Cables: Secure any loose rugs or wires to prevent the robot vacuum from getting tangled and potentially causing accidents. Use rug grippers or cable clips to keep them in place.
- Create Virtual Barriers: If there are areas in your home that you want the robot vacuum to avoid, set up virtual barriers. These can be physical barriers like magnetic strips or virtual barriers using smartphone apps to create no-go zones.
- Elevate Power Cords: Lift any low-hanging power cords or cables off the floor or secure them against the walls to prevent the robot vacuum from getting entangled or damaging them.
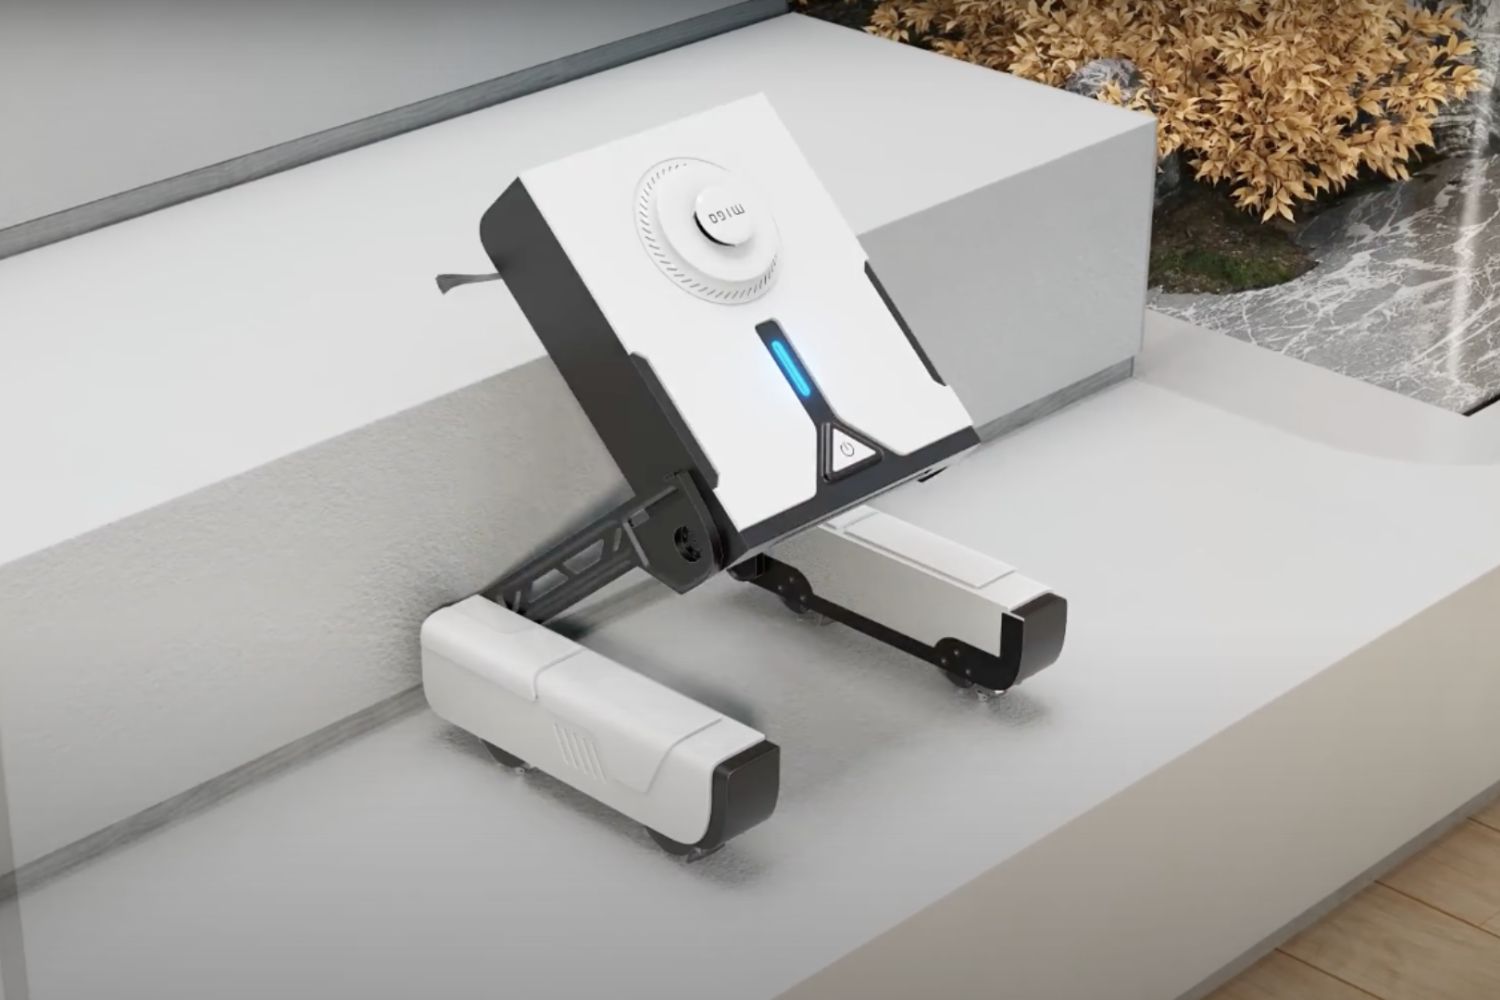
- Block Off Stairs and Drop-offs: If you have stairs or areas with significant drops in your home, it’s essential to block them off or use sensors to prevent the robot vacuum from tumbling down. Safety should always be a priority.
- Clear Obstacles: Remove any obstacles that may obstruct the robot vacuum’s path, such as low furniture or objects on the floor. The more open the space, the easier it will be for the robot vacuum to maneuver and clean effectively.
- Keep Doors Open: Make sure to keep doors open between rooms that you want the robot vacuum to clean. This will allow the vacuum to access all areas without any barriers.
- Close Off Off-Limit Areas: If there are areas in your home that you do not want the robot vacuum to enter, such as a home office or storage room, make sure to close the doors or use physical barriers to prevent access.
By following these steps, you can create a safe and obstacle-free environment for your robot vacuum to efficiently clean your home. Remember, a little preparation goes a long way in ensuring the smooth operation of your robot vacuum.
Charging and Setting up the Robot Vacuum
Once you’ve prepared your home, it’s time to charge and set up your robot vacuum. Here’s a step-by-step guide to get you started:
- Choose the Charging Station Location: Select a central location with access to a power outlet for the charging station. Make sure there is enough space around it for the robot vacuum to dock and charge.
- Connect the Charging Station: Plug in the charging station and ensure it is securely connected to the power source. The robot vacuum will return to the charging station automatically when it needs to recharge.
- Charge the Robot Vacuum: Place the robot vacuum on the charging station and let it charge fully before the initial use. Refer to the user manual for the recommended charging time.
- Set the Date and Time: Most robot vacuums have an option to set the current date and time. This is important for scheduling cleaning sessions accurately.
- Configure Wi-Fi Connectivity (if applicable): For robot vacuums with Wi-Fi connectivity, follow the manufacturer’s instructions to connect the vacuum to your home Wi-Fi network. This will allow you to control the vacuum remotely and access additional features.
- Download the App (if applicable): If your robot vacuum has a dedicated smartphone app, download and install it on your mobile device. The app will provide you with advanced control options and allow you to set up cleaning schedules and monitor the vacuum’s progress.
- Explore and Customize the Settings: Once the robot vacuum is charged and connected, familiarize yourself with the settings and options available. Adjust the cleaning modes, tweak the brush and suction settings, and explore any additional features specific to your vacuum model.
- Test Run: Before setting up a cleaning schedule, perform a test run in an open area to ensure the robot vacuum is functioning correctly and safely navigating around obstacles.
- Set Up Cleaning Schedule: If desired, use the app or control panel to schedule regular cleaning sessions that suit your preferences. Set specific days, times, and cleaning modes according to your needs. This will allow the robot vacuum to automatically clean your floors without any manual intervention.
By following these steps, you can successfully charge and set up your robot vacuum, ensuring it is ready to tackle the cleaning tasks ahead. Get ready to sit back, relax, and enjoy a cleaner home without lifting a finger!
Configuring the Cleaning Schedule
One of the greatest features of robot vacuums is their ability to clean on a schedule, allowing you to maintain a tidy home without any manual effort. Here’s how to configure the cleaning schedule for your robot vacuum:
- Assess Your Cleaning Needs: Determine how frequently you want your robot vacuum to clean based on factors like the size of your home, the number of occupants, and the level of foot traffic. If you have pets or allergies, you may need more frequent cleaning sessions.
- Select the Cleaning Days: Decide which days of the week you want the robot vacuum to activate. You can opt for daily cleaning or select specific days according to your preferences.
- Choose the Cleaning Time: Set a suitable starting time for the cleaning sessions. Consider the times when you’re usually away from home or less likely to be disturbed by the vacuum’s noise.
- Customize the Cleaning Zones: If your robot vacuum supports it, take advantage of the ability to define specific cleaning zones. This way, you can prioritize or exclude certain areas of your home, such as high-traffic zones or rooms with delicate objects.
- Adjust Cleaning Modes: Experiment with the different cleaning modes available on your robot vacuum. Some models offer options like Turbo mode for thorough cleaning or Quiet mode for less noise. Choose the mode that suits your needs and preferences.
- Enable Auto-Recharge and Resume: Check if your robot vacuum supports the auto-recharge and resume feature. This allows the vacuum to return to the charging station when the battery is low and automatically resume cleaning from where it left off once recharged.
- Consider App Integration: If your robot vacuum has a smartphone app, explore the scheduling options it offers. Some apps allow you to set up multiple cleaning schedules for different days, adjust cleaning power, and monitor the vacuum’s progress in real-time.
- Monitor and Adjust as Needed: Keep an eye on how well your robot vacuum is performing and adjust the schedule if necessary. If you notice certain areas aren’t getting adequately cleaned or the schedule doesn’t align with your needs, make adjustments to optimize the cleaning routine.
By configuring the cleaning schedule to fit your lifestyle and preferences, you can enjoy a consistently clean home without having to lift a finger. Sit back and let your robot vacuum take care of the hard work for you.
Understanding the Different Cleaning Modes
Robot vacuums come equipped with various cleaning modes that cater to different cleaning needs and surface types. Understanding these modes will help you optimize your robot vacuum’s performance. Here are some common cleaning modes you may come across:
- Auto Mode: This is the default mode for most robot vacuums. In Auto mode, the vacuum cleans your floors using a combination of random patterns and intelligent navigation. It adjusts the cleaning power and duration based on the floor type and dirt level.
- Turbo Mode: Turbo mode is designed for a deeper and more intensive clean. In this mode, the vacuum increases its suction power to pick up stubborn dirt, pet hair, and debris. Turbo mode is ideal for high-traffic areas or heavily soiled floors.
- Quiet Mode: If you’re looking to minimize noise while the robot vacuum cleans, Quiet mode is the go-to option. This mode reduces the suction power and operates at a lower decibel level, making it suitable for use during quiet hours or when you’re working or sleeping.
- Edge Mode: Edge mode focuses on cleaning along walls, corners, and edges. The vacuum follows a specific path to ensure thorough cleaning in these hard-to-reach areas. Use this mode if you want extra attention to detail when cleaning baseboards or edges.
- Spot Cleaning Mode: Spot cleaning mode is ideal for localized areas that require extra attention. By activating this mode, the robot vacuum intensively cleans a specific spot, using circular or spiral patterns. It’s useful for removing spills or concentrated debris.
- Virtual Wall Mode: Some robot vacuums offer a virtual wall mode that creates a barrier using infrared or magnetic signals. You can use this mode to restrict the vacuum’s access to certain areas or rooms. It’s useful for creating no-go zones or protecting delicate objects.
- Mop Mode: While not all robot vacuums have this feature, some models come with a mop attachment or mopping mode. In this mode, the vacuum dampens and wipes the floor, providing a light mopping effect. It’s suitable for hard floors but is not a replacement for traditional mopping.
Take the time to familiarize yourself with the cleaning modes available on your robot vacuum and experiment with them to find the best settings for different cleaning scenarios. Whether you need a quick spot clean, a thorough deep clean, or a quiet operation during certain times, understanding the various modes will help you get the most out of your robot vacuum.
Troubleshooting Common Issues
While robot vacuums are generally reliable and efficient, occasional issues may arise. Here are some common problems you may encounter and how to troubleshoot them:
- Robot Vacuum Gets Stuck: If your robot vacuum frequently gets stuck on furniture or obstacles, check the area for potential hazards. Clear away any wires, cords, or objects that may obstruct the vacuum’s path. Use physical barriers or virtual walls to create no-go zones if needed.
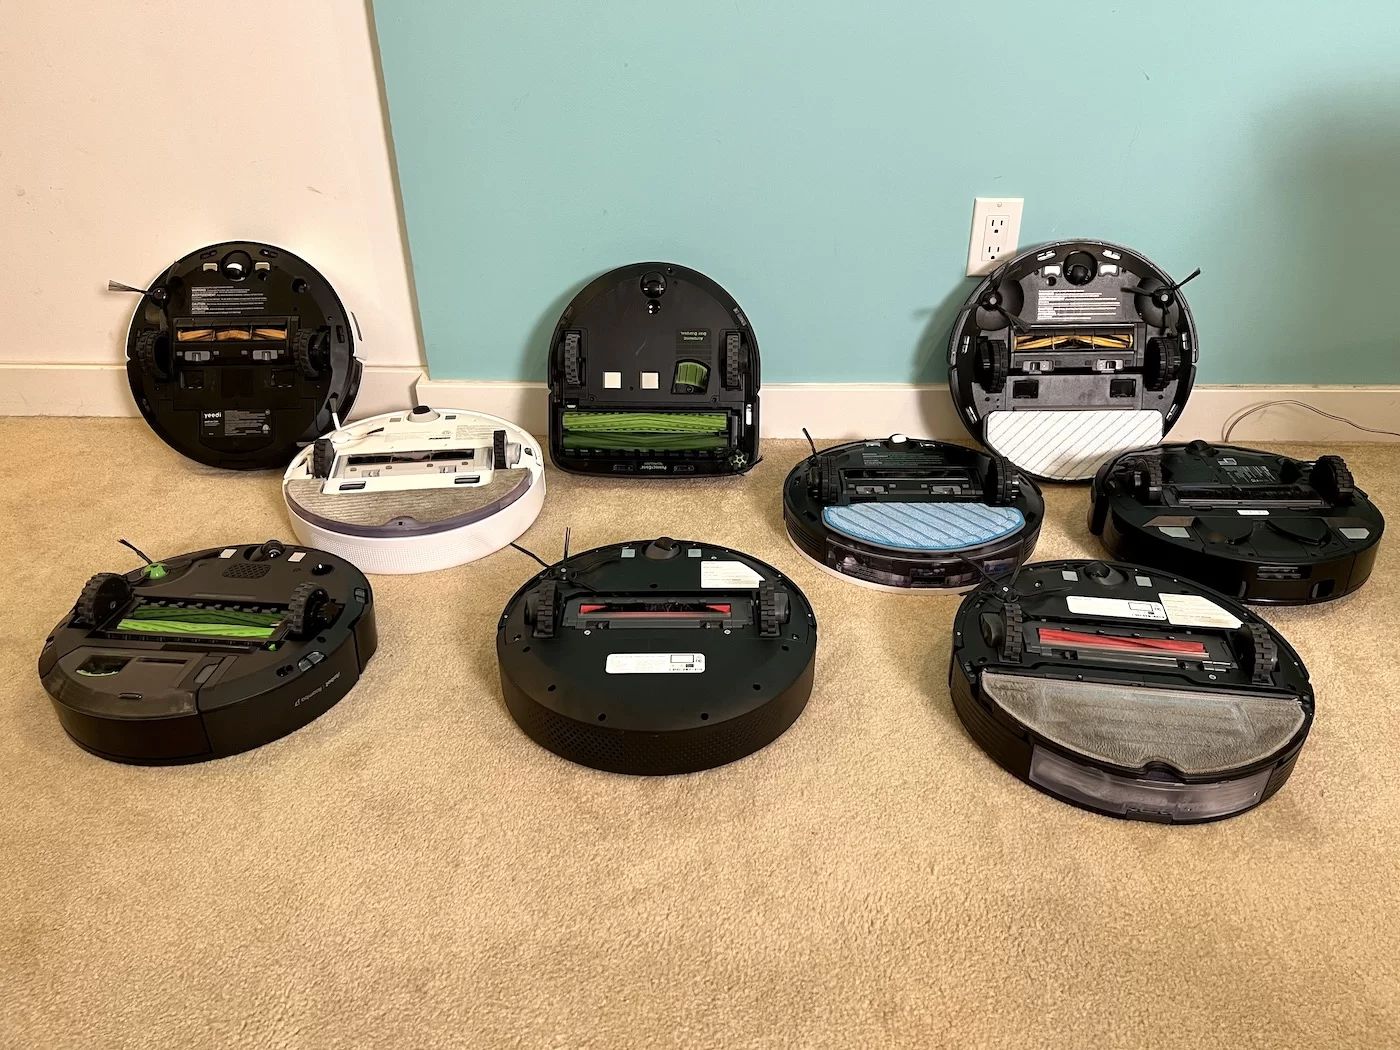
- Poor Cleaning Performance: If the robot vacuum is not picking up dirt as effectively as before, check and clean the brushes, filters, and sensors. Hair, debris, and dust can accumulate over time, affecting the vacuum’s performance. Regularly maintain these components as per the manufacturer’s instructions.
- Random Cleaning Patterns: If the robot vacuum appears to be cleaning in a disorganized or random pattern, it could be due to dirty or obstructed sensors. Clean the sensors and ensure they are free from dust or debris. If the issue persists, check if there are any firmware or software updates available for your model.
- Battery Drains Quickly: If the battery life of the robot vacuum seems shorter than usual, there may be a few causes. First, check if the charging contacts on the vacuum and the charging station are clean and well-connected. If the battery is old or worn out, it may need replacement. Additionally, reducing the frequency or duration of cleaning sessions can help conserve battery life.
- Wi-Fi Connectivity Issues: If your robot vacuum has Wi-Fi connectivity but is unable to connect or drops the connection frequently, check the proximity and signal strength of your Wi-Fi router. Ensure the vacuum is within range and try restarting both your vacuum and router. If the issue persists, contact customer support for further assistance.
- Falling or Tumbling Down Stairs: Ensure that any areas with stairs or significant drops are appropriately blocked off using physical barriers or sensors. If the vacuum is still experiencing issues, check if the cliff sensors are clean and functioning correctly. If necessary, recalibrate or replace the sensors as per the manufacturer’s instructions.
- Navigation Errors: If your robot vacuum consistently has difficulty navigating or seems confused, it may be due to outdated maps or firmware. Check for software updates specific to your model and install them if available. Additionally, ensure that the robot vacuum’s sensors are clean and unobstructed.
- Unresponsive Controls: If the robot vacuum does not respond to commands from the control panel or app, try resetting the vacuum or restarting the app. Make sure the device you’re using to control the vacuum has a stable internet connection. If the problem continues, reach out to customer support for further troubleshooting assistance.
If you encounter any issues with your robot vacuum, consult the user manual or contact customer support for specific troubleshooting steps. With the right precautions and regular maintenance, you can resolve most common issues and keep your robot vacuum in optimal working condition.
Tips for Maximizing the Effectiveness of Your Robot Vacuum
To get the most out of your robot vacuum and ensure that it performs at its best, consider implementing the following tips:
- Clear the Floor: Before each cleaning session, remove any obstacles or loose items from the floor to prevent the robot vacuum from getting stuck or damaging objects.
- Regular Maintenance: Clean and maintain the brushes, filters, and sensors of your robot vacuum as recommended by the manufacturer. This will optimize its cleaning performance and ensure longevity.
- Optimize Cleaning Schedules: Experiment with different cleaning schedules to find the frequency and timing that works best for your lifestyle and cleaning needs.
- Keep Doors Open: Ensure that doors between rooms are open to allow the robot vacuum to move freely and clean more effectively.
- Set Up Virtual Barriers: Take advantage of virtual barriers or no-go zones to block off areas where you don’t want the robot vacuum to go. This can protect delicate objects or prevent the vacuum from accessing certain rooms.
- Elevate Loose Rugs: Secure loose rugs or use rug grippers to prevent the robot vacuum from getting tangled or damaging the rugs during cleaning.
- Regularly Empty the Dustbin: Empty the dustbin after each cleaning session to maintain optimal suction power and prevent debris from spilling back onto the floor.
- Supervise Initial Runs: During the first few cleaning sessions, keep an eye on the robot vacuum to ensure it navigates successfully and doesn’t encounter any unexpected issues.
- Optimize Placement of Charging Station: Position the charging station in a central location for easy access and to provide a clear path for the robot vacuum to dock and recharge.
- Remove Excessive Clutter: Minimize the amount of clutter on the floor to improve the robot vacuum’s efficiency and prevent it from getting stuck or causing damage.
- Stay Updated: Check for firmware or software updates for your robot vacuum periodically and install them to benefit from any performance improvements or new features.
By following these tips, you can maximize the effectiveness of your robot vacuum and ensure that it consistently delivers a thorough and efficient cleaning performance. Sit back, relax, and let your robot vacuum take care of your floors, while you enjoy a clean and tidy living space with minimal effort.
Conclusion
Congratulations on setting up your robot vacuum! By selecting the right model, preparing your home, and configuring the cleaning schedule, you have taken the first steps towards enjoying a cleaner and more convenient lifestyle. Understanding the different cleaning modes, troubleshooting common issues, and implementing effective tips will further enhance the performance and longevity of your robot vacuum.
With your robot vacuum in action, you can now reclaim valuable time and energy that would have been spent on manual cleaning. Sit back, relax, and let your robot vacuum navigate through your home, diligently sweeping away dust, dirt, and debris. You’ll be amazed at the efficiency and thoroughness with which it cleans, reaching those hard-to-reach areas and keeping your floors in pristine condition.
Remember to occasionally check and maintain your robot vacuum, ensuring it remains in top-notch condition. Clean the brushes and filters, empty the dustbin, and address any troubleshooting issues promptly. This will guarantee that your robot vacuum continues to perform optimally and delivers long-lasting results.
Now that you have mastered the art of setting up and maximizing the effectiveness of your robot vacuum, it’s time to sit back, relax, and enjoy the benefits of a cleaner and more convenient home. Say goodbye to the days of traditional vacuuming and embrace the future of cleaning technology.