Introduction
Welcome to our guide on how to set up the ASUS VG278Q gaming monitor! Whether you’re a seasoned gamer or just starting out, investing in a high-quality gaming monitor can greatly enhance your gaming experience. The ASUS VG278Q is a popular choice among gamers for its impressive features, including a high refresh rate, fast response time, and vibrant display.
In this article, we will walk you through the step-by-step process of setting up your ASUS VG278Q gaming monitor. From unboxing the monitor to adjusting the display settings, we’ll cover everything you need to know to get your monitor up and running smoothly. So let’s dive in and get started!
Before we begin, it’s important to note that this guide assumes you already have a computer or gaming console that you will be connecting the monitor to. Additionally, make sure you have all the necessary cables and accessories that come with the monitor, such as the power cable, HDMI or DisplayPort cable, and any other relevant connectors.
Now, let’s move on to the first step of this setup process – unboxing the ASUS VG278Q gaming monitor. This step may seem simple, but it’s essential to handle the monitor properly to avoid any potential damage. So grab your monitor and let’s get started!
Step 1: Unboxing the ASUS VG278Q Gaming Monitor
Before you can set up your ASUS VG278Q gaming monitor, you’ll need to unbox it first. This step is crucial as it ensures that the monitor is intact and ready for use. Follow these simple steps to unbox your monitor:
- Locate the box: The ASUS VG278Q gaming monitor comes in a sturdy package designed to protect it during shipping. Look for the box with the ASUS logo and monitor model on it.
- Open the box: Carefully remove any packaging tape or seals on the box. Gently lift the flaps to reveal the contents inside.
- Remove protective covering: Inside the box, you’ll find the ASUS VG278Q gaming monitor wrapped in protective foam or plastic. Carefully remove the covering to expose the monitor.
- Inspect for any damage: Before proceeding, take a moment to visually inspect the monitor for any signs of damage. Look for cracks, dents, or any other abnormalities that may have occurred during transportation.
- Check the contents: Along with the monitor, the box should contain additional items such as the monitor stand, cables, and accessories. Ensure that all the necessary components are present and in good condition.
By following these steps, you can ensure that your ASUS VG278Q gaming monitor is unboxed safely and without any damage. It’s important to handle the monitor with care throughout this process to avoid any accidental mishaps.
Once you’ve successfully unboxed your monitor, it’s time to move on to the next step – connecting the monitor to your computer or gaming console. We’ll cover this in detail in the next section, so let’s proceed!
Step 2: Connecting the Monitor to Your Computer
Now that you have successfully unboxed your ASUS VG278Q gaming monitor, it’s time to connect it to your computer or gaming console. Follow these steps to ensure a proper connection:
- Identify the ports: Look for the ports on both the monitor and your computer or gaming console. The ASUS VG278Q monitor usually comes with multiple input options such as HDMI, DisplayPort, and DVI. Choose the appropriate port based on the available connections on your device.
- Connect the cable: Once you have identified the port, take the corresponding cable (HDMI, DisplayPort, or DVI) and plug one end into the corresponding port on the back of the monitor. Then, connect the other end of the cable to the matching port on your computer or gaming console.
- Secure the connection: Ensure that the cable is securely plugged into both the monitor and your device. Give it a gentle tug to make sure it doesn’t come loose.
- Power on the monitor: Plug the power cable into the designated port on the monitor and connect the other end to a power outlet or surge protector.
- Turn on your computer or gaming console: Once the connections are in place, power on your computer or gaming console to establish a connection with the monitor.
After following these steps, your ASUS VG278Q gaming monitor should now be successfully connected to your computer or gaming console. However, depending on your device’s settings, you may need to adjust the display settings to ensure optimal performance and visual quality. We’ll cover this in the next step, so let’s proceed!
Step 3: Adjusting the Monitor Stand
Now that your ASUS VG278Q gaming monitor is connected to your computer or gaming console, it’s time to adjust the monitor stand for the perfect viewing angle. Follow these steps to optimize your monitor’s positioning:
- Stabilize the base: Ensure that the monitor stand’s base is positioned on a stable surface, such as a desk or table. This will prevent any wobbling or instability while making adjustments.
- Height adjustment: Most ASUS VG278Q monitors come with a height adjustment feature. To adjust the height, locate the height adjustment mechanism on the stand and gently lift or lower the monitor to your desired viewing level. Make sure it’s at a comfortable eye level to avoid straining your neck and eyes.
- Tilt adjustment: The ASUS VG278Q monitor also allows you to tilt the screen up or down. Locate the tilt adjustment mechanism and tilt the monitor to achieve the optimal viewing angle. Tilting the monitor slightly backward prevents neck strain, while tilting it slightly forward can help reduce glare from surrounding lights.
- Swivel and pivot adjustment (optional): Depending on the model, some ASUS VG278Q monitors offer swivel and pivot adjustment for added flexibility. If your monitor has these features, you can adjust the screen horizontally (swivel) or rotate it vertically (pivot) to suit your preference.
- Secure the adjustments: Once you’ve set the monitor to your desired height, tilt, swivel, and/or pivot, make sure to tighten any adjustment knobs or screws to secure the changes. This will prevent the monitor from moving unintentionally during use.
By following these steps, you can ensure that your ASUS VG278Q gaming monitor is properly adjusted to provide the ideal viewing experience. Remember, finding the right position is crucial for comfortable gaming sessions and minimizing any potential strain on your body.
With the monitor stand adjusted to your liking, you’re ready to move on to the next step – powering on the monitor and accessing the on-screen display menu. We’ll cover this in detail in the upcoming section, so let’s proceed!
Step 4: Powering On the Monitor
With your ASUS VG278Q gaming monitor connected and the stand adjusted to your liking, it’s time to power on the monitor and prepare it for use. Follow these simple steps to power on your monitor:
- Locate the power button: The power button is usually located on the front or side of the ASUS VG278Q monitor. Look for a button with a power symbol or an LED indicator.
- Press the power button: Once you’ve located the power button, press it gently to turn on the monitor. You should see the screen light up and the ASUS logo appear.
- Wait for the monitor to boot up: The monitor may take a few seconds to fully boot up and initialize. During this time, you may see the ASUS logo or a loading screen.
- Check for any error messages: If there are any issues with the monitor or connections, you may see error messages on the screen. If this happens, double-check your connections and ensure they are securely in place.
- Adjust brightness (optional): Once the monitor has successfully powered on, you may want to adjust the brightness level to your preference. Look for dedicated brightness buttons or navigate to the monitor’s on-screen display menu, which we’ll cover in the next step.
By following these steps, you can easily power on your ASUS VG278Q gaming monitor and get it ready for use. Make sure to give it enough time to boot up and check for any error messages or unusual behavior that may require troubleshooting.
Now that the monitor is powered on, it’s time to access the on-screen display menu and make any necessary adjustments to optimize your gaming or viewing experience. We’ll cover this in detail in the next step, so let’s proceed!
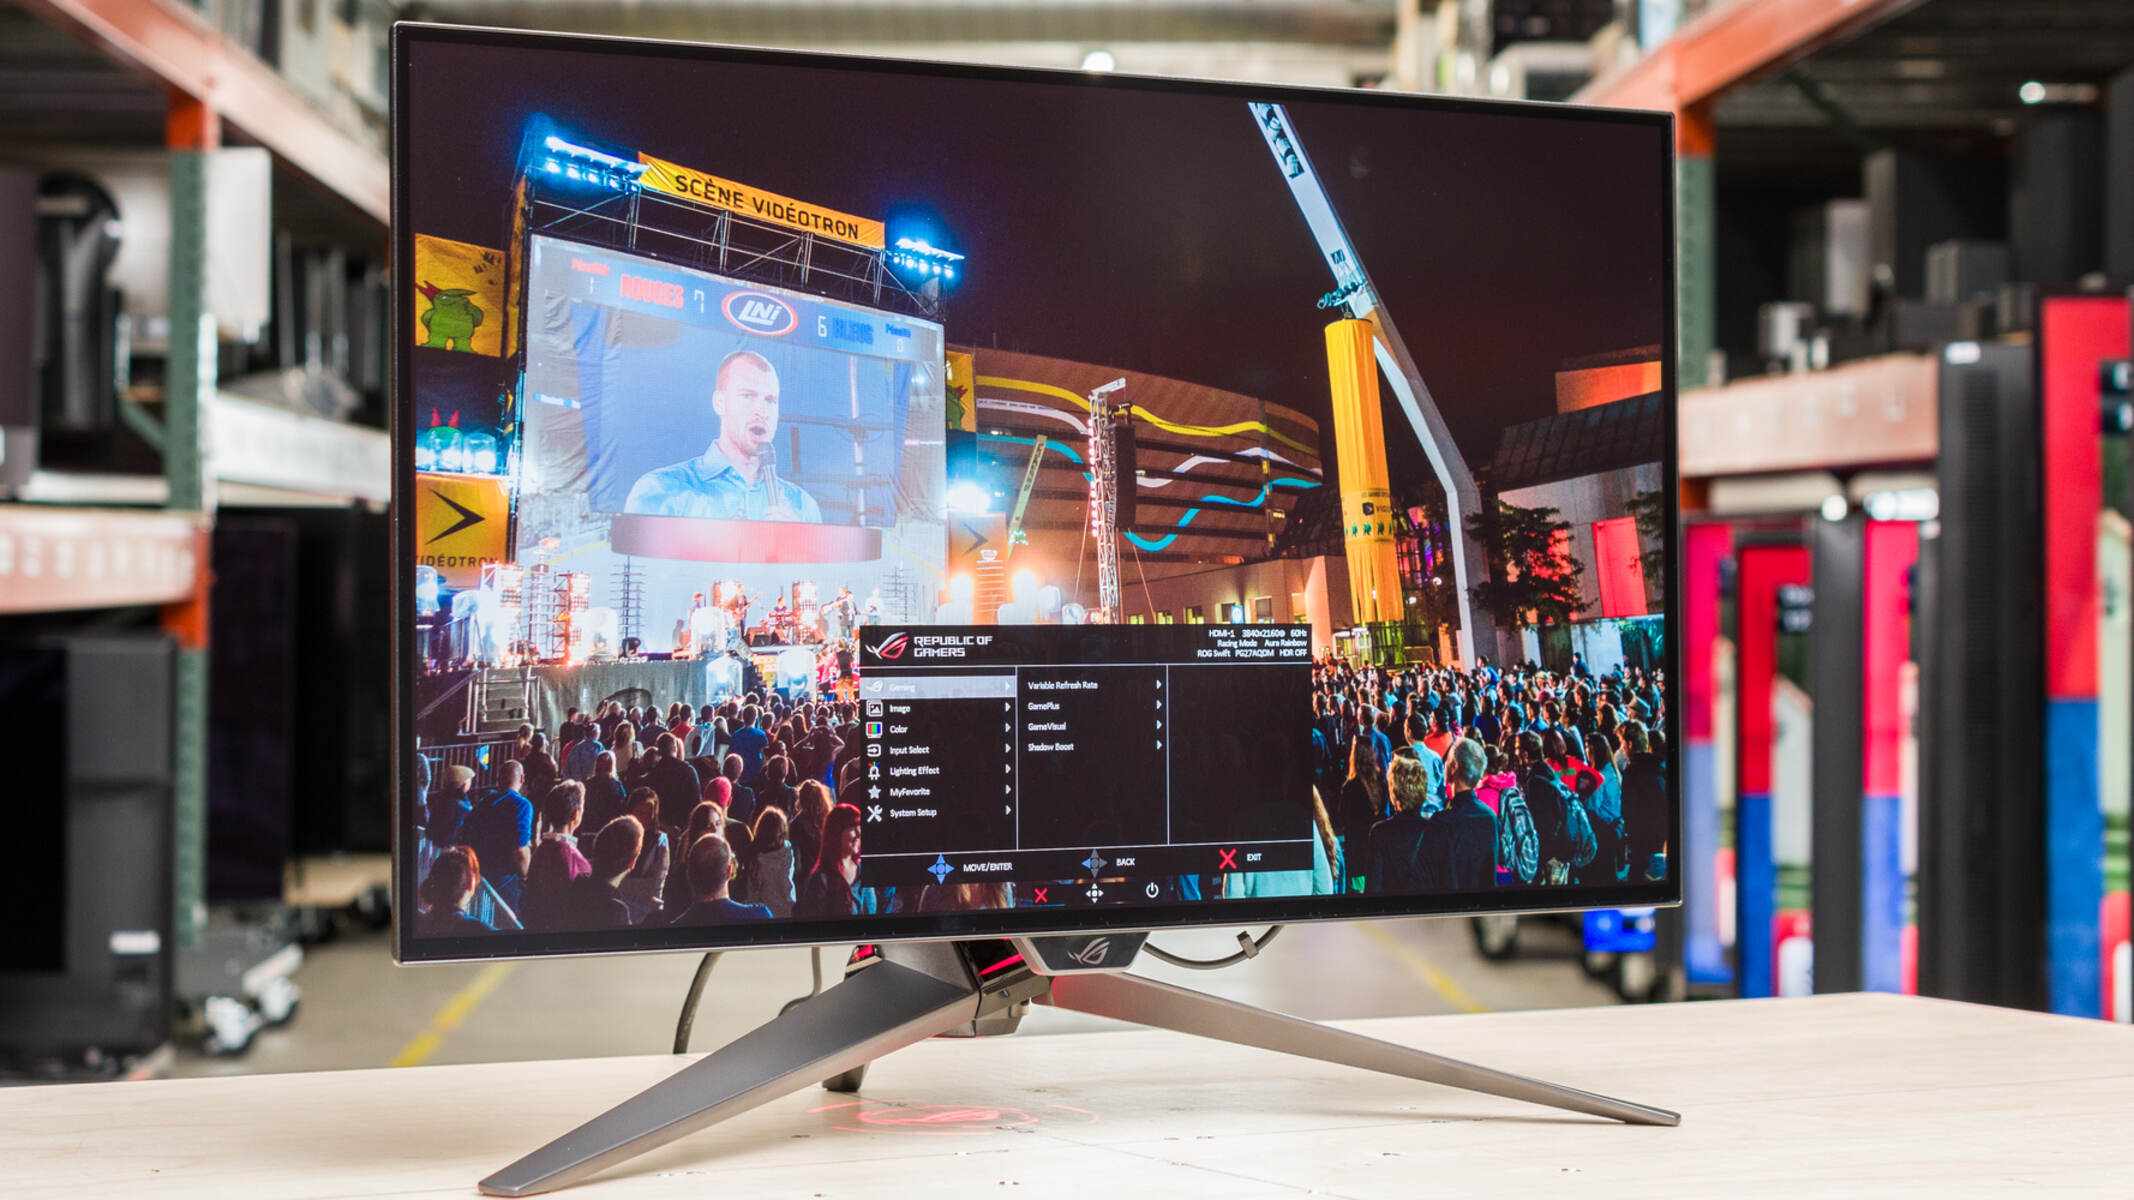
Step 5: Accessing the On-Screen Display Menu
Once your ASUS VG278Q gaming monitor is powered on, you can access the on-screen display (OSD) menu to make various adjustments and customize your viewing experience. Follow these steps to access the OSD menu:
- Locate the OSD buttons: The OSD buttons are typically located on the front or bottom bezel of the monitor. They are labeled with icons or symbols to indicate their functions.
- Press the Menu button: Look for the button labeled “Menu” and press it to enter the OSD menu. This will display the menu options on the screen.
- Navigate the OSD menu: Use the navigation buttons (often labeled as Up, Down, Left, and Right) to navigate through the OSD menu options. Press the corresponding buttons to move up or down the menu and select the desired option.
- Adjust the settings: Once you have selected a menu option, you can further navigate through its submenus or settings using the navigation buttons. Use the Up and Down buttons to adjust the values or settings, and the Enter or OK button to confirm your selection.
- Exit the OSD menu: When you have finished adjusting the settings, navigate to the Exit or Close option in the OSD menu and press the corresponding button to exit the OSD menu. This will save your settings and return you to the normal display mode.
By following these steps, you can easily access and navigate the OSD menu of your ASUS VG278Q gaming monitor. The OSD menu provides options to adjust various settings, including brightness, contrast, color settings, gaming modes, and more. Experiment with the available options to customize your monitor according to your preferences and optimize your gaming or viewing experience.
Now that you know how to access the OSD menu, let’s move on to the next step – adjusting the display settings. We’ll cover this in detail in the upcoming section, so let’s proceed!
Step 6: Adjusting Display Settings
After accessing the on-screen display (OSD) menu of your ASUS VG278Q gaming monitor, you can now adjust various display settings to optimize your visual experience. Follow these steps to adjust the display settings:
- Access the OSD menu: Refer to the previous step to access the OSD menu using the designated buttons on your monitor.
- Navigate to the Display Settings: Within the OSD menu, look for the Display or Image settings option. Use the navigation buttons to select it.
- Adjust Brightness and Contrast: The Display settings typically include options to adjust the brightness and contrast levels. Increase or decrease these settings to achieve the desired display intensity and contrast ratio.
- Tweak Color Settings: Within the Display settings, you’ll find options to adjust color settings such as color temperature, saturation, and hue. Experiment with these settings to achieve the color balance that suits your preference.
- Enable GameVisual Modes (optional): The VG278Q offers different GameVisual modes, which are preset display settings optimized for specific gaming genres or content types. Navigate to the GameVisual mode option within the OSD menu and select the mode that best enhances your gaming experience.
- Apply Other Display Enhancements (optional): Depending on your personal preferences, you may want to explore other display enhancements such as Adaptive-Sync, blue light filter, or low blue light modes. These features can help reduce eyestrain and enhance visual clarity.
- Save and Exit: Once you’ve adjusted the display settings to your liking, navigate to the Exit or Close option in the OSD menu and save the changes. This will apply your settings and exit the OSD menu.
By following these steps, you can fine-tune the display settings of your ASUS VG278Q gaming monitor to achieve optimal visuals. Keep in mind that the ideal settings may vary depending on factors like lighting conditions, personal preferences, and the specific content you’re viewing or gaming.
Now that you have adjusted the display settings, you can proceed to the next step – customizing picture and color settings to further enhance your viewing experience. We’ll cover this in detail in the upcoming section, so let’s continue!
Step 7: Customizing Picture and Color Settings
Once you’ve adjusted the general display settings of your ASUS VG278Q gaming monitor, it’s time to customize the picture and color settings to further enhance your visual experience. Follow these steps to customize these settings:
- Access the OSD menu: Refer to the previous steps to access the on-screen display (OSD) menu using the designated buttons on your monitor.
- Navigate to Picture or Image Settings: Within the OSD menu, locate the Picture or Image settings option. Use the navigation buttons to select it.
- Adjust Picture Mode: The Picture or Image settings menu usually offers different picture modes, such as Standard, Vivid, Cinema, or User. Select the mode that suits your preference or the content you’re viewing.
- Fine-tune Picture Settings: Within the Picture settings, you’ll find options to adjust brightness, contrast, sharpness, and other parameters. Experiment with these settings to achieve the desired level of detail and clarity.
- Customize Color Settings: Look for color-related options within the OSD menu, such as color temperature, saturation, and hue. Adjust these settings to achieve accurate and vibrant colors that satisfy your visual preferences.
- Enable Shadow Boost (optional): The VG278Q monitor offers Shadow Boost, a feature that enhances visibility in dark areas. If you’re experiencing difficulty seeing details in dark scenes, navigate to the Shadow Boost setting and enable it.
- Save and Exit: Once you’ve customized the picture and color settings to your liking, navigate to the Exit or Close option in the OSD menu and save the changes. This will apply your custom settings and exit the OSD menu.
By following these steps, you can further enhance the picture quality and color accuracy of your ASUS VG278Q gaming monitor, ensuring a visually stunning experience. Take some time to experiment with different settings to find the combination that best suits your preferences and the content you’re viewing.
Now that you have customized the picture and color settings, you can proceed to the next step – configuring gaming and image enhancement features to take advantage of the monitor’s additional capabilities. We’ll cover this in detail in the upcoming section, so let’s continue!
Step 8: Configuring Gaming and Image Enhancement Features
The ASUS VG278Q gaming monitor comes with various gaming and image enhancement features that can elevate your gaming experience. Follow these steps to configure these features according to your preferences:
- Access the OSD menu: Use the designated buttons on your monitor to access the on-screen display (OSD) menu.
- Navigate to Gaming or Image Enhancement Settings: Within the OSD menu, look for options such as Gaming, Image Enhancement, or similar. Select it using the navigation buttons.
- Enable GamePlus features: The VG278Q offers GamePlus features, including crosshair overlays, timers, FPS counters, and more. Navigate to the GamePlus settings and enable the features you find useful during gaming sessions.
- Optimize Refresh Rate: If your graphics card supports it, toggle Adaptive-Sync or NVIDIA G-SYNC compatibility mode to match the monitor’s refresh rate with the GPU’s output. This reduces screen tearing and ensures smoother gameplay.
- Activate GameVisual Modes: The VG278Q comes with various GameVisual modes, each optimized for specific gaming genres or content types. Explore the available modes and select the one that best enhances your gaming experience.
- Adjust Smart View Technology (optional): Smart View technology allows you to adjust the color, contrast, and sharpness of the screen with a single button press. Navigate to the Smart View setting and activate it for quick adjustments.
- Configure Image Enhancement settings (optional): Some ASUS VG278Q monitors offer additional image enhancement settings, such as ASUS Eye Care technology or Blue Light Filter. Customize these features according to your preferences for a comfortable and eye-friendly gaming experience.
- Save and Exit: Once you’ve configured the gaming and image enhancement settings, navigate to the Exit or Close option in the OSD menu and save the changes. This will apply your settings and exit the OSD menu.
By following these steps, you can customize the gaming and image enhancement features of your ASUS VG278Q gaming monitor to optimize your gaming experience. Take advantage of the available features to enhance visibility, reduce eye strain, and improve overall gameplay performance.
Now that you have configured these features, you can proceed to the next step – connecting external devices such as gaming consoles or media players. We’ll cover this in detail in the upcoming section, so let’s continue!
Step 9: Connecting External Devices
The ASUS VG278Q gaming monitor allows you to connect various external devices, such as gaming consoles, media players, or laptops, for a versatile entertainment experience. Follow these steps to connect your external devices:
- Identify the available ports: Examine the back of your ASUS VG278Q gaming monitor to identify the available ports. Common options include HDMI, DisplayPort, DVI, and VGA.
- Choose the appropriate cable: Select the cable suitable for your external device and the available port on the monitor. For example, if you’re connecting a gaming console, you might use an HDMI cable.
- Connect the cable: Plug one end of the cable into the corresponding port on your device and the other end into the matching port on the monitor.
- Power on the external device: Switch on your external device, such as a gaming console or media player, to establish a connection with the monitor.
- Select the correct input source: Use the monitor’s built-in control buttons or the remote control to navigate to the input source settings. Select the input source that corresponds to the port you connected your external device to.
- Adjust any necessary settings: Depending on the device and its output settings, you might need to adjust the resolution, refresh rate, or other display settings on your external device to ensure optimal compatibility and performance.
- Test the connection: Once the device is connected and the settings are adjusted, test the connection to ensure that the external device’s output is properly displayed on the ASUS VG278Q gaming monitor.
By following these steps, you can easily connect your external devices to the ASUS VG278Q gaming monitor and enjoy an enhanced visual experience. Whether you’re gaming, watching movies, or working with multiple devices, the monitor’s connectivity options offer versatility and convenience.
Now that you have successfully connected your external devices, let’s move on to the final step – troubleshooting common issues that may arise during the setup or usage of the ASUS VG278Q gaming monitor.
Step 10: Troubleshooting Common Issues
While setting up and using the ASUS VG278Q gaming monitor, you may encounter some common issues. Here are some troubleshooting tips to help you resolve these issues:
- No Display: If the monitor displays no image, ensure that the connections between the monitor and your computer or gaming console are secure. Check if the monitor is powered on and if the correct input source is selected.
- Poor Image Quality: If you notice poor image quality, first adjust the brightness, contrast, and color settings using the OSD menu. Additionally, ensure that your computer or gaming console is set to the appropriate resolution and refresh rate for optimal performance.
- Screen Tearing: If you experience screen tearing during gameplay, make sure that the Adaptive-Sync or G-SYNC compatibility mode is enabled, and your graphics card settings match the monitor’s capabilities.
- No Sound: If you have connected external devices and there is no sound, check that the audio cable is properly connected and the volume is not muted on both the monitor and the external device.
- Incorrect Colors: If the colors appear distorted or inaccurate, adjust the color settings in the OSD menu. You can also check the color settings on your computer or gaming console to ensure they match the monitor’s capabilities.
- Stuck Pixels: If you notice any stuck pixels on the monitor, where they appear as a single color or remain black, try gently massaging the affected area with a soft cloth. There are also software programs available that can help fix stuck pixels.
- Overheating: If the monitor becomes excessively hot during use, ensure that it has proper ventilation and is not covered or obstructed by any objects. If the overheating persists, contact ASUS customer support for assistance.
- Unresponsive Buttons: If the buttons on the monitor are unresponsive, ensure that your fingers are clean and dry. If the issue persists, try gently pressing the buttons or contact ASUS customer support for further assistance.
These are some general troubleshooting tips for common issues that you may encounter with the ASUS VG278Q gaming monitor. However, if these steps do not resolve the problem or if you encounter any other issues, it is recommended to refer to the user manual or reach out to ASUS customer support for further assistance.
With these troubleshooting steps in mind, you’re now well-equipped to overcome any challenges that may arise while setting up or using your ASUS VG278Q gaming monitor. Enjoy your immersive gaming experience!
Conclusion
Congratulations! You have successfully set up your ASUS VG278Q gaming monitor. By following the step-by-step instructions in this guide, you have unboxed the monitor, connected it to your computer or gaming console, adjusted the monitor stand, powered on the monitor, accessed the on-screen display menu, and made necessary adjustments to the display settings, picture and color settings, gaming and image enhancement features, and connected external devices.
The ASUS VG278Q gaming monitor offers an immersive and visually stunning gaming experience, with its high refresh rate, fast response time, and customizable settings. By adjusting the various features and settings, you can optimize the monitor to suit your preferences and enhance your gaming performance.
Remember, if you encounter any issues during the setup or usage of the monitor, refer to the troubleshooting tips provided in this guide. Additionally, consult the user manual or reach out to ASUS customer support for further assistance.
Now that your ASUS VG278Q gaming monitor is ready to go, it’s time to dive into your favorite games and enjoy the immersive visuals and smooth gameplay that this monitor provides. Get ready to experience gaming like never before!