Introduction
Welcome to the guide on how to reset your Galaxy A7 tablet. If you are experiencing performance issues, software glitches, or simply want to start fresh, performing a reset can be a helpful solution. Resetting your tablet will erase all data and settings, allowing you to restore it to its original state.
Before proceeding with the reset process, it is important to back up any important data or files that you want to keep. This will ensure that you don’t lose any valuable information during the reset. Once you have backed up your data, you can proceed with the reset using either the soft reset or factory reset methods.
In this guide, we will walk you through the step-by-step process of performing a soft reset and factory reset on your Galaxy A7 tablet. Whether you want to troubleshoot issues or prepare your tablet for a fresh start, these methods will help you achieve your goal.
Keep in mind that resetting your tablet will erase all data, including apps, accounts, and settings. Therefore, it is crucial to back up any important data before proceeding. Additionally, it is recommended to ensure that your tablet is charged or connected to a power source throughout the reset process to avoid any interruptions.
Now that you are familiar with the importance of backing up your data and the precautions to take, let’s proceed to the different methods of resetting your Galaxy A7 tablet. We will begin with the soft reset method, which can be useful for resolving minor software issues without erasing all of your data.
Part 1: Backup your data
Before performing a reset on your Galaxy A7 tablet, it is crucial to back up your data to prevent any loss of important information. Here are the steps to back up your data:
- Sync your accounts: Ensure that all your accounts, such as Google, Samsung, and any other third-party accounts, are synced with your tablet. This will help you retrieve your data easily after the reset.
- Transfer files to an external storage: Connect your tablet to a computer using a USB cable and transfer important files, such as photos, videos, documents, and any other relevant data, to an external storage device or your computer. This will ensure that your files are safe and can be accessed after the reset.
- Back up app data: If you have specific apps with important data, such as game progress or notes, make sure to back up the app data using the built-in backup feature within the app or using a third-party backup app. This will allow you to restore the app data easily after the reset.
- Take screenshots of important settings: If you have any customized settings on your tablet, such as display settings, accessibility options, or app configurations, take screenshots of these settings for reference after the reset. This will help you set up your tablet quickly to match your preferences.
By following these steps, you can ensure that your important data is safely backed up before proceeding with the reset process. Once you have completed the backup, you can move on to the next step, which is performing a soft reset on your Galaxy A7 tablet.
Part 2: Soft reset
If you are experiencing minor software issues or your Galaxy A7 tablet is frozen and unresponsive, a soft reset can help resolve these issues without erasing your data. Follow the steps below to perform a soft reset:
- Press and hold the Power button: Locate the Power button on your tablet and press and hold it for about 10-15 seconds. You will see the screen turning off and the tablet will vibrate, indicating that the soft reset process has started.
- Release the Power button: Once you feel the vibration, release the Power button. Your tablet will start to reboot and you will see the Galaxy logo appear on the screen.
- Wait for the tablet to restart: Allow your tablet to go through the restart process. It may take a few minutes for the device to fully boot up. Once you see the lock screen or home screen, the soft reset is complete.
A soft reset can help resolve temporary software glitches and bring your tablet back to normal operation. However, if you are still encountering issues or want to perform a complete reset, you may need to proceed with a factory reset.
Before proceeding to a factory reset, make sure you have backed up all your important data as mentioned in Part 1. Performing a factory reset will erase all data and settings on your tablet, returning it to its original factory state.
In the next sections, we will guide you through two different methods of performing a factory reset on your Galaxy A7 tablet – through the settings menu and using the recovery mode.
Part 3: Factory reset through the settings menu
If you have decided to perform a factory reset on your Galaxy A7 tablet, you can do so through the settings menu. This method allows you to initiate the reset process directly from your tablet’s interface. Follow the steps below:
- Open the Settings menu: Swipe down from the top of the screen to access the notification panel, and then tap on the gear icon to open the Settings menu.
- Navigate to the Backup and Reset section: Scroll down and tap on “System” or “General Management,” depending on your tablet’s software version. Look for the “Reset” or “Reset Options” section, and then tap on it.
- Choose Factory Data Reset: In the reset options, you will find the “Factory Data Reset” or “Reset” option. Tap on it to proceed with the factory reset.
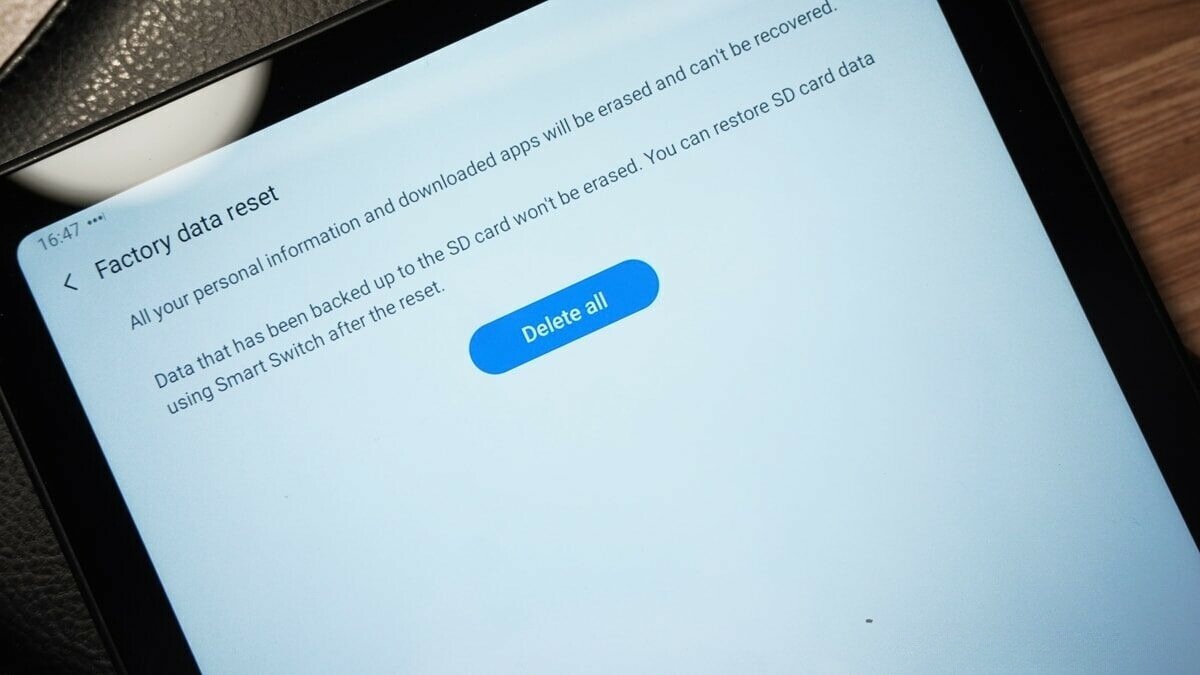
- Confirm the reset: A warning message will appear, informing you that all data will be deleted. Read the message carefully, and if you have already backed up your data and are ready to proceed, tap on “Reset” or “Delete all” to confirm the reset.
- Wait for the reset to complete: Your tablet will now begin the factory reset process. It may take a few minutes for the reset to complete. Once finished, your tablet will reboot automatically.
After the reboot, your Galaxy A7 tablet will be restored to its original factory settings. You can then set up your tablet as if it were brand new, configuring your preferences and reinstalling your desired apps and data.
Performing a factory reset through the settings menu is a convenient method if your tablet is still functional and accessible. However, if your tablet is unresponsive or you are unable to access the settings menu, you can use the recovery mode method, which we will cover in the next section.
Part 4: Factory reset using recovery mode
If your Galaxy A7 tablet is unresponsive or you are unable to access the settings menu, you can perform a factory reset using the recovery mode. This method allows you to initiate the reset process through a special boot menu. Follow the steps below:
- Turn off your tablet: Press and hold the Power button until the Power menu appears. Tap on “Power off” or “Restart” and then wait for your tablet to turn off completely.
- Boot into recovery mode: Press and hold the Volume Up button and the Power button simultaneously. Keep holding both buttons until you see the Samsung logo appear on the screen. Once you see the logo, release both buttons.
- Navigate the recovery mode menu: You will now see the recovery mode menu on the screen. Use the Volume Up and Volume Down buttons to navigate through the options, and the Power button to select them. Look for the “Wipe data/factory reset” or “Factory data reset” option and select it.
- Confirm the reset: A confirmation prompt will appear. Use the volume buttons to highlight the “Yes” or “Delete all user data” option, and then press the Power button to confirm the reset.
- Wait for the reset to complete: The recovery mode will now start the factory reset process. It may take a few minutes for the reset to complete. Once finished, you will see the recovery mode menu again.
- Reboot your tablet: Use the volume buttons to navigate to the “Reboot system now” option, and then press the Power button to reboot your tablet.
Upon rebooting, your Galaxy A7 tablet will be restored to its original factory settings. You will need to go through the initial setup process, configuring your preferences and reinstalling your desired apps and data.
Performing a factory reset using the recovery mode allows you to reset your tablet even if it is unresponsive or experiencing software issues. However, make sure to backup your data as mentioned in Part 1, as this method will erase all data from your tablet.
With the factory reset complete, you have successfully restored your Galaxy A7 tablet to its original state. Whether you performed a soft reset or a factory reset, these methods can help resolve various issues and provide a fresh start for your tablet.
Conclusion
Resetting your Galaxy A7 tablet can be a useful solution for troubleshooting software issues and starting afresh. In this guide, we have covered the steps to perform a soft reset and factory reset using both the settings menu and recovery mode.
Before proceeding with any reset method, it is essential to back up your data to prevent any loss of valuable information. Syncing your accounts, transferring files to an external storage device, backing up app data, and taking screenshots of important settings are crucial steps to ensure your data is safely stored.
A soft reset is a straightforward method to resolve minor software glitches and unresponsiveness without erasing data. On the other hand, a factory reset will restore your tablet to its original factory settings, erasing all data and settings.
To perform a factory reset through the settings menu, you need to navigate to the reset options and confirm the reset. In case your tablet is unresponsive, using the recovery mode allows you to initiate the factory reset process using specific button combinations.
After performing a reset, your tablet will be restored to its original state, and you can set it up according to your preferences. Reinstalling apps, configuring settings, and restoring backed-up data will help you personalize your tablet again.
Remember to exercise caution and ensure you have a backup of your data before proceeding with any reset method. It is also recommended to keep your tablet charged or connected to a power source during the reset process.
We hope this comprehensive guide has been helpful in assisting you through the reset process for your Galaxy A7 tablet. By following the steps outlined in this guide, you can troubleshoot software issues and have a fresh start with your tablet.