Introduction
Welcome to this step-by-step guide on how to replace the charging port on your Galaxy Tablet. Over time, the charging port of your tablet may become damaged or wear out, preventing you from charging your device properly. Rather than replacing the entire tablet, replacing the charging port can often solve the issue and extend the lifespan of the device.
Before we get started, please note that performing any repair on your tablet may void the warranty, so proceed with caution. Also, make sure you have the necessary tools, parts, and a clean, well-lit workspace to work in.
In this article, I will walk you through the process of replacing the charging port on your Galaxy Tablet. Whether you have a Galaxy Tab S7, Tab A, or any other model, the general procedure is similar. However, it is essential to check the specific instructions that come with your tablet or consult the official Samsung website for model-specific guidance.
Replacing the charging port may require some technical skills and experience, but with patience and attention to detail, you can successfully complete the task. Remember to take your time and follow each step carefully to avoid causing any further damage to your tablet.
So, without further ado, let’s dive into the step-by-step process of replacing the charging port on your Galaxy Tablet. By the end of this guide, you’ll have a fully functional charging port, and you can once again enjoy uninterrupted charging and hassle-free tablet use.
Step 1: Gather the necessary tools and parts
Before you begin the process of replacing the charging port on your Galaxy Tablet, it’s crucial to gather all the necessary tools and parts. Having everything prepared beforehand will make the repair process smoother and more efficient.
Here are the tools and parts you will need:
- Replacement Charging Port: First and foremost, you will need a new charging port compatible with your Galaxy Tablet model. You can purchase one online or from an authorized dealer.
- Small Screwdriver Set: To disassemble your tablet, you will require a small screwdriver set with various sizes of Phillips or Torx screwdriver heads, depending on the specific screws used in your tablet.
- Plastic Opening Tools: These tools are used to pry open the tablet’s casing without causing any damage. You can find plastic opening tools specifically designed for electronics repair easily online.
- Tweezers: Tweezers are handy for handling small components and connectors during the repair process. They will help you securely grasp and remove delicate parts without the risk of dropping or misplacing them.
- Anti-static Mat and Wrist Strap: It’s essential to protect your tablet from static electricity during the repair. An anti-static mat and wrist strap will help prevent damage to sensitive internal components caused by static discharge.
- Clean, lint-free Cloth or Microfiber Cloth: Having a clean cloth on hand is necessary for wiping down the tablet’s components and ensuring a dust-free workspace.
- Isopropyl Alcohol and Cotton Swabs: Isopropyl alcohol and cotton swabs are useful for cleaning the charging port and other parts of the tablet before reassembly. They will help remove any dirt, debris, or corrosion that may be affecting the charging port’s functionality.
Once you have gathered all the required tools and parts, you are ready to proceed to the next step: powering off the Galaxy Tablet.
Step 2: Power off the Galaxy Tablet
Before you start disassembling your Galaxy Tablet to replace the charging port, it is crucial to power it off to avoid any potential damage and ensure your safety during the repair process. Following the steps below, you can safely shut down your tablet:
- Save your work and close all applications: It is essential to save any unsaved work and close all applications running on your tablet. This will prevent data loss and potential damage to open files during the power-off process.
- Press and hold the Power button: Locate the Power button on your tablet’s frame. Press and hold this button for a few seconds until the power options menu appears on the screen.
- Select “Power off”: On the power options menu, you should see the “Power off” option. Tap on it to initiate the shutdown process.
- Confirm the power-off: Some models may prompt you to confirm the power-off action. If prompted, make sure to confirm by selecting “OK” or a similar option.
- Wait for the tablet to power off: Once you confirm the power-off action, wait for a few seconds until your tablet completely shuts down. You can verify this by ensuring that the screen goes blank, and there are no lights or indicators turned on.
Powering off your tablet is a crucial step in ensuring your safety and preventing any potential damage to the device or yourself during the repair process. Take a moment to double-check that your tablet is indeed powered off before proceeding to the next step.
Next, we will move on to removing the back cover and battery of your Galaxy Tablet. This step will allow us to access the internal components, including the charging port.
Step 3: Remove the back cover and battery
With your Galaxy Tablet powered off, it’s time to remove the back cover and the battery to gain access to the internal components. Follow the steps below to safely remove the back cover and battery:
- Locate the screws: Look for the screws that secure the back cover to your tablet. The number and placement of the screws may vary depending on your tablet model. Use the appropriate screwdriver from your set to remove these screws.
- Insert a prying tool: Once the screws are removed, use a plastic opening tool to gently separate the back cover from the tablet’s frame. Start at one edge of the tablet and carefully insert the prying tool into the gap between the back cover and the frame.
- Work your way around: Slowly and carefully move the prying tool along the edge, applying gentle pressure to release the clips holding the back cover in place. Be cautious not to use excessive force or insert the tool too deep, as this can damage the tabs or components inside.
- Remove the back cover: Continue working your way around the tablet’s edges until the back cover is completely free. Once all clips are released, lift the back cover away from the tablet’s body. Set it aside in a safe place.
- Locate the battery: With the back cover removed, you will now see the battery inside the tablet. Depending on your tablet model, the battery may be secured by screws or adhesive. Refer to your tablet’s documentation or online resources for specific instructions on how to remove the battery.
- Detach the battery connector: Carefully disconnect the battery connector from the motherboard by gently pulling it straight away from its socket. Take care not to bend or damage the connector or the circuit board.
- Remove the battery: If your tablet’s battery is secured by screws, remove them using the appropriate screwdriver. If it is secured by adhesive, use a plastic opening tool to gently lift the battery off the adhesive. Slowly and steadily apply pressure to release the battery’s grip, taking care not to damage any components nearby.
With the back cover and battery removed, you now have access to the internal components, including the charging port. In the next step, we will disconnect the old charging port from the tablet.
Step 4: Disconnect the old charging port
Now that you have successfully removed the back cover and battery of your Galaxy Tablet, it’s time to disconnect the old charging port. This step involves carefully detaching the charging port from the motherboard to replace it with a new one. Follow the steps below:
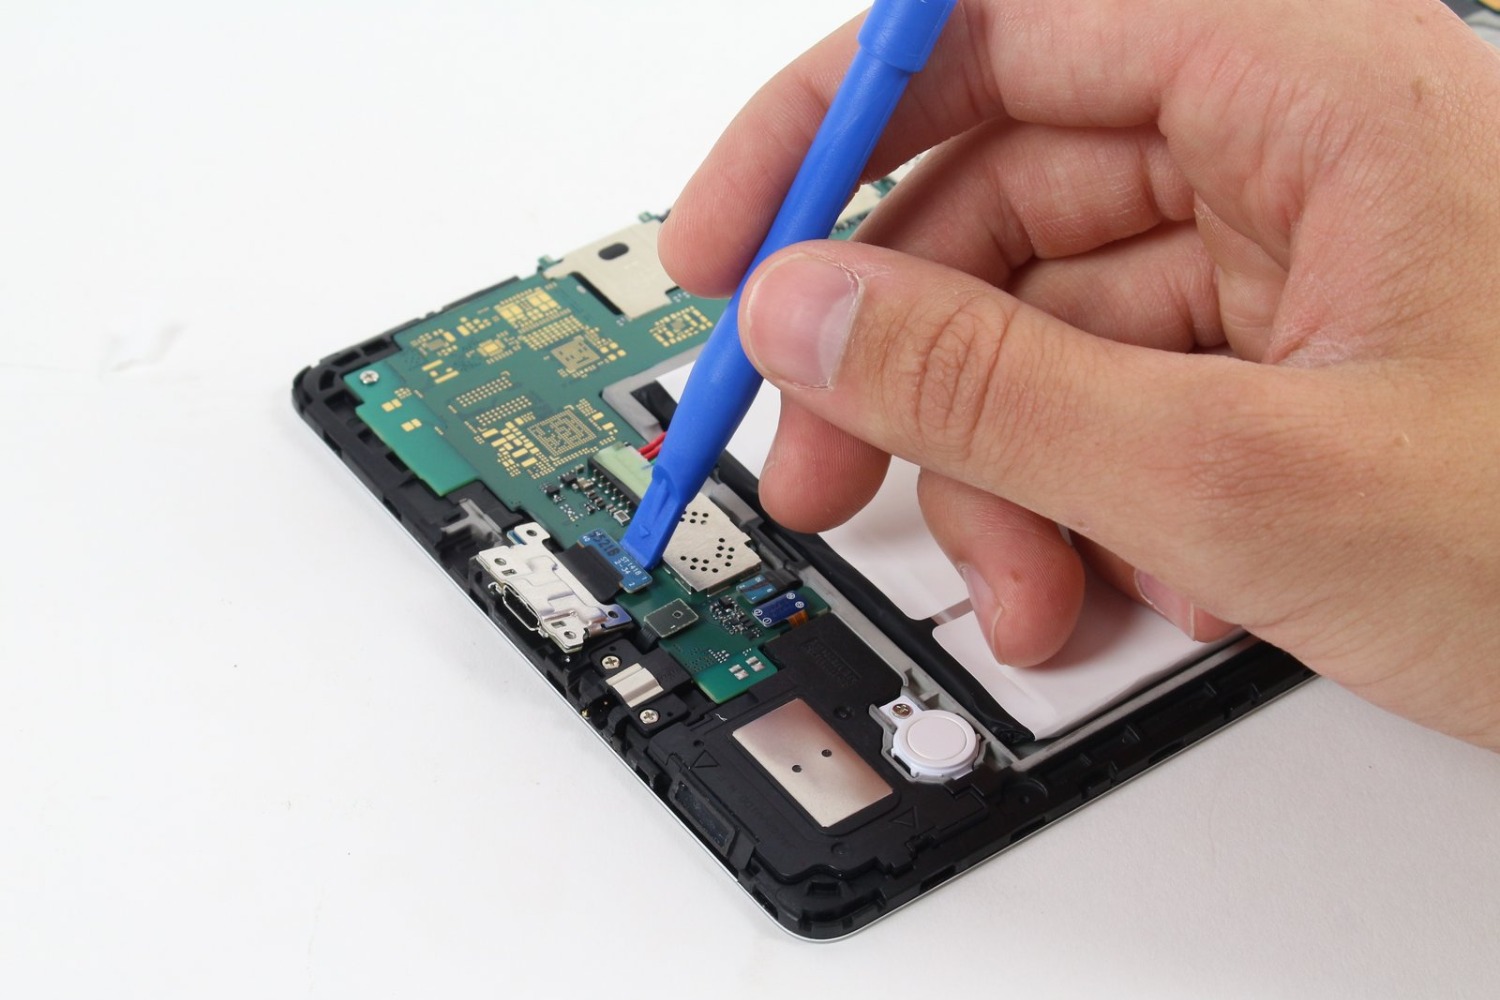
- Locate the charging port: Identify the location of the old charging port on your tablet’s motherboard. It is usually situated near the bottom edge of the device and has a connector attached to it.
- Disconnect the cable connector: Using a pair of tweezers or your fingers, carefully disconnect the cable connector that is attached to the charging port. Grip the connector firmly but gently and pull it straight out from its socket.
- Inspect for any securing brackets or adhesive: Depending on your tablet model, there may be securing brackets or adhesive holding the charging port in place. If you notice any, carefully remove or disconnect them using the appropriate tools or techniques, ensuring not to damage any other nearby components.
- Detach the old charging port: Once the cable connector and any securing brackets or adhesive have been dealt with, you can now detach the old charging port from the motherboard. Grip the port firmly but gently and wiggle it back and forth while pulling it away from the motherboard until it is completely detached.
- Inspect for any damage or debris: With the old charging port removed, carefully examine the area for any signs of damage or debris that may have contributed to the charging issues. Clean the area using a lint-free cloth or a cotton swab slightly dampened with isopropyl alcohol if necessary.
- Set aside the old charging port: Place the old charging port in a safe location or discard it responsibly. Using it as a reference, ensure that the new replacement charging port matches the old one in terms of size, shape, and connector type.
By successfully disconnecting the old charging port from your Galaxy Tablet, you are now ready to install the new charging port in the next step. Take your time and exercise caution throughout the process to prevent any accidental damage to the tablet’s components.
Step 5: Install the new charging port
With the old charging port disconnected, it’s time to install the new charging port on your Galaxy Tablet. This step involves carefully attaching the new charging port to the motherboard and securing it in place. Follow the steps below:
- Align the new charging port: Take the new replacement charging port and align it with the corresponding slot or connector on the motherboard. Ensure that the port is oriented correctly, matching the position and alignment of the old charging port.
- Insert the charging port: With the new charging port aligned, gently and steadily push it into the slot or connector on the motherboard. Apply even pressure until the port is fully inserted and properly seated. Take care not to use excessive force that could damage the port or the motherboard.
- Secure the charging port: If there were securing brackets or adhesive previously, reattach or apply them to hold the new charging port securely in place. Follow the manufacturer’s guidelines or use the same method as the old charging port to ensure proper sealing and stability.
- Reconnect the cable connector: Take the cable connector attached to the new charging port and align it with its corresponding socket on the motherboard. Firmly but gently push the connector into the socket until it is fully seated and securely connected.
- Inspect the connection: Once the cable connector is connected, visually inspect the connection to ensure it is secure and properly seated. Take care not to dislodge the connector while performing the next steps of reassembling the tablet.
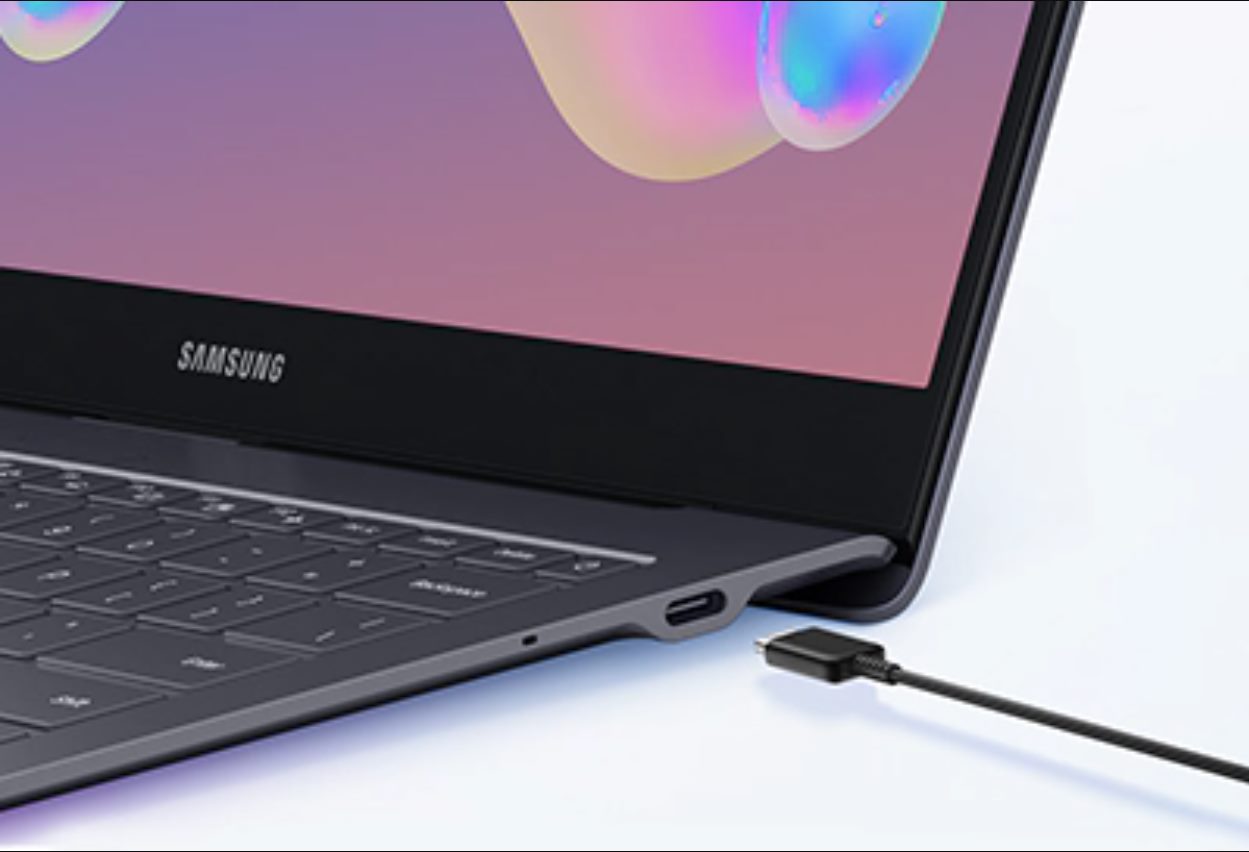
- Verify the charging port’s functionality: Before proceeding with reassembly, it’s a good practice to test the newly installed charging port. Connect the tablet to a power source using the charger or USB cable and verify that it charges correctly without any issues.
By successfully installing the new charging port, you have taken a significant step towards resolving charging problems on your Galaxy Tablet. However, it is essential to proceed with the reassembly process carefully and ensure all components are securely positioned and connected.
Step 6: Reassemble the Galaxy Tablet
With the new charging port successfully installed, it’s time to reassemble your Galaxy Tablet. This step involves putting the components back together and securing the back cover. Follow the steps below to ensure a proper reassembly:
- Attach the battery: If you removed the battery during the earlier steps, reattach it to its original position. Make sure to align the battery correctly and connect the battery connector securely to the motherboard.
- Place the back cover: Take the back cover and position it over the tablet’s frame, aligning it carefully with all the edges and ports. Ensure that it fits snugly and that there are no gaps or misalignments.
- Press the back cover: Begin by pressing down gently on the edges of the back cover, starting from one corner and working your way across to the opposite corner. Apply even pressure to ensure the clips snap into place and the back cover is securely attached to the tablet.
- Secure the back cover screws: If your tablet’s back cover was held in place by screws, use the appropriate screwdriver to secure them back into their original positions. Make sure not to overtighten the screws, as this can cause damage to the threads or the back cover.
- Clean the tablet: Before booting up your tablet, use a clean, lint-free cloth or a microfiber cloth to wipe down the exterior surface. This will remove any fingerprints, smudges, or dust that may have accumulated during the repair process.
- Power on the tablet: Once the back cover is securely attached and the tablet is cleaned, press and hold the Power button to turn on your Galaxy Tablet. If the battery had ample charge, the tablet should power on normally.
- Verify functionality: With the tablet powered on, test the charging port to ensure that it is functioning properly. Connect the tablet to a power source using the charger or USB cable and ensure it charges without any issues.
By successfully reassembling your Galaxy Tablet, you have completed the repair process and restored the charging port. Take a moment to double-check that all components are securely fastened and that the tablet is functioning as expected before moving on to the final step.
Step 7: Test the new charging port
After reassembling your Galaxy Tablet, it’s important to test the new charging port to ensure that it is functioning correctly. This step will help you verify that the charging issue has been resolved and that your tablet can now charge properly. Follow the steps below to test the new charging port:
- Connect the charger or USB cable: Plug in the charger or insert the USB cable into the charging port on your Galaxy Tablet.
- Check for charging indicators: Look for any charging indicators on your tablet, such as an LED light or a battery icon appearing on the screen. These indicators will vary depending on your tablet model and settings.
- Monitor the charging progress: Keep an eye on the tablet’s battery level. If the charging port is functioning properly, you should see the battery level gradually increasing as the tablet receives power.
- Ensure stable charging: Monitor the charging process to ensure that the battery level continues to rise steadily. If you notice any interruptions or inconsistencies in the charging, such as the battery level dropping or fluctuating, it may indicate a problem with the new charging port or a different issue. In such cases, it is recommended to consult a professional or revisit the previous steps to diagnose and resolve the issue.
- Test different charging cables and power sources: To further confirm the functionality of the new charging port, try using different charging cables and power sources. This will help ensure that the port is compatible with different accessories and charger types.
- Observe overheating or unusual behavior: While testing the charging port, pay attention to any signs of overheating or abnormal behavior, such as excessive heat, sparks, or unusual noises. If you notice any of these indications, immediately disconnect the charger or USB cable and discontinue use. These signs may indicate a faulty charging port that needs further inspection or replacement.
By thoroughly testing the new charging port, you can confirm its functionality and ensure that your Galaxy Tablet can now charge reliably. If the charging issue has been resolved, you can now enjoy uninterrupted charging and continued use of your tablet.
Conclusion
Congratulations! You have successfully replaced the charging port on your Galaxy Tablet. By following the step-by-step guide provided in this article, you were able to resolve charging issues and restore the functionality of your device.
Remember, the process of replacing the charging port may require some technical skills and careful handling of delicate components. It is important to take your time, follow each step precisely, and exercise caution throughout the repair process.
With the new charging port installed, you can now enjoy uninterrupted charging and hassle-free use of your Galaxy Tablet. Ensure that you continue to use compatible chargers and cables to maintain the longevity of the charging port and prevent any future issues.
If you encountered any challenges during the repair or if the charging issue persists even after replacing the charging port, it is recommended to seek professional assistance or consult the official Samsung support resources for further guidance and troubleshooting.
We hope that this guide has been helpful in guiding you through the process of replacing the charging port on your Galaxy Tablet. By following these steps, you have extended the lifespan of your device and saved yourself from the expense of purchasing a new tablet.
Thank you for choosing this guide, and we wish you many more years of enjoyable and convenient use with your fully functional Galaxy Tablet!