Introduction
Welcome to the world of Chromecast, where you can effortlessly cast your favorite content from your devices onto the big screen. Are you looking to add a touch of entertainment to your living room or office? If so, you’ve come to the right place. In this guide, we’ll show you how to play a slideshow on Chromecast, allowing you to showcase your cherished memories in a stunning visual display.
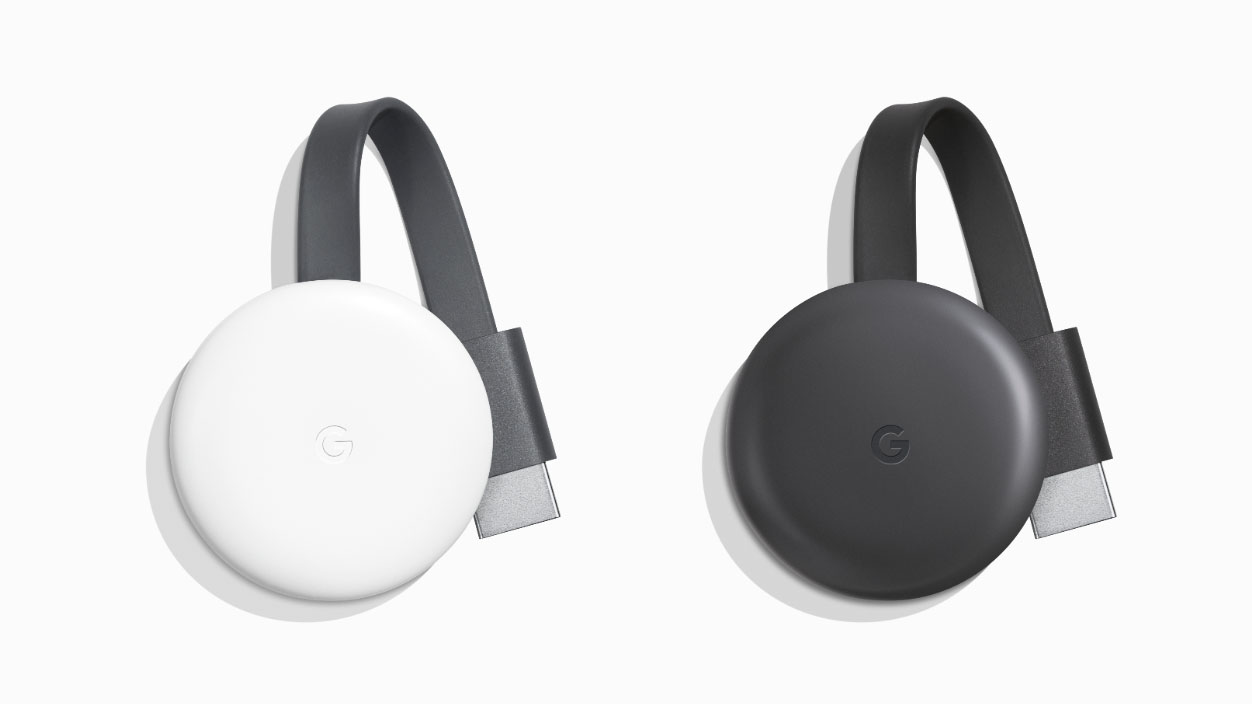
Chromecast, developed by Google, is a small and affordable device that plugs into your TV or monitor’s HDMI port. With the ability to stream multimedia content directly from your phone, tablet, or computer, Chromecast brings a new level of convenience and versatility to your entertainment setup.
If you’re eager to share a collection of photos with friends and family, creating a slideshow on Chromecast is the perfect solution. Whether it’s a vacation album, a selection of special occasions, or even a portfolio of your photography skills, using Chromecast to display your photos adds a dynamic and engaging element to your visual presentation.
In this guide, we’ll walk you through the step-by-step process of setting up Chromecast, connecting your device, selecting a slideshow app, choosing your desired photos, starting the slideshow, and even customizing the settings to suit your preferences. We’ll also provide troubleshooting tips for common issues you may encounter along the way.
So, grab your Chromecast device and get ready to unleash the power of your photos on the big screen. Let’s dive in and learn how to play a stunning slideshow on Chromecast!
Setting Up Chromecast
Before you can start playing a slideshow on Chromecast, you’ll need to set up the device and ensure it’s ready for use. Don’t worry; the setup process is simple and straightforward. Follow the steps below to get started:
- Unbox the Chromecast device and plug it into an available HDMI port on your TV or monitor. Ensure that the USB power cable is securely connected to the Chromecast and a power source.
- Using your TV’s remote or the input/source button on your monitor, select the appropriate HDMI input where you plugged in the Chromecast to see the setup screen.
- Download the Google Home app on your mobile device or tablet. This app will be used to configure and manage your Chromecast.
- Open the Google Home app and follow the on-screen instructions to set up your Chromecast. Make sure that your mobile device or tablet is connected to the same Wi-Fi network you want to connect your Chromecast to.
- The Google Home app will automatically discover your Chromecast and guide you through the rest of the setup process. You’ll be asked to choose a name for your Chromecast and connect it to your Wi-Fi network.
- Once the setup is complete, you’ll see a confirmation screen. Your Chromecast is now ready to use.
- If prompted, make sure to enable automatic updates for your Chromecast so that you can benefit from the latest features and improvements.
Setting up Chromecast is a breeze and should only take a few minutes. Once you’ve completed the setup process, you can start casting your photos and enjoy a captivating slideshow experience on your TV or monitor.
Connecting Your Device to Chromecast
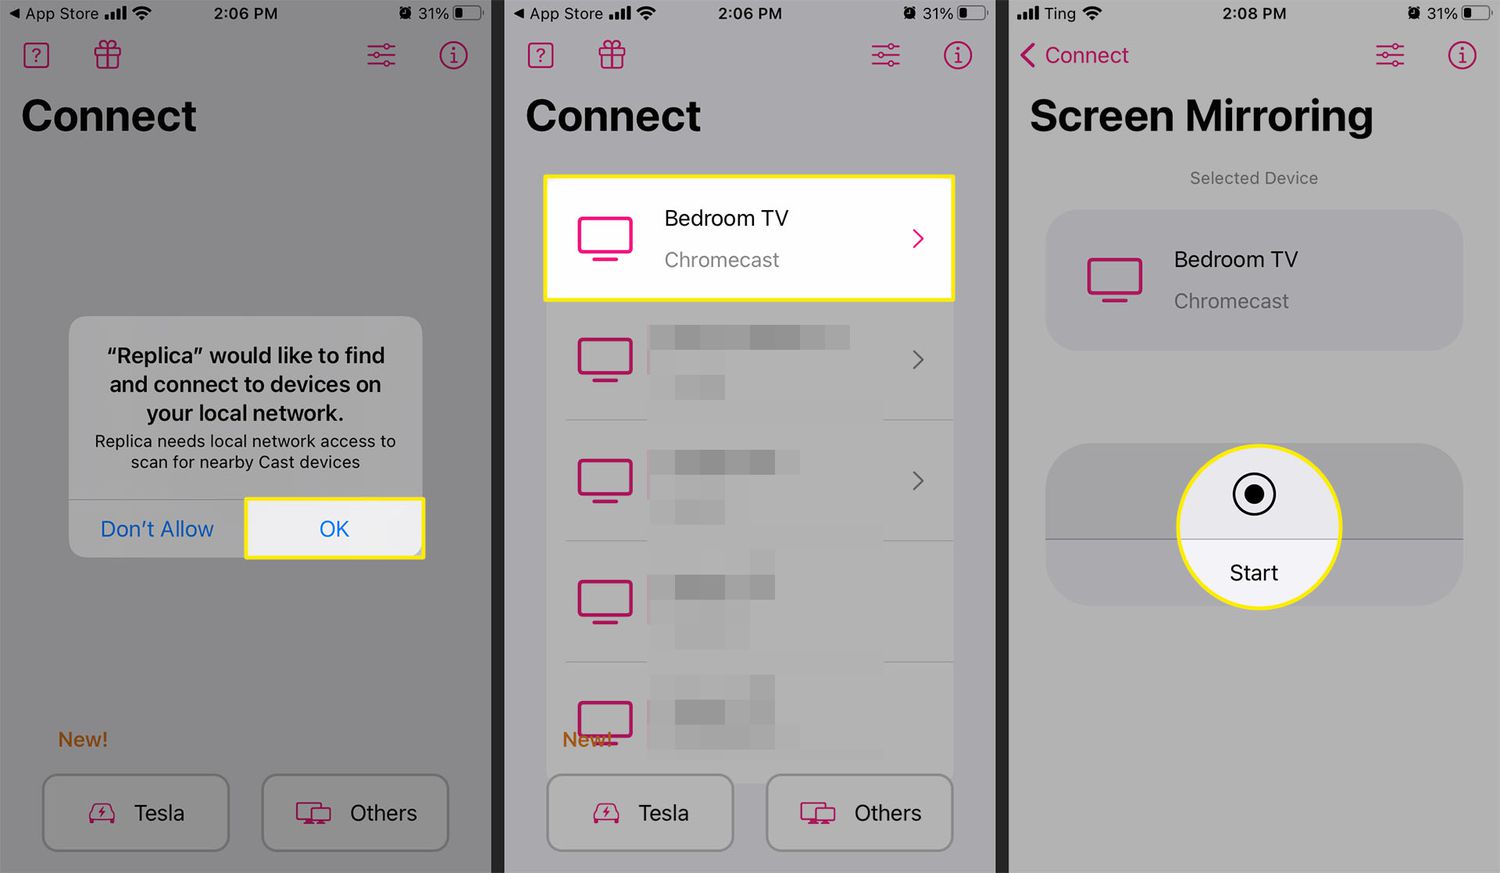
Now that you have your Chromecast set up, it’s time to connect your device to it so you can start playing your slideshow. Follow these steps to establish a connection between your device and Chromecast:
- Ensure that your device (phone, tablet, or computer) is connected to the same Wi-Fi network as your Chromecast.
- Open the app or program you want to use for the slideshow. There are several options available, such as Google Photos, Plex, or third-party apps like PhotoCast and Dayframe. Choose the app that best suits your needs and preferences.
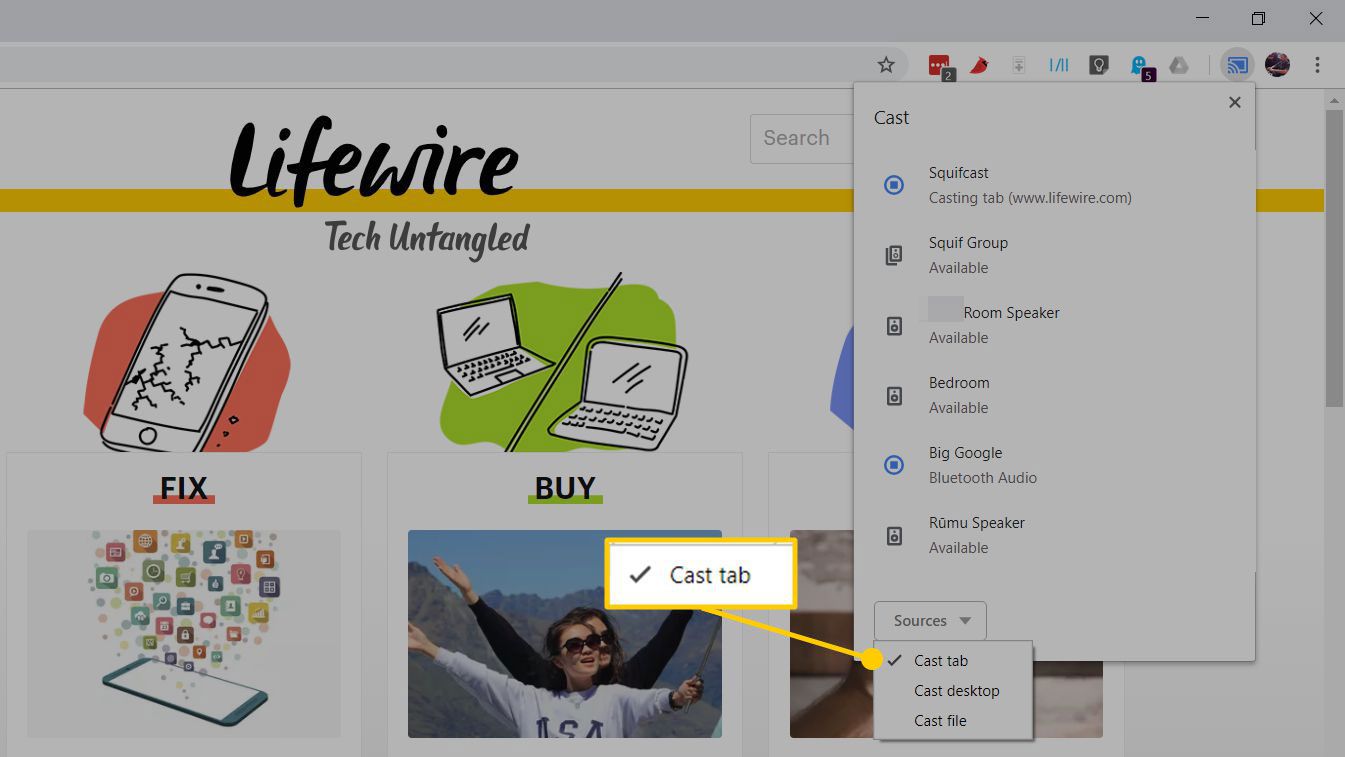
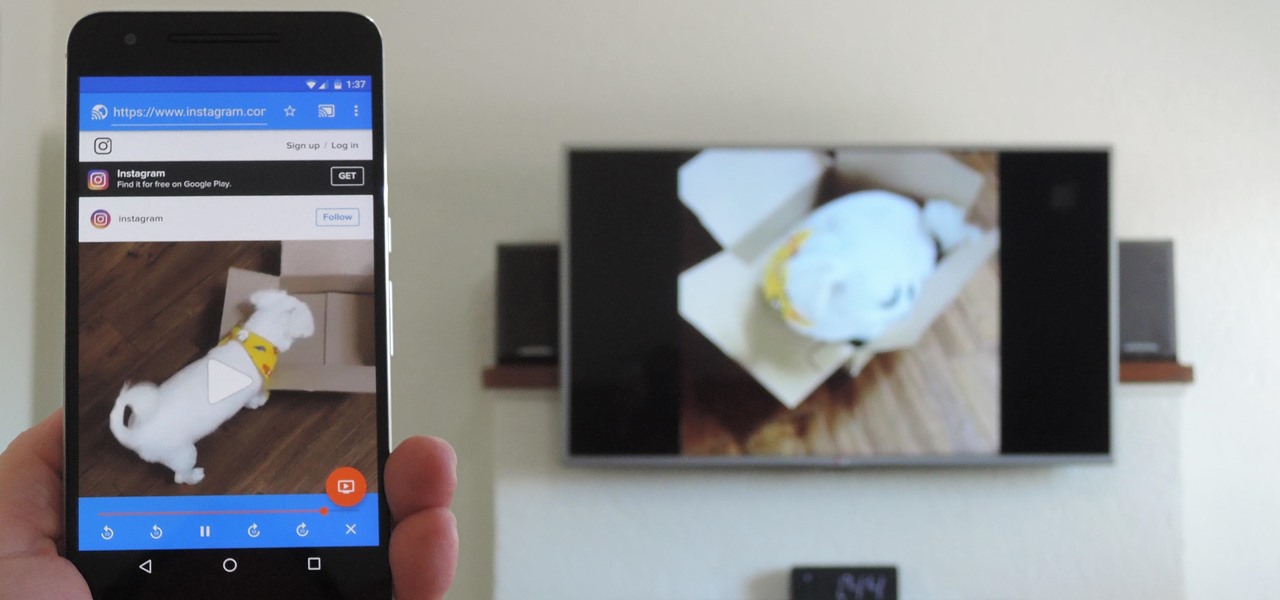
- Look for the Cast icon within the app. It usually resembles a rectangle with a Wi-Fi symbol in the bottom-left corner. Tap or click on this icon to initiate casting.
- A list of available devices will appear. Select your Chromecast from the list.
- After selecting your Chromecast, your device will establish a connection with it. You may see a loading screen or a message indicating that your device is connecting to the Chromecast.
- Once the connection is established, your device’s screen or the selected app’s interface will be mirrored or casted to your TV or monitor. You should now see your slideshow on the big screen.
It’s important to note that some apps may offer additional features or settings for the slideshow, such as transitions, timers, or music integration. Explore the options within the app to enhance your slideshow experience and tailor it to your liking.
Keep in mind that while casting, you can continue using your device for other tasks, such as browsing the internet or checking emails. The slideshow will continue to play on your Chromecast until you stop or disconnect it.
Now that your device is connected to Chromecast, it’s time to select the photos you want to include in your slideshow. Let’s move on to the next section and explore how to choose the perfect slideshow photos.
Selecting Slideshow App
When it comes to playing a slideshow on Chromecast, you have a variety of apps to choose from. Each app offers different features and functionalities, allowing you to personalize and enhance your slideshow experience. Here are a few popular slideshow apps to consider:
- Google Photos: If you’re already using Google Photos to store and manage your photo library, this app is a great choice. You can easily cast your entire photo collection or create albums specifically for your slideshow. Google Photos also offers options for adding captions, choosing transition effects, and even playing background music.
- Plex: Known for its media server capabilities, Plex allows you to organize not only your photos but also your videos and music. You can create slideshows using specific Plex libraries and customize settings such as duration, transition effects, and background music. Plex also provides the option to create multiple slideshows with different themes and styles.
- PhotoCast: PhotoCast is a third-party app that supports casting photos from various sources, including your device’s local storage, Google Drive, Dropbox, and more. It offers features like shuffle mode, transition effects, automatic rotation, and even the ability to cast live photos. PhotoCast is user-friendly and provides a smooth slideshow experience.
- Dayframe: This app not only supports casting photos from your device but also integrates with various social media platforms like Facebook, Instagram, and Flickr. Dayframe allows you to create slideshows using your own photos or explore public photo feeds from different sources. With features like automatic refresh, custom playlists, and background music, Dayframe offers a dynamic and interactive slideshow experience.
These are just a few examples of the many slideshow apps available for Chromecast. Take some time to explore different apps and determine which one suits your preferences and needs. Many apps offer both free and premium versions, each with its own set of features. Consider experimenting with different apps to find the one that best showcases your photos and delivers the desired slideshow experience.
Now that you have an app in mind, let’s move on to the next section and learn how to choose the photos that will make your slideshow truly captivating.
Choosing Slideshow Photos
The success of your slideshow largely depends on the photos you choose to include. To create a visually engaging and memorable slideshow on Chromecast, consider the following tips when selecting your photos:
- Variety: Mix up your photo selection by including a variety of subjects, such as landscapes, portraits, events, and candid moments. This will add visual interest and keep your audience engaged throughout the slideshow.
- Quality: Choose high-resolution photos that are sharp and clear. Blurry or pixelated images can detract from the overall viewing experience. Make sure to crop or resize your photos, if needed, to fit the screen properly.
- Storytelling: Arrange your photos in a way that tells a story or evokes a specific emotion. Consider the flow and sequence of your photos to create a narrative that captivates your audience from start to finish.
- Highlight the Best: Select the best shots from your collection to showcase your photography skills or capture memorable moments. Avoid including duplicate or similar photos to maintain a fresh and engaging slideshow.
- Consider Duration: Depending on the number of photos you have and the desired pace of your slideshow, adjust the duration of each photo accordingly. Keep in mind that faster transitions may work well for energetic or dynamic photos, while slower transitions can be more suitable for serene or contemplative images.
- Include Captions: If the app you’re using allows it, consider adding captions or descriptions to your photos. This can provide context, tell a story, or add a personal touch to your slideshow.
- Theme and Style: Depending on the occasion or mood you want to convey, choose a theme or style for your slideshow. This could be based on a specific color palette, a particular event, or a seasonal theme. Consistency in theme and style will create a cohesive and visually appealing slideshow experience.
Remember, the goal of your slideshow is to engage and captivate your audience. Take some time to curate your photo selection and ensure that each photo adds value to the overall visual presentation. Experiment with different combinations of photos until you achieve the desired effect.
Now that you’ve chosen your photos, it’s time to move on to the next section and start the slideshow on Chromecast.
Starting the Slideshow on Chromecast
With your Chromecast set up, your device connected, and your photos selected, it’s time to start the slideshow on Chromecast. Follow these steps to begin showcasing your photos on the big screen:
- Make sure that your Chromecast is powered on and your TV or monitor is set to the appropriate HDMI input where your Chromecast is connected.
- Open the slideshow app on your device, whether it’s Google Photos, Plex, PhotoCast, or another app you’ve chosen.
- Select the album or folder that contains the photos you want to include in your slideshow.
- Look for the Cast icon within the app. It is typically located on the top or bottom of the screen. Tap or click on the Cast icon to choose your Chromecast device from the list.
- After selecting your Chromecast, the app will start casting or mirroring the slideshow to your TV or monitor. It may take a few moments to load the first photo.
- Enjoy the mesmerizing display of your photos as they transition smoothly on the big screen. Sit back, relax, and let your slideshow take center stage.
While the slideshow is playing, you can leave your device aside or continue using it for other tasks. The control of the slideshow will typically be managed through the app on your device or by using a remote control if the slideshow app supports it. Explore the app’s features to pause, skip, or customize the slideshow settings as desired.
Remember to adjust the settings within the app to suit your preferences. This can include options like transition effects, timing between photos, background music, and other customization features offered by the chosen app.
Now that your slideshow is in full swing, sit back and enjoy the showcase of your cherished photos on the big screen. Take this opportunity to share your stories, memories, and emotions with your audience through a visually stunning presentation.
In the next section, we’ll offer tips on how to control and customize the settings of your slideshow on Chromecast to enhance your viewing experience even further.
Controlling the Slideshow
Once the slideshow is playing on Chromecast, you have several options for controlling its playback. The exact method may vary depending on the app you’re using, but here are some common controls you can utilize:
- Pause/Play: To temporarily stop the slideshow, look for the pause or play button within the app. This allows you to freeze a specific photo on the screen or resume the slideshow from where you left off.
- Next/Previous: If you want to skip to the next photo or go back to the previous one, most slideshow apps provide buttons or gestures for these actions. Use these controls to navigate through your photos as desired.
- Shuffle: Some apps offer a shuffle mode, which randomizes the order of your selected photos. Enable this feature if you prefer a more dynamic or unpredictable slideshow experience.
- Settings: Most slideshow apps provide a settings menu where you can customize various aspects of the slideshow. This may include options for transition effects, timing, background music, captions, and more. Explore the settings to adjust them according to your preferences.
- Remote Control: If your slideshow app supports it, you may be able to control the playback using a physical or virtual remote control. Check the app’s documentation to learn how to set up and use a remote control for a seamless slideshow experience.
Keep in mind that the availability of these controls may vary depending on the app you’re using and the specific features it offers. Take some time to familiarize yourself with the controls within the app to fully utilize the available options.
Controlling the slideshow allows you to pause on specific photos, select your favorite images, or adjust the pace and timing of your presentation. Use these controls to create an engaging and personalized experience for yourself and your audience.
In the next section, we’ll dive into customizing the settings of your slideshow on Chromecast to suit your preferences and elevate the viewing experience even further.
Customizing Slideshow Settings
Customizing the settings of your slideshow on Chromecast allows you to personalize the experience and make it truly unique. While the specific settings available may vary depending on the app you’re using, here are some common customization options to consider:
- Transition Effects: Choose from a variety of transition effects to add visual interest and smooth transitions between your photos. Options may include fade, slide, dissolve, or more dynamic effects like zoom or flip.
- Timing: Adjust the timing between each photo to control the pace of your slideshow. Some apps allow you to set a specific duration for each photo or choose an automatic timing option for seamless transitions.
- Background Music: Enhance your slideshow by adding background music that complements the mood and tone of your photos. Select songs or soundtracks that evoke the desired emotions and create an immersive experience.
- Captions and Descriptions: If available within the app, add captions or descriptions to your photos to provide context or tell a story. This can be helpful for sharing additional information or memories with your audience as each photo is displayed.
- Shuffle Mode: Enable shuffle mode if you want your photos to be displayed in a random order instead of following the sequence you’ve selected. This can add an element of surprise and freshness to your slideshow.
- Repeat: Choose whether you want your slideshow to repeat automatically once it reaches the end. This can be useful for continuous playback, ensuring that your photos are always on display.
- Theme and Style: Some apps allow you to customize the theme and style of your slideshow. This includes options for different layouts, color schemes, fonts, and other visual elements to match your personal preferences or the occasion.
Remember to explore the settings menu within your chosen app to discover the full range of customization options available to you. Experiment with different combinations to create a unique and captivating slideshow experience.
Customizing the settings of your slideshow allows you to tailor the presentation to your preferences, showcase your photos in the best possible way, and create a visually stunning display on your Chromecast.
In the next section, we’ll address common troubleshooting tips for any issues you may encounter while playing a slideshow on Chromecast.
Troubleshooting Common Issues
While Chromecast offers a seamless and convenient way to play a slideshow on the big screen, you may encounter some common issues along the way. Here are a few troubleshooting tips to help you resolve any potential problems:
- Connection Problems: If your device is not connecting to Chromecast or is unable to cast the slideshow, ensure that both the Chromecast device and your device are connected to the same Wi-Fi network. Restart your device and Chromecast, and try the connection again.
- App Not Working: If the slideshow app is not working properly or crashing, make sure that you have the latest version of the app installed. Check for any available updates in your device’s app store and install them. Restart your device and try opening the app again.
- Slow or Laggy Playback: If the slideshow playback is slow or laggy, ensure that your Wi-Fi connection is stable and strong. Move your device closer to the router or consider using a Wi-Fi extender to improve the signal strength. Close any other apps or processes running in the background on your device to free up system resources.
- Photos Not Displaying Correctly: If your photos are not displaying correctly or appear distorted on the Chromecast, check the file format and resolution of your photos. Chromecast supports common image formats like JPG and PNG. Ensure that your photos are high resolution and not overly compressed. If necessary, convert or resize your photos to a compatible format and resolution.
- No Sound: If you’re experiencing issues with sound, check the volume settings on both your device and the TV or monitor connected to the Chromecast. Make sure the volume is not muted or set too low. If you’re using an external audio device, ensure it is properly connected and functioning correctly.
- Chromecast Not Responding: If your Chromecast is unresponsive or not working as expected, try restarting it. Disconnect the power source from the Chromecast, wait a few moments, and then reconnect it. Wait for the Chromecast to fully boot up before attempting to use it again.
If you continue to encounter issues despite trying these troubleshooting tips, it may be helpful to consult the user manual or support documentation for your specific Chromecast device or the slideshow app you’re using. Additionally, visiting online forums or communities dedicated to Chromecast or contacting customer support can provide further assistance in resolving any persistent issues.
Now that you’re equipped with troubleshooting knowledge, you can confidently tackle any challenges that may arise while playing a slideshow on your Chromecast.
Conclusion
Creating and playing a slideshow on Chromecast is a fantastic way to showcase your photos and bring them to life on the big screen. With the ability to connect your device, select a slideshow app, and customize the settings, you can create a visually engaging and personalized viewing experience.
Throughout this guide, we’ve explored the step-by-step process of setting up Chromecast, connecting your device, selecting a slideshow app, choosing photos, starting the slideshow, controlling the playback, customizing settings, and troubleshooting common issues. By following these instructions, you can easily create a captivating slideshow that captures the hearts and imaginations of your audience.
Remember to choose your photos carefully, considering variety, quality, and storytelling. Take advantage of the customization options available in your chosen app, such as transition effects, timing, background music, and captions. Experiment with different settings to create a unique and memorable slideshow that reflects your vision and style.
If you encounter any issues along the way, refer to the troubleshooting section for guidance. With a few simple troubleshooting steps, you can overcome common problems and ensure a smooth and uninterrupted slideshow experience.
So, grab your Chromecast device, select your favorite photos, and get ready to impress your friends, family, or audience with a stunning slideshow. Whether it’s a special occasion, a memorable vacation, or simply a showcase of your photography skills, playing a slideshow on Chromecast will elevate your visual presentation and leave a lasting impression.
Now, go ahead and embark on your Chromecast slideshow journey. Enjoy the process, relish in the memories, and captivate your audience with an awe-inspiring display of your cherished photos!