Introduction
Welcome to the world of wireless earbuds! With the advancement in technology, listening to music or taking calls on the go has never been easier. Wireless earbuds offer convenience, mobility, and freedom from tangled wires. Whether you are a fitness enthusiast, a frequent traveler, or just someone who values the simplicity of wireless audio, knowing how to pair your wireless earbuds is crucial.
In this article, we will guide you through the process of pairing your wireless earbuds with your devices. Whether you have just purchased a brand new pair or are struggling to connect your current pair, we’ve got you covered. So, let’s dive right in!
Before we get into the details of the pairing process, it’s important to note that different brands and models of wireless earbuds may have slightly different steps. However, the overall concept remains the same for most devices.
So, without further ado, let’s explore how to successfully pair your wireless earbuds with your devices and embark on a wire-free listening experience.
Step 1: Check compatibility
Before you begin the pairing process, it is essential to ensure that your wireless earbuds are compatible with the device you want to connect them to. Most wireless earbuds are designed to work with a variety of devices, such as smartphones, tablets, laptops, and even smart TVs. However, it’s always a good idea to double-check the compatibility to avoid any connectivity issues.
To check if your wireless earbuds are compatible with your device, start by reviewing the specifications of both the earbuds and the device. Look for compatibility indicators such as Bluetooth version requirements or specific device compatibility restrictions. Most wireless earbuds utilize Bluetooth technology for connectivity, so ensure that your device has Bluetooth capabilities. If your device doesn’t have built-in Bluetooth, you may need to use an external Bluetooth adapter or consider using a different device that supports wireless connectivity.
Additionally, it is important to update the firmware of your wireless earbuds to the latest version. Manufacturers often release firmware updates to improve compatibility, connectivity, and overall performance. Check the manufacturer’s website or user manual for instructions on how to update the firmware for your specific model.
Once you have confirmed the compatibility and updated the firmware if necessary, you are ready to move on to the next step of the pairing process. Remember, ensuring compatibility before attempting to pair your wireless earbuds will save you time and frustration in the long run.
Step 2: Put the earbuds in pairing mode
In order to connect your wireless earbuds to your device, you will need to put them in pairing mode. Pairing mode allows the earbuds to be discovered by your device’s Bluetooth settings, enabling the initial connection.
The process of entering pairing mode varies depending on the make and model of your earbuds, so refer to the user manual for specific instructions. However, most wireless earbuds follow a similar approach:
- Start by ensuring that your wireless earbuds are powered on. Some models may require you to place them in the charging case to activate them.
- Once the earbuds are powered on, locate the pairing button or the designated button for entering pairing mode. This button is usually located on one of the earbuds or on the charging case.
- Press and hold the pairing button for a few seconds. You may need to refer to the user manual for the exact duration. The earbuds should now enter pairing mode, indicated by a flashing LED light or an audio prompt.
Keep in mind that some wireless earbuds may enter pairing mode automatically when they are powered on for the first time. In this case, you don’t need to manually activate pairing mode.
Putting your wireless earbuds in pairing mode ensures that they are discoverable by your device during the Bluetooth scanning process. Now that your earbuds are in pairing mode, we can move on to the next step of the pairing process.
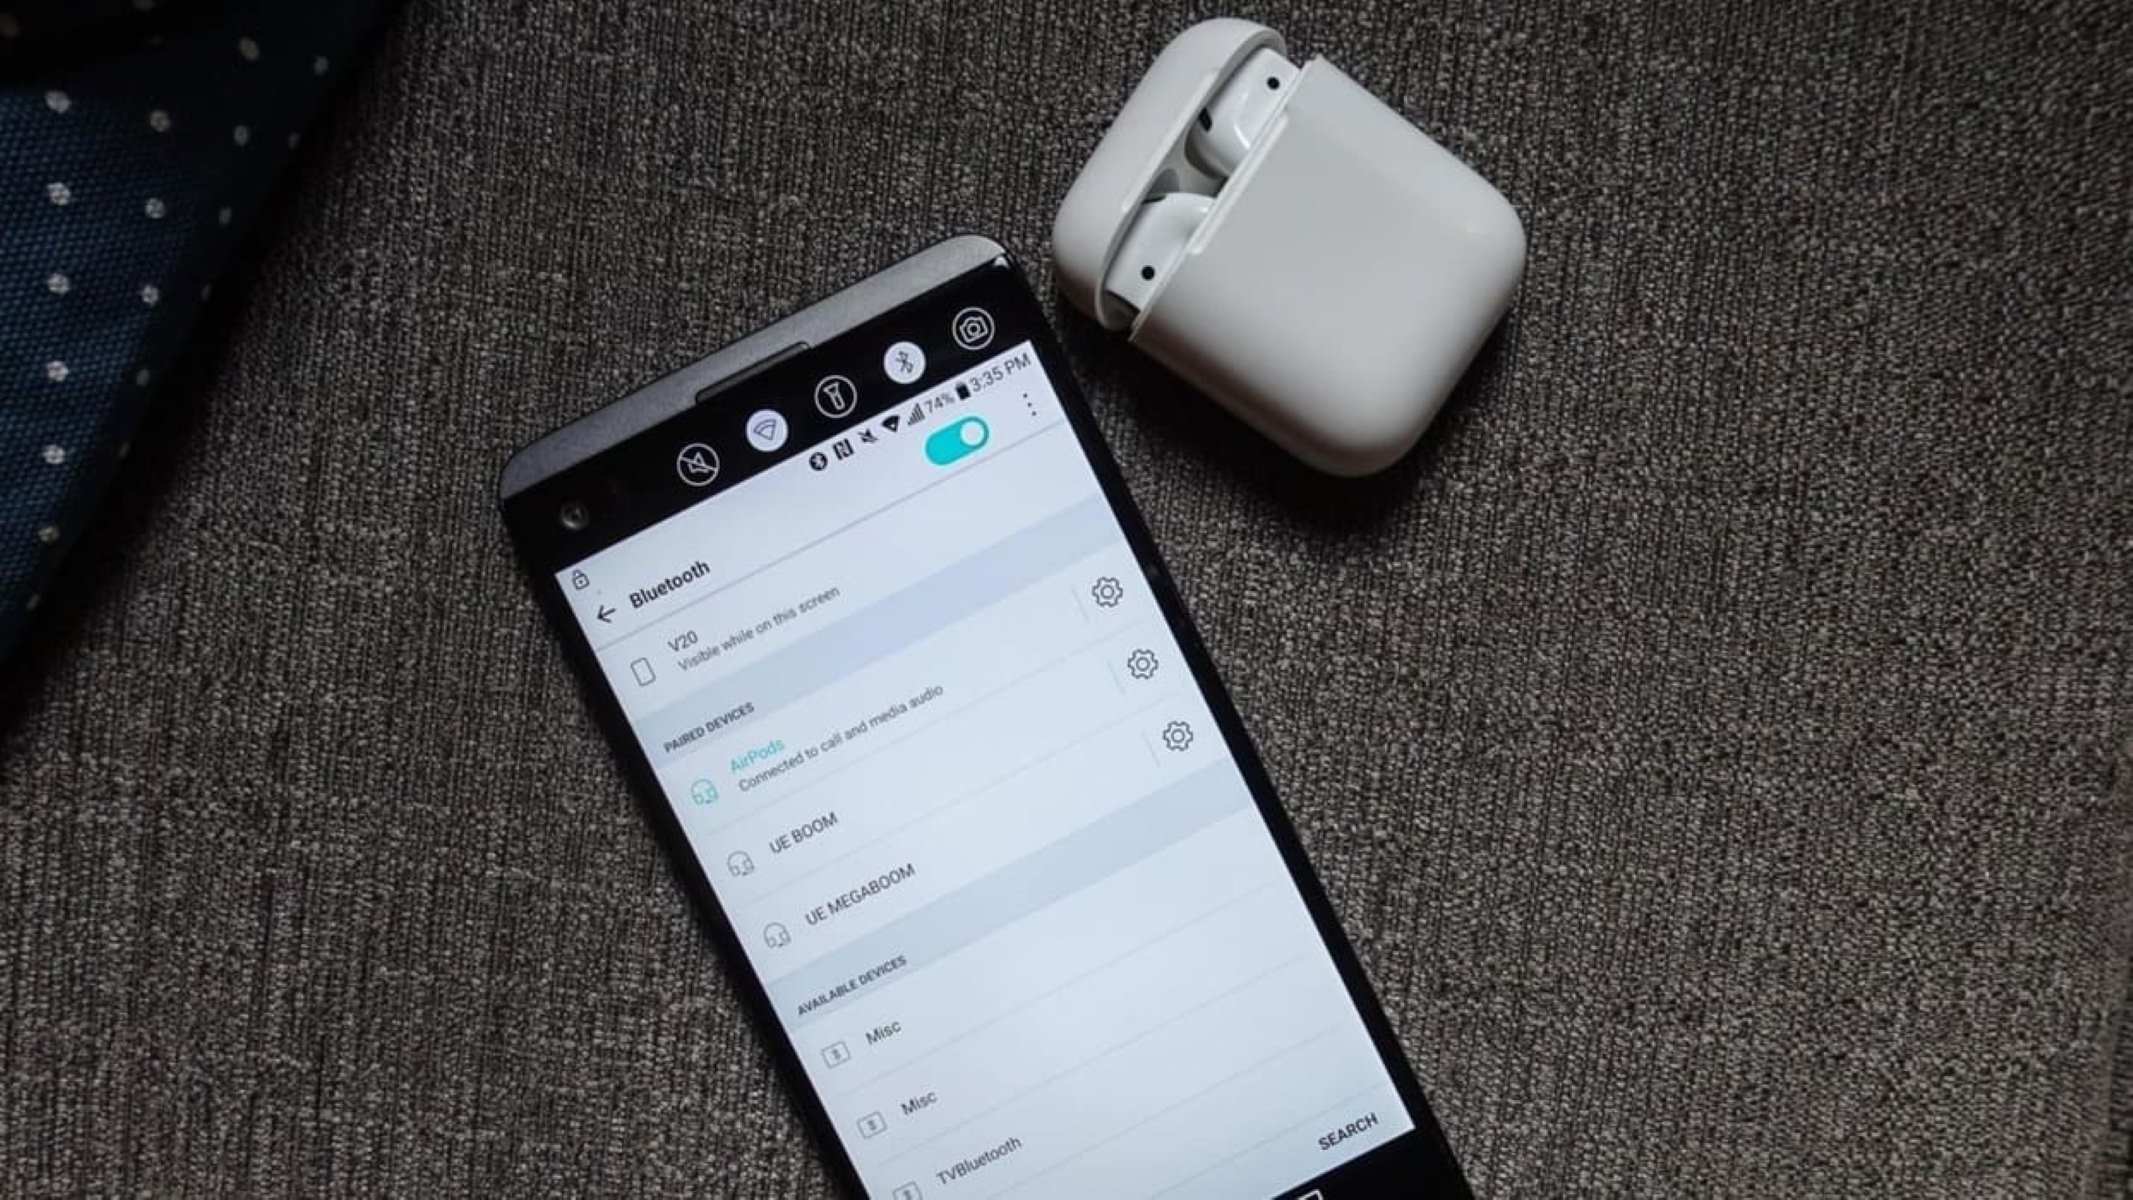
Step 3: Open Bluetooth settings on your device
Now that your wireless earbuds are in pairing mode, it’s time to open the Bluetooth settings on your device. This step will vary slightly depending on the operating system of your device, whether it’s Android, iOS, Windows, or macOS. However, the general process remains similar across different devices.
To open the Bluetooth settings on your device, follow these general steps:
- Unlock your device and navigate to the home screen or main menu.
- Look for the settings icon, usually represented by a gear or cogwheel. Tap or click on the settings icon to access the device settings.
- Within the settings menu, locate and select the section related to Bluetooth connectivity. It may be labeled as “Bluetooth,” “Wireless & Networks,” or something similar.
- If Bluetooth is currently turned off, toggle the switch or button to enable it. If Bluetooth is already enabled, you can proceed to the next step.
Keep in mind that the terminology and layout of the settings menu may vary slightly depending on your device’s manufacturer and the version of the operating system. If you are unsure of how to access the Bluetooth settings, refer to the device’s user manual or search online for specific instructions.
By opening the Bluetooth settings on your device, you are ready to establish a connection with your wireless earbuds. In the next step, we will enable Bluetooth and start the pairing process.
Step 4: Enable Bluetooth
Now that you have opened the Bluetooth settings on your device, it’s time to enable Bluetooth. Enabling Bluetooth allows your device to search for and establish a connection with your wireless earbuds that are currently in pairing mode.
The steps to enable Bluetooth may vary depending on the operating system of your device. Here’s a general guide:
- Within the Bluetooth settings menu, you should see a toggle switch or button labeled “Bluetooth” or “Enable Bluetooth.” Tap or click on this switch to turn on Bluetooth.
- Once Bluetooth is enabled, your device will start scanning for available devices in the vicinity. This scanning process may take a few seconds.
- Keep an eye out for your wireless earbuds in the list of available devices. They may be listed under their specific model name or a generic name related to the earbud brand.
If you do not see your wireless earbuds in the list, make sure they are in pairing mode and within the range of your device. You may need to restart the scan or troubleshoot any connectivity issues. Refer to the user manual of your earbuds for troubleshooting tips or consult the manufacturer’s support channels.
By enabling Bluetooth, you have set your device to search for nearby devices, including your wireless earbuds. In the next step, we will select your earbuds from the available devices list to establish the connection.
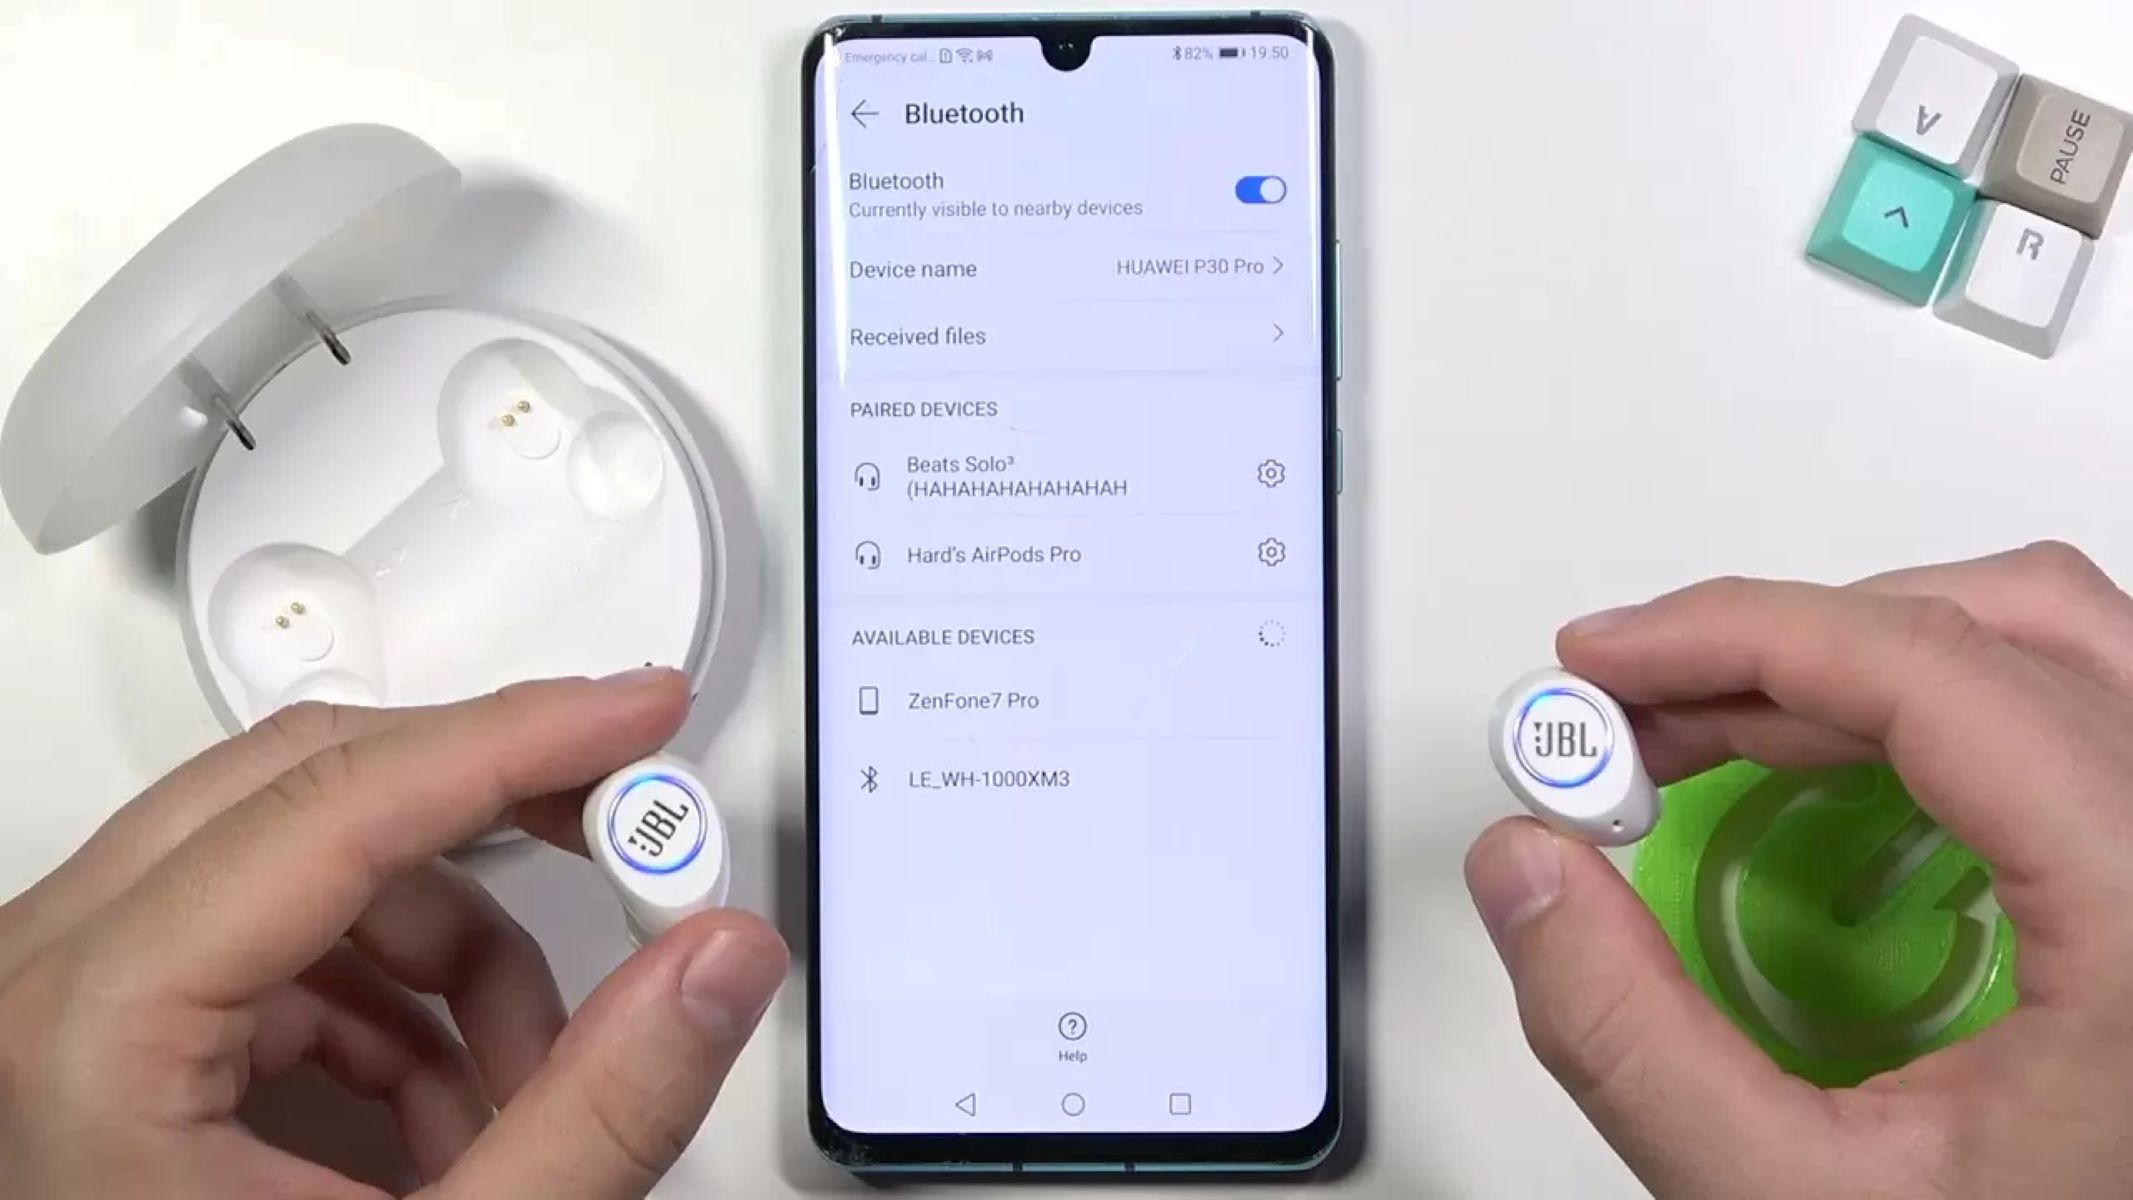
Step 5: Select your earbuds from the available devices list
With Bluetooth enabled on your device, it’s time to select your wireless earbuds from the list of available devices. This step is crucial in establishing a successful connection between your device and the earbuds.
Follow these steps to select your earbuds:
- In the Bluetooth settings menu on your device, you should see a list of available devices. The list may include both nearby devices that are currently in pairing mode and previously paired devices.
- Scan the list to locate your wireless earbuds. They should be identifiable by their brand name or specific model name.
- Tap or click on the name of your earbuds to select them. Your device will then attempt to establish a connection with the chosen pair of earbuds.
During this process, your device may prompt you to enter a passcode or confirm a pairing request. Follow the on-screen instructions to complete the pairing process. Some earbuds may not require a passcode or confirmation, and the connection will be established automatically.
Keep in mind that it may take a few moments for the connection to be established. Be patient and avoid moving too far away from your device during this process, as it may interfere with the connection.
Once the connection is successfully established, your device will display a notification or an indicator showing that the pairing is complete. Congratulations! You have paired your wireless earbuds with your device.
Step 6: Complete the pairing process
After selecting your wireless earbuds from the available devices list, you are closer to enjoying a seamless audio experience. However, before you can start using your earbuds, it is essential to complete the final steps of the pairing process to ensure a stable and reliable connection.
Follow these steps to complete the pairing process:
- Once your device has successfully connected to your wireless earbuds, you may need to wait for a moment as the final configurations and settings are applied.
- During this time, your device may display a notification or indicate that the pairing process is being completed. It may also install specific drivers or software to optimize the earbuds’ performance.
- Once the pairing process is complete, your device will display a confirmation message or a symbol indicating that the connection has been successfully established.
At this point, your wireless earbuds are ready to use. However, it’s essential to take a moment to familiarize yourself with any additional features or settings that the earbuds offer. This may include adjusting the volume, managing playback controls, activating noise-canceling features, or accessing virtual assistants.
Refer to the user manual or the manufacturer’s website for instructions on how to utilize these features effectively. Understanding and customizing these options will enhance your overall listening experience with the wireless earbuds.
Congratulations! You have completed the pairing process and are now ready to enjoy the wire-free freedom of your wireless earbuds. Now it’s time to move on to the final step to ensure that the connection is stable.
Step 7: Test the connection
Once you have completed the pairing process, it’s crucial to test the connection between your device and your wireless earbuds to ensure a stable and reliable audio experience. Testing the connection will help identify any issues or inconsistencies that may need troubleshooting.
Here’s how to test the connection:
- Start by playing some audio, such as a music track or a video, on your device.
- Make sure the sound output is set to the wireless earbuds. You can usually find this option in the playback settings or the media controls of your device.
- Listen closely to verify that the audio is playing through the earbuds and that the sound quality is satisfactory.
- Adjust the volume using the controls on your device or the earbuds themselves to ensure that the sound level is comfortable.
- Move around your environment to test the range and stability of the connection. Your earbuds should maintain a clear audio signal within a reasonable distance from your device.
- If you encounter any issues, such as distortion, intermittent sound, or a weak connection, try the following troubleshooting steps:
- Restart your device and earbuds.
- Ensure that your wireless earbuds are within the Bluetooth range of your device.
- Disconnect and reconnect the earbuds from the Bluetooth settings menu.
- Check for any software updates for your earbuds and install them if available.
- Refer to the user manual or contact the manufacturer’s support for further assistance.
By testing the connection and troubleshooting any potential issues, you can ensure a seamless audio experience with your wireless earbuds.
Now that you have successfully paired and tested the connection, you can enjoy your favorite music, podcasts, or calls without the hassle of tangled wires. Embrace the freedom that wireless earbuds bring to your audio experience, and make the most out of your device’s portability.
Conclusion
Congratulations! You have successfully learned how to pair your wireless earbuds with your devices. By following the step-by-step instructions in this guide, you can now enjoy the convenience and freedom of wire-free audio.
Remember that the process of pairing wireless earbuds may vary slightly depending on the brand and model you own. It’s always a good idea to refer to the user manual or the manufacturer’s website for specific instructions tailored to your earbud set.
Whether you love listening to music, engaging in phone calls, or even watching videos, your wireless earbuds will provide you with a tangle-free and immersive experience. The freedom to move around without being tied down to a wired connection is truly liberating, especially during workouts or while on the go.
Keep in mind that maintaining a stable connection is essential for optimal performance. Regularly check for software updates for both your device and your earbuds to ensure compatibility and to access new and improved features.
Lastly, experiment with different controls and settings on your earbuds to personalize your audio experience. Adjust the volume, activate noise-canceling features, or explore any other unique features your earbuds offer. Make the most out of your wireless earbuds to enjoy immersive sound quality and enhanced convenience.
Now, it’s time to sit back, relax, and enjoy your favorite content with the freedom and mobility that wireless earbuds provide. So put on your earbuds, hit play, and immerse yourself in the captivating world of wireless audio!