Introduction
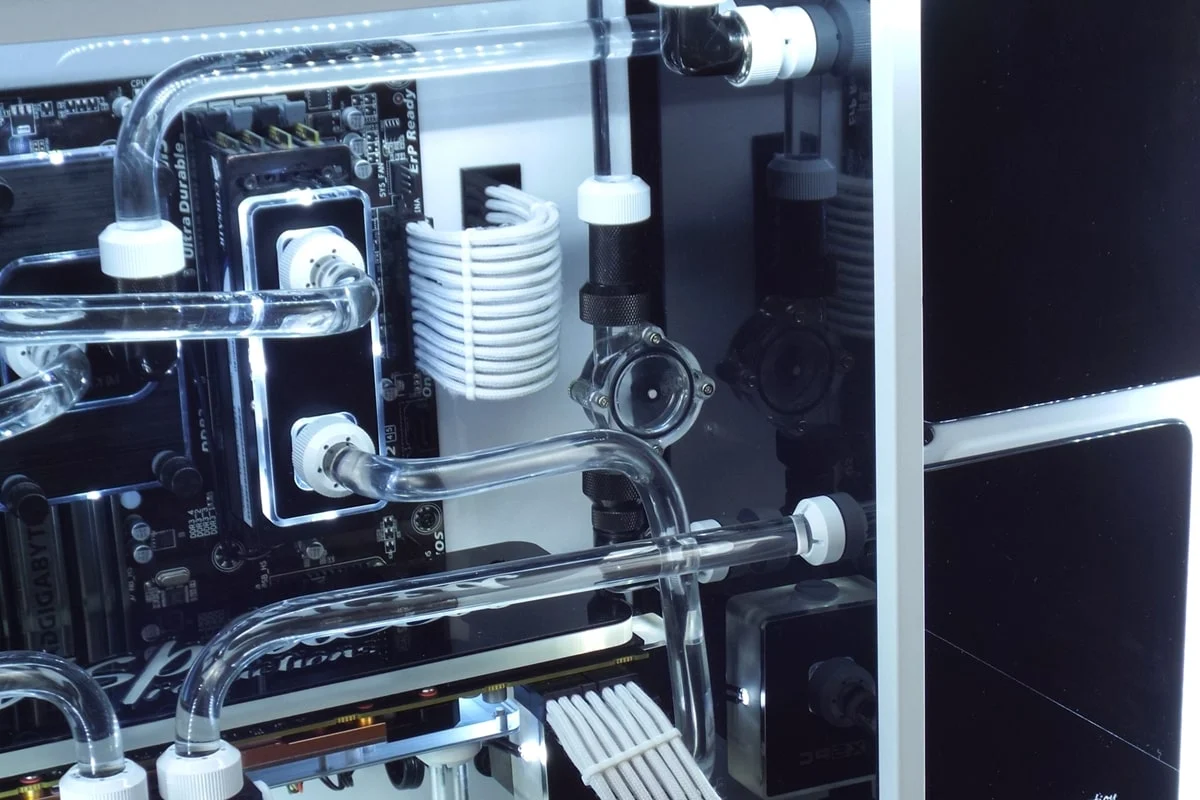
Jumping a PSU to drain a water loop is a crucial step in maintaining and troubleshooting custom liquid cooling systems. Liquid cooling systems are a popular choice among PC enthusiasts and gamers due to their exceptional cooling capabilities. However, these systems require occasional maintenance, which includes draining the loop to replace coolant or to fix any issues that may arise.
Jumping a PSU, also known as paperclip testing, involves bypassing the motherboard to power the pump and fans, allowing the water to circulate and facilitating the draining process. This technique ensures that the water loop is drained efficiently without the risk of damaging the components or the PSU.
In this guide, we will explain in detail what a PSU is, why jumping a PSU is necessary, and provide a step-by-step guide on how to safely jump a PSU to drain a water loop. We will also discuss the precautions that need to be taken to prevent any mishaps during the process.
Whether you are a PC enthusiast looking to build a custom liquid cooling system or someone who needs to perform maintenance on an existing setup, this guide will provide you with the necessary knowledge to safely and effectively drain your water loop.
What is a PSU?
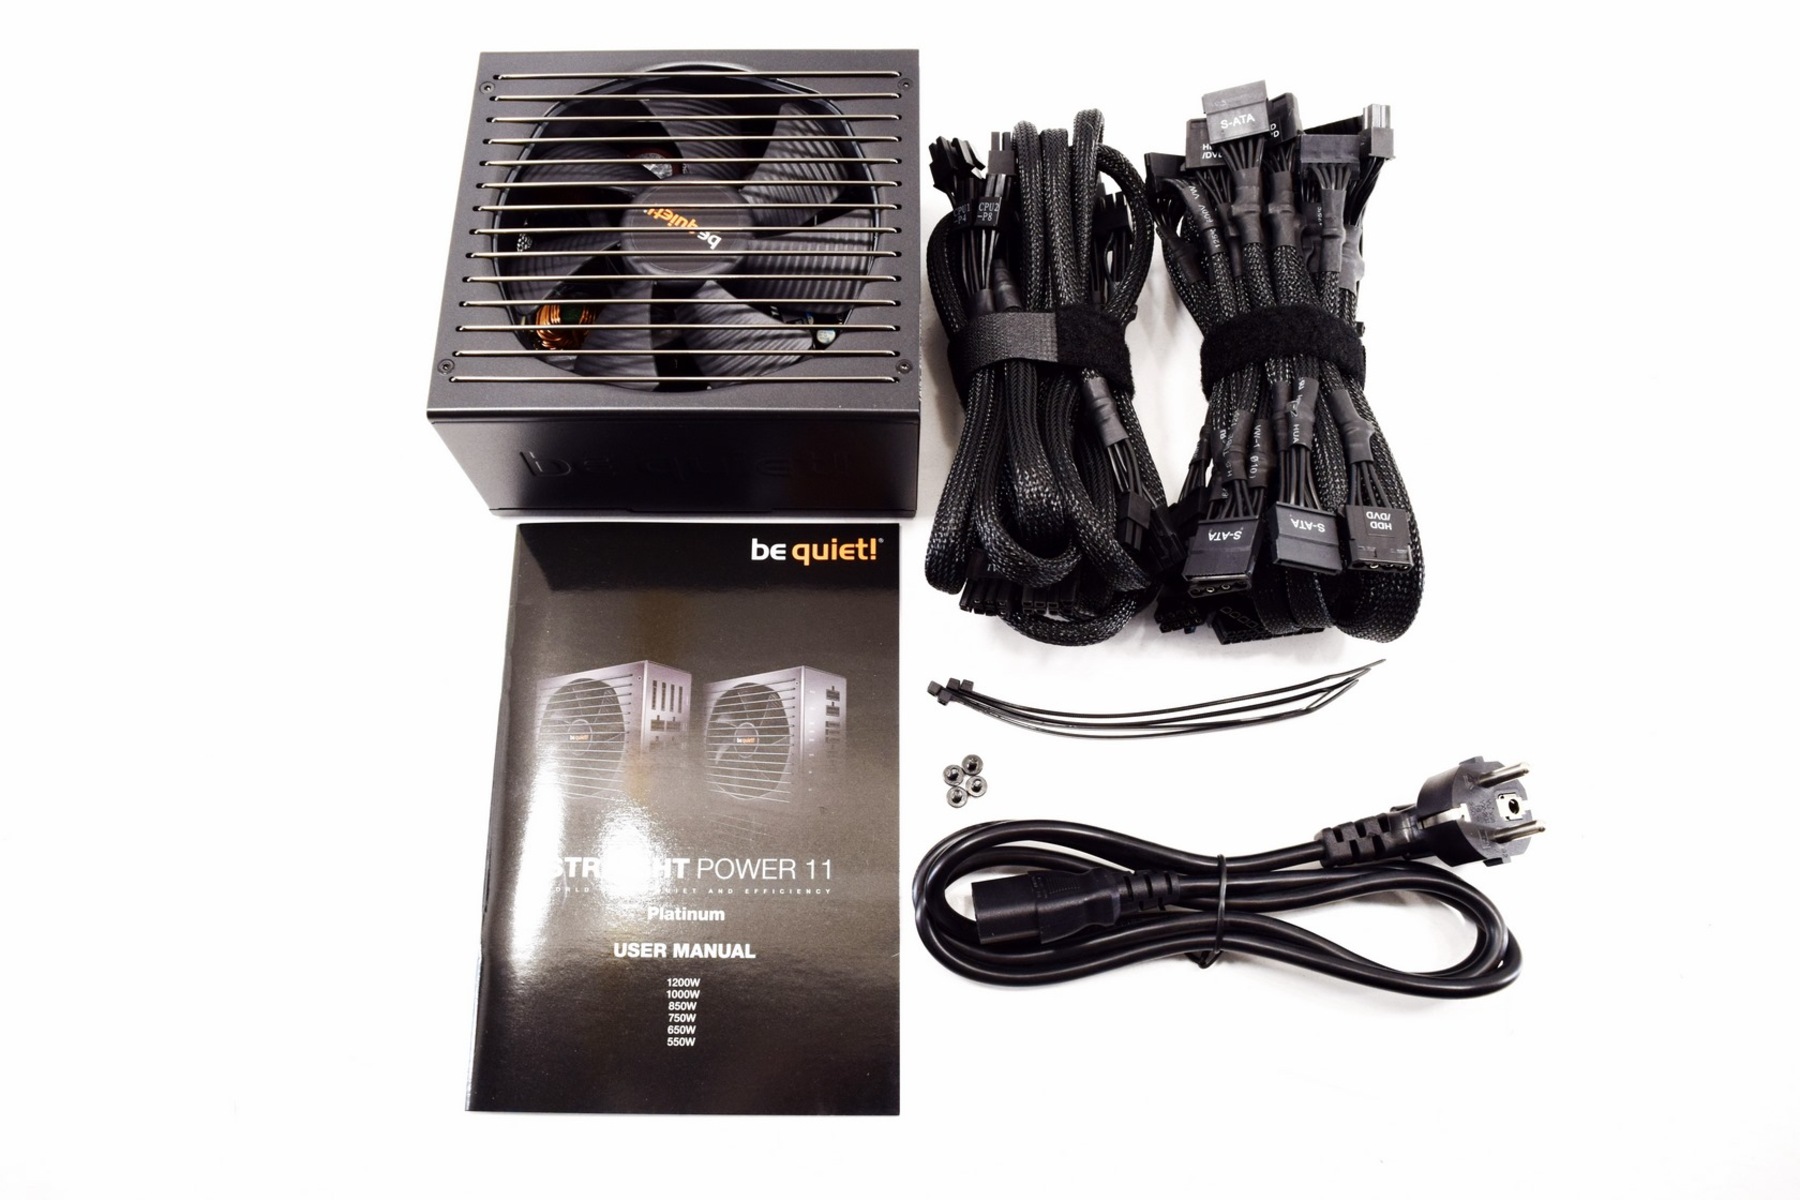
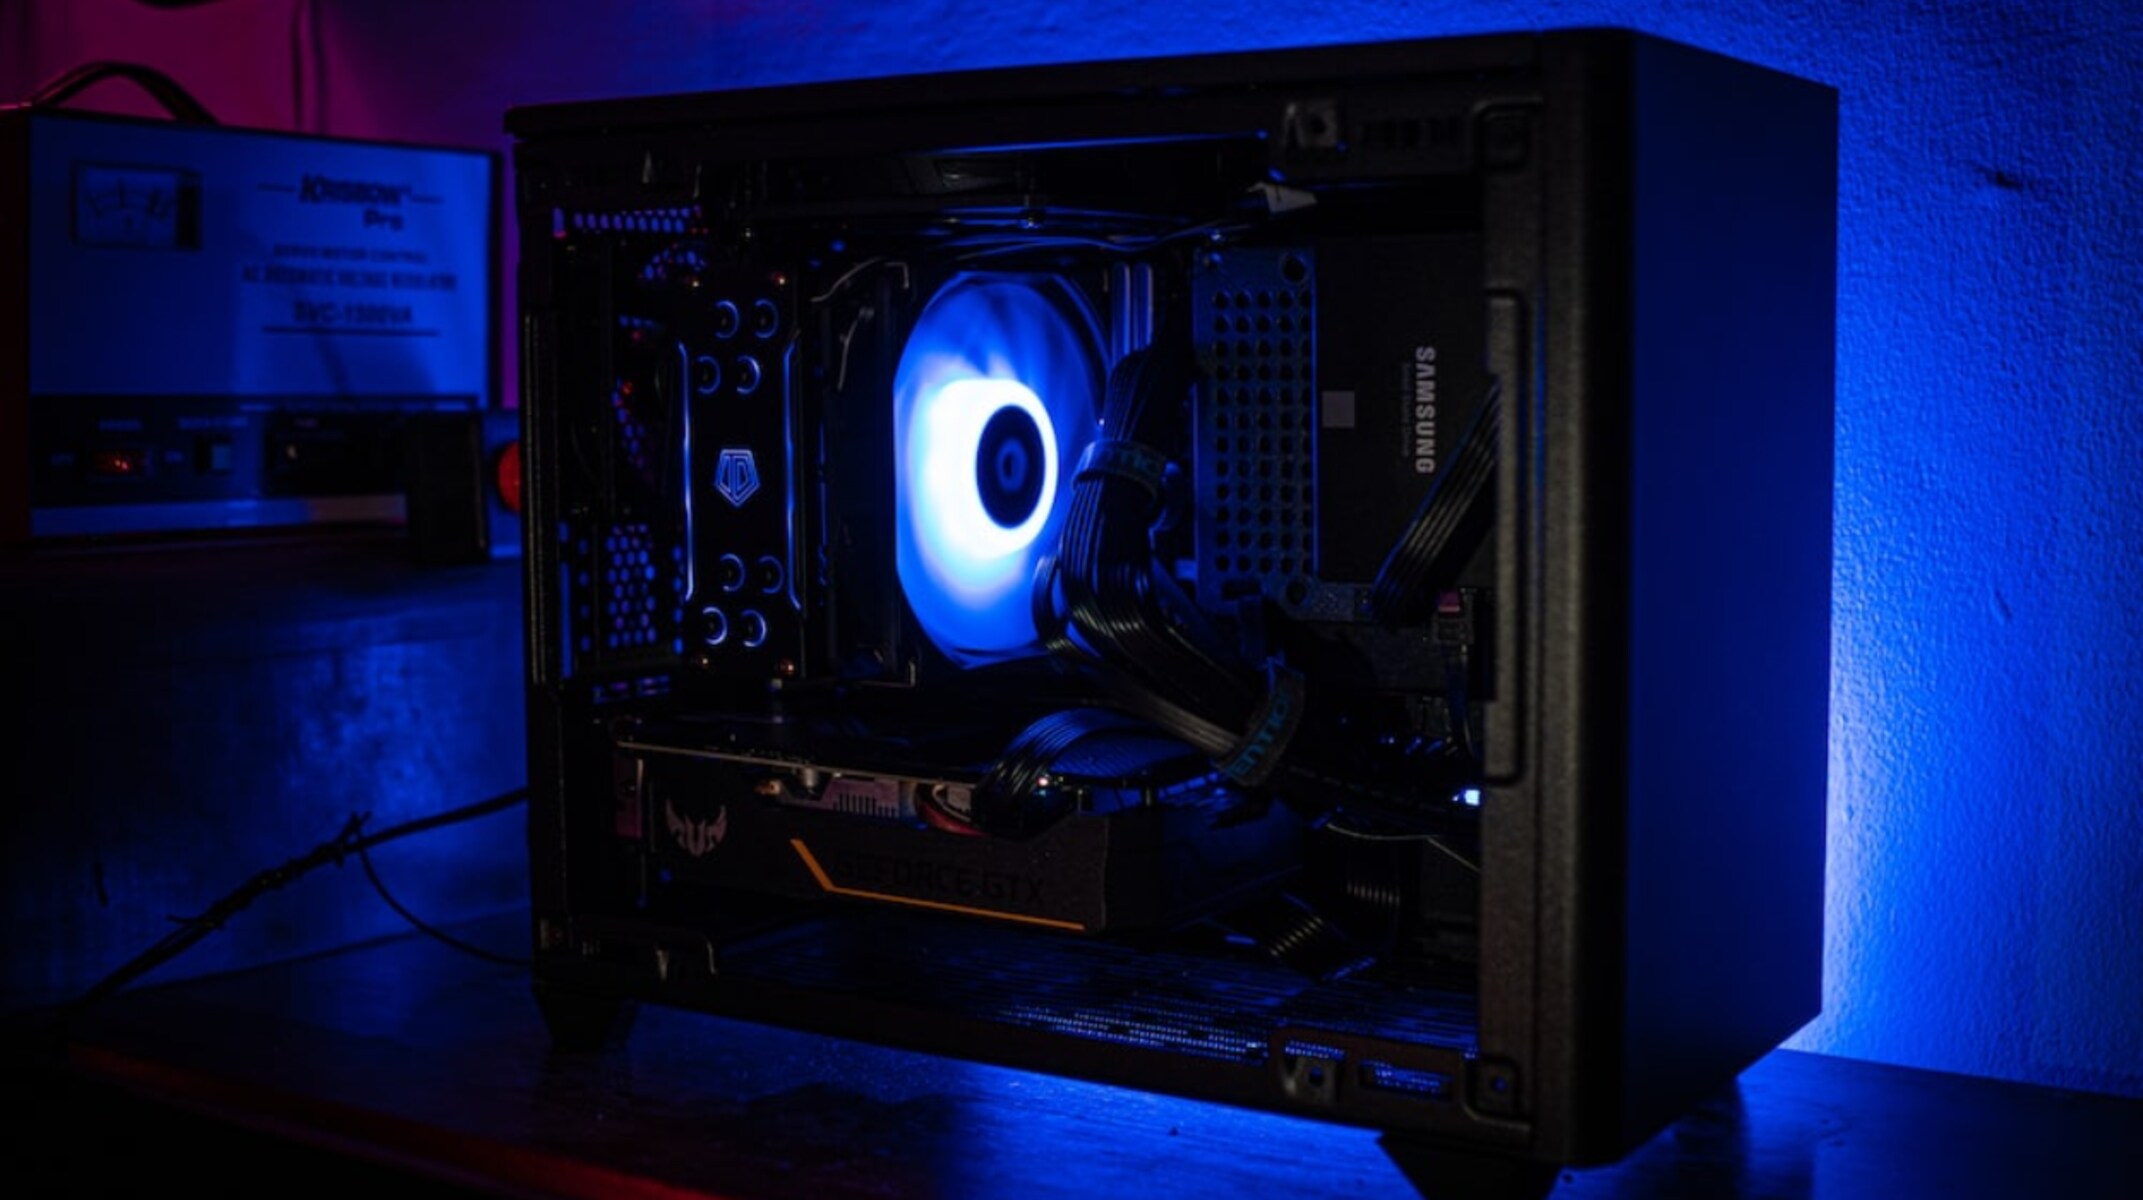
A PSU, or Power Supply Unit, is an essential component of a computer system. It is responsible for converting alternating current (AC) power from the wall outlet into direct current (DC) power that is required by the computer’s internal components. The PSU supplies power to the motherboard, CPU, graphics card, drives, and other peripherals.
PSUs come in different wattages and form factors, allowing users to choose the one that meets their system’s power requirements. They are typically mounted inside the computer case and connected to the motherboard and other components through a series of cables.
A PSU plays a critical role in ensuring the stability and reliability of your computer system. It protects the internal components from power fluctuations, voltage spikes, and provides a steady flow of power. In the context of liquid cooling systems, the PSU is responsible for powering the pump and fans that circulate the coolant through the loop, maintaining optimal temperatures for the components.
PSUs are equipped with various safety features, including overvoltage protection (OVP), undervoltage protection (UVP), overcurrent protection (OCP), and short circuit protection (SCP). These measures are in place to safeguard the components from any electrical issues that may arise.
Understanding the basic functionality and components of a PSU is crucial when it comes to jumping it to drain a water loop. By bypassing the motherboard and directly powering the necessary components, we can ensure that the water loop is drained properly, without any damage to the system.
Why do you need to jump a PSU?
When it comes to custom liquid cooling systems, draining the water loop is a necessary step for routine maintenance and troubleshooting. Jumping a PSU is required to facilitate the draining process and ensure the water loop is properly emptied.
Here are some reasons why you need to jump a PSU:
- Powering the pump: The pump in a liquid cooling system is responsible for circulating the coolant throughout the loop. By jumping the PSU, you can provide power directly to the pump, allowing it to run and facilitate the draining process.
- Activating the fans: The fans in the system play a crucial role in dissipating heat from the components. When jumping the PSU, the fans will also receive power, ensuring proper airflow and aiding in the cooling process during the draining procedure.
- Removing trapped air: Draining a water loop requires the removal of any trapped air bubbles. By running the pump and fans through the jumped PSU, the circulation created helps in bringing the air bubbles to a location where they can be easily purged from the system.
- Preventing damage to the PSU: Draining the loop without jumping the PSU can cause strain on the power supply unit. The PSU is designed to power the entire system, and without it being engaged properly, it can lead to power surges or improper functionality.
Jumping a PSU allows you to have control over the power supply and ensures that the components involved in the draining process are receiving the necessary power. It enables you to safely drain the water loop without the risk of damaging the PSU or other components.
By following the step-by-step guide provided in the next section, you will be able to jump your PSU effectively and efficiently, making the draining process a breeze.
Step-by-step guide to jumping a PSU to drain a water loop
Jumping a PSU is a simple process that involves bypassing the motherboard to provide power directly to the necessary components in order to drain a water loop. Follow these steps to safely and effectively jump your PSU:
- Turn off your computer: Before starting the process, make sure your computer is completely powered off. This will prevent any potential issues or accidents during the procedure.
- Unplug your PSU: Disconnect the power supply from the electrical outlet to ensure your safety and prevent any electrical mishaps.
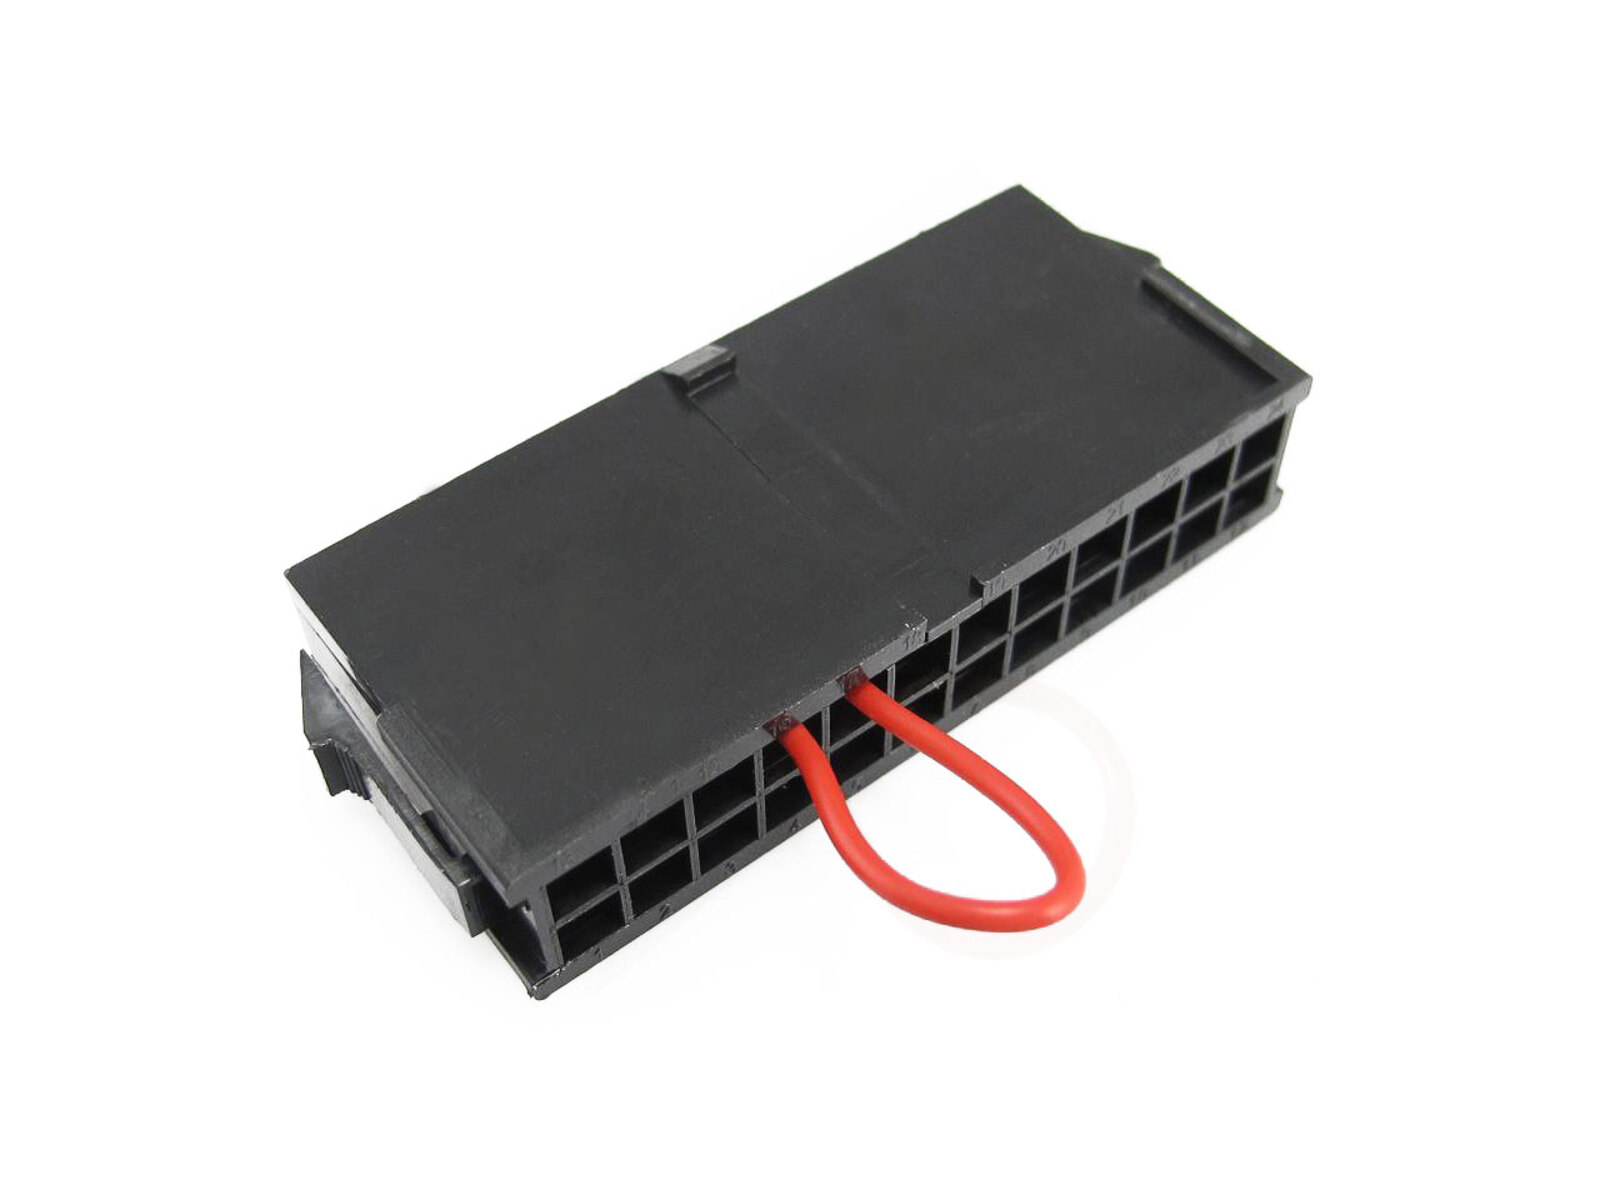
- Locate the 24-pin motherboard connector: Identify the 24-pin connector that connects the PSU to the motherboard. This is typically a large, rectangular connector with 24 pins.
- Prepare a paperclip or wire: Straighten out a paperclip or use a small piece of wire to create a short circuit. Ensure that the paperclip or wire is long enough to reach the pins inside the 24-pin connector.
- Insert the paperclip or wire: Insert one end of the paperclip or wire into the green wire pin (pin 16) of the 24-pin connector. Insert the other end of the paperclip or wire into any one of the black wire pins (grounds).
- Plug in your PSU: Once the paperclip or wire is inserted, plug your PSU back into the electrical outlet. The PSU will now be powered without the motherboard being involved.
- Power on the PSU: Flip the switch at the rear of the PSU to the “on” position. You will see and hear the fans and pump start running. This indicates that the PSU has been successfully jumped.
- Drain the water loop: With the PSU jumped and the components receiving power, you can now proceed to drain the water loop properly. Follow the manufacturer’s instructions or consult online resources specific to your liquid cooling system for the proper way to drain the loop.
- Power off and unplug the PSU: After the draining process is complete, turn off the PSU by flipping the switch to the “off” position. Unplug the PSU from the electrical outlet once again to ensure your safety.
Remember to exercise caution when jumping a PSU, as it involves working with electrical components. Always follow proper safety protocols and refer to your PSU and liquid cooling system documentation for specific instructions.
By following these simple steps, you can effectively jump your PSU and drain your water loop safely and efficiently.
Precautions to take while jumping a PSU
While jumping a PSU is a fairly straightforward process, it is important to exercise caution and take necessary precautions to ensure your safety and prevent any damage to your components. Here are some important precautions to keep in mind:
- Handle the PSU with care: The PSU houses electrical components and should be handled with caution. Avoid dropping or mishandling it to prevent any potential damage to the unit or injury to yourself.
- Make sure the PSU is unplugged: Before jumping the PSU, make sure to unplug it from the electrical outlet. This will prevent any potential electrical shocks or accidents during the procedure. Never attempt to jump a PSU while it is still plugged in.
- Use proper tools: When creating the short circuit to jump the PSU, use a paperclip or wire that is insulated to prevent any electric shock hazards. Ensure the paperclip or wire is securely inserted into the correct pins and does not have any exposed ends.
- Double-check your connections: Before plugging the PSU back into the electrical outlet, double-check that the paperclip or wire is properly inserted into the right pins of the 24-pin connector. Incorrect connections can lead to damage to your components or the PSU itself.
- Avoid touching exposed pins: Be careful not to touch any exposed pins inside the 24-pin connector while the PSU is plugged in. Doing so can result in electric shock or damage to the PSU or other components.
- Ensure proper drainage: Once the PSU is jumped, ensure there is a proper drainage path for the water loop. Follow the manufacturer’s instructions or consult online resources specific to your liquid cooling system to ensure a smooth and effective draining process.
- Avoid prolonged jumping: Jumping a PSU for an extended period of time can cause the components to overheat. As soon as the water loop has been drained, power off the PSU and unplug it from the electrical outlet.
- Refer to manufacturer instructions: It is always recommended to refer to the specific instructions provided by the PSU manufacturer and your liquid cooling system manufacturer for accurate guidance on jumping the PSU and any precautions specific to your devices.
Following these precautions will help ensure a safe and successful process of jumping your PSU to drain the water loop. Safety should always be a priority when working with electrical components, so exercise caution and take the necessary steps to protect yourself and your devices.
Conclusion
Jumping a PSU to drain a water loop is an essential step in maintaining and troubleshooting custom liquid cooling systems. By following the step-by-step guide provided, you can effectively bypass the motherboard and provide power directly to the necessary components, allowing for a proper and efficient draining process.
Throughout this guide, we have discussed what a PSU is and its role in powering the components of a computer system. We have also explored the reasons why jumping a PSU is necessary when it comes to draining a water loop in a liquid cooling system.
It is crucial to take precautions during the jumping process to ensure your safety and prevent any damage to your components. Handling the PSU with care, using proper tools, and double-checking connections are some of the important precautions to keep in mind. Additionally, always refer to manufacturer instructions and specific guidance for your devices.
Properly jumping a PSU and draining the water loop will help you perform routine maintenance and address any issues that may arise with your liquid cooling system. By maintaining optimal temperatures, liquid cooling systems can provide efficient cooling for your PC, enhancing its performance and longevity.
Remember, whenever working with electrical components, it is crucial to prioritize safety. By following the guidelines presented in this guide, you can safely and effectively jump your PSU to drain your water loop without any mishaps or damage to your system.
Now that you have the knowledge and understanding of how to jump a PSU for the purpose of draining a water loop, you can confidently maintain your liquid cooling system and ensure its smooth operation. Happy cooling!