Introduction
Welcome to our guide on how to install a solid state drive (SSD) on a Toshiba Satellite laptop. Upgrading your laptop’s hard drive to an SSD is a fantastic way to enhance its performance and overall speed. With its superior read and write speeds compared to traditional hard drives, an SSD can significantly reduce boot times, improve file transfer speeds, and enhance overall system responsiveness.
In this article, we will provide you with a step-by-step guide on how to install an SSD in your Toshiba Satellite laptop. We will cover everything from the necessary tools and preparations to backing up your existing data, opening up your laptop, and securely installing the SSD. Additionally, we will guide you through the process of configuring the SSD and restoring your data from the backup.
Before we proceed, it’s important to note that performing any type of hardware modification may void your laptop’s warranty. If you are unsure about any step or feel uncomfortable with the process, we highly recommend seeking assistance from a professional technician.
Now that we’ve covered the basics, let’s dive into the necessary preparations and gather the tools and materials required for this installation.
Prep Work
Before diving into the installation process, it’s essential to complete some preparatory steps to ensure a smooth and successful upgrade. The following are the key steps to follow before proceeding with the installation:
- Gather the necessary tools and materials: To install an SSD in your Toshiba Satellite laptop, you will need a few essential tools. Be sure to have a small Phillips screwdriver, an anti-static wrist strap (optional but recommended), and of course, your new SSD.
- Backup your existing data: Before making any changes to your laptop’s hard drive, it’s crucial to back up all your important files and data. You can either create a complete system backup using backup software or manually transfer your essential files to an external storage device like a USB drive or an external hard disk.
- Shut down and unplug your laptop: Before opening up your laptop, make sure it is turned off and disconnected from any power source. This will help prevent any potential electrical hazards and protect your laptop from accidental damage.
Properly completing these preparatory steps will ensure that you have the necessary tools, a backup of your important data, and a safely powered-down laptop ready for the installation process. Once you have gathered the required tools and materials and backed up your data, you can move on to opening up your Toshiba Satellite laptop and beginning the installation of the SSD.
Step 1: Gather the necessary tools and materials
Before you start the installation process, it’s important to gather all the tools and materials you will need. Having everything prepared beforehand will ensure a smooth and efficient installation. Here is a list of the necessary tools and materials:
- Small Phillips screwdriver: You will need a small Phillips screwdriver to remove and secure screws during the installation process. Make sure to use the appropriate size to avoid damaging the screws.
- Anti-static wrist strap (optional but recommended): An anti-static wrist strap helps prevent electrostatic discharge (ESD) that can potentially damage your laptop’s components. If you have one, it’s recommended to wear it during the installation process.
- New Solid State Drive (SSD): This is the main component you will be installing. Ensure that the SSD is compatible with your laptop’s specifications and has sufficient storage capacity to meet your needs.
- External storage device: It’s always a good idea to have an external storage device, such as a USB flash drive or an external hard drive, to back up your data before the installation process.
- Laptop manual: While not a physical tool, having your laptop’s manual or accessing the user guide online can be helpful to guide you through any specific steps or precautions related to your Toshiba Satellite model.
Before starting the installation process, make sure you have all these tools and materials readily available. This will help ensure a hassle-free installation experience without the need to interrupt the process to search for missing items.
Once you have gathered the necessary tools and materials, you are ready to proceed to the next step: backing up your existing data.
Step 2: Backup your existing data
Before embarking on any hardware modifications, it’s crucial to back up your existing data to ensure it remains safe and secure throughout the installation process. Follow these steps to create a backup of your important files:
- Identify your essential files: Determine which files, documents, photos, videos, or other data you deem important and cannot afford to lose. This might include personal documents, work files, or sentimental media.
- Choose a backup method: Decide on the backup method that best suits your needs. There are several options to consider, such as using backup software, manually copying files to an external storage device, or utilizing cloud storage services.
- Backup with software: If you prefer a comprehensive backup solution, you can use backup software specifically designed for this purpose. These programs often offer automated backups, incremental backups, and the ability to restore your data easily.
- Manual backup: Alternatively, you can manually copy your important files to an external storage device, such as a USB flash drive or an external hard drive. Create a new folder and organize your files accordingly for a more systematic backup.
- Cloud storage: Another option is to utilize cloud storage services like Google Drive, Dropbox, or OneDrive. These services allow you to upload your files to secure cloud servers, ensuring easy access and protection from data loss.
Remember to verify that you have successfully backed up all your important data before proceeding with the installation. Double-check that your backup files are accessible and complete to ensure a smooth restoration process later on.
By backing up your data, you can have peace of mind knowing that even if something goes awry during the installation, your important files will remain safe and unaffected. With your data securely backed up, you’re now ready to move on to the next step: shutting down and unplugging your laptop.
Step 3: Shut down and unplug your laptop
Before you begin working on your laptop’s hardware, it’s crucial to shut it down properly and disconnect it from any power sources. Following these steps will ensure the safety of both you and your laptop during the installation process:
- Save your work and close all applications: Before shutting down, make sure to save any ongoing work and close all open applications to avoid data loss or corruption. This ensures a clean shutdown without any unsaved changes.
- Click on the Start menu: On your laptop’s screen, locate and click on the Start button, typically located at the bottom-left corner of the screen. This will open the Start menu, from which you can initiate the shutdown process.
- Select the Shut Down option: In the Start menu, you will see various options. Click on the “Power” button, and then choose “Shut Down” from the list of available options. This will prompt your laptop to begin the shutdown sequence.
- Wait for the shutdown process: Give your laptop some time to complete the shutdown process. It may take a few moments, depending on the number of applications running and the complexity of the shutdown sequence.
- Unplug your laptop: Once your laptop has completely shut down, unplug it from the power outlet. This step ensures that no electrical current is running through the device and reduces the risk of any electrical damage.
- Remove any external peripherals: Before proceeding with the installation, disconnect any external peripherals, such as USB devices or charging cables, from your laptop. This will prevent any accidental damage to these devices or interference during the installation process.
By following these steps and ensuring that your laptop is powered down and disconnected, you are taking the necessary precautions to protect yourself and your device. Now that you have shut down and unplugged your laptop, you can proceed to the next step: opening up your laptop and accessing the hard drive.
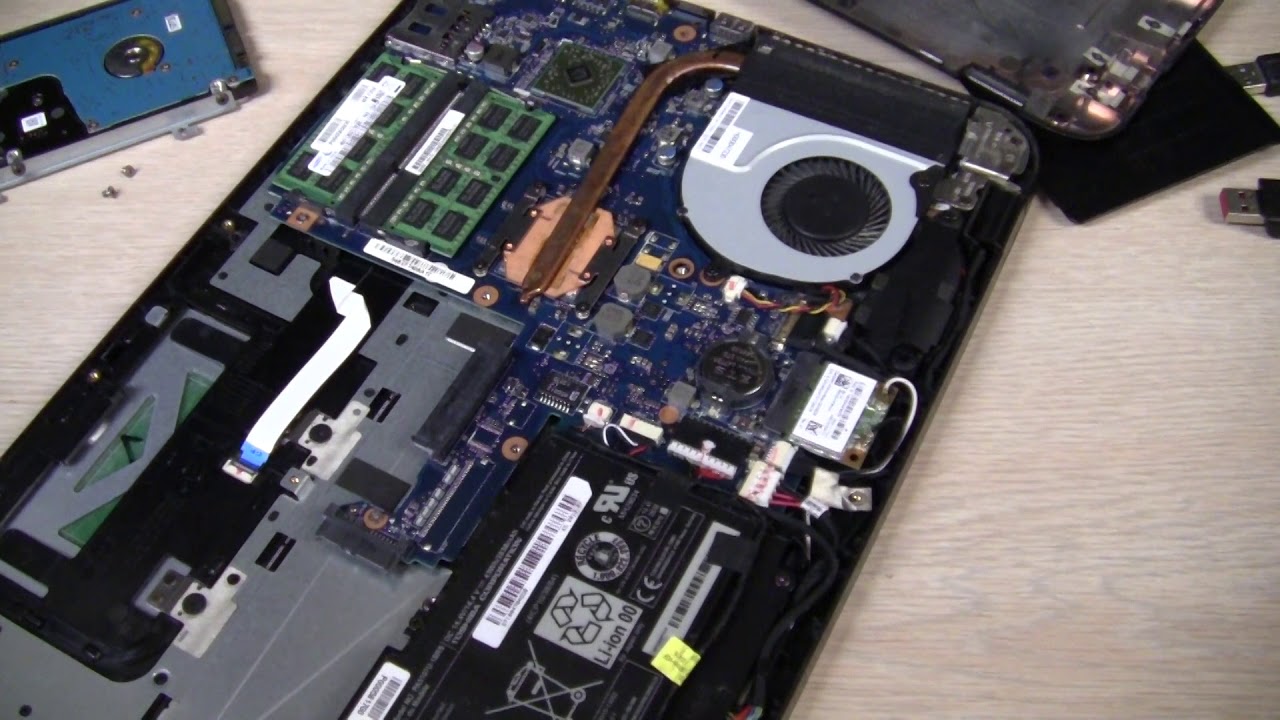
Opening Up Your Laptop
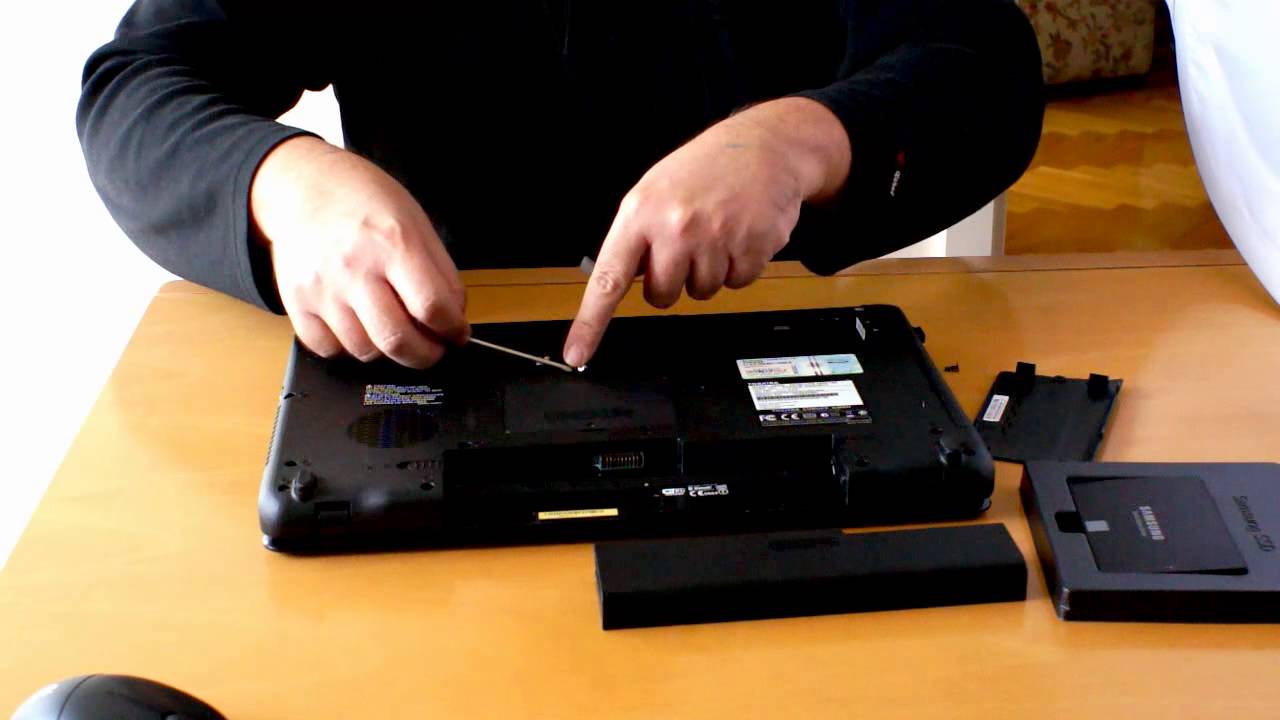
Now that you have shut down and unplugged your laptop, you can proceed to open it up and gain access to the internal components. Follow these steps carefully to ensure a successful and safe opening:
- Place your laptop on a flat, clean surface: Find a suitable workspace where you can comfortably work on your laptop. Choose a surface that is clean, well-lit, and sturdy enough to support your laptop during the process.
- Flip your laptop over: Turn your laptop upside down so that the bottom side is facing up. This is where you will find the access panels and screws that need to be removed.
- Locate and remove the bottom cover screws: Look for the screws that secure the bottom cover of your laptop in place. These are usually indicated by small icons or labels. Use a small Phillips screwdriver to carefully unscrew and remove them. Keep the screws in a safe place to avoid misplacing them.
- Remove the bottom cover: With the screws removed, gently pry off the bottom cover using your fingers or a plastic opening tool. Be cautious and apply even pressure to avoid damaging any internal components.
- Ground yourself to prevent electrostatic discharge: Before touching any internal components, it’s advisable to ground yourself to prevent any potential damage from electrostatic discharge. This can be done by touching a grounded metal object or wearing an anti-static wrist strap.
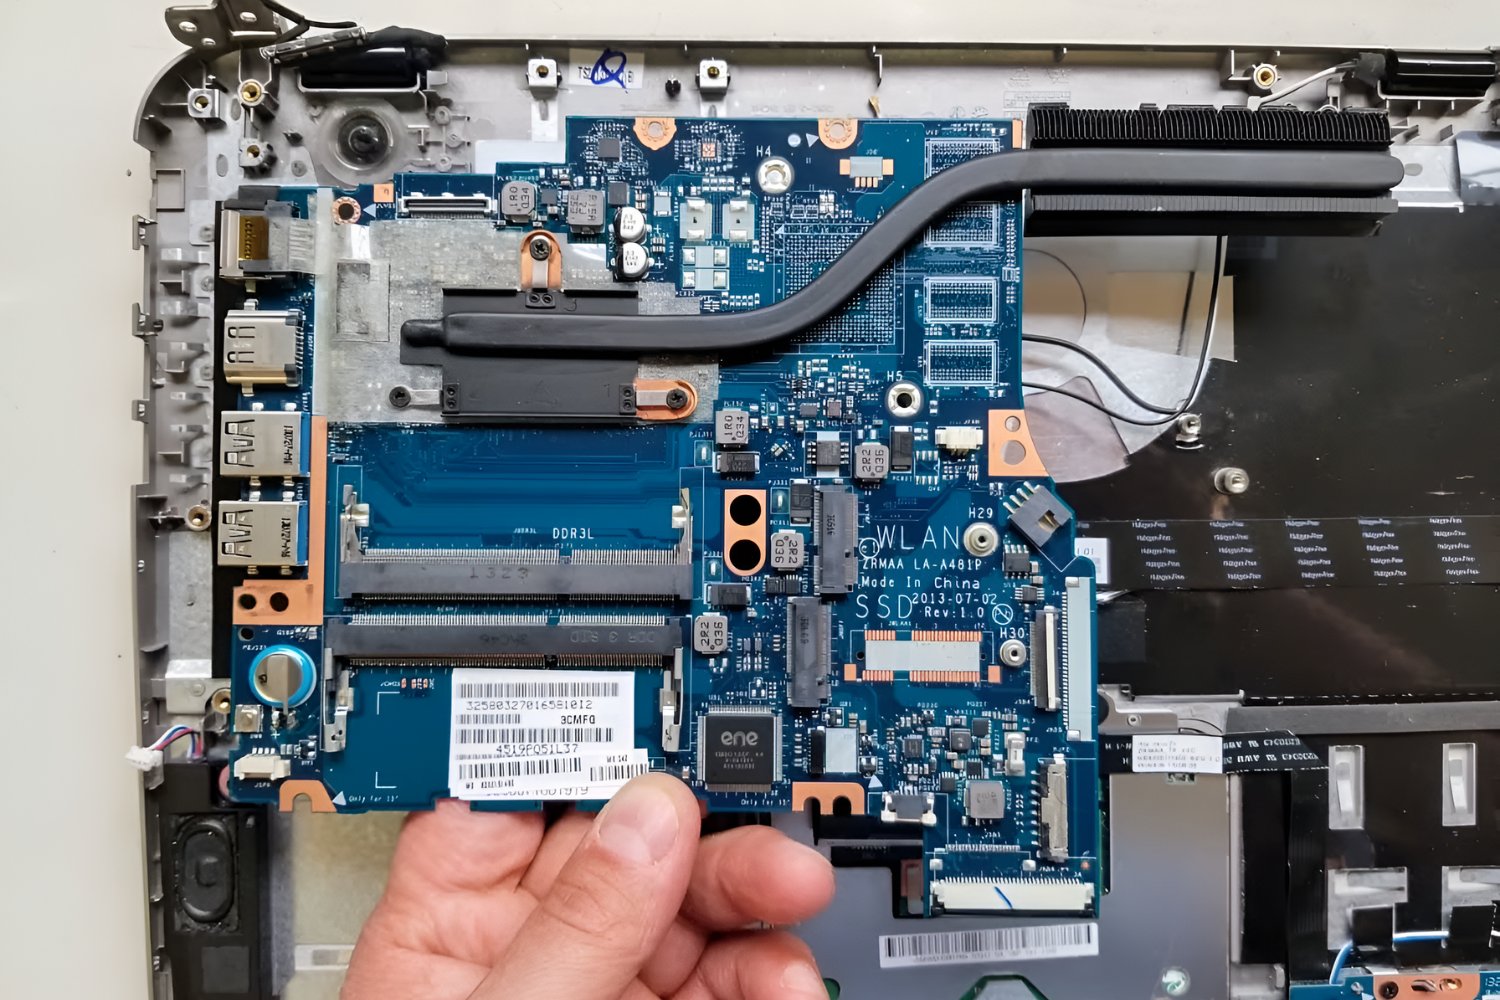
- Locate the hard drive bay: Inside your open laptop, locate the hard drive bay. This is where your laptop’s current hard drive is installed.
By following these steps, you have successfully opened up your laptop and gained access to the internal components. Remember to be gentle and cautious during this process to avoid any accidental damage. Now that you have located the hard drive bay, you are ready to proceed to the next step: removing the existing hard drive from your laptop.
Step 4: Remove the bottom cover
After flipping your laptop over and locating the screws that secure the bottom cover in place, you are ready to remove the cover and gain access to the internal components, including the hard drive. Follow these steps carefully to remove the bottom cover:
- Identify the screws: Take note of the screws that hold the bottom cover in place. They are usually located around the edges of the laptop’s underside, often marked with small icons or labels.
- Use the appropriate screwdriver: Select the appropriate size Phillips screwdriver that fits the screws snugly. This ensures a proper grip on the screws and prevents any damage to their heads.
- Unscrew the screws: Start removing the screws one by one by turning counterclockwise. Keep these screws in a safe place to avoid misplacing them.
- Pry off the bottom cover: Once all the screws are removed, gently pry off the bottom cover using your fingers or a plastic opening tool. Start from one corner and work your way around, applying even pressure to release any clips or tabs securing the cover.
- Set aside the bottom cover: Place the removed bottom cover in a safe and clean area, away from any potential damage. You may want to use a soft cloth or an anti-static mat to prevent any scratches or electrical discharge.
By following these steps, you have successfully removed the bottom cover of your laptop. This allows you to access the internal components and proceed with the installation of the solid-state drive (SSD). Keep the screws and the bottom cover in a secure location, as you will need them later for reassembling your laptop.
Now that you have removed the bottom cover, you can move on to the next step: locating the hard drive bay within your laptop.
Step 5: Locate the hard drive bay
Now that you have removed the bottom cover of your laptop, it’s time to locate the hard drive bay where the current hard drive is installed. Follow these steps to find the hard drive bay:
- Inspect the interior: Take a careful look at the exposed internal components of your laptop. The hard drive bay is typically located towards one side of the laptop, near the center or edge.
- Search for labels or markings: Look for labels or markings that indicate the hard drive or its housing. The bay may also have a bracket or screws holding the hard drive in place.
- Consult your laptop’s manual or online resources: If you’re having trouble locating the hard drive bay, consult the laptop’s manual or search online resources specific to your laptop model. These resources can provide detailed visual guides and instructions.
- Identify the hard drive: Once you have located the hard drive bay, you will see the current hard drive installed. It is usually a rectangular-shaped device with connectors on one side.
Take your time during this step to ensure you accurately locate the hard drive bay. If you encounter any difficulties, refer to your laptop’s manual or use online resources to aid your search. By identifying the hard drive bay, you are one step closer to replacing the existing hard drive with your new solid-state drive (SSD).
With the hard drive bay located, you’re ready to proceed to the next step: removing the current hard drive from your laptop.
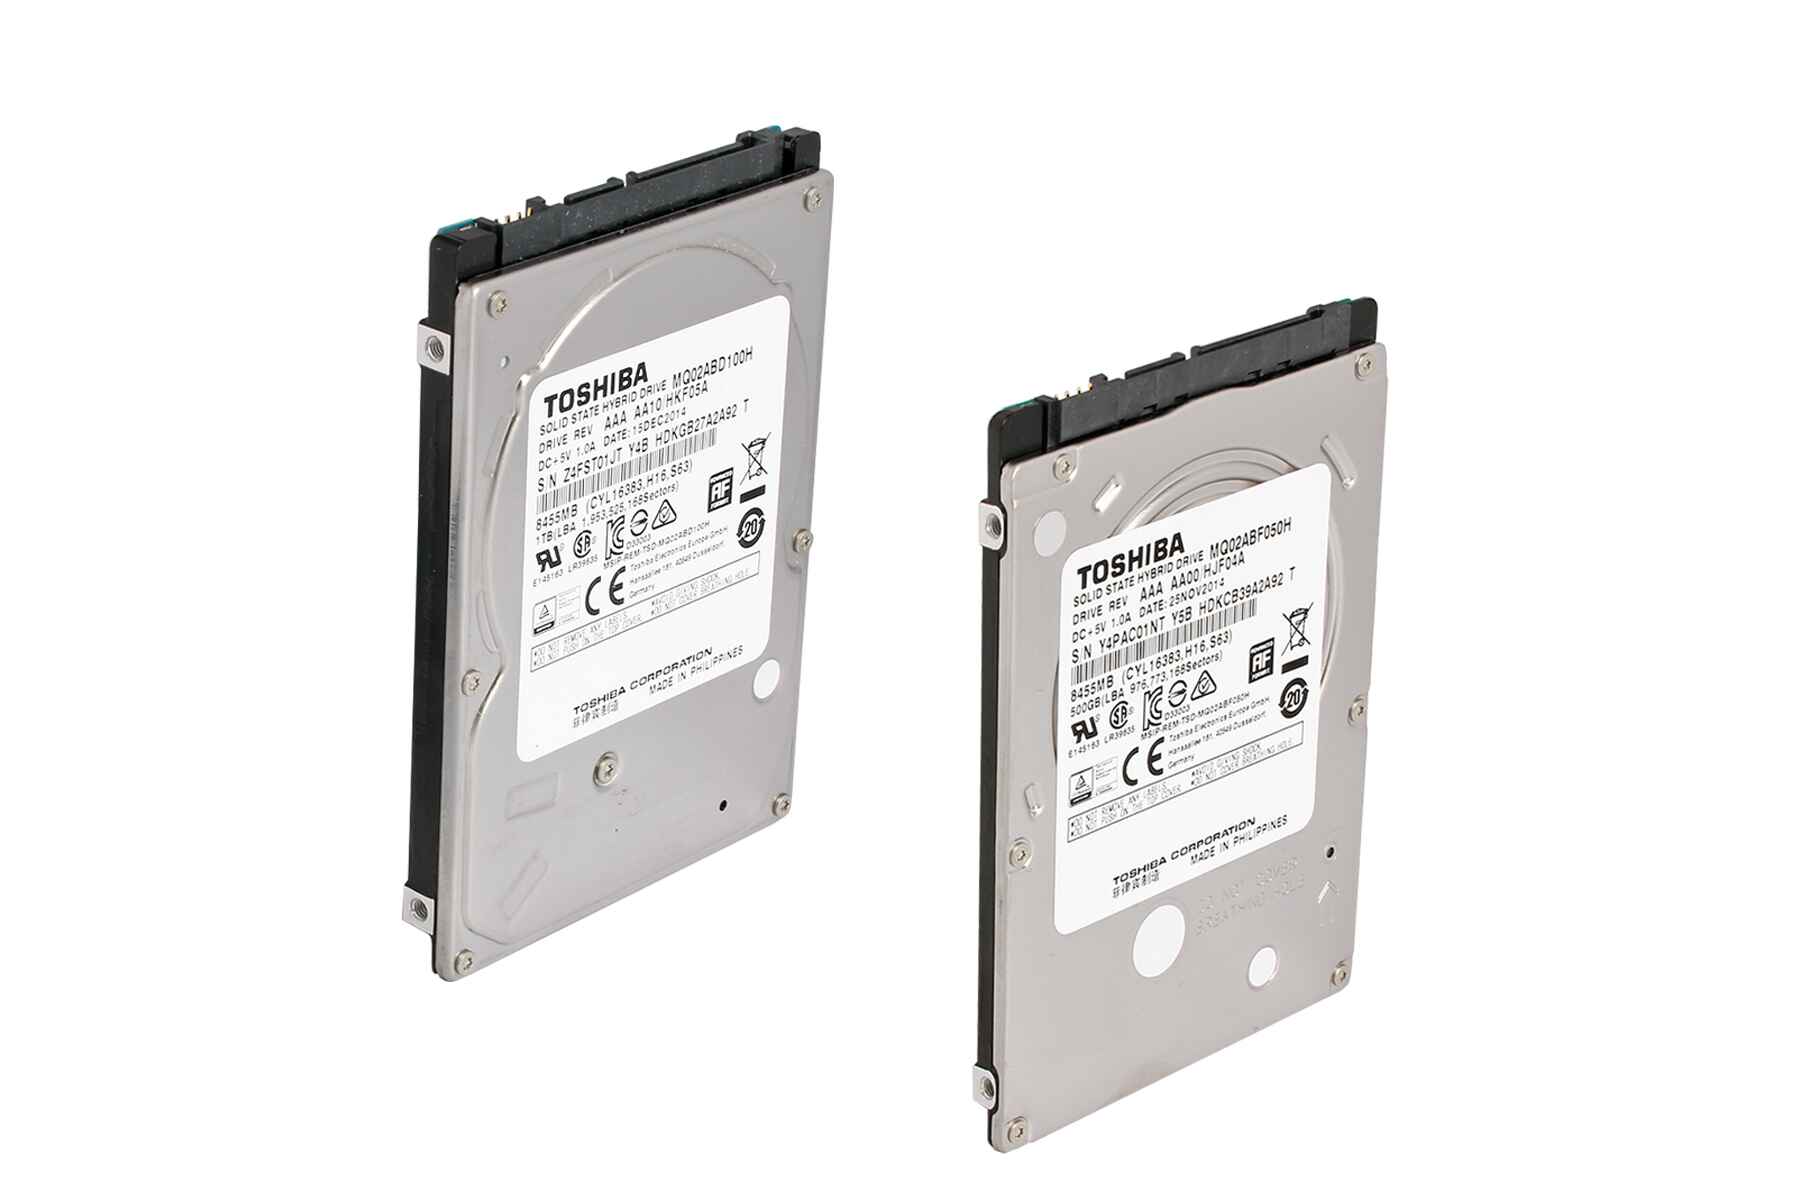
Step 6: Remove the hard drive
With the hard drive bay identified, it’s time to proceed with removing the current hard drive from your laptop. Follow these steps carefully to safely remove the hard drive:
- Disconnect the cables: Locate the cables connected to the current hard drive. There will likely be a data cable and a power cable. Carefully disconnect these cables by gently pulling them away from the hard drive connectors.
- Remove any mounting brackets: Check if there are any mounting brackets or screws securing the hard drive in place. If present, unscrew or remove these brackets to allow the hard drive to be freely detached from the bay.
- Slide out or lift the hard drive: Depending on the design of your laptop, you may need to gently slide the hard drive out of the bay, or lift it at an angle while being mindful of any other components in the vicinity.
- Set aside the removed hard drive: Once the hard drive has been detached, place it in a safe and clean area to avoid any damage. If possible, use an anti-static bag or a soft cloth to protect it from static electricity or physical harm.
Throughout this process, it’s crucial to handle the hard drive with care and avoid applying excessive force. Take note of any cables or brackets that were connected to the hard drive, as you will need to reconnect them to the new solid-state drive (SSD) later on.
By successfully removing the current hard drive, you have cleared the way for the installation of the new SSD. Ensure that the hard drive bay is clean and clear before proceeding to the next steps in the installation process.
The hard drive has now been removed, and you are ready to move on to the next section: installing the solid-state drive (SSD).
Installing the Solid State Drive
Now that you have removed the old hard drive, it’s time to install the new solid-state drive (SSD) into the hard drive bay of your laptop. Follow these steps carefully to ensure a successful installation:
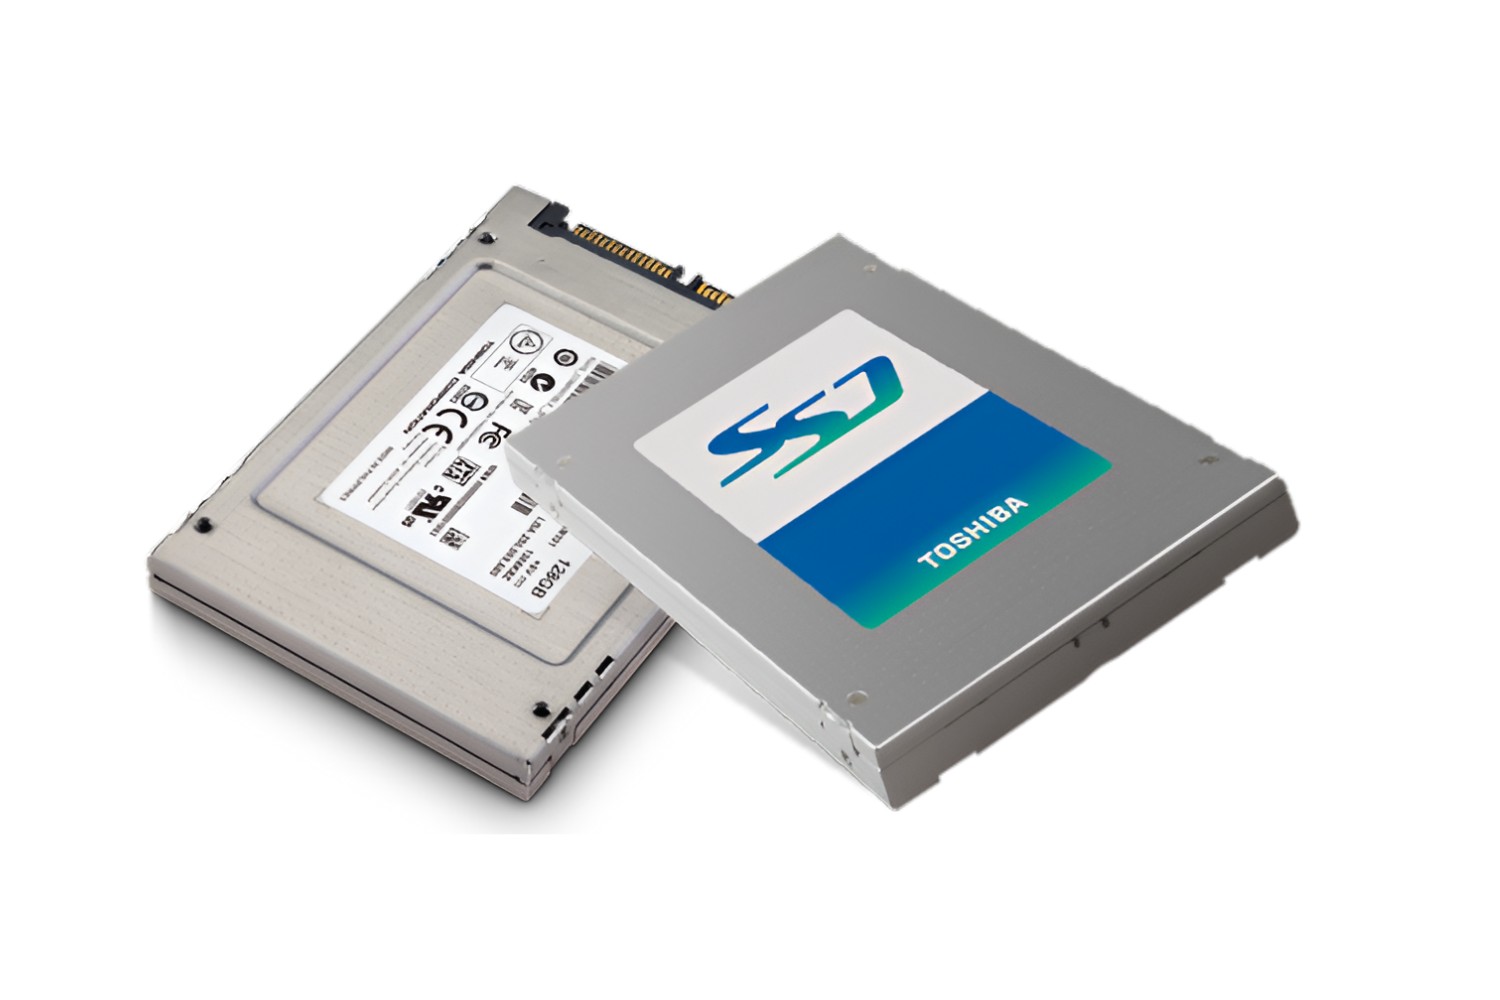
- Prepare the SSD for installation: Remove the new SSD from its packaging and check if any protective covers or brackets are attached. If present, remove them before proceeding.
- Align the SSD with the drive bay: Carefully align the connectors on the SSD with the corresponding slots in the hard drive bay. Ensure a proper fit by positioning the SSD correctly and gently sliding it into place.
- Secure the SSD in place: If your laptop’s hard drive bay has mounting brackets or screws, refer to the laptop’s manual or online resources to determine if these are required for securing the SSD. If necessary, use the provided screws or brackets to firmly fasten the SSD to the drive bay.
- Reconnect the cables: Once the SSD is securely installed, reconnect the cables that were previously detached from the old hard drive. Connect the data cable to the corresponding SSD connector and the power cable to the appropriate power supply connector. Ensure a secure connection by gently pushing the cables into place.
Throughout the installation process, handle the SSD and cables with care to avoid any damage or disconnection. Double-check that everything is securely connected and fastened before proceeding to the next steps.
By successfully installing the solid-state drive (SSD), you have upgraded your laptop’s storage and prepared it for improved performance. With the SSD securely in place and the cables reconnected, you’re ready to move on to the next step: reinstalling the bottom cover of your laptop.
Step 7: Insert the SSD into the drive bay
With the solid-state drive (SSD) prepared for installation, it’s time to insert it into the drive bay of your laptop. Follow these steps carefully to ensure a proper insertion:
- Hold the SSD securely: Before inserting the SSD, make sure you are holding it securely by the sides or edges. Avoid touching any connectors or components on the SSD to prevent damage from static electricity.
- Align the SSD: Position the SSD in a way that aligns the connectors on the drive with the corresponding slots in the hard drive bay. Take your time to ensure a proper fit and avoid any forceful insertion.
- Gently slide the SSD into the drive bay: Applying even pressure, gently slide the SSD straight into the drive bay. Use your fingertips or the palm of your hand to push it in, making sure it goes in smoothly without any resistance.
- Double-check the insertion: Once the SSD is fully inserted, double-check its alignment and ensure that it is securely in place. The connectors on the SSD should be fully seated in the slots of the hard drive bay.
It’s crucial to handle the SSD with care and avoid applying excessive force during the insertion process. If you encounter any resistance or difficulties, recheck the alignment and make sure the SSD is oriented correctly.
By successfully inserting the SSD into the drive bay, you have completed a crucial step in the installation process. The SSD is now properly positioned, allowing for a seamless connection with the laptop’s internal components. Next, you will proceed to secure the SSD in place to ensure it remains stable during usage.
Step 8: Secure the SSD in place
After inserting the solid-state drive (SSD) into the drive bay, it’s important to secure it properly to ensure it remains stable during usage. Follow these steps carefully to securely fasten the SSD in place:
- Check for mounting brackets or screws: Inspect the drive bay to determine if there are any mounting brackets or screw holes that can be used to secure the SSD. Refer to your laptop’s manual or online resources for guidance specific to your model.
- Attach mounting brackets (if applicable): If your laptop’s drive bay has mounting brackets, align them with the SSD’s screw holes. Use the provided screws to firmly attach the brackets to the SSD, ensuring a secure fit.
- Fasten the SSD with screws (if applicable): If there are screw holes in the drive bay or bracket, align them with the corresponding holes on the SSD. Use the appropriate screws to securely fasten the SSD, keeping it in place and preventing any movement during usage.
- Ensure a snug fit: As you secure the SSD, make sure it is snugly in place without any wobbling or loose connections. Avoid over-tightening the screws to prevent any damage to the SSD or the drive bay.
When securing the SSD, be cautious not to overtighten the screws, as this may cause damage to the SSD or strip the screw holes. Ensure that the SSD is firmly and securely fastened, providing stability and minimizing the risk of any disconnection.
By properly securing the SSD in place, you have completed an important step in the installation process. The SSD is now firmly connected to the laptop’s internal components, ensuring it remains in place during regular usage. Next, you will proceed to reassemble the laptop by reinstalling the bottom cover.
Step 9: Reinstall the bottom cover
After successfully securing the solid-state drive (SSD) in place, it’s time to reassemble your laptop by reinstalling the bottom cover. Follow these steps to ensure a proper reinstallation:
- Retrieve the bottom cover: Take the bottom cover that you set aside earlier and ensure it is clean and free from any dust or debris. If necessary, use a soft cloth to wipe off any dirt before proceeding.
- Position the bottom cover: Carefully position the bottom cover over the laptop’s casing, aligning it with the screw holes and any clips or tabs on the laptop’s body. Ensure that the cover is aligned properly to avoid any misalignment or potential damage.
- Start with the screws: Begin by inserting and tightening the screws back into their respective slots on the bottom cover. Start with one corner and gradually work your way around, tightening the screws evenly to ensure a secure and balanced attachment.
- Double-check the fit: Once all the screws are tightened, double-check the fit of the bottom cover. Ensure that it sits flush with the rest of the laptop’s casing and there are no gaps or misalignments.
As you reinstall the bottom cover, be mindful of any connectors or cables that may be present. Ensure that they are properly routed and not trapped or pinched between the cover and the laptop’s body.
By successfully reinstalling the bottom cover, you have completed the installation of the solid-state drive (SSD) in your laptop. The bottom cover provides protection and a secure casing for the internal components, including the newly installed SSD.
With the bottom cover securely in place, you are ready to move on to the next section: configuring the SSD and preparing it for use in your Toshiba Satellite laptop.
Configuring the SSD
After successfully installing the solid-state drive (SSD) in your Toshiba Satellite laptop, it’s time to configure it and prepare it for use. Follow these steps to ensure proper configuration:
- Reconnect your laptop and power it on: Plug in your laptop and power it on by pressing the power button. Allow the laptop to boot up and initialize the new SSD.
- Access the BIOS settings: During the startup process, look for the key prompt to access the BIOS settings. This key varies depending on your laptop model, but common keys include Delete, F2, or F12. Press the designated key repeatedly to enter the BIOS settings.
- Set the SSD as the primary boot device: Within the BIOS settings, navigate to the Boot or Startup section. Locate the option to set the primary boot device and select the SSD as the first boot option. This will ensure that your laptop boots from the SSD.
- Save and exit the BIOS: After making the necessary changes to the boot settings, save the changes by selecting the “Save and Exit” or equivalent option. This will exit the BIOS settings and restart the laptop.
- Initialize and format the SSD: Once your laptop has restarted, it’s time to initialize and format the SSD. This ensures that the SSD is recognized by the operating system and ready for use. Access the Disk Management tool in Windows or Disk Utility on macOS to initialize and format the SSD with the desired file system.
- Create partitions (optional): If desired, you can create partitions on the SSD to organize your data. This step is optional and can be done using the Disk Management tool in Windows or Disk Utility on macOS.
- Install the operating system (if applicable): If you have a fresh installation of the operating system planned, follow the necessary steps to install it on the SSD. Make sure to select the SSD as the destination drive during the installation process.
- Install necessary drivers and software: Once the SSD is properly configured and the operating system is installed, proceed to install any necessary drivers and software to ensure optimal performance and functionality.
By following these steps, you have successfully configured your SSD and prepared it for use in your Toshiba Satellite laptop. The SSD is now recognized by the system, and you are ready to enjoy the improved performance and speed it provides.
Take the time to ensure that all necessary configurations and installations are completed before using your laptop. This will allow you to fully maximize the benefits of your new SSD and enjoy a faster computing experience.
Step 10: Reconnecting your laptop and powering it on
After configuring the solid-state drive (SSD) and preparing it for use, it’s time to reconnect your laptop and power it on. Follow these steps to ensure a smooth startup:
- Verify proper connections: Double-check that all cables and peripherals are properly connected to your laptop. Ensure that the power adapter is securely plugged into a power source, and any other necessary cables or devices are properly connected.
- Press the power button: Locate the power button on your laptop and press it to turn on the device. Depending on your laptop model, the power button is typically located along the top panel or on the side.
- Observe the startup process: As your laptop powers on, pay attention to any startup screens and messages. You may see the Toshiba logo or a boot-up sequence indicating that your laptop is initializing the newly installed SSD.
- Allow the operating system to load: After the initial startup screens, the operating system will load and take you to the login screen or desktop. Depending on the speed of your SSD, you may notice a significant improvement in boot time and overall system responsiveness.
If your laptop does not boot properly or encounters any issues, ensure that the SSD is securely connected and properly configured. Refer to troubleshooting resources or seek assistance from a professional if needed.
By properly reconnecting your laptop and powering it on, you have completed an important step in the installation process. Your laptop is now ready to be used with the new solid-state drive (SSD), offering improved performance and enhanced speed.
Now that your laptop is successfully powered on and the operating system has loaded, you can proceed to the next step: initializing and formatting the SSD.
Step 11: Initialize and format the SSD
After reconnecting your laptop and powering it on, it’s time to initialize and format the solid-state drive (SSD) to ensure it is ready for use. Follow these steps to properly initialize and format the SSD:
- Access Disk Management: On Windows, right-click on the Start button and select “Disk Management” from the context menu. On macOS, open “Disk Utility” from the Applications folder or by searching in Spotlight.
- Initialize the SSD: In Disk Management or Disk Utility, you should see the newly installed SSD listed as a disk. Right-click on the SSD (Windows) or select it from the sidebar (macOS) and choose the option to initialize the disk. Select the appropriate partition style (MBR or GPT) and proceed.
- Create a partition: Once the SSD is initialized, right-click on the unallocated space (Windows) or click on the “+” button (macOS) to create a new partition on the SSD. Specify the desired size and file system for the partition.
- Format the partition: After creating the partition, right-click on it (Windows) or select it and click on the “Erase” button (macOS) to format the partition. Choose a suitable file system, such as NTFS for Windows or APFS for macOS, and provide a name for the partition.
- Confirm the formatting: Review the formatting settings and click on “OK” (Windows) or “Erase” (macOS) to initiate the formatting process. This will erase any existing data on the SSD, so ensure you have backed up any important files before proceeding.
During the initialization and formatting process, make sure to select the appropriate settings and file system that align with your intended use for the SSD. This ensures compatibility and optimal performance with your operating system.
By initializing and formatting the SSD, you are preparing it for data storage and use on your laptop. The SSD is now recognized by the operating system and ready to store files and applications.
With the SSD initialized and formatted, you can now proceed to the next step: restoring your data from the backup.
Step 12: Restore your data from the backup
After initializing and formatting the solid-state drive (SSD), it’s time to restore your data from the backup you created earlier. Follow these steps to ensure a successful data restoration:
- Connect your backup storage device: If you backed up your data to an external storage device, such as a USB flash drive or an external hard drive, connect the device to your laptop.
- Locate and copy your backed-up data: Navigate to your backup storage device and locate the files and folders you want to restore. Copy these files to an appropriate location on the newly installed SSD.
- Organize your restored data: Once the files are copied to the SSD, organize them into the desired folders and directory structure. This will ensure that your data is easily accessible and well-organized.
- Install necessary applications and software: If any of your backed-up data includes software or applications, reinstall them onto the SSD. Use the original installation files or download the latest versions from official sources.
- Configure application preferences: After reinstalling the necessary software, configure the application preferences and settings according to your preferences. This may include customizing the interface, setting up email accounts, or establishing synchronization preferences.
Take your time during the data restoration process to ensure that all files and applications are successfully transferred to the SSD. Double-check that important files are restored and accessible before proceeding further.
By successfully restoring your data from the backup, you have completed the final step in the installation process. Your important files and applications are now available on the newly installed solid-state drive, ensuring a seamless transition and continued usage of your laptop.
With your data successfully restored, you can now enjoy the improved performance and responsiveness offered by the SSD in your Toshiba Satellite laptop.
Conclusion
Congratulations! You have successfully completed the installation of a solid-state drive (SSD) on your Toshiba Satellite laptop. By following the step-by-step guide provided in this article, you have upgraded your laptop’s storage and improved its overall performance.
Throughout the installation process, you learned how to gather the necessary tools and materials, backup your existing data, safely open up your laptop, remove the old hard drive, insert and secure the new SSD, configure the drive, and restore your data from the backup. These steps ensured a smooth and successful SSD installation.
By upgrading to an SSD, you can now experience faster boot times, quicker file transfers, and increased system responsiveness. The SSD’s superior read and write speeds will greatly enhance your overall computing experience, allowing for more efficient multitasking and smoother performance.
Remember, it’s essential to properly configure and format the SSD, ensuring compatibility with your operating system and data organization. Take the time to reinstall any necessary applications, restore your important files, and configure application preferences to make the most out of your new SSD.
As with any hardware modification, it’s important to exercise caution and follow the manufacturer’s guidelines. If you encounter any difficulties or are unsure about any step, it is recommended to seek assistance from a professional technician or refer to the laptop’s documentation.
With your SSD successfully installed and your data restored, you are now ready to enjoy the improved performance and efficiency of your Toshiba Satellite laptop. Take full advantage of your upgraded storage capacity and the enhanced speed provided by the SSD to tackle your everyday tasks with ease.
Thank you for choosing this guide to help you with your SSD installation. We hope it has been informative and valuable in upgrading your laptop’s storage. Enjoy the benefits of your faster and more responsive system!