Introduction
Having Wi-Fi connectivity is essential in today’s digital age, allowing you to browse the internet, stream videos, and connect with others without the limitations of wires. While most modern laptops come with built-in Wi-Fi capability, desktop computers often require additional hardware to get connected.
If you’re using a desktop PC and want to enjoy the convenience and flexibility of Wi-Fi, you’re in the right place. In this article, we’ll guide you through the steps to get Wi-Fi on your PC. Whether you have a built-in Wi-Fi feature or need to purchase and install a Wi-Fi adapter, we’ll cover everything you need to know to get connected.
With the increasing availability of public Wi-Fi hotspots and the ubiquity of home networks, being able to connect your desktop PC to Wi-Fi can greatly improve your productivity and convenience. You can receive faster internet speeds, join virtual meetings, and enjoy online entertainment with ease.
So, let’s dive into the world of Wi-Fi and learn how to equip your PC with wireless connectivity. Whether you’re a tech-savvy individual or a novice, this guide will walk you through the necessary steps to get your PC online without the hassle of ethernet cables.
Before we jump into the nitty-gritty details, let’s first gain a basic understanding of what Wi-Fi is and how it works. This knowledge will help you make informed decisions when it comes to selecting the right equipment and troubleshooting any connectivity issues you may encounter along the way.
Understanding Wi-Fi
Wi-Fi, short for “Wireless Fidelity,” is a technology that allows devices to connect to the internet or communicate with each other wirelessly. It relies on radio waves to transmit data between devices, eliminating the need for physical cables. Wi-Fi operates within a specific frequency range, typically 2.4 GHz or 5 GHz, which enables devices to communicate and exchange information.
Wi-Fi networks are made up of two primary components: a router and a wireless adapter. The router serves as the central hub that connects to the internet and distributes the Wi-Fi signal. It acts as a bridge between your devices and the internet service provider. On the other hand, the wireless adapter is the component that allows your device, such as a PC, to connect to the Wi-Fi network.
It’s important to choose the right Wi-Fi band for your needs. The 2.4 GHz band offers a wider range and better penetration through walls, making it ideal for larger spaces or areas with multiple obstacles. The 5 GHz band, on the other hand, provides faster speeds but has a shorter range, making it suitable for smaller spaces with fewer obstructions.
When it comes to Wi-Fi security, it’s crucial to protect your network from unauthorized access. The most common type of security protocol used in Wi-Fi networks is WPA2 (Wi-Fi Protected Access 2), which encrypts data transmitted between devices. It’s highly recommended to set a strong password for your Wi-Fi network to prevent unauthorized users from accessing your internet connection.
Understanding these basics of Wi-Fi will provide you with a solid foundation as we move forward into the steps to get Wi-Fi on your PC. Whether you already have Wi-Fi capabilities built into your PC or need to purchase and install a Wi-Fi adapter, the next sections will provide you with the guidance you need to successfully connect your PC to a Wi-Fi network.
Step 1: Check for Built-in Wi-Fi
The first step in getting Wi-Fi on your PC is to determine if your computer already has built-in Wi-Fi capabilities. Many modern laptops and some desktop computers come with Wi-Fi functionality preinstalled. This means you can easily connect to Wi-Fi networks without any additional hardware.
To check if your PC has built-in Wi-Fi, follow these steps:
- Look for Wi-Fi indicators on your PC: Many laptops have dedicated LED lights or physical switches to indicate Wi-Fi status. Look for symbols such as an antenna or waves to determine if your laptop has Wi-Fi built-in.
- Check the device specifications: If you’re unsure about your PC’s Wi-Fi capabilities, you can check the device specifications. This information is usually available in the user manual or on the manufacturer’s website. Look for terms like “Wireless LAN,” “Wi-Fi,” or “802.11” to confirm if your PC supports Wi-Fi.
- Open the Network settings: On a Windows PC, you can go to the Control Panel or Settings and navigate to the Network settings. Look for options like “Wi-Fi” or “Wireless” to verify if your PC has Wi-Fi capabilities.
If you discover that your PC already has built-in Wi-Fi, you’re one step closer to connecting to a Wi-Fi network. Proceed to the next section to learn how to connect to a Wi-Fi network using the existing hardware on your PC.
However, if your PC does not have built-in Wi-Fi capabilities, don’t worry! You can still get Wi-Fi on your desktop computer by using an external Wi-Fi adapter. The next steps will guide you through purchasing and installing a Wi-Fi adapter to enable wireless connectivity on your PC.
Step 2: Purchase a Wi-Fi Adapter
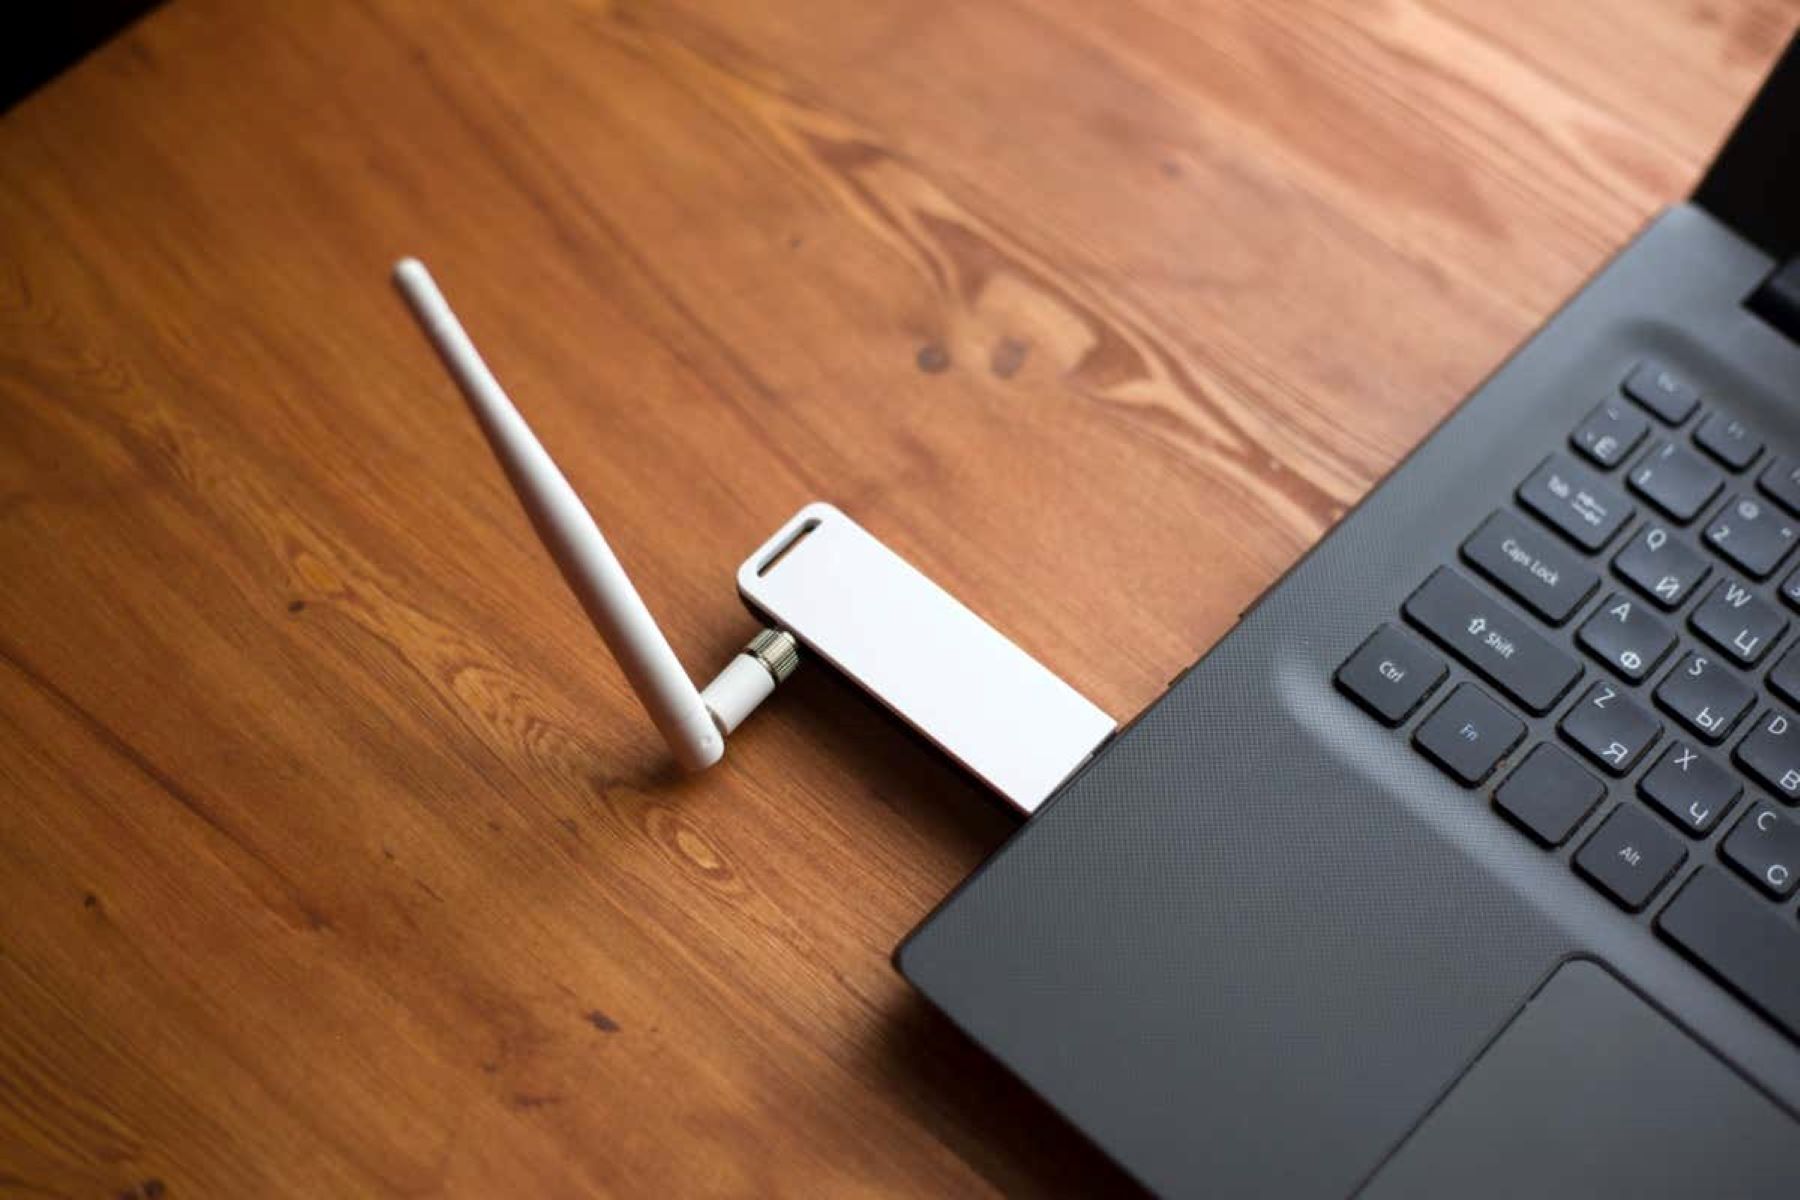
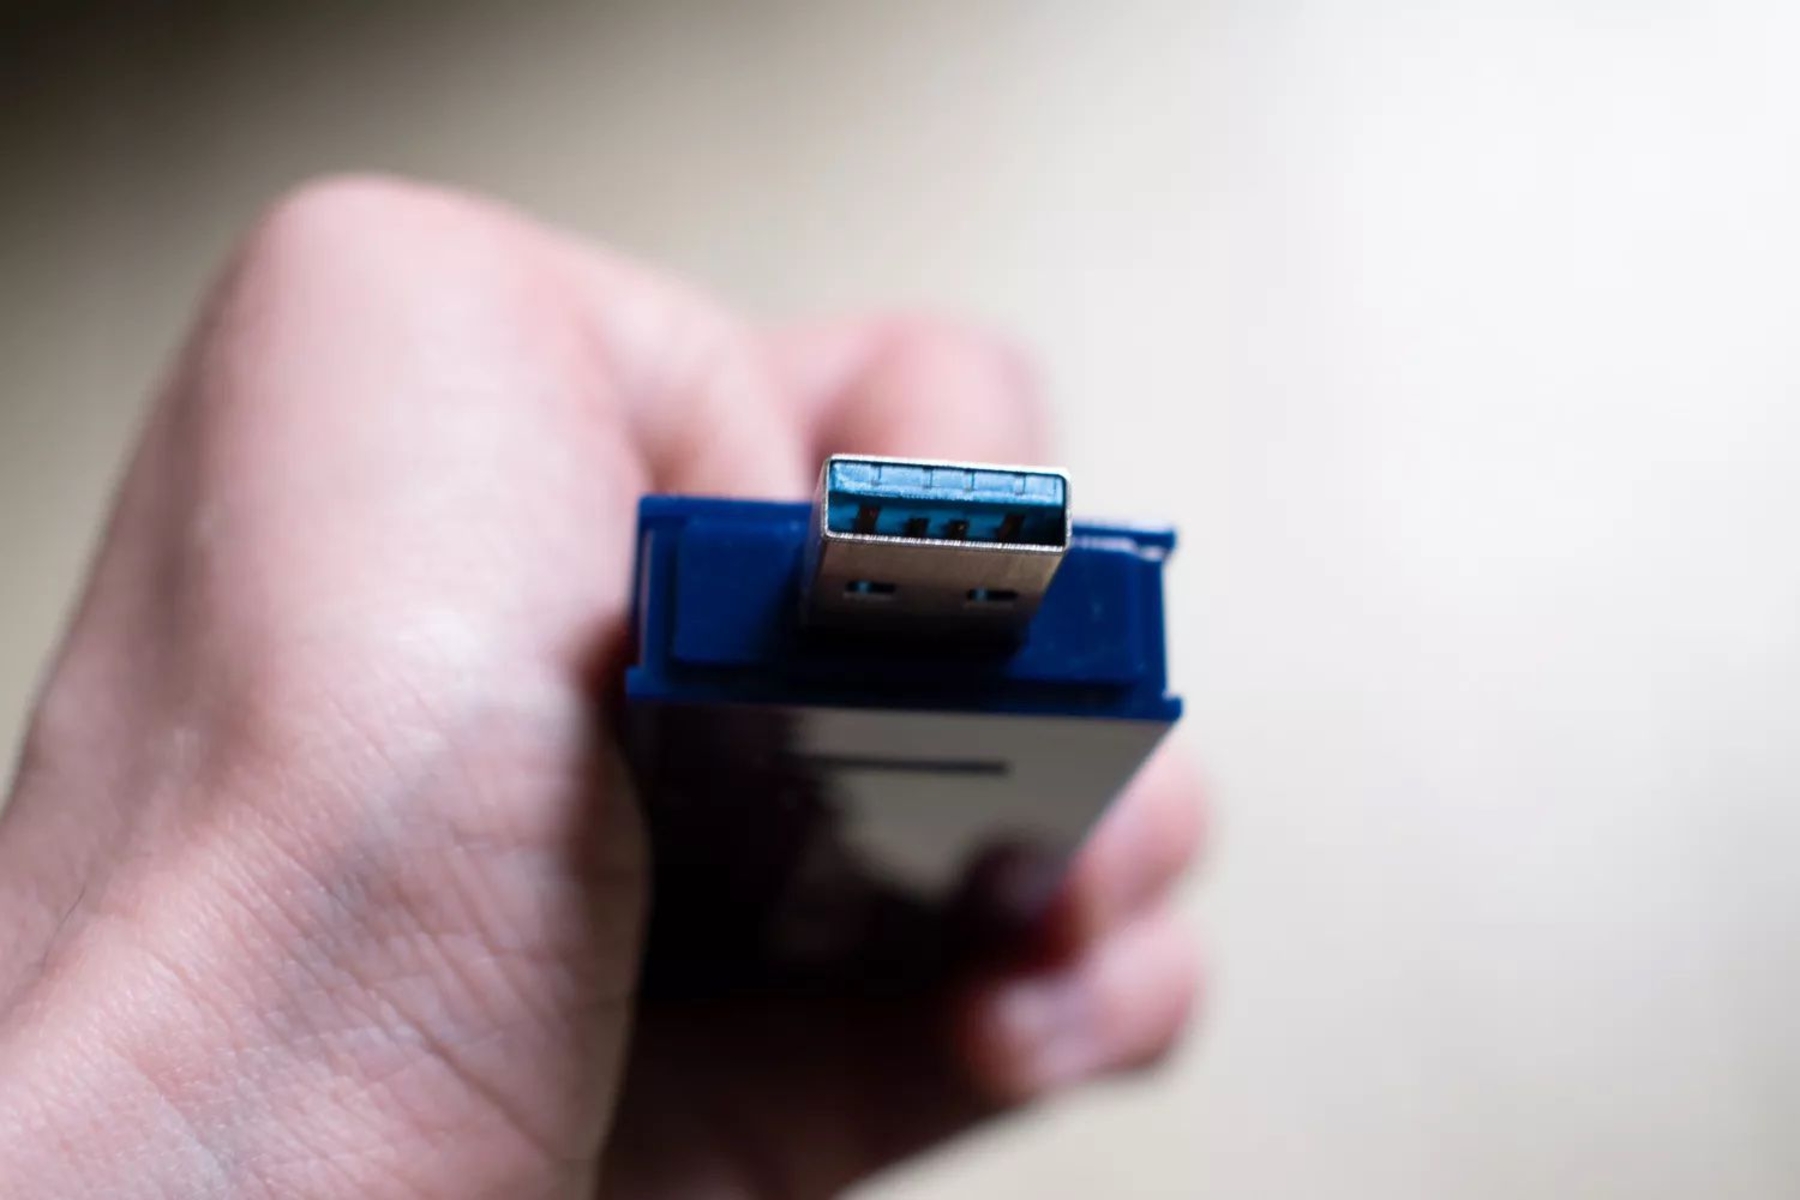
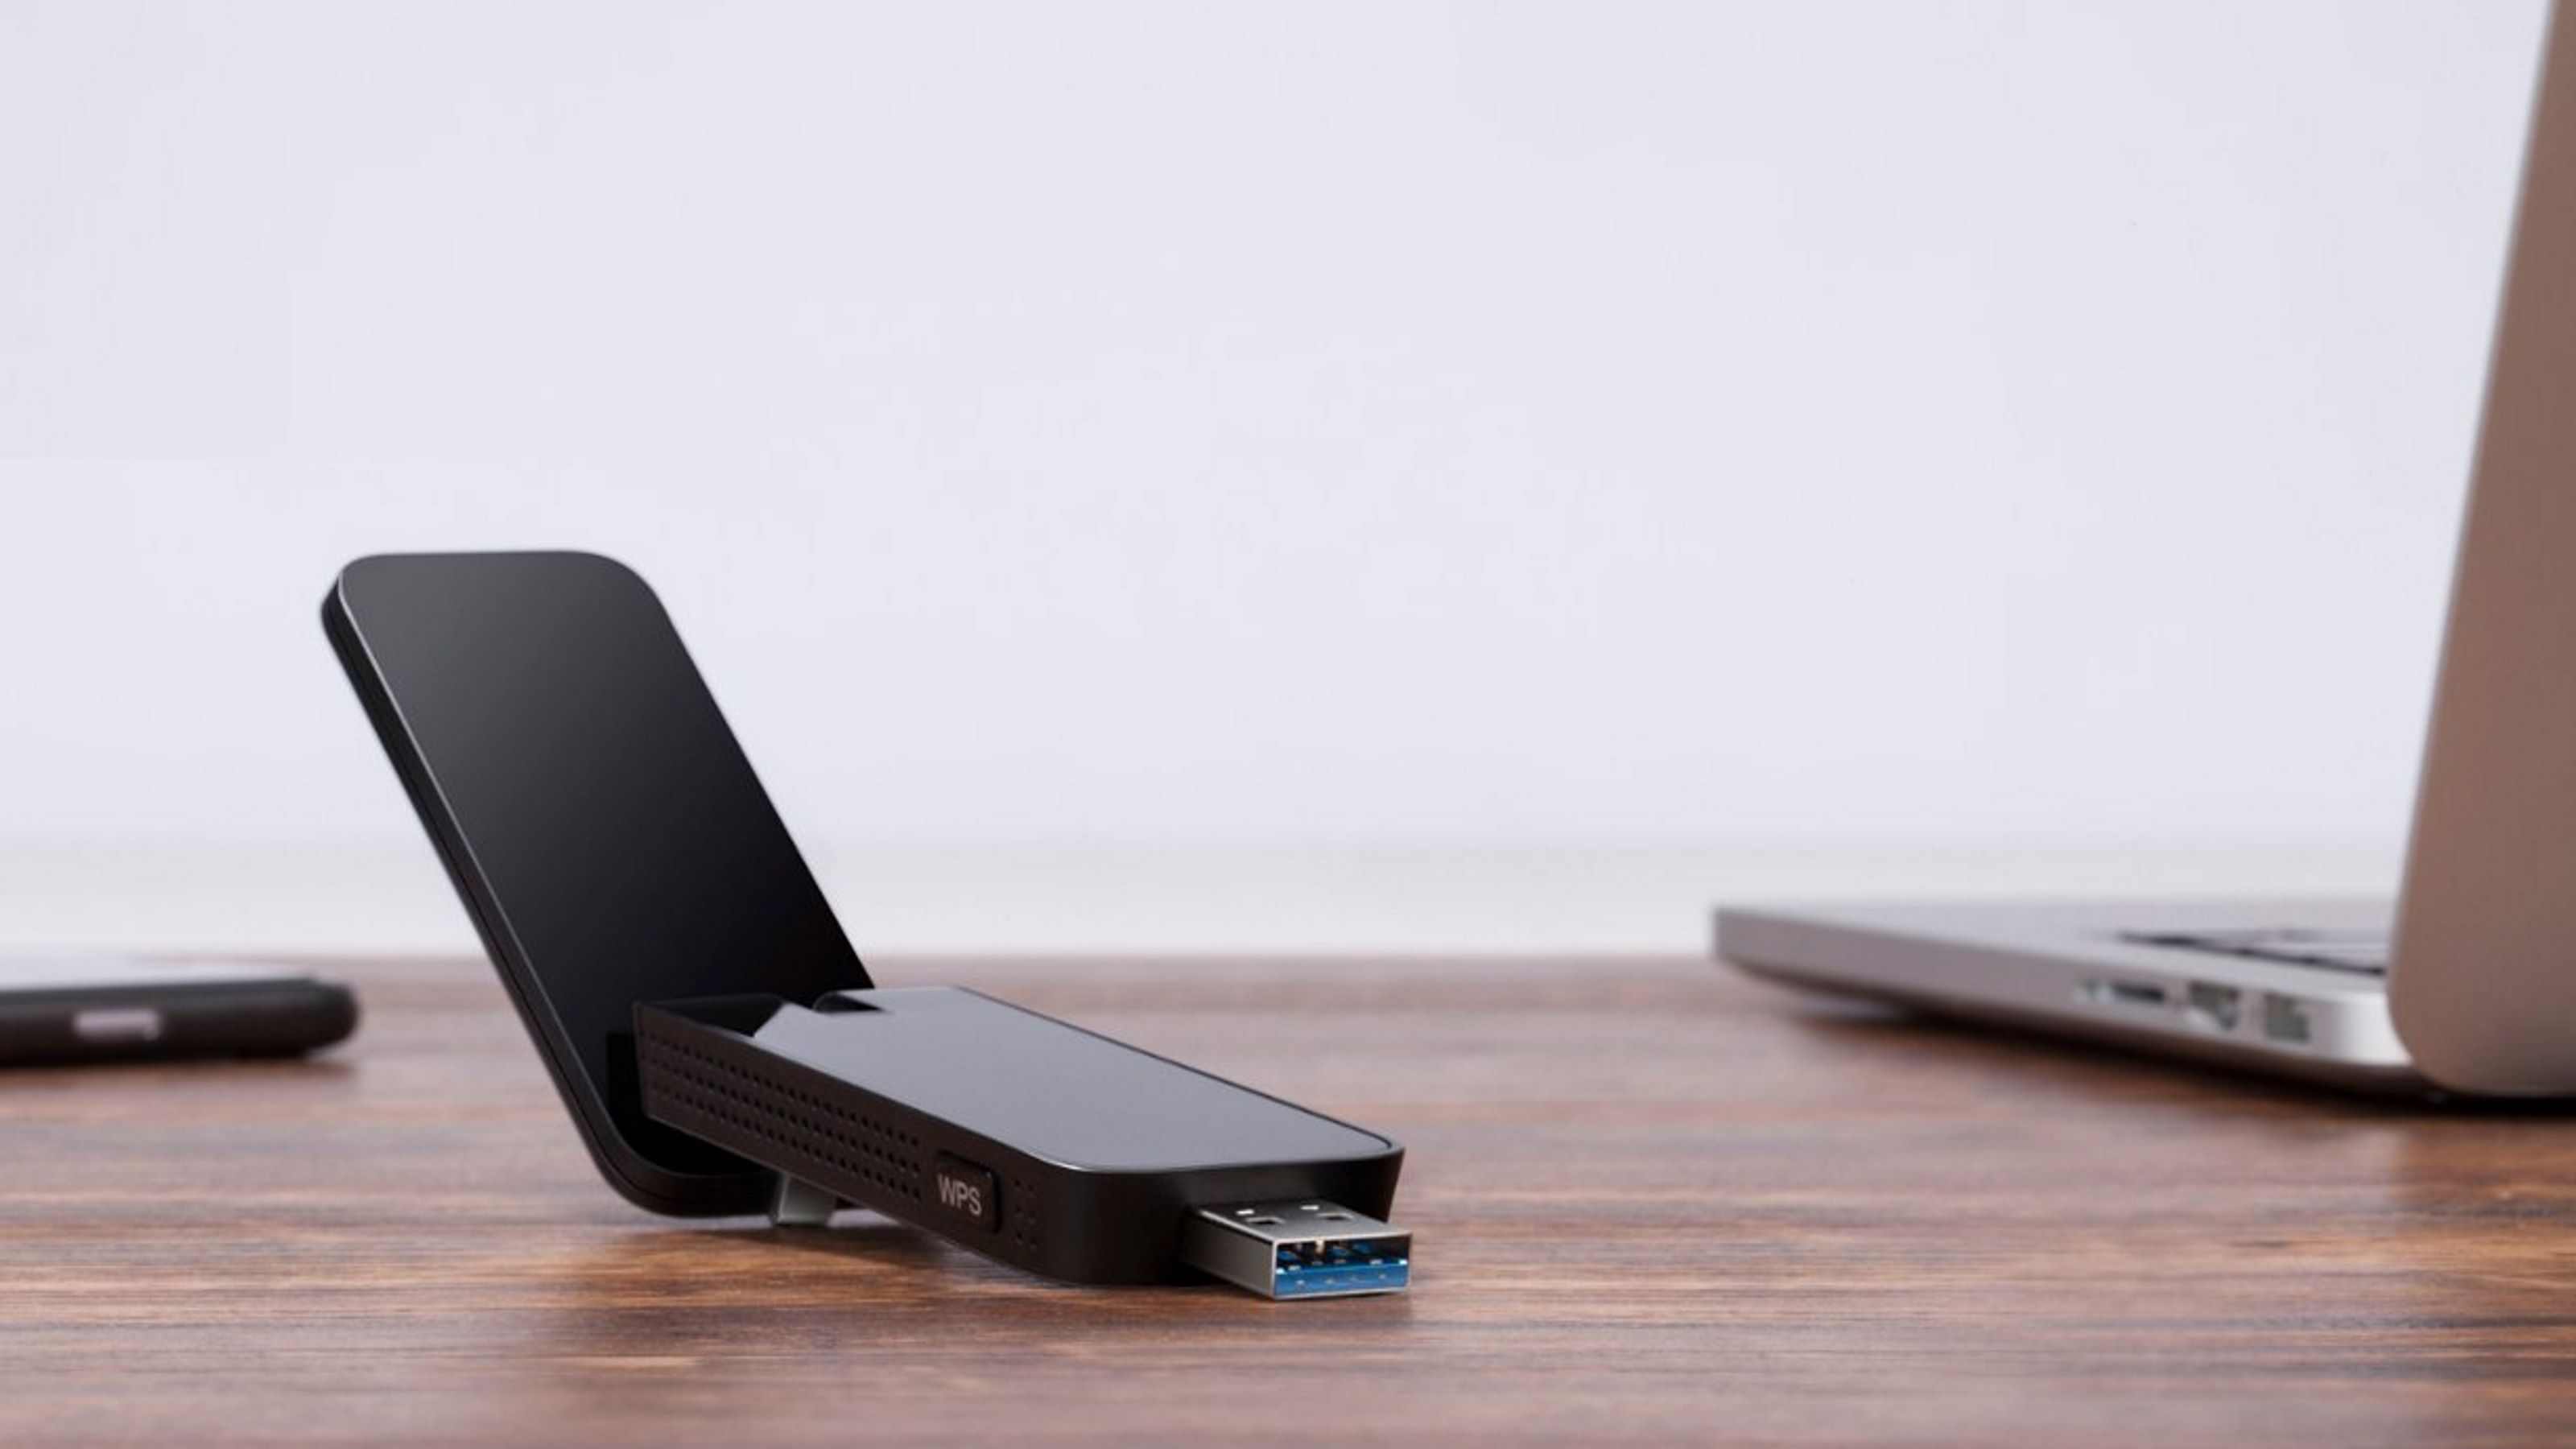
If your PC does not have built-in Wi-Fi capabilities, you will need to purchase a Wi-Fi adapter to enable wireless connectivity. A Wi-Fi adapter, also known as a wireless network adapter or dongle, is a small device that connects to your PC’s USB port or PCI slot and allows it to communicate with Wi-Fi networks.
When selecting a Wi-Fi adapter, consider the following factors:
- Type of Adapter: There are two main types of Wi-Fi adapters: USB and PCI. USB adapters are portable and can be easily plugged into a USB port, making them a convenient choice for laptops or desktops with limited expansion slots. PCI adapters are installed internally, providing a more permanent and stable connection for desktop computers.
- Wireless Standards: Look for Wi-Fi adapters that support the latest wireless standards, such as 802.11ac or 802.11ax (also known as Wi-Fi 5 and Wi-Fi 6, respectively). These standards offer faster speeds, better range, and improved reliability compared to older standards.
- Speed and Range: Consider the speed and range capabilities of the Wi-Fi adapter. Higher speeds, such as those provided by an adapter supporting AC1200 or AC1900, allow for faster data transfer rates. The range is also crucial, especially if you need to connect to Wi-Fi networks located far away from your PC.
- Compatibility: Ensure that the Wi-Fi adapter is compatible with your operating system. Most adapters are compatible with Windows, macOS, and Linux, but it’s always a good idea to double-check the specifications to avoid any compatibility issues.
Once you have chosen the Wi-Fi adapter that meets your requirements, you can proceed with purchasing it. Online marketplaces and electronics stores offer a wide range of options to choose from. Make sure to read customer reviews and consider reputable brands to ensure a quality purchase.
With your newly purchased Wi-Fi adapter in hand, you are ready to move on to the next step: installing the Wi-Fi adapter on your PC. This step will enable your PC to detect and connect to available Wi-Fi networks, providing you with wireless internet connectivity. Continue reading to learn how to install the Wi-Fi adapter and get your PC online.
Step 3: Install Wi-Fi Adapter
Now that you have purchased a Wi-Fi adapter for your PC, it’s time to install it. The installation process may vary depending on the type of adapter you purchased, whether it is a USB adapter or a PCI adapter. Follow the instructions below to install your Wi-Fi adapter:
USB Wi-Fi Adapter:
- Power off your PC and locate an available USB port.
- Gently insert the USB Wi-Fi adapter into the USB port. Make sure it is firmly plugged in.
- Power on your PC and wait for it to recognize the new hardware.
- If prompted, insert the included driver CD or visit the manufacturer’s website to download the latest drivers for your specific Wi-Fi adapter model.
- Follow the on-screen instructions to complete the driver installation.
PCI Wi-Fi Adapter:
- Power off your PC and open the computer case.
- Locate an available PCI slot on your motherboard.
- Gently insert the PCI Wi-Fi adapter into the appropriate slot.
- Secure the adapter in place using the screws provided.
- Close the computer case and power on your PC.
- If prompted, insert the included driver CD or visit the manufacturer’s website to download the latest drivers for your specific Wi-Fi adapter model.
- Follow the on-screen instructions to complete the driver installation.
Once the driver installation is complete, your PC is now ready to detect and connect to available Wi-Fi networks using the newly installed Wi-Fi adapter. Ensure that the adapter is powered on, and you will be able to see the available Wi-Fi networks in your network settings.
If you encounter any issues during the installation process, refer to the user manual or visit the manufacturer’s support website for troubleshooting guidance. They often provide online resources, FAQs, and customer support to assist with any difficulties you may face.
Now that you have successfully installed the Wi-Fi adapter on your PC, it’s time to move on to the next step: updating the Wi-Fi adapter driver. This step is crucial to ensure optimal performance and compatibility with your operating system. Let’s learn how to update the driver in the next section.
Step 4: Update Wi-Fi Adapter Driver
After installing the Wi-Fi adapter on your PC, it is essential to update the driver to ensure optimal performance and compatibility with your operating system. Outdated or incompatible drivers can cause connectivity issues or limit the functionality of the Wi-Fi adapter. Follow the steps below to update the Wi-Fi adapter driver:
- Open the Device Manager on your PC. On Windows, you can do this by right-clicking on the Start button and selecting “Device Manager.”
- In the Device Manager window, expand the “Network adapters” category.
- Locate your Wi-Fi adapter from the list. It is usually labeled with the brand or model name.
- Right-click on the adapter and select “Update driver.”
- Choose the option to search automatically for updated driver software. Windows will search online for the latest driver available.
- If Windows does not find any updates, you can visit the manufacturer’s website for your Wi-Fi adapter and download the latest driver manually.
- Once the driver update is complete, restart your PC for the changes to take effect.
Updating the Wi-Fi adapter driver ensures that you have the latest features, bug fixes, and performance enhancements. It can also resolve any compatibility issues that might arise with your operating system. Regularly checking for driver updates is recommended to keep your Wi-Fi adapter functioning smoothly.
If you encounter any issues during the driver update process or experience ongoing connectivity problems despite updating the driver, you may need to seek further assistance from the manufacturer’s support website or their customer support channels. They can provide specific troubleshooting steps or firmware updates that can help resolve any persistent connectivity issues.
With the Wi-Fi adapter driver updated, you’re now ready for the final step: connecting to a Wi-Fi network. Whether you’re connecting to a home network or a public hotspot, the next section will guide you through the process of establishing a wireless connection on your PC.
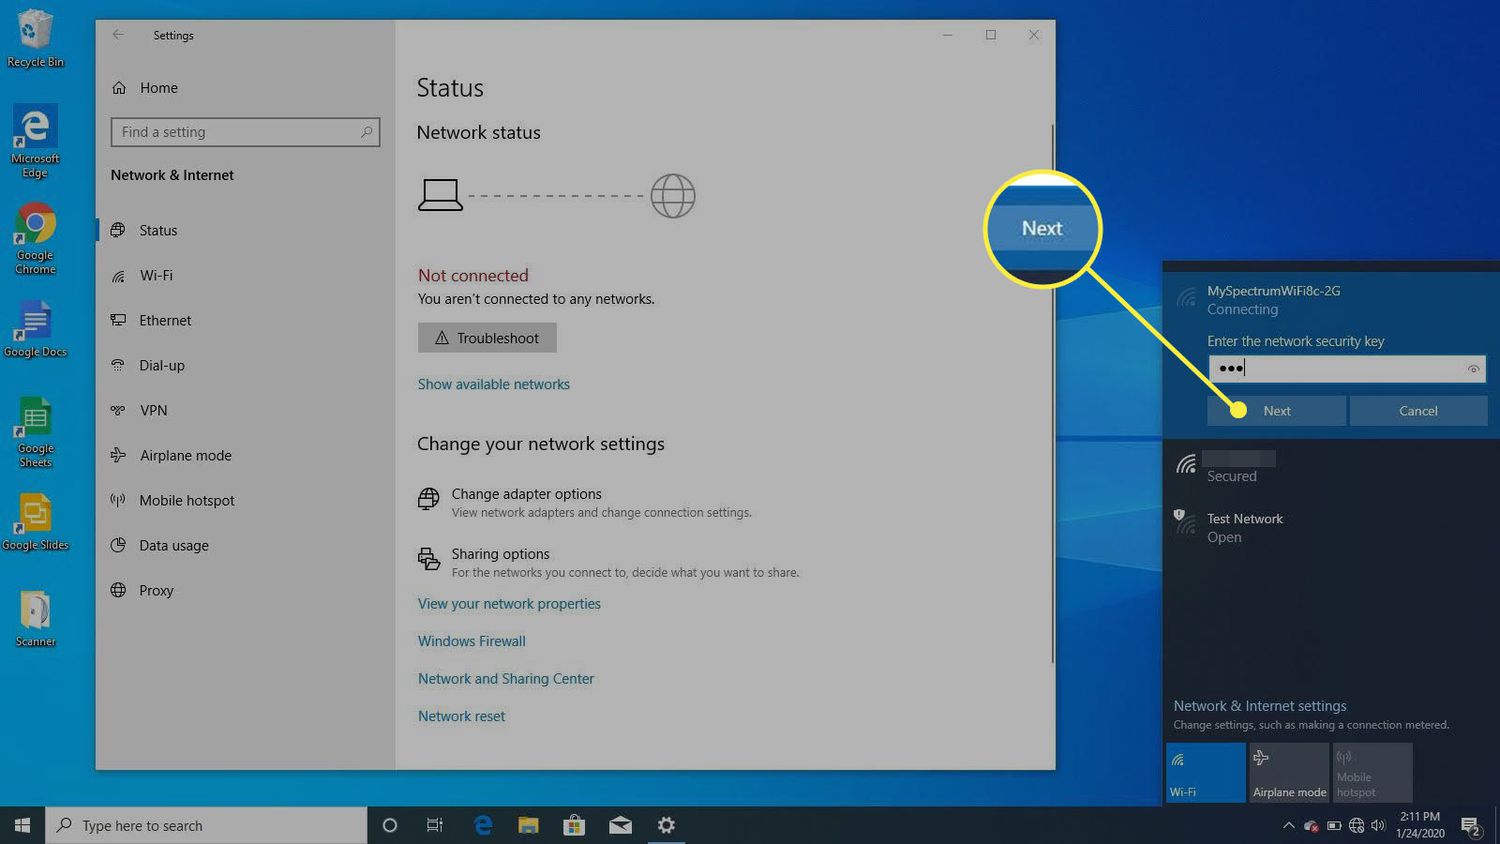
Step 5: Connect to Wi-Fi Network
Now that you have installed and updated the Wi-Fi adapter driver on your PC, it’s time to connect to a Wi-Fi network. Whether you’re connecting to your home network or a public Wi-Fi hotspot, the steps to connect are generally the same. Follow the instructions below to connect to a Wi-Fi network:
- Ensure that your Wi-Fi adapter is enabled and powered on.
- Click on the network icon in the system tray or navigate to the Wi-Fi settings in your operating system.
- A list of available Wi-Fi networks will appear. Select the network you want to connect to.
- If the network is password-protected, enter the correct Wi-Fi password when prompted. Make sure to enter it accurately, as passwords are case-sensitive.
- Click on the “Connect” or “Join” button to establish a connection to the selected Wi-Fi network.
- Once connected, your PC will obtain an IP address and other network settings automatically.
- You should now have a stable and secure connection to the Wi-Fi network.
If you are connecting to a home network, make sure you know the network name (SSID) and password. This information can usually be found on the back or underside of your router. For public Wi-Fi networks, such as those in coffee shops or airports, you may need to obtain the Wi-Fi network name and password from the establishment’s staff or displayed instructions.
If you are experiencing difficulties connecting to a Wi-Fi network, ensure that you are within range of the network and that the network is functioning properly. You can also try restarting your PC, router, and modem, as this can resolve some connectivity issues.
Remember, connecting to a Wi-Fi network allows you to enjoy the benefits of wireless internet on your PC. You can browse the web, stream videos, download files, and connect with others without the limitations of traditional wired connections.
Congratulations! You have successfully connected your PC to a Wi-Fi network. Now, you can take full advantage of the wireless capabilities of your PC and enjoy the benefits of being connected to the internet without the hassle of cables.
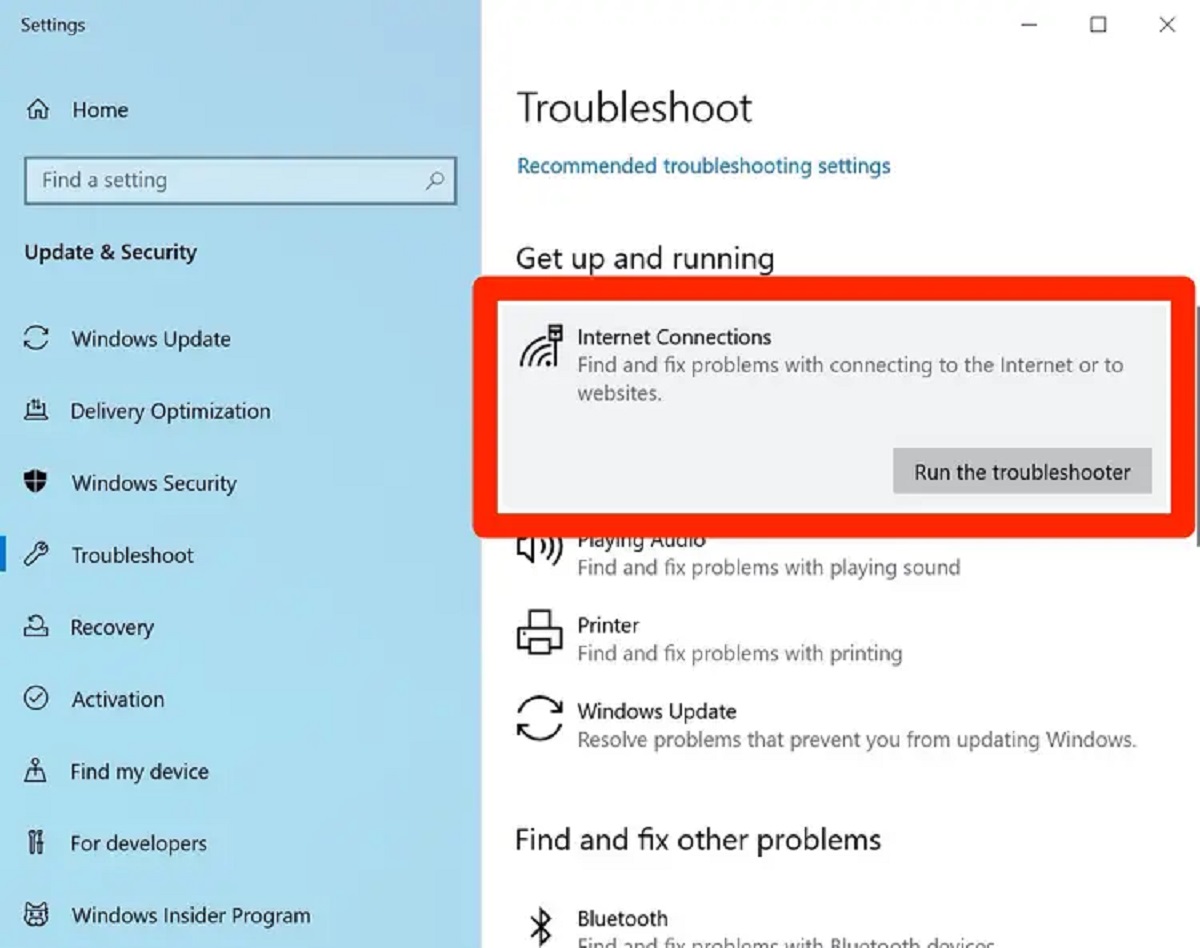
Troubleshooting Wi-Fi Issues
While connecting your PC to a Wi-Fi network is usually a straightforward process, you may encounter certain issues along the way. Here are some common Wi-Fi problems and their potential solutions:
1. Weak or No Signal:
If your Wi-Fi signal is weak or non-existent, try the following:
- Ensure that your PC is within range of the Wi-Fi router.
- Remove any physical obstructions between your PC and the router.
- Reposition the router or consider using Wi-Fi range extenders to improve coverage.
2. Slow Internet Speed:
If you are experiencing slow internet speeds, consider these troubleshooting steps:
- Check your internet plan to ensure you are not exceeding your data limit.
- Perform a speed test to determine if your internet speeds match the expected values.
- If necessary, contact your internet service provider for assistance.
3. Network Connection Drops:
If your Wi-Fi connection frequently disconnects, try these suggestions:
- Keep your PC and the router firmware updated to the latest version.
- Change the Wi-Fi channel on your router to avoid interference from neighboring networks.
- Reset the router or contact your internet service provider for further assistance.
4. Incorrect Password:
If you are unable to connect due to an incorrect password, double-check the following:
- Ensure that you are entering the correct password, as Wi-Fi passwords are case-sensitive.
- If you’re not sure of the password, consult your router’s documentation or contact the network administrator.
5. Driver Issues:
If you continue to experience connectivity problems, consider updating your Wi-Fi adapter driver to the latest version. Visit the manufacturer’s website for the adapter and download the appropriate driver for your operating system.
If none of these solutions resolve your Wi-Fi issues, it may be beneficial to seek assistance from technical support or a professional network technician. They can help diagnose and resolve more complex problems related to your Wi-Fi connectivity.
By troubleshooting common Wi-Fi issues, you can ensure a smooth and uninterrupted wireless experience on your PC. Don’t let connectivity problems hinder your productivity or enjoyment – take the necessary steps to keep your Wi-Fi network in optimal condition.
Conclusion
Congratulations! You have successfully learned how to get Wi-Fi on your PC. Whether you have a built-in Wi-Fi feature or needed to purchase and install a Wi-Fi adapter, you now have the freedom to connect to Wi-Fi networks without the limitations of wires.
In this guide, we covered the essential steps you need to take to get Wi-Fi on your PC. We started by understanding Wi-Fi technology and its basic components. Then, we walked through the process of checking for built-in Wi-Fi capabilities and purchasing and installing a Wi-Fi adapter if necessary.
We also highlighted the importance of updating the Wi-Fi adapter driver and provided guidance on connecting to Wi-Fi networks. Finally, we discussed troubleshooting common Wi-Fi issues that you may encounter along the way.
By following these steps and troubleshooting techniques, you can enjoy the benefits of wireless connectivity on your PC. Whether you’re browsing the web, streaming videos, or staying connected with friends and colleagues, having Wi-Fi on your PC adds a new level of flexibility and convenience to your digital experience.
Remember, Wi-Fi networks are continuously evolving, and new technologies and advancements will emerge over time. Stay informed about the latest Wi-Fi standards, encryption protocols, and network security practices to ensure a secure and reliable connection.
Thank you for joining us on this journey to get Wi-Fi on your PC. Enjoy the freedom of wireless connectivity and make the most out of your online experiences!