Introduction
Welcome to this guide on how to add a WiFi card in an HP All-In-One PC. If you own an older model or one that doesn’t come with built-in WiFi capabilities, adding a WiFi card can be a great solution to connect wirelessly to the internet and enjoy all the benefits of a stable and fast connection.
While adding a WiFi card to a desktop computer may seem like a complex task, it is actually a straightforward process that you can easily accomplish with the right guidance and tools. In this guide, we will take you through each step, explaining the process in a simple and understandable way.
Before we get started, it’s important to note that not all HP All-In-One PCs are compatible with WiFi card upgrades. Therefore, our first step will be to check the compatibility of your PC. This will ensure that you don’t encounter any issues along the way and that you get the best results from your WiFi upgrade.
Once we establish compatibility, we will gather all the necessary materials for the installation. This includes the WiFi card itself, any required adapters, and the appropriate tools for opening the PC case. Having everything prepared in advance will make the process smoother and more efficient.
Before we begin, it’s essential to power down your computer and unplug it from the electrical outlet. This will ensure your safety while working on the internal components of the PC. Additionally, make sure to ground yourself to prevent any static electricity from damaging sensitive parts.
Once you’ve taken the necessary precautions, we’ll move on to opening the PC case. Following our step-by-step instructions, you’ll be able to access the PCIe slot, where the WiFi card will be installed. We’ll guide you through the process of inserting the card correctly and securely into the slot.
After the WiFi card is securely in place, we’ll show you how to connect the antennas to ensure optimal signal reception. This will allow you to enjoy a strong and stable wireless connection without any interruptions.
Once all the hardware is in place, we’ll guide you through closing the PC case and securing it properly. Finally, we’ll power up the PC, install the necessary drivers for the WiFi card, and make sure everything is functioning as it should.
Adding a WiFi card to an HP All-In-One PC is a relatively straightforward process that can greatly enhance your computing experience. So, let’s get started and transform your PC into a wireless powerhouse!
Step 1: Check Compatibility
Before you embark on the process of adding a WiFi card to your HP All-In-One PC, it’s crucial to check the compatibility of your computer. Not all models support WiFi card upgrades, so it’s important to ensure that your PC is compatible to avoid any potential issues down the line.
Start by checking the specifications of your HP All-In-One PC. Look for information on whether the computer has an available PCIe slot for adding expansion cards like a WiFi card. If your PC doesn’t have an available PCIe slot, unfortunately, it may not be compatible with a WiFi card upgrade.
Next, identify the compatible form factor for your WiFi card. Common form factors for WiFi cards include PCIe Mini, M.2, and USB. Check the available expansion slots in your computer and make sure they match the required form factor for the WiFi card you plan to install.
It’s also important to consider the operating system compatibility. Check if the WiFi card you intend to install is compatible with your specific version of Windows or any other operating system you might be using. This will ensure that you can install the necessary drivers and enjoy a seamless wireless connection.
If you’re unsure about the compatibility of your computer or need assistance in identifying the appropriate WiFi card for your HP All-In-One PC, it’s recommended to consult the manufacturer’s website or reach out to their customer support. They will be able to provide you with accurate information and recommendations based on your specific model.
Checking the compatibility of your HP All-In-One PC before proceeding with the WiFi card installation is an important step to ensure a successful upgrade. By confirming that your PC has an available PCIe slot, a compatible form factor, and supports your operating system, you can proceed with confidence, knowing that you have a compatible setup for a smooth installation process.
Step 2: Gather the Necessary Materials
Before you begin the process of adding a WiFi card to your HP All-In-One PC, it’s important to gather all the necessary materials for a successful installation. Having everything prepared in advance will save you time and ensure a smooth and efficient process.
Here’s a list of the materials you’ll need:
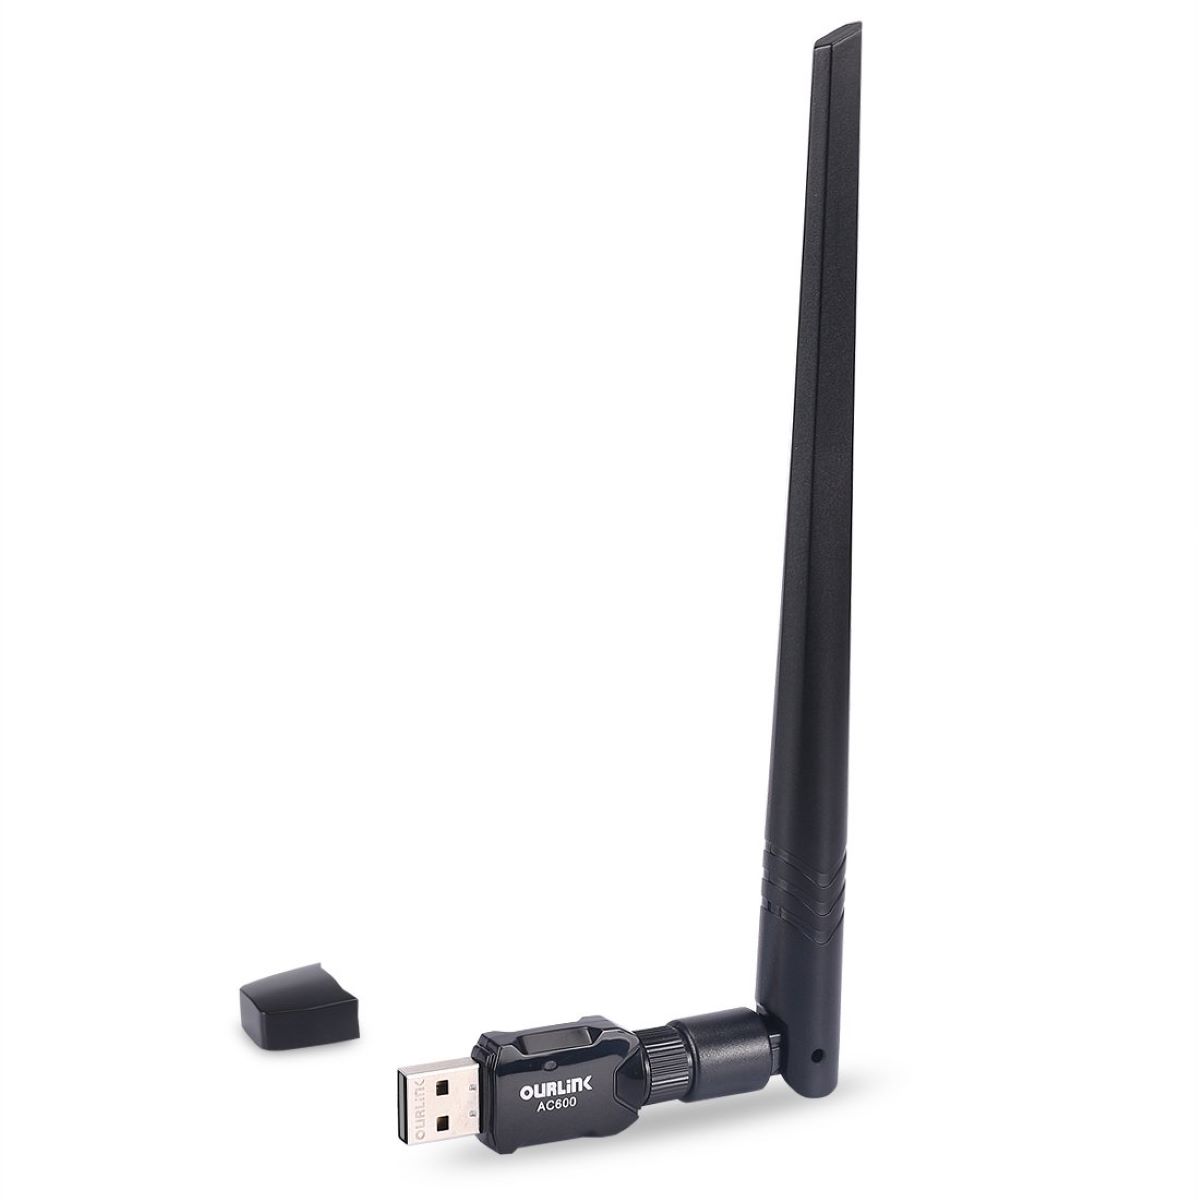
- WiFi Card: Choose a WiFi card that is compatible with your HP All-In-One PC. Ensure that it has the appropriate form factor and meets your desired specifications, such as WiFi standards (e.g., 802.11ac) and maximum data transfer rates.
- Adapters (if needed): Depending on the form factor of your WiFi card and the available expansion slots in your PC, you may require adapters to make them compatible. For example, if your WiFi card is a PCIe Mini form factor and your PC has an M.2 expansion slot, you’ll need a PCIe to M.2 adapter.
- Tools: Gather the necessary tools for opening the PC case and installing the WiFi card. A screwdriver set with various sizes and potentially an anti-static wrist strap are essential tools that you may need for this process. Ensure that you have the appropriate tools for your specific PC model.
- Antennas: Many WiFi cards require antennas for optimal signal reception. Check the specifications of your WiFi card to see if it requires external antennas. If so, ensure that the antennas are included or purchase them separately.
- Driver Disc or Downloadable Drivers: Most WiFi cards come with a driver disc. However, it is recommended to download the latest drivers from the manufacturer’s website to ensure you have the most up-to-date drivers for your WiFi card.
Once you have gathered all the necessary materials, double-check that everything is compatible and ready for installation. This step will help you avoid any delays or complications during the process.
If you’re unsure about the specific materials you need or have any questions, refer to the documentation provided with your WiFi card or consult the manufacturer’s website. Additionally, you can reach out to their customer support for further assistance in selecting the right materials for your HP All-In-One PC.
By ensuring you have all the necessary materials before starting the installation process, you’ll be well-prepared to add a WiFi card to your HP All-In-One PC and enjoy an enhanced wireless experience.
Step 3: Power Down and Unplug the PC
Before you begin the process of adding a WiFi card to your HP All-In-One PC, it’s important to ensure your safety by powering down the computer and unplugging it from the electrical outlet. This step will protect you from any potential electrical hazards and prevent damage to the internal components of the PC during the installation process.
To power down your HP All-In-One PC, follow these steps:
- Save and close all open applications: Before shutting down the PC, make sure to save any unsaved work and close all open applications. This will prevent any data loss or damage.
- Click on the “Start” menu: Click on the Windows “Start” button located in the bottom-left corner of the screen.
- Select “Power”: From the “Start” menu, click on the “Power” option, which will display a dropdown menu.
- Choose “Shut down”: From the dropdown menu, select the “Shut down” option. This will initiate the shutdown process for your PC.
After you have successfully shut down your HP All-In-One PC, it’s crucial to unplug it from the electrical outlet. This step will ensure that there is no power supply to the computer, eliminating the risk of electric shock or damage to the internal components during the installation process.
To unplug your HP All-In-One PC, follow these steps:
- Locate the power cord: Identify the power cord connected to the back of your PC. It is usually a thick cable that connects to a power outlet or a power strip.
- Unplug the power cord: Gently pull the power cord out of the power outlet or power strip. Ensure that the cord is fully disconnected from the power source.
Once you have powered down your HP All-In-One PC and unplugged it from the electrical outlet, you can proceed with the installation process with peace of mind. Taking these precautions will help protect both you and your computer from potential electrical hazards and ensure a smooth and safe WiFi card upgrade.
Step 4: Open the Case
Now that you have safely powered down and unplugged your HP All-In-One PC, it’s time to open the case to access the internal components. Opening the case will allow you to locate the PCIe slot where the WiFi card will be installed.
Follow these steps to open the case of your HP All-In-One PC:
- Identify the case screws: Examine the backside of your PC to locate the screws that secure the case. These screws are usually located near the edges of the back panel.
- Choose the appropriate screwdriver: Depending on the type of screws used on your HP All-In-One PC, select the appropriate screwdriver. Most PC cases require a Phillips screwdriver, but some may use Torx or Allen screws.
- Unscrew and remove the case screws: Using the screwdriver, carefully unscrew and remove all the case screws. Set them aside in a safe place to prevent loss.
- Remove the PC case cover: Gently slide or lift off the case cover from the back of the PC. Be cautious as some cases may have latches or clips that secure the cover in place. If needed, consult the user manual for your specific PC model for instructions on removing the case cover.
Once you have successfully removed the case cover, you will have access to the internal components of your HP All-In-One PC. Take a moment to familiarize yourself with the internal layout before proceeding further. Locate the PCIe slot where the WiFi card will be installed. This slot is typically longer than other expansion slots on the motherboard and is usually positioned closer to the back of the PC.
It’s important to handle the internal components of your PC with care. Avoid touching any exposed circuitry or delicate parts to prevent damage. If you need additional lighting to see inside the case, consider using a flashlight or working in a well-lit area.
Keep track of the case screws and other parts you removed, as you will need them when closing the case later. Placing them in a small container or baggie will help prevent any misplacement.
By following these steps and opening the case of your HP All-In-One PC, you are now ready to move on to the next step of installing the WiFi card. Take your time and proceed with caution to ensure a successful installation without causing any damage to the internal components of your PC.
Step 5: Locate the PCIe Slot
Now that you have opened the case of your HP All-In-One PC, your next step is to locate the PCIe slot where the WiFi card will be installed. The PCIe slot serves as the interface for the WiFi card to connect with the motherboard and allows for high-speed data transfer.
Follow these steps to locate the PCIe slot in your HP All-In-One PC:
- Locate the motherboard: Within the open case, identify the main circuit board known as the motherboard. It is the large, flat board that all other components connect to.
- Look for the expansion slots: On the motherboard, observe the available expansion slots. These slots are where you can add expansion cards like WiFi cards to enhance the functionality of your computer.
- Identify the PCIe slot: Among the expansion slots, look for the PCIe slot. It is usually longer than other slots and may have a small latch or clip that secures the card in place. The PCIe slot is commonly positioned closer to the back of the PC.
Ensure that you correctly identify the PCIe slot before proceeding with the installation of the WiFi card. Mistakenly inserting the card into the wrong slot can prevent it from functioning properly and may cause damage to the system.
Take note of the position and orientation of the PCIe slot. This will help you properly align the WiFi card and insert it in the correct manner. It’s important to handle the WiFi card with care to avoid bending or damaging any of its delicate components.
If you are uncertain about the location of the PCIe slot in your specific HP All-In-One PC model, consult the user manual or refer to the manufacturer’s website for detailed instructions or diagrams. Additionally, you can reach out to customer support for guidance and assistance.
By locating the PCIe slot in your HP All-In-One PC, you are one step closer to installing the WiFi card successfully. Once you have identified the slot, you are ready to move on to the next step and insert the WiFi card securely into the PCIe slot of your computer.
Step 6: Insert the WiFi Card
With the PCIe slot located in your HP All-In-One PC, you’re now ready to insert the WiFi card securely. This step will establish the connection between the WiFi card and the motherboard, enabling wireless communication and internet connectivity.
Follow these steps to insert the WiFi card into the PCIe slot:
- Handle the WiFi card with care: Hold the WiFi card by its edges, taking care not to touch the metal contacts or any sensitive components. This will help prevent static discharge and potential damage to the card.
- Align the WiFi card with the PCIe slot: With the PCIe slot in sight, position the WiFi card above it. Align the gold contacts on the bottom of the card with the contacts within the slot. Ensure that the notches or grooves on the WiFi card line up with the corresponding tabs in the slot.
- Insert the WiFi card into the PCIe slot: Gently but firmly push the WiFi card into the PCIe slot. Apply even pressure on both ends of the card, ensuring that it is inserted as straight as possible. The card may require some force to slide in smoothly, but do not use excessive pressure.
- Confirm proper installation: Once the WiFi card is fully inserted into the PCIe slot, check to ensure that it is securely in place. The card should be level and the connectors should be completely inserted into the slot.
It’s important to double-check that the WiFi card is properly seated in the PCIe slot before moving on to the next step. A loose or partially inserted card can result in connectivity issues or malfunctioning of the card. If necessary, gently wiggle the card while firmly holding the sides to ensure it is securely in place.
If you encounter any resistance or difficulty during the insertion process, double-check that you have correctly aligned the WiFi card with the PCIe slot. Avoid forcing the card into the slot as this may cause damage. Take a moment to reposition the card and try again.
Remember to handle the WiFi card with caution, avoiding any unnecessary static discharge or physical damage. If you have any doubts or concerns about properly inserting the card, consult the user manual of your HP All-In-One PC or seek assistance from the manufacturer’s customer support.
By successfully inserting the WiFi card into the PCIe slot, you have completed a major step in the installation process. The card is now ready to be secured and properly connected to the rest of the components for optimal performance.
Step 7: Secure the WiFi Card
After inserting the WiFi card into the PCIe slot of your HP All-In-One PC, it’s crucial to secure the card in place to prevent any movement or dislodging. This step will ensure a stable and reliable connection between the WiFi card and the motherboard.
Follow these steps to securely fasten the WiFi card in your HP All-In-One PC:
- Locate the mounting screw hole: Look for the mounting screw hole near the end of the PCIe slot where the WiFi card is inserted. It is usually located at the back or the front of the slot, depending on the design of your PC.
- Line up the WiFi card: Align the mounting screw hole on the WiFi card with the corresponding hole on the PCIe slot. Ensure the card is flush against the motherboard and seated properly.
- Insert and tighten the mounting screw: Insert the mounting screw through the hole on the WiFi card and into the corresponding hole on the PCIe slot. Use a screwdriver to gently tighten the screw, but be careful not to overtighten as it may damage the components.
- Double-check card placement: After securing the mounting screw, give the WiFi card a gentle but firm push to make sure it is still properly seated in the PCIe slot. Ensure that the card is still level and fully inserted.
Securing the WiFi card with the mounting screw will provide stability and prevent any accidental disconnection during use. It will also help to maintain an uninterrupted wireless connection and ensure the best performance from your WiFi card.
If your HP All-In-One PC doesn’t have a mounting screw hole, this indicates that the case design or the specific WiFi card model you have chosen does not require a screw for securing. In such cases, carefully check that the card is fully inserted and in a stable position within the PCIe slot.
It’s worth noting that not all WiFi cards or PC models will have the same mounting screw hole design. Read the user manual of your specific WiFi card and consult any documentation provided by the manufacturer for instructions specific to your HP All-In-One PC model.
Once you have successfully secured the WiFi card, you can proceed with connecting the antennas to ensure optimal signal reception. The secure placement of the WiFi card is an essential step in the installation process, contributing to a reliable wireless connection for your HP All-In-One PC.
Step 8: Connect the Antennas
With the WiFi card securely in place, the next step in upgrading your HP All-In-One PC is to connect the antennas. The antennas are essential for receiving and transmitting wireless signals, allowing you to establish a strong and reliable connection to your WiFi network.
Follow these steps to connect the antennas to your WiFi card:
- Locate the antenna connectors: Look for small, cylindrical connectors near the edge of the WiFi card. These connectors are typically labelled “ANT” or “AUX” and may be color-coded.
- Identify the antenna cables: Locate the antenna cables that are included with your WiFi card or were previously connected to your PC. These cables will have connectors that match the ones on the WiFi card. They may be labelled or color-coded to correspond with the connectors on the WiFi card.
- Connect the antennas: Take one of the antenna cables and align its connector with the corresponding connector on the WiFi card. Gently push the connectors together until they are securely connected. Repeat this step for the second antenna cable.
It’s important to make sure that the antenna cables are correctly and securely connected to the WiFi card. A loose or improperly connected antenna can result in weak signal reception and a diminished wireless performance. Take a moment to double-check that the connectors are firmly attached and fully seated.
If the antennas are labeled or color-coded, ensure that you connect them to the correct connectors on the WiFi card. Plugging the antennas into the wrong connectors may compromise their effectiveness and impact the quality of your wireless connection.
Once the antennas are connected, position them for optimal signal reception. Extend the antennas and adjust their placement to minimize interference and maximize the strength of the wireless signal. Some WiFi cards have magnetic bases on the antennas, allowing you to attach them to a metal surface or the PC case for stability.
If your WiFi card requires external antennas but they were not included with the card, you will need to purchase them separately. Consult the documentation or the website of your WiFi card manufacturer for recommendations on compatible antennas and the ideal placement for maximizing signal strength.
By connecting the antennas to your WiFi card, you have completed a vital step in the installation process. The antennas will enable your HP All-In-One PC to establish a robust and reliable wireless connection, providing you with seamless internet access.
Step 9: Close the Case
With the WiFi card installed and the antennas connected, it’s time to close the case of your HP All-In-One PC. Closing the case will protect the internal components and ensure that everything remains in place for optimal performance.
Follow these steps to properly close the case of your HP All-In-One PC:
- Check the alignment of the case cover: Position the case cover in alignment with the computer chassis. Ensure that all the edges of the cover line up properly with the edges of the chassis.
- Slide or press the case cover into place: Apply gentle pressure and slide or press the case cover into its original position. It should fit snugly and evenly with the rest of the computer chassis. If your case has latches or clips, ensure that they secure the cover properly.
- Verify that the case cover is properly aligned: Take a moment to inspect the overall appearance of your HP All-In-One PC. Check that the case cover is flush with the rest of the chassis and that there are no gaps or misalignments.
- Secure the case cover with screws: If your case requires screws to hold the cover in place, insert and gently tighten them using the appropriate screwdriver. Ensure that the screws are snug, but be careful not to overtighten and strip the screw threads.
Taking care to properly close the case of your HP All-In-One PC is essential for the protection and maintenance of your upgrade. A securely closed case will minimize the risk of dust, debris, or any potential damage to the internal components.
Once you have closed the case, take a moment to ensure that everything is in order. Check that all cables and connectors are properly connected and secured. Verify that none of the internal components or wires are obstructing the case cover or impeding the airflow within the PC.
If you encounter any difficulty closing the case or suspect that something is not properly aligned, carefully remove the case cover and inspect the internals again. Double-check the positioning of the WiFi card, antennas, and any other components to ensure everything is correctly installed.
By successfully closing the case of your HP All-In-One PC, you have completed the physical installation process of your WiFi card upgrade. Your PC is now ready to be powered up and configured to enjoy the benefits of a wireless connection.
Step 10: Power Up and Install Drivers
With the WiFi card installed, antennas connected, and the case closed, it’s time to power up your HP All-In-One PC and install the necessary drivers for the WiFi card. Installing the drivers will enable your computer to recognize and utilize the WiFi card, allowing you to connect to wireless networks and enjoy a seamless internet experience.
Follow these steps to power up your HP All-In-One PC and install the WiFi card drivers:
- Plug in your PC: Connect your HP All-In-One PC to a power source and ensure that the power cable is securely plugged into the back of the PC.
- Press the power button: Locate the power button on your PC and press it to turn on your computer.
- Wait for the operating system to load: Allow your computer’s operating system to fully load. This may take a few moments.
- Insert the driver disc (if applicable): If your WiFi card came with a driver disc, insert it into the appropriate disc drive on your computer.
- Follow the on-screen prompts: If you inserted the driver disc, follow the on-screen prompts to install the drivers for your WiFi card. Ensure that you read and follow the instructions carefully.
- Download drivers from the manufacturer’s website: If your WiFi card didn’t come with a driver disc or you prefer to install the latest drivers, visit the manufacturer’s website and navigate to the support or downloads section. Locate the drivers specific to your WiFi card model and download them.
- Run the driver installation program: Once the drivers are downloaded, run the installation program and follow the on-screen instructions to install the drivers for your WiFi card.
- Restart your computer (if necessary): After the driver installation is complete, you may need to restart your HP All-In-One PC. Follow any prompts and allow the computer to restart.
It’s important to install the appropriate drivers for your WiFi card to ensure optimal performance. Using the latest drivers can also provide bug fixes, performance enhancements, and additional features for your WiFi card.
If you encounter any issues during the driver installation process or have difficulty locating the drivers for your WiFi card, refer to the user manual provided with the card or visit the manufacturer’s website for support. They should be able to provide you with the necessary assistance and guidance to complete the process successfully.
Once the WiFi card drivers are installed and your computer has restarted (if necessary), you’re ready to start using your upgraded HP All-In-One PC with a wireless connection. Enjoy the convenience and flexibility of wirelessly connecting to the internet and exploring all that it has to offer.
Conclusion
Congratulations! You have successfully learned how to add a WiFi card to your HP All-In-One PC. By following the step-by-step guide provided, you have upgraded your computer to enable wireless connectivity and enjoy the benefits of a stable and fast internet connection.
Throughout the process, you checked the compatibility of your PC, gathered the necessary materials, and safely powered down and unplugged the computer before opening the case. You then located the PCIe slot, inserted the WiFi card, and securely fastened it in place. After connecting the antennas, you closed the case and powered up the PC to install the WiFi card drivers.
It’s important to keep in mind that every computer model and WiFi card installation may have slight variations. Always refer to the specific instructions provided by your WiFi card manufacturer and your HP All-In-One PC’s user manual for the most accurate and up-to-date information.
Adding a WiFi card to your HP All-In-One PC opens up a world of possibilities, allowing you to connect wirelessly to the internet, stream media, play online games, and engage in online activities without the limitations of a wired connection. Whether you’re a student, professional, or simply a technology enthusiast, the WiFi card upgrade enhances your computing experience.
Remember to periodically update your WiFi card drivers to ensure optimal performance and stay up to date with the latest features and improvements. Utilize the support and resources provided by the manufacturer to troubleshoot any issues that may arise during the installation process or while using your upgraded PC.
Now, sit back, relax, and enjoy the freedom and convenience of wireless internet on your HP All-In-One PC. Stay connected, explore new opportunities, and make the most of your upgraded computer. Happy computing!