Introduction
Having a busted OLED TV can be a frustrating experience. Whether it’s a black screen, flickering images, or distorted colors, a malfunctioning TV can put a damper on your entertainment experience. While it may seem daunting at first, there are steps you can take to fix the issue and get your TV back to its optimal performance.
In this guide, we’ll walk you through the process of troubleshooting and fixing a busted OLED TV. From diagnosing the problem to seeking professional help if needed, we’ll cover each step in detail to ensure that you can resolve the issue effectively.
Before we begin, it’s important to note that some problems may require professional assistance or even a replacement of the screen. However, there are several common issues that you can attempt to fix on your own. So, grab your tool kit and let’s dive in!
In the following sections, we’ll outline the necessary steps to diagnose the problem, check the power source, reset the TV, adjust the settings, update the software, and check the cables. We’ll also discuss the option of repairing or replacing the screen, and when it’s advisable to seek professional help.
It’s essential to approach the troubleshooting process with patience and caution. Sometimes, the fix may be as simple as adjusting a few settings, while other times it may require more advanced repairs. By following the steps outlined in this guide, you’ll be equipped with the knowledge and tips to tackle most common issues that may arise with your OLED TV.
So, let’s get started with the first step: diagnosing the problem. This will help identify the root cause of the issue and determine the most appropriate course of action.
Step 1: Diagnose the problem
When your OLED TV is not functioning properly, the first step is to diagnose the problem. This involves identifying the specific issue or symptom you’re experiencing. Understanding the problem will help you narrow down the potential causes and determine the best approach to fix it.
Start by observing the TV and noting any visible signs of malfunction. Is the screen completely black? Are there any flickering images or distorted colors? Are there any error messages displayed? Taking note of these details will provide valuable information to help diagnose the problem.
Next, check the TV’s connections and inputs. Ensure that all cables are securely plugged in and that there are no loose connections. Sometimes, a faulty or loose cable can cause issues with the display. Try swapping cables or using different inputs to see if the problem persists.
If the issue seems to be specific to a certain source, such as a cable box or gaming console, try connecting that source to another TV or monitor. If the problem persists on a different display, it may indicate that the issue lies with the source device rather than the TV itself.
Another way to diagnose the problem is to perform a factory reset on the TV. This will revert all settings back to their default values and can help resolve software-related issues or conflicts. Consult the user manual or the manufacturer’s website for instructions on how to perform a factory reset on your specific TV model.
It’s also worth checking for any firmware updates for your TV. Manufacturers often release software updates that address known issues and improve performance. Visit the manufacturer’s website or use the TV’s built-in software update feature to check for and install any available updates.
If none of these initial troubleshooting steps resolve the problem, it may be necessary to seek professional help. A certified technician will have the expertise and specialized equipment to diagnose and repair more complex issues.
In the next section, we’ll discuss Step 2: checking the power source. Sometimes, the issue may be as simple as a power supply problem, and fixing it can restore your OLED TV’s functionality.
Step 2: Check the power source
One of the most common causes of a malfunctioning OLED TV is a power source issue. Before diving into more complex troubleshooting steps, it’s important to ensure that the TV is receiving consistent and stable power.
Start by checking if the power cord is securely plugged into both the TV and the wall outlet. Sometimes, a loose connection can result in intermittent power supply or no power at all. Make sure the power cord is fully inserted and that there are no frayed or damaged wires.
If the TV is connected to a power strip or surge protector, try plugging it directly into a wall outlet. Power strips or surge protectors can sometimes cause irregular power flow, which can affect the TV’s performance. By bypassing the power strip, you can determine if it is the source of the problem.
Next, check if there is power in the outlet by plugging in another device or using a voltage tester. If there is no power, check the circuit breaker or fuse box and ensure that the corresponding switch or fuse is in the “on” position. If necessary, reset the breaker or replace the fuse.
In some cases, power fluctuations or electrical surges can damage the TV’s internal components. If you suspect this may be the case, consider using a voltage regulator or surge protector to protect your TV from future power-related issues.
It’s also worth trying a different power cord if you have one available. Sometimes, a faulty or damaged power cord can prevent the TV from receiving adequate power. By replacing the power cord, you can eliminate this possibility.
If, after performing these checks, the TV still does not receive power or continues to have power-related issues, it may indicate a more serious electrical problem within the TV. At this point, it would be advisable to consult a professional technician who can diagnose and repair the issue.
Once you have ensured a stable and consistent power supply to the TV, move on to the next step: resetting the TV. This step can help resolve various software-related issues and bring your TV back to its normal functioning state.
Step 3: Reset the TV
If your OLED TV is still experiencing issues after checking the power source, the next step is to perform a reset. Resetting the TV can resolve software-related issues and restore the TV to its default settings.
Before proceeding with the reset, it’s important to note that performing a reset will erase any custom settings, preferences, and installed apps. Make sure to take note of any personalized settings or apps that you would like to restore after the reset.
The process of resetting the TV may vary depending on the brand and model. Consult the user manual or the manufacturer’s website for specific instructions on how to perform a reset on your TV model.
Typically, there are two types of resets: a soft reset and a hard reset. A soft reset involves restarting the TV with the remote control or through the settings menu. This can resolve minor issues and glitches without affecting your personalized settings.
If a soft reset doesn’t resolve the problem, a hard reset may be necessary. This involves a more in-depth reset that clears all settings and restores the TV to its factory defaults. The process may involve pressing specific buttons on the remote control or accessing the settings menu in a specific way.
During the reset process, you may be prompted to confirm the reset and select the desired reset options. Follow the on-screen instructions carefully and proceed with the reset. Be patient, as the reset process may take a few minutes to complete.
Once the TV has been reset, you will need to go through the initial setup process, including selecting language, connecting to Wi-Fi, and signing in to any streaming accounts. After the setup is complete, test the TV to see if the issue has been resolved.
If the reset successfully resolves the problem, you can proceed with reconfiguring any personalized settings, restoring apps, and adjusting picture and sound settings to your preference.
If, after performing the reset, the issue persists, it’s time to move on to the next step: adjusting the settings. In some cases, incorrect or unsupported settings can cause display or performance issues on the TV.
Step 4: Adjust the settings
If your OLED TV is still not functioning properly even after performing a reset, the next step is to adjust the settings. Incorrect or incompatible settings can often cause display or performance issues.
Start by checking the picture settings. Go to the TV’s settings menu and navigate to the picture or display settings. Ensure that the brightness, contrast, and color settings are properly configured. Adjust them to your preference or try restoring them to their default values.
Additionally, some TVs offer picture presets for different viewing modes such as “Standard,” “Movie,” or “Vivid.” Try selecting a different preset to see if it improves the display quality. Experiment with different presets until you find one that suits your preference and produces the desired picture quality.
Another setting to consider is the aspect ratio or screen format. Make sure the TV is set to the correct aspect ratio for the content you’re watching. For example, if you’re watching a widescreen movie, select the 16:9 aspect ratio to avoid stretching or cropping the image.
Additionally, check the TV’s color temperature settings. Some TVs offer options such as “Warm,” “Neutral,” or “Cool.” Adjusting the color temperature can help enhance the overall color accuracy of the display.
If you’re experiencing audio issues, check the sound settings. Ensure that the volume level is appropriately set and that the TV’s speakers are not muted or set to an extremely low level. You can also try adjusting the equalizer settings to optimize the audio quality according to your preferences.
Furthermore, some TVs have advanced settings that may affect performance, such as motion smoothing or noise reduction. Experiment with these settings to see if they have any impact on the overall picture quality or performance of your TV.
If you have connected external devices to your TV, such as a gaming console or a cable box, make sure their settings are compatible with the TV. Check the output resolution and refresh rate of the connected devices and ensure they match the capabilities of your TV. Incorrect settings can result in distorted or flickering images.
After making any adjustments to the settings, test the TV to see if the issue has been resolved. It’s worth noting that adjusting settings may require some trial and error, as the optimal settings can vary depending on personal preferences and the specific TV model.
If adjusting the settings doesn’t solve the problem, the next step is to check for software updates. In some cases, outdated software can cause compatibility issues or bugs that affect the TV’s performance.
Step 5: Update the software
If your OLED TV is still experiencing issues after adjusting the settings, it’s advisable to check for any available software updates. Outdated software can sometimes result in compatibility issues or bugs that affect the performance and functionality of your TV.
Start by accessing the TV’s settings menu and look for a “Software Update” or “System Update” option. Click on it to check for any available updates. Depending on the TV model, the update process may vary. Some TVs allow you to update the software directly through the internet connection, while others may require downloading the update onto a USB drive and manually installing it.
If an update is available, follow the on-screen instructions to download and install it. Keep in mind that the update process may take some time, so be patient and avoid turning off the TV during the update.
Software updates often introduce bug fixes, stability improvements, and new features. By keeping your TV’s software up to date, you can ensure that it is running on the latest version and minimize the chances of encountering software-related issues.
Once the software update is complete, test the TV to see if the issue has been resolved. If the problem persists, it may be necessary to check the cables connected to your TV.
Move on to Step 6: Check the cables to ensure that all connections are secure and properly functioning.
Step 6: Check the cables
When experiencing issues with your OLED TV, it’s important to check the cables connected to the TV to ensure that all connections are secure and properly functioning. Loose or faulty cables can cause a range of display and audio problems.
Start by inspecting the HDMI cables. HDMI cables are commonly used to connect external devices such as gaming consoles, Blu-ray players, or cable boxes to the TV. Ensure that the HDMI cables are securely plugged into both the TV and the respective external devices. If any of the cables are loose or damaged, replace them with a new HDMI cable.
If you’re using other types of cables, such as component cables or composite cables, double-check that they are connected correctly and securely to both the TV and the external devices.
Inspect the cables for any visible damage, such as frayed wires or bent connectors. If you notice any damage, it’s best to replace the cable with a new one to ensure optimal performance.
In some cases, cables can become loose over time due to frequent movements or vibrations. Simply unplugging and re-plugging the cables can establish a more secure connection and resolve any intermittent issues.
Additionally, check if the cables are compatible with your TV and the connected devices. Older TV models may not support the latest cable standards, such as HDMI 2.1. If your TV does not support the cable standard you’re using, it may result in limited functionality or degraded performance. Check the user manual or the manufacturer’s website for compatibility information.
Once you have verified the cable connections, test the TV to see if the issue has been resolved. If the problem persists, it may indicate a more serious issue with the screen itself. In such cases, you may need to consider repairing or replacing the screen.
In the next step, we will discuss the options for repairing or replacing the screen, depending on the severity of the issue.
Step 7: Repair or replace the screen
If your OLED TV is still not functioning properly after checking the cables, it’s time to consider the option of repairing or replacing the screen. Depending on the severity of the issue, this step may be necessary to restore your TV to its optimal performance.
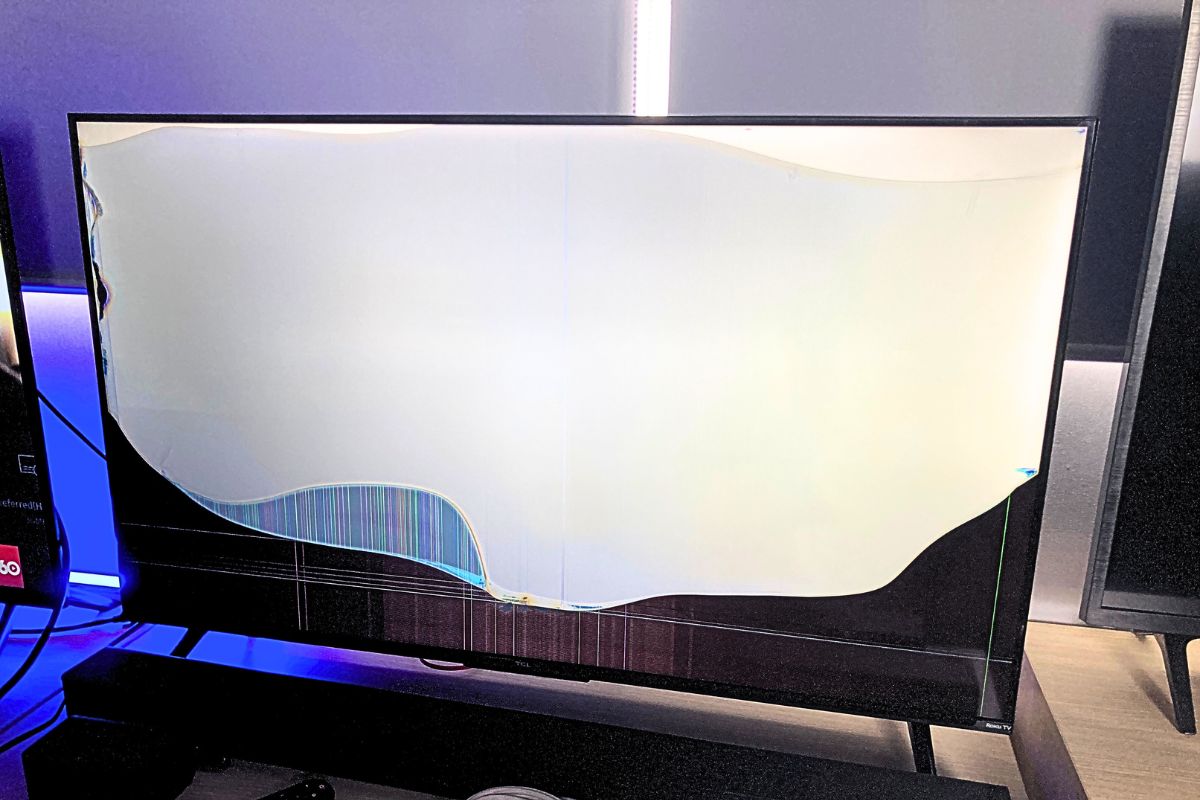
If the screen is physically damaged, such as cracks or deep scratches, repairing or replacing the screen may be the only solution. However, it’s important to note that screen repairs can be costly and may require professional assistance. Contact the manufacturer or a certified technician to inquire about repair options and associated costs.
Keep in mind that repairing the screen can be a delicate process, as OLED panels are sensitive to pressure and require specialized tools and expertise. Attempting a DIY repair may cause further damage or void the warranty, so it’s recommended to seek professional help.
In some cases, the issue with the screen may be due to internal component failure or malfunction. Again, it is advisable to reach out to the manufacturer or a professional technician to diagnose and repair the issue.
If the cost of repair is prohibitively high or if your TV is older and no longer under warranty, you may consider replacing the screen altogether. Research the cost of a replacement screen and compare it to the price of a new TV. In some instances, it may be more cost-effective to invest in a new TV rather than repairing or replacing the screen.
Before proceeding with any repair or replacement, carefully evaluate the cost and benefits. Consider the overall condition of the TV, its age, and whether the repair or replacement will provide a significant improvement in its performance.
If the issue is not severe or if the cost of repair or replacement is not feasible, you may want to seek professional help to assess the TV further. A certified technician can provide expert advice and guidance based on the specific issue you’re facing.
Remember, the decision to repair or replace the screen ultimately depends on your individual circumstances and preferences. It’s essential to weigh the pros and cons before making a final decision.
If professional help is needed, it’s time to move on to the final step: seeking assistance from a qualified technician to ensure a proper diagnosis and resolution of the issue.
Step 8: Seek professional help if needed
If you’ve followed all the previous steps and your OLED TV is still not functioning properly, it may be time to seek professional help. A qualified technician can provide expert guidance and assistance in diagnosing and resolving the issue.
Professional technicians have the knowledge and specialized equipment to perform in-depth diagnostics on your TV and identify any underlying problems. They can also provide professional insights and recommendations for the most effective course of action.
When seeking professional help, it’s important to choose a reputable and certified technician. Look for technicians who specialize in TV repairs and have experience working with OLED screens. Checking online reviews and getting recommendations from trusted sources can help ensure that you’re relying on a reliable and trustworthy professional.
Before contacting a technician, make sure you have all the necessary details about your TV, such as the model number, serial number, and a clear description of the issue. This information will help the technician assess the situation more accurately and provide appropriate solutions.
When interacting with the technician, be open about the troubleshooting steps you’ve already taken and any observations you’ve made. This will give them a better understanding of the problem and help expedite the repair process.
It’s worth noting that professional repairs can be costly, especially if it involves replacing major components or the entire screen. Be sure to inquire about the cost and warranty terms before moving forward with any repairs. Compare these costs with the price of a new TV to determine the most cost-effective solution.
If your TV is still under warranty, contact the manufacturer or authorized service centers to inquire about repair options. Warranty coverage can significantly reduce the cost of repairs or even cover them entirely, depending on the terms and conditions.
Remember, professional help is invaluable when facing complex or severe issues with your OLED TV. They have the expertise and resources to efficiently diagnose and repair problems, bringing your TV back to its optimal performance.
With the guidance of a qualified technician, you’ll have peace of mind knowing that you’ve explored all possible solutions and taken the necessary steps to resolve the issue with your OLED TV.
Conclusion
Dealing with a busted OLED TV can be frustrating, but with the right troubleshooting steps, you can often resolve the issue and get your TV back in working order. Throughout this guide, we have covered several steps to help diagnose and fix common problems that may arise with your OLED TV.
Starting with the first step of diagnosing the problem, we covered how to identify the specific issue or symptom you’re experiencing. Checking the power source, resetting the TV, adjusting the settings, and updating the software were all subsequent steps to address various potential causes of the problem.
Additionally, we discussed the importance of checking cables to ensure secure and proper connections. If necessary, we explored the options of repairing or replacing the screen, depending on the severity of the issue. Lastly, we emphasized the significance of seeking professional help if needed.
Throughout the troubleshooting process, it’s important to approach the situation with patience and caution. Experimenting with different steps and adjustments can help narrow down the problem and find the appropriate solution.
Remember, certain issues may require professional assistance or even a replacement of certain components. It’s crucial to evaluate the costs and benefits of repair versus replacement, taking into consideration factors such as warranty coverage, overall TV condition, and individual circumstances.
By following the steps outlined in this guide and seeking professional help when necessary, you can resolve many common issues with your OLED TV. Restoring your TV to its optimal performance and enjoying your favorite movies, shows, and games can be just a few steps away.
As always, if you’re uncomfortable or unsure about performing any of the troubleshooting steps, it’s best to consult a professional technician. They have the expertise and experience to handle complex issues and ensure that your OLED TV is in the best possible hands.
We hope that this guide has been helpful in assisting you with fixing your busted OLED TV. Remember to always refer to the user manual or contact the manufacturer for specific instructions and guidance related to your TV model.
Now, armed with the knowledge and tips provided, it’s time to get started and get your OLED TV back to its prime performance!


