Introduction
With the increasing popularity of social media platforms, Instagram has emerged as one of the leading platforms for sharing photos and videos. Instagram offers a wide range of features to engage with your audience, including the ability to run polls. Polls are a great way to gather opinions, make decisions, and interact with your followers.
Running a poll on Instagram is not only easy but also fun, allowing you to directly engage with your followers and gain valuable insights. Whether you want to ask your audience for their preferences, opinions, or even decide between two options, polls are a versatile tool that can be used for various purposes.
In this article, we will walk you through the step-by-step process of creating and conducting a poll on Instagram. By the end of this guide, you’ll be able to effectively use this feature and make the most out of your Instagram presence.
Before we dive into the details, it’s important to note that you’ll need to have the Instagram app installed on your smartphone or tablet to access the platform’s features. If you haven’t already done so, head to your device’s app store, search for “Instagram,” and download the app. Once you have the app installed and set up, you can begin creating your polls.
Now, let’s get started with the first step: accessing the Instagram app.
Step 1: Accessing the Instagram app
The first step to creating a poll on Instagram is to access the Instagram app on your smartphone or tablet. Once you have it installed and set up, follow these simple steps:
- Open the Instagram app: Locate the Instagram app icon on your home screen or app drawer. Tap on it to open the app.
- Log in or sign up: If you already have an Instagram account, enter your username and password to log in. If you don’t have an account, you’ll need to sign up for a new one. Follow the on-screen instructions to create a new account.
- Explore the home screen: After logging in, you will be directed to the home screen. This is the main dashboard of the app, where you can view posts from the accounts you follow, as well as access various features and settings.
- Navigate to your profile: To access your Instagram profile, tap on the profile icon located at the bottom right corner of the screen. This will open up your personal account page.
By following these steps, you can successfully access the Instagram app and prepare to create your poll. Now, let’s move on to the next step: creating a new post.
Step 2: Creating a new post
Once you have accessed the Instagram app and logged in to your account, you are ready to create a new post. Follow these steps to start the process:
- Tap on the plus icon: On your profile page, you’ll notice a plus icon located at the bottom center of the screen. Tap on it to create a new post.
- Select the type of content: Instagram offers different types of content that you can post, including photos, videos, and carousel posts. Choose the type of content that you want to use for your poll.
- Choose a photo or video: If you have chosen to post a photo or video, you’ll be directed to your device’s gallery. Browse through your media library and select the photo or video you wish to use.
By following these steps, you can successfully create a new post on Instagram. Now, let’s move on to the next step: adding a photo or video to your post.
Step 3: Adding a photo or video to your post
After creating a new post on Instagram, the next step is to add a photo or video to your post. Follow these steps to incorporate visual content:
- Editing options: Once you have selected a photo or video from your device’s gallery, you will be directed to the editing screen. Here, you can apply filters, adjust brightness or contrast, crop or rotate the image, and make other edits to enhance your content. Take your time to personalize the appearance of your post.
- Caption your post: Below the edited photo or video, you’ll find a caption box. This is where you can add text to accompany your post. Whether it’s providing context, asking a question, or setting up your poll, use this opportunity to engage with your audience and provide any necessary details.
- Add hashtags and location: To increase the visibility of your post, consider adding relevant hashtags and tagging your location. This helps users discover your content when they search for specific topics or locations.
- Mention other accounts (optional): If your post is related to another user or brand, you can mention their Instagram handle in your caption or tag them in the photo or video. This allows you to collaborate with others and increase your reach.
By following these steps, you can successfully add a photo or video to your Instagram post. Now, let’s move on to the next step: customizing your poll.
Step 4: Customizing your poll
After adding a photo or video to your Instagram post, it’s time to customize your poll. This step allows you to tailor the question and options to suit your specific needs. Follow these steps to personalize your poll:
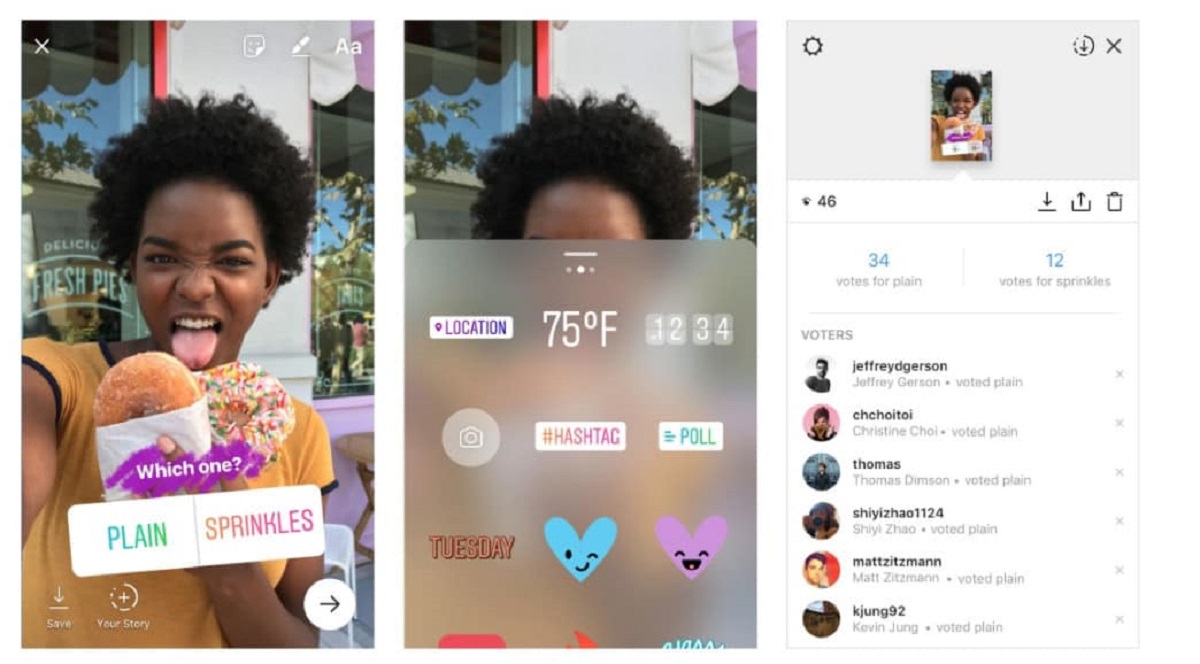
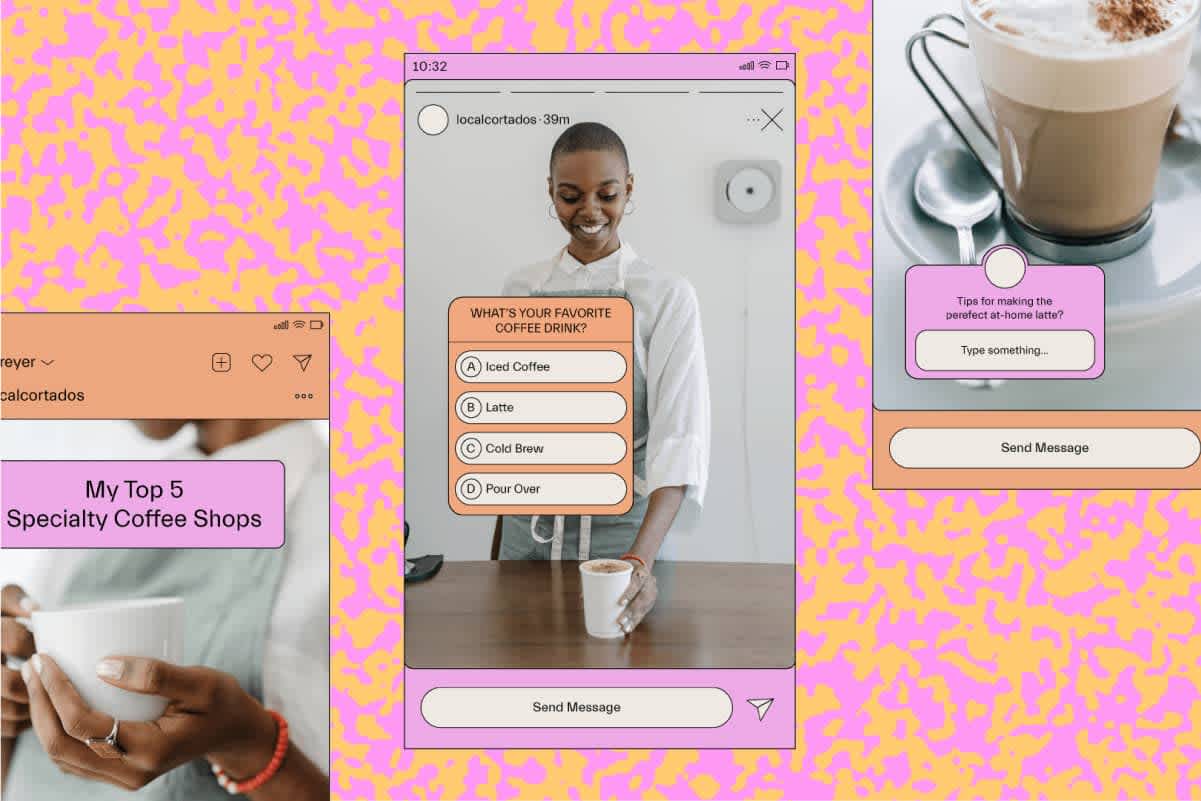
- Add the poll sticker: To include a poll in your post, select the sticker icon from the editing toolbar at the top of the screen. This will open a variety of sticker options that you can use.
- Select the poll sticker: Among the available sticker options, locate and select the poll sticker. It is represented by a “poll” icon and can usually be found in the sticker tray.
- Create your poll question: Once you have added the poll sticker, you can customize the question that you want to ask your audience. Type in the question in the “Ask a question…” field provided.
- Add answer options: After entering your poll question, you need to provide answer options. By default, Instagram provides two options, but you can either use them as they are or replace them with your own options. To edit the options, simply tap on each answer field and enter the desired text.
- Customize the poll appearance: Instagram allows you to customize the appearance of your poll. You can choose different colors and styles for the poll sticker, making it more visually appealing and aligned with your post’s theme.
By following these steps, you can easily customize your poll to reflect your desired question and options. Now, let’s move on to the next step: posting your poll.
Step 5: Posting your poll
Once you have customized your poll, it’s time to post it on Instagram and share it with your audience. Follow these steps to publish your poll:
- Review your post: Before posting your poll, take some time to review your entire post. Make sure that the photo or video, caption, and poll question are all in line with your intentions.
- Choose your audience: Instagram offers different audience options for your posts. You can choose to share your poll with everyone, restrict it to your followers only, or even share it with specific individuals or groups through direct messaging.
- Add additional content (optional): If you want to supplement your poll with additional content, such as tagging other accounts or adding stickers or emojis, you can do so before proceeding to the next step.
- Post your poll: Once you are satisfied with your post, tap the “Share” button to post it on your Instagram feed. Your poll and its associated content will be visible to your chosen audience.
By following these steps, you can successfully post your poll on Instagram and make it available for your audience to participate in. Now, let’s move on to the final step: interacting with poll results.
Step 6: Interacting with poll results
Once your poll is live on Instagram, you will start receiving responses from your audience. Interacting with these poll results can help you gain valuable insights and engage with your followers. Follow these steps to effectively interact with your poll results:
- Monitor the poll: Keep an eye on your poll’s progress by regularly checking the number of responses and the distribution of votes. This will give you an idea of the overall participation and the preferences of your audience.
- View individual responses: Instagram allows you to view individual responses to your poll. By tapping on the poll sticker in your post, you can see who voted for each option, allowing you to understand the choices made by your audience.
- Engage with your audience: Take the opportunity to engage with those who participated in your poll. Respond to comments, reply to direct messages, and show appreciation for their input. This will help strengthen the connection between you and your audience.
- Use poll results strategically: Analyze the poll results to gain insights into your audience’s preferences, opinions, or decision-making. This information can be used to shape future content, make business decisions, or simply understand your audience better.
- Share poll results (optional): If you want to share the results of your poll with your audience, you can create a follow-up post or story to showcase the outcome. This not only keeps your audience engaged but also shows the transparency and appreciation you have for their participation.
By following these steps, you can effectively interact with your poll results and make the most out of the feedback from your audience. Now, you have successfully completed all the steps to create and conduct a poll on Instagram.
Conclusion
Running a poll on Instagram is a powerful tool for engaging with your audience and gaining valuable insights. By following the step-by-step process outlined in this article, you can create and conduct a poll seamlessly.
We began by accessing the Instagram app and logging into our account. Then, we learned how to create a new post and add a photo or video to it. After that, we explored customizing the poll by creating a question and answer options that are tailored to our specific needs.
Once the poll was customized, we were ready to post it on Instagram and share it with our audience. We discussed reviewing the post, choosing the audience, and adding any additional content before finally posting the poll.
Lastly, we covered the importance of interacting with poll results. Monitoring the progress, viewing individual responses, engaging with the audience, and strategically using the results can help you make informed decisions and strengthen your relationship with your followers.
Now that you have all the information and steps necessary, it’s time to put it into action. Create your poll, engage with your audience, and see the valuable insights that can be gained through this interactive feature on Instagram. Happy polling!


