Introduction
Electric skateboards have become increasingly popular in recent years, offering a thrilling and environmentally-friendly mode of transportation. However, there may come a time when you want to divide or disassemble your electric skateboard. Whether you want to upgrade certain components, perform maintenance tasks, or simply gain a better understanding of how your skateboard functions, knowing how to divide an electric skateboard is essential.
In this guide, we will walk you through the step-by-step process of dividing an electric skateboard. We will cover the necessary tools and safety precautions, as well as provide detailed instructions on each stage of the disassembly process. By following these instructions, you can confidently take apart your electric skateboard and delve deeper into its inner workings.
Please note that dividing an electric skateboard requires some technical knowledge and basic understanding of the components involved. If you are uncomfortable with performing these procedures or are unsure about any step, it is best to consult with a professional or reach out to the manufacturer for assistance.
So, if you’re ready to dive into the world of electric skateboards and learn how to divide one, let’s get started with the essential tools and materials you’ll need for the disassembly process.
Tools and Materials
Before diving into the process of dividing your electric skateboard, it’s important to gather the necessary tools and materials. Having these items on hand will not only make the disassembly process easier but also ensure that you don’t encounter any difficulties along the way.
Here are the essential tools and materials you will need:
- Allen wrench set: Most electric skateboards feature screws and bolts that require an Allen wrench to remove. Make sure you have a set of Allen wrenches in different sizes to accommodate different components of your skateboard.
- Screwdriver: Have a variety of screwdrivers, including Phillips head and flathead, as some parts may be held together with screws instead of bolts.
- Pliers: Pliers come in handy when disconnecting wires or cables. They provide a good grip and make it easier to handle smaller components.
- Wire cutters/strippers: In some cases, you may need to cut or strip wires during the disassembly process. Having a pair of wire cutters/strippers will allow you to perform these tasks efficiently.
- Labeling materials: To keep track of the various components as you disassemble your electric skateboard, it’s helpful to have some labels or stickers. This will make it easier to identify and reassemble the parts correctly later on.
- Clean cloth or towel: Keeping a clean cloth or towel nearby will help you wipe off any dirt, debris, or grease that may accumulate during the disassembly process. It’s important to keep your work area clean for better visibility and to prevent any damage to the components.
It’s important to ensure that the tools and materials you gather are of good quality, as this will make the disassembly process smoother and less prone to accidents or damage. Once you have all the necessary tools and materials ready, you can proceed with the disassembly process.
Step 1: Safety Precautions
Before embarking on the process of dividing your electric skateboard, it’s crucial to prioritize your safety. Taking the necessary safety precautions will help prevent accidents and ensure a smooth disassembly process.
Here are some safety precautions to keep in mind:
- Turn off the skateboard: Before starting any disassembly, make sure your electric skateboard is turned off. This will prevent any unexpected movements or engagement of the motor during the process.
- Remove the battery: Disconnect the battery from the skateboard to avoid any accidental activation or electrical shocks. Consult the manufacturer’s guide to determine the correct method for disconnecting the battery.
- Wear protective gear: Always wear appropriate protective gear, such as gloves and safety glasses, to safeguard yourself from any potential injury. This is especially important when handling sharp tools or disassembling components near moving parts.
- Work in a clean, well-lit area: Choose a clean and well-lit area to work on your skateboard. This will help you see the components clearly, reducing the risk of errors or mishaps.
- Follow manufacturer guidelines: Refer to the manufacturer’s guide or user manual for any specific safety instructions or recommendations for disassembling your particular electric skateboard model. Different models may have unique requirements, so it’s essential to follow the provided guidelines.
By adhering to these safety precautions, you will minimize the risk of accidents and protect both yourself and your electric skateboard. Once you have taken the necessary safety measures, you can proceed confidently with the disassembly process.
Step 2: Removing the Deck
Now that you have taken the appropriate safety precautions, it’s time to begin the disassembly process. The first step is to remove the deck of your electric skateboard. The deck is the main platform where you stand while riding, and it houses many of the internal components. Follow these steps to remove the deck:
- Flip the skateboard upside down: Carefully flip your electric skateboard upside down, ensuring that it is stable and secure. Placing it on a soft surface, such as a carpet or towel, will help prevent any scratches or damage.
- Locate the deck screws: Take note of the screws securing the deck to the trucks. These are typically found on the underside of the skateboard. Use the appropriate screwdriver or Allen wrench to loosen and remove these screws. Keep the screws in a safe place, as you will need them for reassembly later.
- Disconnect any cables or wires: Check if there are any cables or wires connecting the deck to other components, such as the battery, motor, or controller. Carefully disconnect these cables by gently pulling apart the connectors. Be cautious not to yank or damage the wires.
- Lift off the deck: Once all screws and cables have been removed, you can gently lift the deck off the skateboard. Place it aside in a safe location, ensuring it will not be damaged or stepped on accidentally.
By following these steps, you can successfully remove the deck from your electric skateboard. Remember to handle the deck with care to avoid any damage or injury. With the deck removed, you can now proceed to the next steps of the disassembly process.
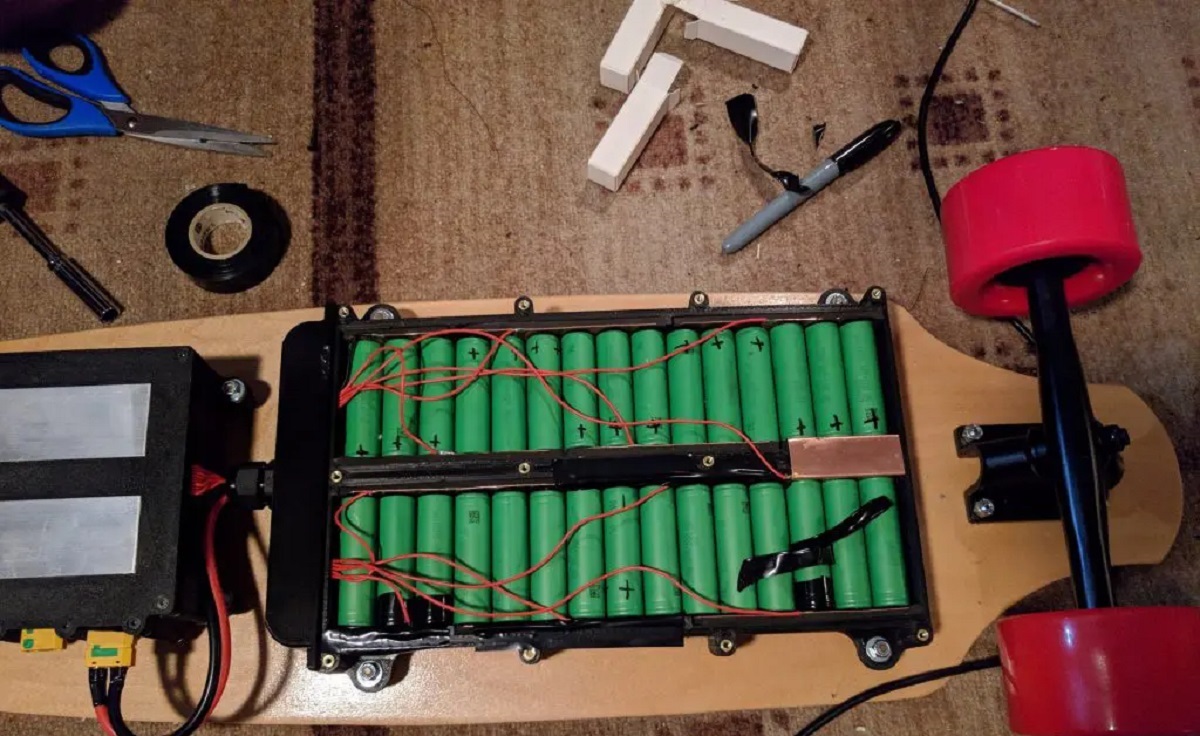
Step 3: Disconnecting the Battery
With the deck removed, you can now move on to disconnecting the battery. It’s crucial to disconnect the battery before proceeding with the disassembly to ensure your safety and prevent any accidental electrical discharge. Follow these steps to disconnect the battery:
- Locate the battery: Identify the location of the battery on your electric skateboard. It is typically housed within the deck or a designated compartment.
- Turn off the power switch: Look for the power switch on your electric skateboard, usually located near the battery. Turn off the power switch to deactivate the electrical system.
- Disconnect the battery connector: Find the connector that attaches the battery to the rest of the components. This connector can vary depending on your skateboard model. It is typically a plastic or metal plug that connects the battery wires to the skateboard’s electrical system.
- Gently unplug the connector: Carefully unplug the battery connector by gently pulling it apart. It may require some force, but be cautious not to apply excessive pressure or pull on the wires. If the connector is stubborn, you can use pliers to grip it better.
- Secure the battery: Once the battery is disconnected, ensure it is secured properly. If it is a removable battery, place it in a safe location away from any potential hazards.
By following these steps, you can safely disconnect the battery from your electric skateboard. Remember to exercise caution and handle the battery and its connectors delicately to prevent any damage. With the battery disconnected, you can proceed with the next steps of the disassembly process.
Step 4: Detaching the Trucks and Wheels
After disconnecting the battery, you can move on to detaching the trucks and wheels of your electric skateboard. The trucks are the metal components that hold the wheels in place, while the wheels allow for smooth movement. Follow these steps to detach the trucks and wheels:
- Locate the trucks: Identify the location of the trucks on your electric skateboard. There are typically two trucks, one at the front and one at the rear of the deck.
- Remove the axle nuts: Each truck has an axle nut on both sides that secures the wheels in place. Use a skate tool or a socket wrench to loosen and remove the axle nuts on both trucks.
- Slide off the wheels: Once the axle nuts are removed, you can slide off the wheels from the trucks. Gently pull them away from the trucks and set them aside in a safe location.
- Disconnect any wires or cables: Check if there are any wires or cables connected to the trucks or wheels. Disconnect them by gently pulling apart the connectors, being careful not to damage the wires.
- Remove the trucks: Now that the wheels and cables are detached, you can remove the trucks from the deck. Unscrew the bolts or screws that hold the trucks to the deck. Keep these fasteners in a safe place for reassembly later.
By following these steps, you can successfully detach the trucks and wheels from your electric skateboard. Handle the components with care to avoid any damage and ensure a smooth disassembly process. With the trucks and wheels removed, you can proceed with the next steps of the disassembly process.
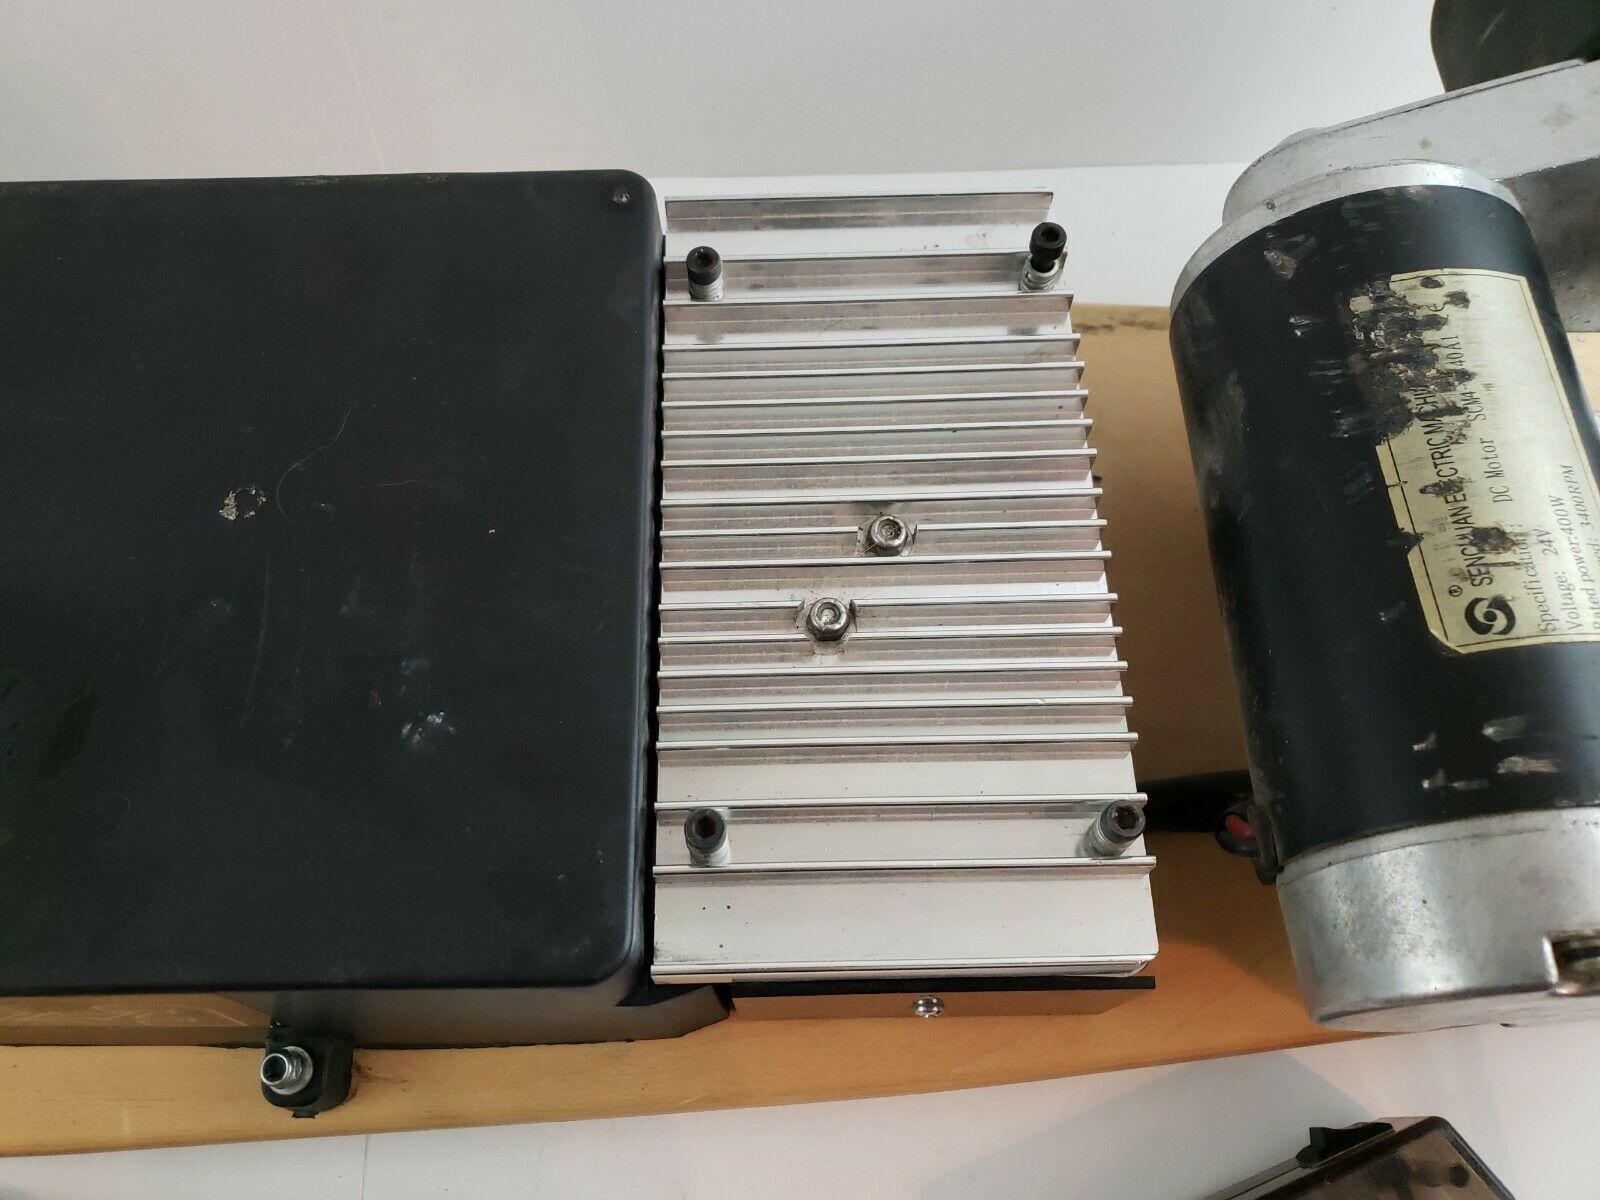
Step 5: Removing the Motor and Drive Train
With the trucks and wheels detached, it’s time to remove the motor and drive train from your electric skateboard. The motor and drive train are crucial components responsible for propelling the skateboard. Follow these steps to remove the motor and drive train:
- Identify the motor: Locate the motor on your electric skateboard. It is usually mounted on one of the trucks, connected to the drive train.
- Disconnect motor cables: Check for any cables connected to the motor. These cables supply power and control signals to the motor. Gently disconnect the cables by pulling apart the connectors.
- Remove the motor mounting screws: Take note of the screws that secure the motor to the truck. Use the appropriate tools to loosen and remove these screws. Keep them in a safe place for reassembly later.
- Separate the motor from the truck: Once the mounting screws are removed, you can carefully separate the motor from the truck. Be mindful of any wires or cables still attached to the motor and handle it with care to avoid any damage.
- Remove the drive train components: The drive train consists of various components that transfer power from the motor to the wheels. Disassemble the drive train according to your specific skateboard model. This may involve removing belts, gears, or other connecting parts.
By following these steps, you can successfully remove the motor and drive train from your electric skateboard. Take your time and handle the components delicately to avoid any damage. With the motor and drive train removed, you can proceed with the next steps of the disassembly process.
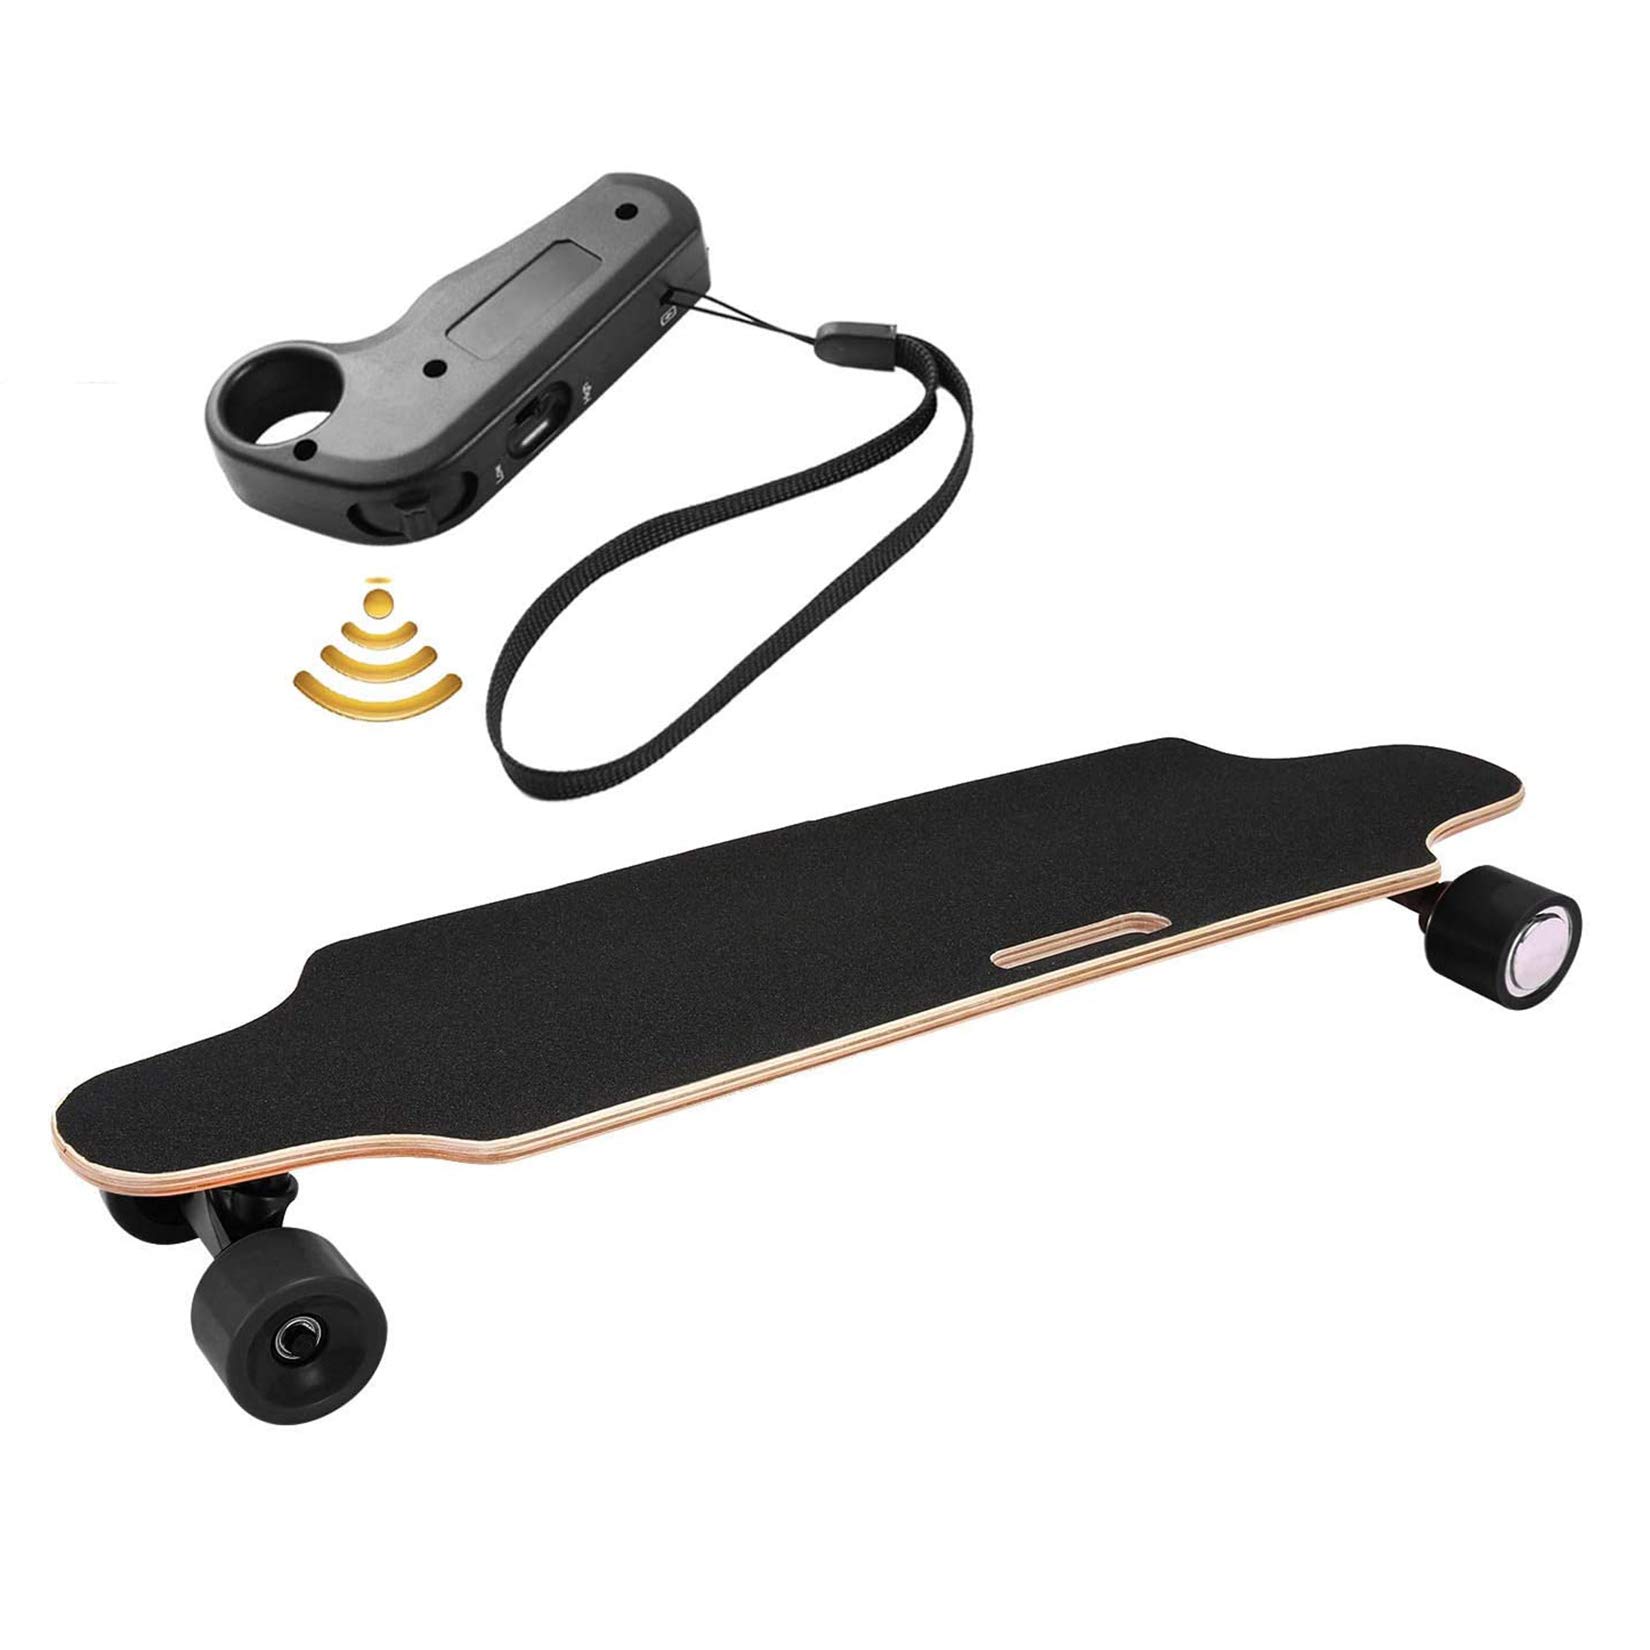
Step 6: Disassembling the Controller
After removing the motor and drive train, the next step is to disassemble the controller of your electric skateboard. The controller is the device you use to control the speed and direction of the skateboard. Follow these steps to disassemble the controller:
- Locate the controller: Identify the location of the controller on your electric skateboard. It is usually a handheld device or a component attached to the deck.
- Remove the battery: If the controller has a removable battery, take it out to ensure the device is not accidentally activated during disassembly.
- Check for screws or fasteners: Inspect the controller for any screws or fasteners that hold it together. Use the appropriate tools, such as a screwdriver or Allen wrench, to remove these fasteners.
- Separate the controller components: Once the fasteners are removed, carefully separate the different components of the controller. This may involve detaching the buttons, circuit board, or other internal parts.
- Organize and label the parts: As you disassemble the controller, keep the components organized and label them if necessary. This will make reassembly easier and ensure you know which part goes where.
Take your time during the disassembly process and handle the controller components with care to avoid any damage. Once the controller is disassembled, you can proceed with the next steps of the disassembly process.
Step 7: Organizing and Labeling Parts
As you continue to disassemble your electric skateboard, it’s important to stay organized and keep track of the various components. This will make reassembly much smoother and ensure that you don’t misplace or confuse any parts. Follow these steps to organize and label the disassembled parts:
- Clean and prepare your workspace: Before organizing the parts, make sure your workspace is clean and free of any debris. This will provide a clear space to arrange and label the components.
- Separate and group the parts: Sort the disassembled parts into different groups based on their functionality or where they were originally located in the skateboard. For example, group together the screws, nuts, and bolts in one container, while placing the electronic components in another.
- Label the parts: Use stickers or labels to mark each group of parts. If possible, label individual components as well. This will make it easier to identify and match them during reassembly.
- Keep small parts together: Use small containers or bags to store smaller parts, such as screws, washers, or connectors. Keeping them together will prevent loss or confusion during the reassembly process.
- Take photos for reference: Before dismantling, take clear photos of the skateboard from different angles. These photos can serve as a visual reference later on when reassembling the parts.
By organizing and labeling the disassembled parts, you’ll have a clear understanding of how everything fits together and can easily locate the necessary components when it’s time to reassemble your electric skateboard.
Step 8: Troubleshooting and Maintenance Tips
Once you have successfully disassembled your electric skateboard, it’s a good time to address any troubleshooting or perform maintenance tasks. Here are some helpful tips to consider:
- Inspect and clean the components: Take the opportunity to thoroughly inspect each component for any signs of wear, damage, or dirt. Clean any debris or grime that may have accumulated during use.
- Check the motor and belts: Examine the motor and drive belts for any signs of damage or excessive wear. Replace any worn-out belts or address any issues with the motor, as these are crucial components for the performance of your skateboard.
- Inspect the battery: Check the battery for any signs of swelling, leakage, or other abnormalities. If you notice any issues, it may be necessary to replace the battery to maintain optimal performance and safety.
- Review the wiring connections: Make sure all wiring connections are secure and free from any damage or wear. Reconnect any cables that may have been disconnected during the disassembly process.
- Apply lubrication: If applicable, lubricate moving parts such as the wheels, bearings, or pivoting mechanisms. This will help maintain smooth and efficient operation of your electric skateboard.
- Consult the manufacturer’s guide: Refer to the manufacturer’s guide or user manual for specific troubleshooting tips or maintenance recommendations. Following their guidelines can help ensure you’re performing the necessary tasks correctly.
- Keep a record: Document any maintenance or troubleshooting tasks you’ve performed, along with any notable observations or changes. This record can be helpful for future reference or if you need to seek assistance from a professional.
By addressing troubleshooting needs and performing regular maintenance, you can prolong the lifespan of your electric skateboard and maintain its optimal performance. Remember to follow safety guidelines and consider seeking professional assistance if you encounter issues beyond your expertise.
Conclusion
Congratulations! You have successfully learned how to divide an electric skateboard. By following the step-by-step instructions provided in this guide, you were able to disassemble the various components of your electric skateboard, from removing the deck to detaching the trucks, motor, and controller.
Dividing an electric skateboard is a valuable skill that allows you to gain a better understanding of your skateboard’s inner workings, perform maintenance tasks, and upgrade specific components. However, it’s important to note that disassembling your electric skateboard should be approached with caution and only when necessary. If you are unsure or uncomfortable with any step of the process, it’s always best to seek guidance from a professional or consult the manufacturer’s guide.
Remember to prioritize your safety throughout the disassembly process by wearing appropriate protective gear, working in a well-lit area, and following safety precautions such as disconnecting the battery and turning off the skateboard. Taking these safety measures will help prevent accidents and ensure a smooth disassembly process.
Once you have divided your electric skateboard, you can address troubleshooting needs, perform maintenance tasks, and explore opportunities for customization or upgrading. Keeping a record of the disassembly process, along with any maintenance or troubleshooting tasks performed, will be beneficial in the long run.
Now that you have successfully divided your electric skateboard, you have the knowledge and skills to delve deeper into its components and enjoy a better understanding of how it operates. Whether you’re looking to enhance performance, replace parts, or simply satisfy your curiosity, dividing an electric skateboard is a valuable skill to have.
Happy skateboarding and enjoy the process of exploring and customizing your electric skateboard!