Introduction
Welcome to the era of smart technology, where our devices are getting smarter and more connected than ever before. If you have a smart TV and a computer, you might be wondering how to connect the two to enjoy a seamless multimedia experience. Whether you want to stream your favorite shows and movies from your computer to your TV or use your TV as a second monitor for your computer, this guide will walk you through the steps on how to connect your smart TV to your computer.
Connecting your smart TV to your computer opens up a world of possibilities, allowing you to enjoy your computer’s content on a larger screen or leverage the power of your TV for gaming or watching movies. While the specific steps may vary depending on the brand and model of your TV and computer, the general principles remain the same.
In this article, we will explore various methods of connecting your smart TV to your computer, including using an HDMI cable, a VGA cable, or a wireless connection via Wi-Fi or an Ethernet cable. We will also provide troubleshooting tips to address any common issues you may encounter during the setup process.
By the end of this guide, you’ll have the knowledge and confidence to connect your smart TV to your computer, allowing you to stream your favorite content, work on a larger display, or simply enhance your entertainment experience. So, let’s get started and unlock the full potential of your smart TV and computer!
Step 1: Check Your Smart TV
Before diving into the process of connecting your smart TV to your computer, it’s essential to ensure that your TV is compatible with the connection methods we’ll be discussing. Here are a few things to check:
Firstly, verify if your smart TV has the necessary ports for the connection types you’ll be using. The two most common and versatile ports are HDMI and VGA. HDMI is capable of transmitting both audio and video signals, making it ideal for high-definition content. VGA, on the other hand, is primarily used for video signals and requires an additional audio cable. Check your TV for these ports and determine which option will work best for your setup.
Next, consider the age and model of your smart TV. Older TVs may have limited connectivity options or lack the necessary hardware for certain connection types. It’s important to consult your TV’s user manual or visit the manufacturer’s website to determine its capabilities.
Additionally, ensure that your smart TV is equipped with network connectivity features such as Wi-Fi or an Ethernet port. This will be useful if you plan to connect your TV to your computer using a wireless method, such as screen mirroring or streaming media wirelessly.
Lastly, check if your smart TV and computer are on the same local network. This is crucial for wireless connections and will allow seamless communication between the devices. Make sure both devices are connected to the same Wi-Fi network or have a wired connection to the same router.
Once you have confirmed that your smart TV meets the necessary requirements and is ready for the connection, you can proceed to the next steps. In the following sections, we will guide you on how to connect your smart TV to your computer using different methods, depending on your preference and the available ports on your devices. So let’s dive in and turn your smart TV and computer into a powerful multimedia duo!
Step 2: Connect Using an HDMI Cable
Connecting your smart TV to your computer using an HDMI cable is one of the simplest and most common methods. HDMI (High-Definition Multimedia Interface) cables transmit both audio and video signals, providing a high-quality connection between devices.
To begin, locate the HDMI ports on both your smart TV and computer. These ports are usually labeled “HDMI” and may be found on the sides or rear panel of the devices. Once located, insert one end of the HDMI cable into the HDMI port on your computer and the other end into the HDMI port on your smart TV.
After connecting the HDMI cable, ensure that your smart TV is set to the correct HDMI input. Most smart TVs have multiple HDMI inputs, so you’ll need to select the one that corresponds to the HDMI port you connected the cable to. Use your TV’s remote control or on-screen menu to choose the correct input source.
Once the correct HDMI input is selected, your computer’s display will appear on your smart TV. Depending on your computer’s settings, you may need to adjust the display resolution to fit the TV screen properly. To do this, right-click on your computer’s desktop and select “Display settings.” From there, you can adjust the resolution and other display preferences to ensure optimal viewing.
Connecting your computer to your smart TV using an HDMI cable is ideal for streaming video content, playing games, or even presenting slideshows or presentations. The HDMI connection provides a crisp and clear picture quality, making it a preferred method for many users.
Remember, HDMI cables come in different versions, with each version offering different capabilities. It’s advisable to use an HDMI cable that supports the highest version available on your devices to ensure compatibility and take advantage of the best possible video and audio quality.
Now that you’ve successfully connected your smart TV to your computer using an HDMI cable, you’re ready to enjoy your favorite content on a larger screen. In the following steps, we’ll explore alternative methods of connecting your smart TV to your computer, providing you with more flexibility based on your specific needs and available connectivity options.
Step 3: Connect Using a VGA Cable
If your smart TV or computer lacks an HDMI port, or if you prefer to use a different connection method, you can connect your devices using a VGA (Video Graphics Array) cable. While VGA cables primarily transmit video signals, they require an additional audio cable to transmit audio signals. Here’s how you can connect your smart TV to your computer using a VGA cable:
Start by identifying the VGA ports on both your smart TV and computer. The VGA port on your TV might be labeled “VGA” or “PC” and is typically found on the rear panel. On your computer, the VGA port is usually blue and is likewise located on the rear of the machine.
Once you’ve located the VGA ports, connect one end of the VGA cable to the VGA port on your computer and the other end to the VGA port on your smart TV. Afterward, connect the audio cable from your computer’s audio output to the audio input port on your TV. The audio cable can be a 3.5mm stereo jack or any other compatible audio connection.
Once the VGA and audio cables are connected, power on your computer and smart TV. Then, on your smart TV, switch to the input source corresponding to the VGA connection. This can typically be done using your TV’s remote control or on-screen menu options.
As with the HDMI connection, you may need to adjust the display settings on your computer to match the TV’s resolution. Right-click on your computer’s desktop and select “Display settings.” From there, you can modify the resolution and other display preferences to ensure the best visual experience.
Connecting your smart TV to your computer using a VGA cable provides a reliable and straightforward method, albeit with separate audio cable requirements. While VGA does not support high-definition video signals like HDMI, it is still suitable for many applications, such as watching videos or browsing the internet on a larger screen.
Keep in mind that not all modern smart TVs have VGA ports, as this connection type is becoming less common. Therefore, it’s essential to check your TV’s specifications to verify the availability of a VGA port.
With your smart TV and computer successfully connected using a VGA cable, you can now enjoy your computer’s content on the big screen. In the following steps, we’ll explore wireless connectivity options, allowing you more flexibility and freedom in connecting your devices.
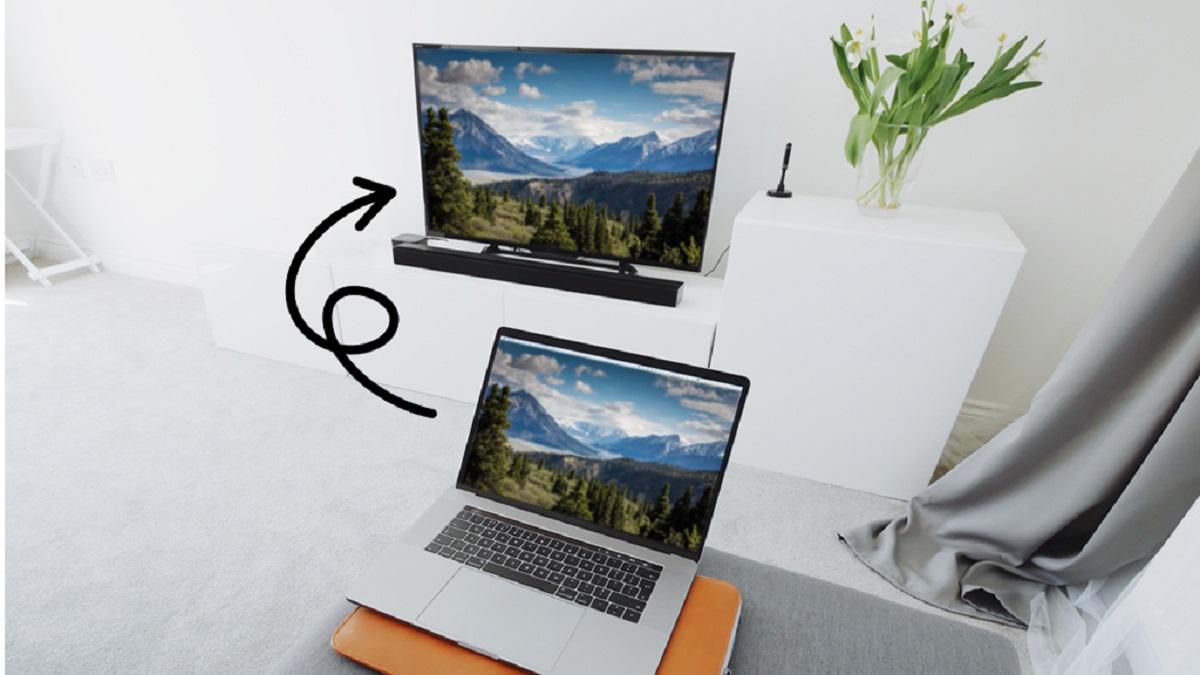
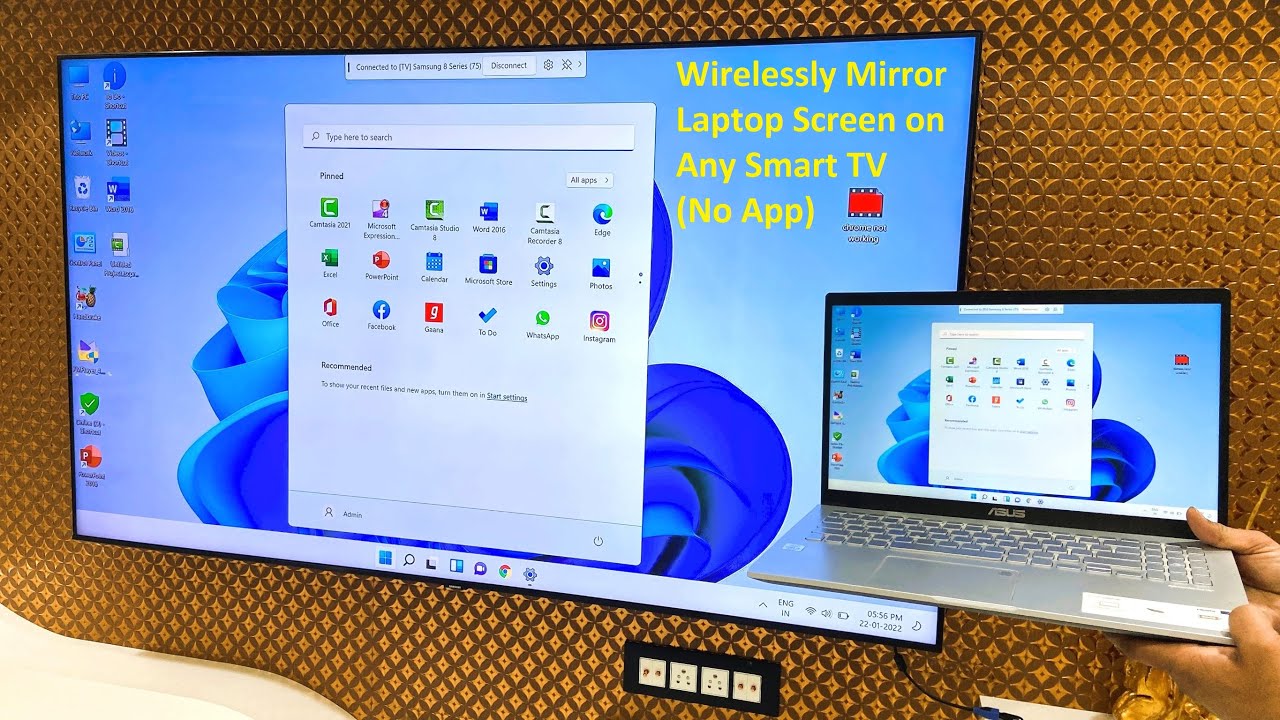
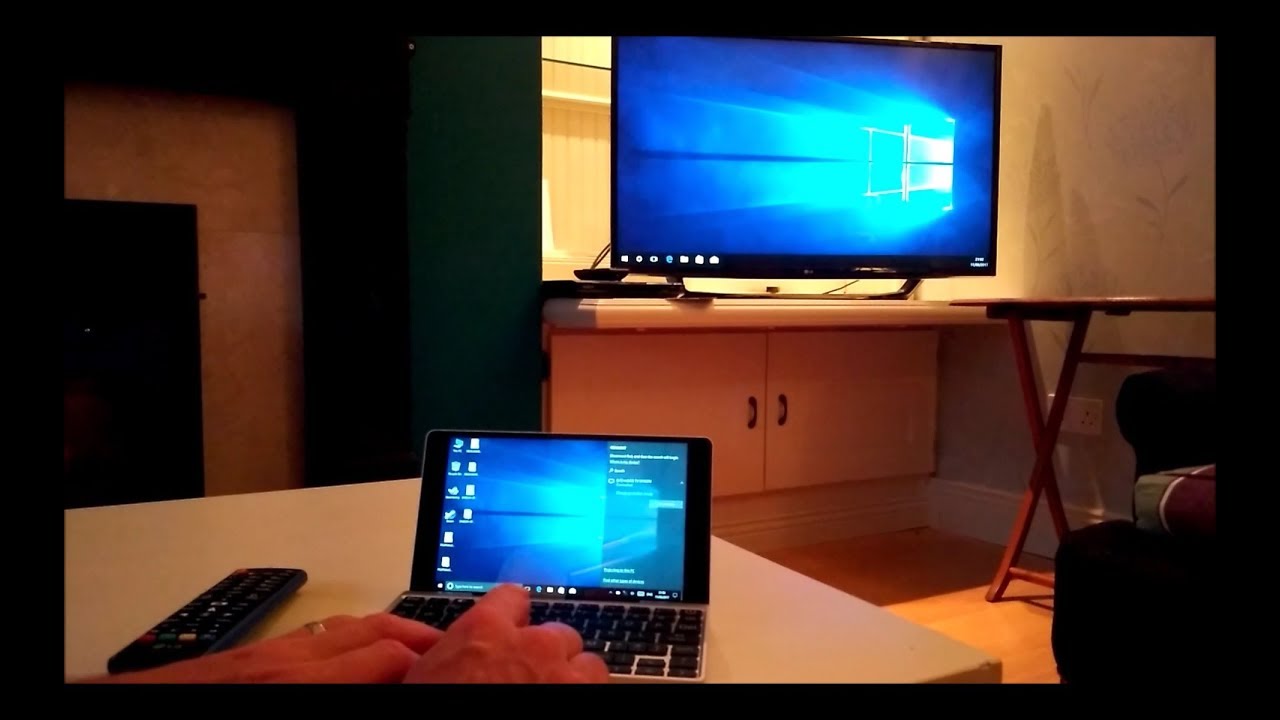
Step 4: Connect Using Wi-Fi or Ethernet Cable
If you prefer a wireless connection or if your smart TV and computer are in different rooms and unable to use a direct cable connection, you can connect them using Wi-Fi or an Ethernet cable. This method allows for more flexibility in terms of device placement and eliminates the need for physical cables. Here’s how you can connect your smart TV to your computer via Wi-Fi or Ethernet:
Wi-Fi Connection:
Ensure that both your smart TV and computer are connected to the same Wi-Fi network. This typically involves accessing the network settings on both devices and connecting to the appropriate network name (SSID) using the correct password.
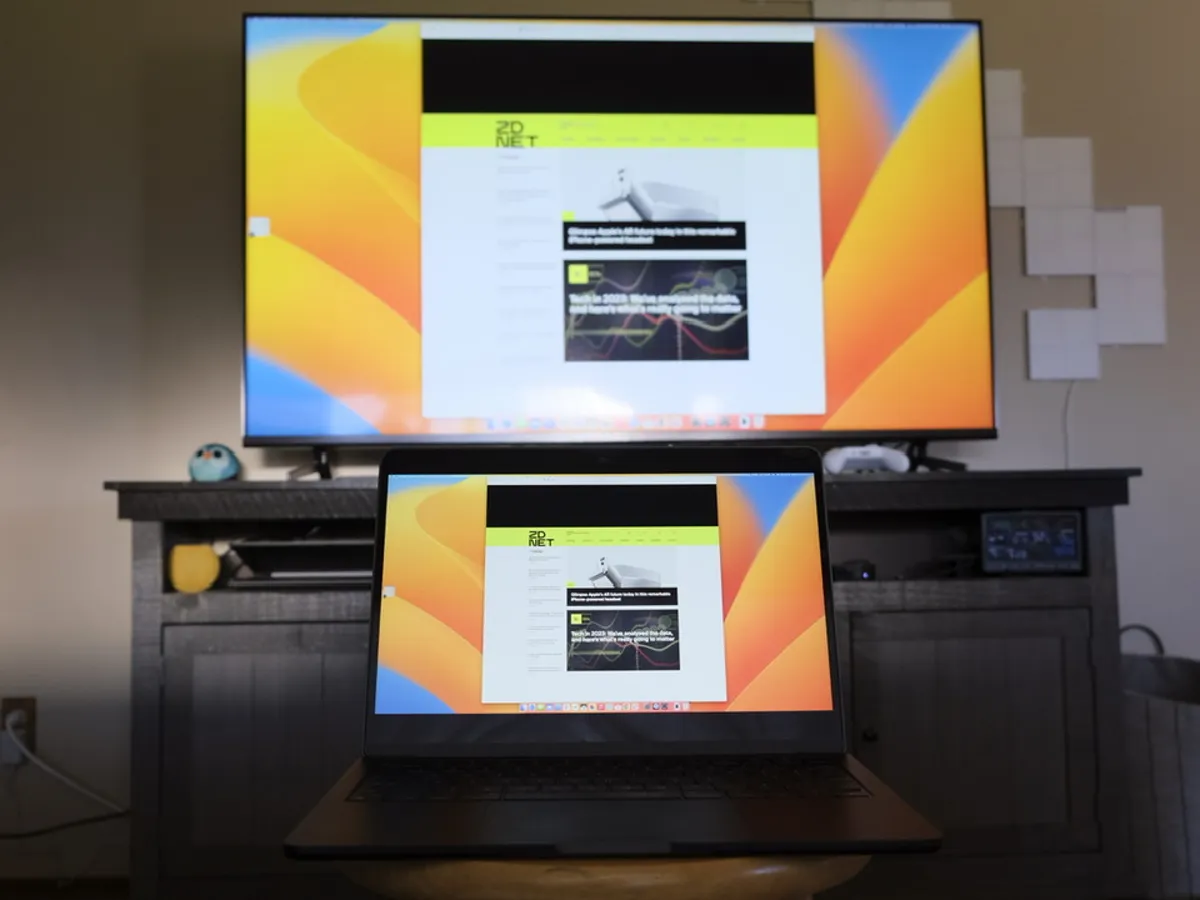
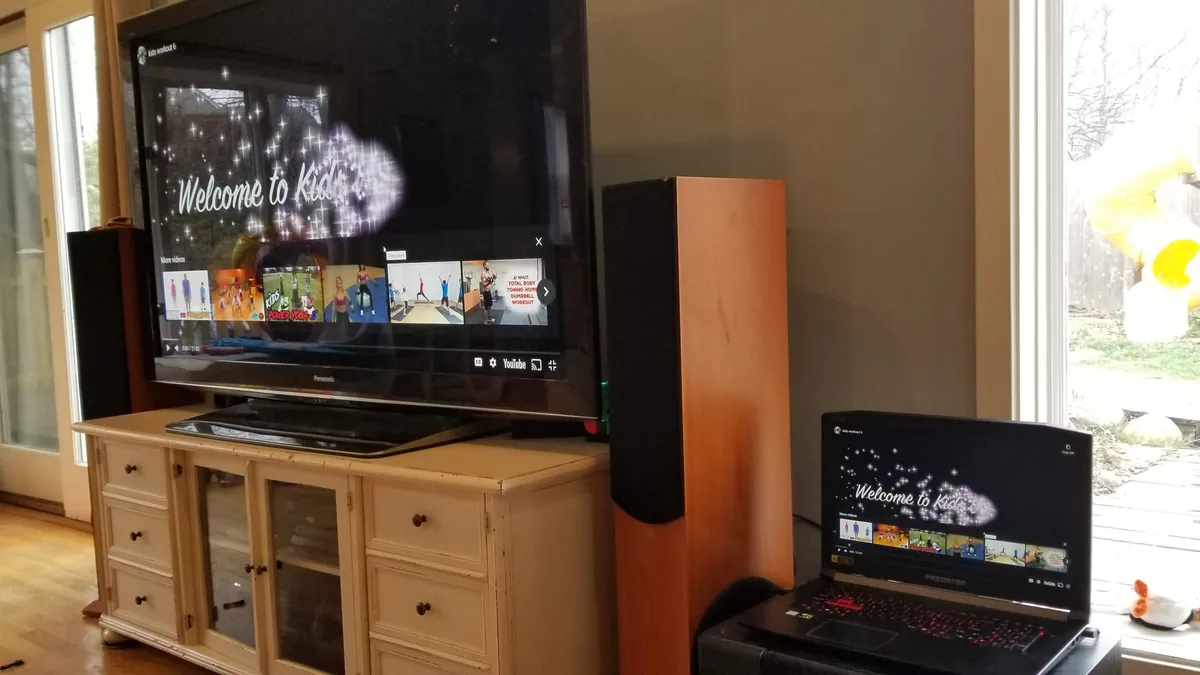
Once connected, check if your smart TV supports screen mirroring or “cast” functionality. If it does, turn on the screen mirroring option on your TV. On your computer, open the display settings and select the option to “Connect to a wireless display” or a similar feature, depending on your operating system.
Your computer should now search for available wireless displays. Select your smart TV from the list of available devices. You may be prompted to enter a PIN or confirm the connection on your TV.
Once connected, your computer’s screen will be mirrored on your smart TV, allowing you to view your computer’s content wirelessly. Keep in mind that screen mirroring may have some limitations, such as lag or decreased video quality, depending on the Wi-Fi connection strength and device capabilities.
Ethernet Connection:
If your smart TV and computer are in close proximity and prefer a more stable and faster connection, you can use an Ethernet cable to connect them directly. This method requires an Ethernet port on both devices.
Connect one end of the Ethernet cable to the Ethernet port on your computer and the other end to the Ethernet port on your smart TV.
Once connected, your smart TV should automatically detect the network connection. You may need to adjust the display settings on your computer to ensure the proper resolution and display preferences.
By connecting your smart TV to your computer using Wi-Fi or an Ethernet cable, you can enjoy the convenience of wirelessly streaming content or having a direct and stable connection. Whether you want to watch videos, browse the internet, or even work on a bigger screen, this wireless method provides flexibility and versatility.
Now that you’ve successfully connected your smart TV and computer, you can start enjoying your favorite content or extending your computer’s display to a larger screen. In the following steps, we’ll address some common troubleshooting tips to help you overcome any connectivity issues you may encounter along the way.
Step 5: Adjust Display Settings on Your Computer
After successfully connecting your smart TV to your computer, it’s important to adjust the display settings to ensure optimal viewing and performance. By adjusting these settings, you can customize the resolution, screen orientation, and other display preferences to suit your needs. Here’s how to adjust the display settings on your computer:
Windows:
To adjust the display settings on a Windows computer, right-click on your desktop and select “Display settings” from the dropdown menu. This will open the Display settings panel.
In the Display settings panel, you can modify various display options, such as resolution, screen orientation, brightness, and color calibration. To change the resolution, simply click on the drop-down menu under “Resolution” and select the desired resolution that matches your smart TV’s capabilities.
Experiment with other settings to find the optimal configuration for your setup. You can also arrange multiple displays if you are using your smart TV as a second monitor.
Once you’ve made the necessary adjustments, click “Apply” or “OK” to save the changes. Your computer will then adjust the display settings accordingly.
macOS:
If you’re using a Mac computer, adjusting the display settings is just as straightforward. Click on the Apple menu in the upper-left corner and select “System Preferences.” From the System Preferences menu, choose “Displays.”
In the Displays preferences panel, you’ll find various options to adjust the display settings. To change the resolution, select the “Resolution” tab and choose the appropriate resolution for your smart TV.
Explore other settings, such as arrangement, color, and brightness, to optimize your viewing experience. Make sure to click on “Apply” to save any changes.
By adjusting the display settings on your computer, you can ensure that the content on your smart TV is displayed correctly and enjoy a seamless viewing experience. Take the time to experiment with different configurations until you find the best settings that suit your preferences and maximize the capabilities of your smart TV.
Now that you’ve fine-tuned the display settings on your computer, you’re ready to enjoy your favorite content on the big screen. However, sometimes issues may arise when connecting your smart TV to your computer. In the next step, we will discuss some troubleshooting tips to help you overcome common challenges and ensure a smooth and seamless connection.
Step 6: Troubleshooting Tips
While connecting your smart TV to your computer can be a straightforward process, you may encounter some challenges along the way. Here are some troubleshooting tips to help you overcome common issues and ensure a successful connection:
1. Check cable connections: Make sure all cables are securely connected to both your smart TV and computer. Sometimes loose or faulty connections can cause display or audio issues. Disconnect and reconnect the cables to ensure a proper connection.
2. Update device drivers: Ensure that the graphics and audio drivers on your computer are up-to-date. Outdated drivers can lead to compatibility issues and prevent your computer from properly recognizing and connecting to your smart TV. Visit the manufacturer’s website and download the latest drivers for your specific hardware.
3. Restart your devices: Sometimes a simple restart can resolve connectivity issues. Power off both your smart TV and computer, then turn them back on after a few seconds. This can refresh the connection and resolve any temporary glitches.
4. Verify network connectivity: If you’re using a wireless connection, ensure that both your smart TV and computer are connected to the same Wi-Fi network. You can also try restarting your router to resolve any network-related issues.
5. Update firmware: Check if there are any firmware updates available for your smart TV. Manufacturers often release firmware updates to improve compatibility and address known issues. Visit the manufacturer’s website or refer to your TV’s user manual for instructions on how to update the firmware.
6. Disable display extensions or mirroring software: If you have third-party display extension or screen mirroring software installed on your computer, try disabling them temporarily. Some software can interfere with the default display settings and cause compatibility problems with your smart TV.
7. Consult user manuals and online forums: If you’re still experiencing issues, consult the user manuals and support resources provided by both your smart TV and computer manufacturers. You can also search online forums and communities for troubleshooting tips and solutions specific to your setup.
By following these troubleshooting tips, you should be able to resolve most connectivity issues and enjoy a smooth and seamless connection between your smart TV and computer. Remember, patience and persistence are key when troubleshooting, as sometimes it may require a combination of steps to address the problem.
Now that you’re armed with troubleshooting knowledge, you’re ready to connect your smart TV to your computer with confidence. Take advantage of the different connection methods available and enjoy the limitless possibilities of a connected multimedia experience!
Conclusion
Connecting your smart TV to your computer opens up a world of possibilities, allowing you to enjoy a more immersive multimedia experience, work with a larger display, or even use your smart TV as a second monitor. Whether you choose to connect through an HDMI cable, a VGA cable, or wirelessly via Wi-Fi or Ethernet, the steps outlined in this guide have provided you with the knowledge and confidence to make the connection.
By checking the compatibility of your smart TV, connecting the appropriate cables, adjusting display settings, and troubleshooting any issues that arise, you can successfully connect your devices and unlock the full potential of your smart TV and computer.
Remember to consider the specific requirements and limitations of your smart TV and computer, such as available ports, resolution support, and firmware updates, to ensure a seamless and optimized connection. Additionally, keep in mind that different connection methods may have varying audio capabilities, image quality, and convenience, so choose the one that best suits your needs.
Lastly, don’t forget to explore and experiment with the wide range of entertainment and productivity possibilities that become available once your smart TV and computer are connected. Whether you’re streaming movies, playing games, giving presentations, or simply enjoying the convenience of a larger screen, a connected setup can greatly enhance your multimedia experience.
We hope that this guide has provided you with valuable insights and instructions on how to connect your smart TV to your computer. By following the steps outlined above and understanding the troubleshooting tips, you can overcome any challenges that may arise along the way.
Now, go ahead and connect your smart TV to your computer and make the most of the seamless integration and enhanced multimedia experience it brings. Have fun streaming, gaming, working, and enjoying your favorite content on the big screen!