Introduction
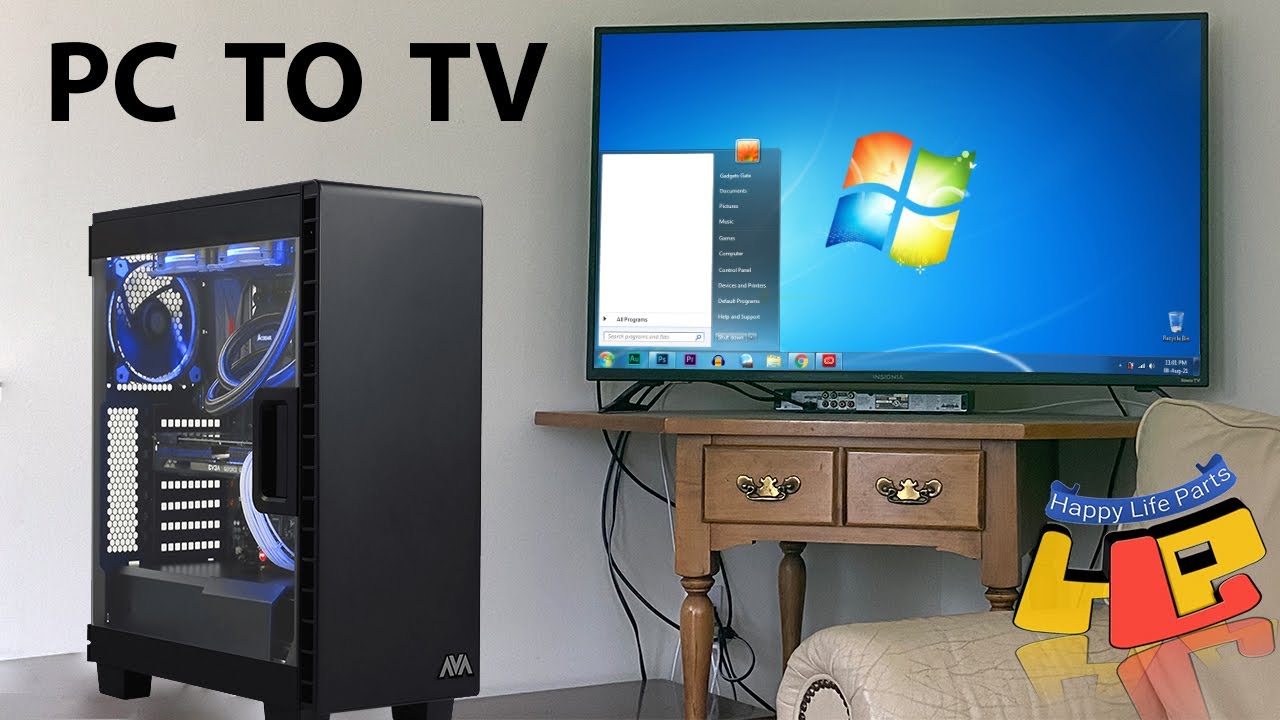
Connecting your CPU to a TV screen is a great way to enhance your multimedia experience. Whether you want to watch movies, play video games, or view photos on a larger screen with better resolution, connecting your CPU to a TV can provide an immersive entertainment experience.
Gone are the days when computers and TVs were completely separate entities. Thanks to the advancements in technology, you can now use your TV as a display for your computer, allowing you to enjoy all the features of your CPU on a bigger screen. This can be especially beneficial for presentations, video editing, or simply enjoying your favorite content with friends and family.
In this guide, we will walk you through the process of connecting your CPU to a TV screen. We will cover the different types of cables and connectors you may need, how to assess the inputs on your TV and outputs on your computer, and step-by-step instructions for connecting various types of cables, including HDMI, VGA, DVI, and DisplayPort cables.
Additionally, we will discuss how to adjust the display settings on your computer to ensure that the output is optimized for your TV screen. We will also address common troubleshooting issues that you may encounter during the setup process and provide solutions to help you overcome them.
By the end of this guide, you will have all the knowledge and confidence to connect your CPU to your TV screen and enjoy a seamless multimedia experience that takes your entertainment to the next level.
Gather the necessary cables and connectors
Before you can connect your CPU to a TV screen, it is essential to gather the appropriate cables and connectors. The type of cables you will need depends on the available inputs on your TV and the outputs on your computer. Here are the commonly used cables for connecting a CPU to a TV:
1. HDMI cable: HDMI (High-Definition Multimedia Interface) is widely used to connect devices, including computers and TVs. It provides high-quality digital audio and video signals, making it an ideal choice for connecting your CPU to a TV. Ensure that you have an HDMI cable that is long enough to reach from your CPU to the TV without any strain.
2. VGA cable: VGA (Video Graphics Array) cables are common on older computers and TVs. This analog cable transmits video signals, but it does not carry audio. If your CPU or TV has a VGA port, you may need a VGA cable to establish a connection.
3. DVI cable: DVI (Digital Visual Interface) cables are another option for connecting your CPU to a TV. Like VGA cables, DVI cables transmit only video signals. If your computer or TV has DVI ports, you will need a DVI cable for the connection.
4. DisplayPort cable: DisplayPort cables are primarily used for connecting computers to monitors, but they can also be used to connect a CPU to a TV if both devices have DisplayPort ports. DisplayPort offers high-resolution video and audio signals, ensuring excellent picture and sound quality.
It is essential to check the available inputs on your TV and the outputs on your CPU to determine the appropriate cables and connectors needed. Some TVs may only have HDMI ports, while others may have a variety of inputs such as VGA, DVI, or DisplayPort. Similarly, not all CPUs will have every type of output, so make sure to check your computer’s specifications.
Gathering the necessary cables and connectors upfront will save you time and prevent any frustration during the setup process. Once you have all the required cables, you can proceed to the next step of assessing the inputs on your TV and outputs on your computer.
Assess your TV’s inputs and your computer’s outputs
Before connecting your CPU to a TV screen, it is crucial to assess the available inputs on your TV and the outputs on your computer. This will help you determine the appropriate cable and connector needed for the connection.
Start by examining your TV’s input ports. Common types of input ports found on TVs include:
- HDMI: This is the most common type of input port found on modern TVs. It provides high-definition audio and video signals, making it an ideal choice for connecting your CPU.
- VGA: VGA ports are often found on older TVs. They transmit analog video signals but do not carry audio.
- DVI: Some TVs may have DVI ports, which transmit digital video signals but do not carry audio.
- DisplayPort: DisplayPort is becoming increasingly common on newer TVs. It offers high-resolution video and audio signals for a superior viewing experience.
Once you have identified the available input ports on your TV, you need to determine the outputs on your computer. Common types of output ports found on CPUs include:
- HDMI: Most modern CPUs have HDMI output ports, allowing for a straightforward connection to your TV.
- VGA: Older CPUs may have VGA output ports, which can be connected to TVs with VGA input ports.
- DVI: Some computers may have DVI output ports, requiring a DVI cable for the connection.
- DisplayPort: If your computer has a DisplayPort output port, you can connect it directly to a TV with a DisplayPort input port.
It is important to note that the availability of input and output ports may vary depending on the TV and computer model. It’s always recommended to consult the user manuals or specifications of your TV and computer to ensure compatibility.
By assessing your TV’s inputs and your computer’s outputs, you can determine the best cable and connector to use for the connection. This will save you time and ensure a successful setup process.
Connect the HDMI cable
Using an HDMI cable is one of the most popular and convenient ways to connect your CPU to a TV screen. HDMI (High-Definition Multimedia Interface) cables transmit high-quality audio and video signals, providing a seamless and immersive viewing experience. Here’s how you can connect your CPU to a TV using an HDMI cable:
- Start by locating the HDMI output port on your CPU. It is commonly labeled as “HDMI” and may be located on the back or side of your computer.
- Next, identify the HDMI input port on your TV. The HDMI input ports are typically labeled as “HDMI” and may be located on the back, side, or bottom of your TV.
- Once you have identified the HDMI output port on your CPU and the HDMI input port on your TV, simply plug one end of the HDMI cable into the HDMI output port of your CPU and the other end into the HDMI input port of your TV.
- Make sure the connection is secure by gently wiggling the cable. You should feel a firm connection without any movement or looseness.
- Now, using the TV remote or the input/source button on your TV, select the HDMI input channel that corresponds to the HDMI input port you connected the cable to. This will display the output from your CPU on the TV screen.
- Adjust the display settings on your computer to ensure that the resolution and scaling are optimized for the TV screen. You can do this by right-clicking on the desktop, selecting “Display Settings” or “Screen Resolution,” and making the necessary adjustments.
Note that some computers may require you to enable the HDMI output in the graphics or display settings. This is done through the computer’s control panel or graphics control panel. Refer to the user manual or the manufacturer’s website for specific instructions based on your computer model.
By following these steps and connecting the HDMI cable between your CPU and the TV, you can enjoy high-definition audio and video playback on the big screen. HDMI cables simplify the process of connecting your computer to your TV and offer excellent picture and sound quality for a remarkable multimedia experience.
Connect the VGA cable
If your computer or TV has a VGA (Video Graphics Array) port, you can connect them using a VGA cable. Although VGA is an older analog technology, it is still used in many devices. Follow these steps to connect your CPU to a TV using a VGA cable:
- Locate the VGA output port on your computer. It is typically blue and has three rows of pins.
- Identify the VGA input port on your TV. It is also typically blue and has three rows of holes.
- Take one end of the VGA cable and insert it firmly into the VGA output port on your computer.
- Connect the other end of the VGA cable into the VGA input port on your TV. Ensure the connection is secure by tightening the screws on the cable ends.
- Using the TV remote or the input/source button on your TV, select the VGA input channel that corresponds to the VGA input port you connected the cable to. This will display the output from your CPU on the TV screen.
- Adjust the display settings on your computer to optimize the resolution and aspect ratio for the TV screen. Right-click on the desktop, select “Display Settings” or “Screen Resolution,” and make the necessary adjustments.
It’s important to note that VGA cables transmit only video signals, not audio. Therefore, you will need to use additional audio cables to connect your computer’s audio output to the TV’s audio input if you want sound through the TV speakers.
If your computer has a separate audio output port, you can use a 3.5mm audio cable to connect the audio output of your computer to the audio input on your TV. Alternatively, you can use a separate audio adapter cable that connects both the VGA and audio outputs on your computer to a single HDMI input on your TV, allowing audio and video to be transmitted together.
By following these steps and connecting the VGA cable between your CPU and the TV, you can use your TV screen as an extended display or mirror your computer’s screen onto the TV for presentations, streaming media, or other uses.
Connect the DVI cable
If your computer or TV has a DVI (Digital Visual Interface) port, you can connect them using a DVI cable. DVI is a digital signal transmission technology that provides high-quality video output. Follow these steps to connect your CPU to a TV using a DVI cable:
- Locate the DVI output port on your computer. It is typically white and has a rectangular shape with pins or holes.
- Identify the DVI input port on your TV. It may be white or gray and also has a rectangular shape with pins or holes.
- Take one end of the DVI cable and insert it firmly into the DVI output port on your computer.
- Connect the other end of the DVI cable into the DVI input port on your TV. Ensure the connection is secure by tightening the screws on the cable ends.
- Using the TV remote or the input/source button on your TV, select the DVI input channel that corresponds to the DVI input port you connected the cable to. This will display the output from your CPU on the TV screen.
- Adjust the display settings on your computer to optimize the resolution and aspect ratio for the TV screen. Right-click on the desktop, select “Display Settings” or “Screen Resolution,” and make the necessary adjustments.
Similar to VGA, DVI cables transmit video signals only and do not carry audio. If you want to have audio output through your TV speakers, you will need to use separate audio cables. Depending on your computer’s audio output options and your TV’s audio input ports, you can use an appropriate audio cable or adapter to connect the audio output of your computer to the audio input on your TV.
It is worth noting that there are different types of DVI cables, including DVI-D (digital), DVI-A (analog), and DVI-I (integrated digital/analog). Ensure that you use the correct DVI cable type based on the capabilities of your computer and TV.
By following these steps and connecting the DVI cable between your CPU and the TV, you can enjoy high-quality digital video output on the TV screen. DVI cables are a reliable and efficient option when connecting your computer to a TV that supports DVI connectivity.
Connect the DisplayPort cable
If both your computer and TV have DisplayPort ports, you can connect them using a DisplayPort cable. DisplayPort is a high-performance digital audio and video interface that supports high-resolution displays. Follow these steps to connect your CPU to a TV using a DisplayPort cable:
- Locate the DisplayPort output port on your computer. It is typically labeled as “DisplayPort” and has a rectangular shape with a small notch on one side.
- Identify the DisplayPort input port on your TV. It may also be labeled as “DisplayPort” and has a rectangular shape with a small notch on one side.
- Take one end of the DisplayPort cable and insert it firmly into the DisplayPort output port on your computer.
- Connect the other end of the DisplayPort cable into the DisplayPort input port on your TV. Ensure the connection is secure by pressing the cable connector into the port until it clicks into place.
- Using the TV remote control or the input/source button on your TV, select the DisplayPort input channel that corresponds to the DisplayPort input port you connected the cable to. This will display the output from your CPU on the TV screen.
- Adjust the display settings on your computer to optimize the resolution and aspect ratio for the TV screen. Right-click on the desktop, select “Display Settings” or “Screen Resolution,” and make the necessary adjustments.
DisplayPort cables support both audio and video signals, allowing you to transmit high-quality, synchronized audio and video from your computer to the TV. However, it is essential to ensure that your DisplayPort cable is compatible with the version of DisplayPort supported by your computer and TV. The most common types are DisplayPort 1.2 and DisplayPort 1.4, which offer different capabilities and resolutions.
If your computer or TV does not have a DisplayPort input or output port, you can use a DisplayPort to HDMI adapter or cable to establish the connection. The adapter will convert the DisplayPort signal to HDMI, allowing you to connect to an HDMI input on your TV.
By following these steps and connecting the DisplayPort cable between your CPU and the TV, you can enjoy high-quality audio and video output on your TV screen. DisplayPort offers excellent performance and compatibility, making it an ideal choice for connecting your computer to a TV.
Adjust the display settings on your computer
Once you have successfully connected your CPU to the TV screen, it is important to adjust the display settings on your computer to ensure optimal visual performance. Properly configuring the display settings will ensure that the output from your CPU is optimized for the TV screen and provides the best viewing experience. Here’s how you can adjust the display settings:
- Right-click on the desktop of your computer and select “Display Settings” or “Screen Resolution” from the context menu. This will open the display settings panel.
- Depending on your operating system, you will see different display settings options. You can adjust the following settings to optimize the display:
- Resolution: Set the resolution to match the native resolution of your TV screen. The native resolution is the optimal resolution at which the TV is designed to display the sharpest and most accurate visuals.
- Orientation: Choose whether you want the display to be in landscape or portrait mode. Most TV screens are in landscape orientation by default.
- Scaling: Adjust the scaling options to ensure that the content fits properly on the TV screen. You can choose to scale the content to fit the screen or maintain the aspect ratio.
- Refresh Rate: If your TV supports a higher refresh rate, you can select a higher value to enhance the smoothness of on-screen motion.
- Color Calibration: Use the color calibration settings to adjust the brightness, contrast, and color levels to your preference.
- Make the necessary adjustments to the display settings and click “Apply” or “OK” to save the changes.
- If the changes result in a black screen or distorted image, wait for a few seconds, and the display settings will revert to the previous configuration. This allows you to restore the settings in case they are not compatible with your TV.
It is important to note that the availability of display settings and options can vary depending on your operating system and graphics card. Refer to the documentation provided with your computer or visit the manufacturer’s website for more detailed instructions specific to your system.
By adjusting the display settings on your computer to match the capabilities of your TV, you can ensure that the visuals are crisp, clear, and properly displayed on the screen. Taking the time to optimize the display settings will enhance your viewing experience and maximize the potential of connecting your CPU to a TV screen.
Troubleshooting common issues
While connecting your CPU to a TV screen is generally a straightforward process, you may encounter some common issues along the way. Understanding how to troubleshoot these issues can help you resolve them quickly and ensure a successful connection. Here are some common issues you may face and their possible solutions:
- No signal or blank screen: If you are not getting any signal or experiencing a blank screen on your TV, check the cable connections first. Ensure that the cables are securely connected to both the CPU and the TV. If using an adapter or converter, ensure that it is compatible with your devices. Additionally, try selecting the correct input/source channel on your TV to ensure it is receiving the signal from the CPU.
- Poor image quality: If the image quality is not satisfactory, first check if the resolution settings are correctly configured on your computer. Ensure that the resolution matches the native resolution of your TV. If the issue persists, try a different cable or connector, as a faulty cable can also result in poor image quality.
- No audio: If you are not getting any audio through your TV speakers, check the audio settings on your computer. Verify that the correct audio output device is selected. If using a separate audio cable, ensure it is connected properly. You may need to adjust the sound settings on your TV as well.
- Incompatible resolutions: Some TVs do not support certain resolutions, especially if they are non-standard or higher than what the TV can handle. In such cases, you may need to lower the resolution on your computer to match the TV’s capabilities. Adjust the display settings on your computer and try selecting a lower resolution.
- Interference or flickering: If you experience interference or flickering on the TV screen, check for any physical obstructions or interference sources near the cables. Electrical devices, fluorescent lights, or even other cables can cause interference. Try repositioning the cables or moving any potential sources of interference away from the setup.
If none of the above solutions resolve your issue, consult the user manual or the support resources provided by the manufacturer of your computer or TV. They may have specific troubleshooting steps or recommendations for common connection issues.
Remember to check for software updates for your computer’s operating system and graphics card drivers, as these updates can sometimes address compatibility issues and improve the overall performance of the connection.
By being aware of these common issues and their solutions, you can troubleshoot and resolve any problems encountered during the process of connecting your CPU to a TV screen. Patience and persistence will help you overcome obstacles and enjoy a seamless multimedia experience.
Conclusion
Connecting your CPU to a TV screen opens up a whole new world of possibilities for entertainment, productivity, and multimedia enjoyment. Whether you prefer watching movies, playing games, or showcasing presentations, the ability to utilize a larger display can greatly enhance your overall experience.
In this guide, we have covered the necessary steps to connect your CPU to a TV screen using various cables and connectors such as HDMI, VGA, DVI, and DisplayPort. We discussed the importance of gathering the appropriate cables and assessing the inputs on your TV as well as the outputs on your computer to ensure compatibility.
We provided detailed instructions on how to connect each type of cable, including the HDMI cable for high-quality audio and video transmission, the VGA cable for older devices, the DVI cable for digital video output, and the DisplayPort cable for high-performance display connectivity.
Furthermore, we emphasized the importance of adjusting the display settings on your computer to optimize the resolution, scaling, and other visual parameters to ensure an optimal viewing experience on the TV screen.
Lastly, we addressed common issues you may encounter during the setup process and provided troubleshooting tips to help you overcome them. By effectively troubleshooting problems such as signal issues, poor image quality, audio problems, incompatible resolutions, and interference, you can ensure a successful connection between your CPU and TV screen.
Now that you have the knowledge and steps required to connect your CPU to a TV screen, you can enjoy an immersive multimedia experience, whether it be for gaming, streaming, video editing, or any other activity that benefits from a larger screen.
Remember, always consult the user manuals or support resources for your specific devices if you encounter any difficulties or have unique setup requirements. With these steps and troubleshooting tips, you are well-equipped to embark on the journey of connecting your CPU to a TV screen and unlocking an enhanced multimedia experience.


