Introduction
Welcome to the world of gaming on the big screen! If you’ve ever wanted to experience the fun and excitement of playing Nintendo Wii games on a larger display, connecting your Wii console to a projector is the way to go. By doing so, you can transform your living room or gaming area into an immersive gaming hub.
With the advancements in technology, projectors have become increasingly popular for home entertainment setups. Their ability to project a large, high-quality image onto a screen or wall is perfect for gaming enthusiasts looking for a bigger, more immersive experience.
However, connecting a gaming console like the Wii to a projector may seem intimidating, especially if you’re not familiar with the technical aspects. But fear not! In this guide, we’ll walk you through all the steps required to connect your Wii to a projector with ease.
Whether you’re hosting a gaming party with friends or just want to enjoy some family-friendly gaming on a larger scale, this guide will help you make the most out of your Wii console and projector setup.
So, let’s dive in and learn how to connect a Wii to a projector and unlock a whole new level of gaming!
Step 1: Gather the necessary equipment
Before you start connecting your Wii console to a projector, it’s essential to gather all the required equipment. Here’s a list of what you’ll need:
- Wii console: Ensure that you have a working Wii console. This is the central device that you will be connecting to the projector.
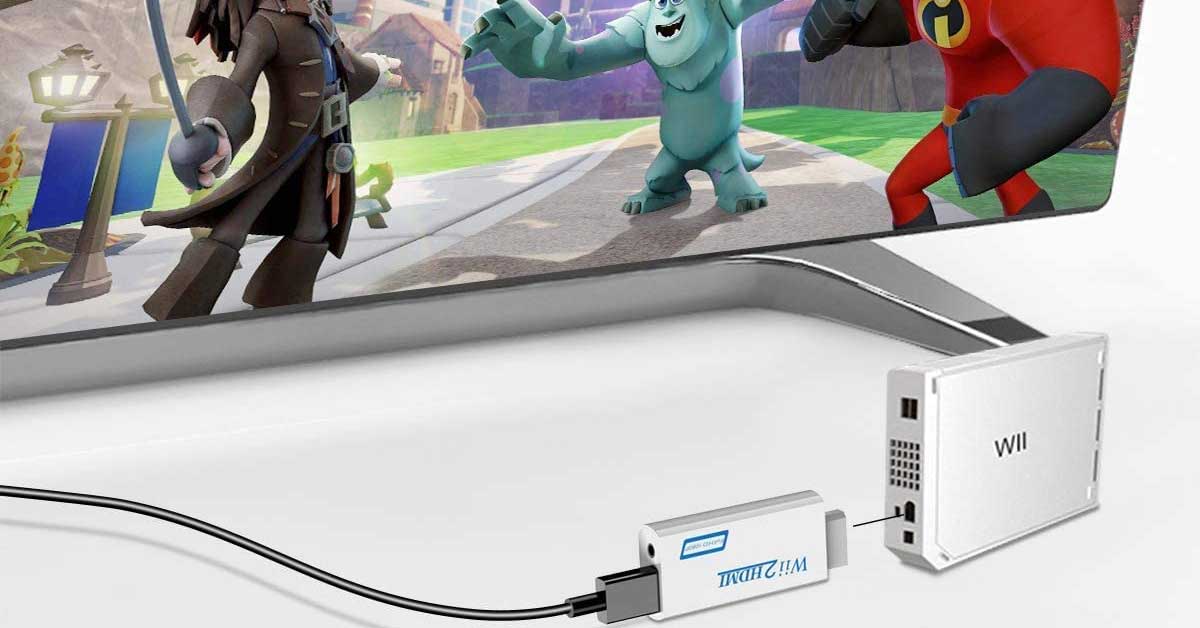
- Projector: Make sure you have a compatible projector. Look for a projector that has the necessary inputs to connect your Wii console. The most common inputs include HDMI, VGA, and component video.
- Cables: Depending on the inputs on your projector, you may need specific cables to connect the Wii console. For example, if your projector has an HDMI input, you will need an HDMI cable. If it has VGA or component video inputs, you will need the corresponding cables.
- Audio equipment: While projectors usually have built-in speakers, they might not be sufficient for an immersive gaming experience. Consider connecting external speakers or a surround sound system to enhance the audio quality.
- Wii sensor bar: The Wii sensor bar is a crucial component for playing Wii games. Make sure you have it connected to your Wii console and positioned properly near your gaming area.
- Power outlets and extension cords: Ensure you have access to power outlets near both the Wii console and the projector. In case the power cords are not long enough, have extension cords on hand to reach the desired locations.
By gathering all the necessary equipment beforehand, you can ensure a smooth and hassle-free setup process. Now that you have all the required items, let’s move on to the next step: setting up the Wii console.
Step 2: Set up the Wii console
Now that you have all the necessary equipment gathered, it’s time to set up your Wii console. Follow these steps to ensure a proper setup:
- Find a suitable location: Choose a location near your projector where you have enough space to move around while playing games. Make sure there is sufficient ventilation to prevent overheating.
- Connect the power: Plug the power cord of the Wii console into a power outlet. Ensure that the power source is stable and reliable.
- Connect the sensor bar: Take the sensor bar and connect it to the Wii console using the provided cable. Place the sensor bar either above or below the projector screen, ensuring that it is positioned at the same height as your remote when gaming.
- Turn on the Wii console: Press the power button on the Wii console to turn it on. You should see a power indicator light up.
- Set up your display settings: Follow the on-screen instructions to set up your display settings. If you’re using a widescreen projector, choose the appropriate display format to ensure that the image appears correctly on the screen.
- Sync your Wii remote: Open the battery cover on the back of your Wii remote and press the red sync button. Then, press the sync button on the Wii console to establish a connection between the remote and the console.
- Test the console: Once the setup is complete, navigate through the Wii console menu using your Wii remote to ensure that everything is working correctly. This will also help you familiarize yourself with the Wii interface.
By following these steps, you have successfully set up your Wii console, and it’s now ready to be connected to the projector. In the next step, we’ll guide you through the process of connecting the Wii console to the projector.
Step 3: Connect the Wii to the projector
With your Wii console set up, it’s time to connect it to your projector. Follow these steps to establish a connection:
- Identify the projector inputs: Examine the back or side of your projector to locate the available input ports. Common input ports include HDMI, VGA, and component video.
- Select the appropriate cable: Based on the available inputs on your projector and the outputs on your Wii console, select the appropriate cable for the connection. For example, if your projector has an HDMI input, use an HDMI cable. If it has VGA or component video inputs, use the corresponding cables.
- Connect the Wii to the projector: Plug one end of the chosen cable into the corresponding output port on the Wii console. Then, connect the other end of the cable to the input port on the projector.
- Power on the projector: Turn on the projector and select the input source that corresponds to the port you connected the Wii to. Most projectors have an input or source button on the remote control or the projector unit itself.
- Enable the display on the Wii: On your Wii console, go to the system settings and navigate to the “Display” or “Screen” options. Make sure the display is set to the correct output mode based on the connection you made. For example, if you connected the Wii using an HDMI cable, select the “HDMI” output mode.
Once you have completed these steps, the Wii console should be successfully connected to the projector. The projector will now display the output from the Wii console, allowing you to enjoy gaming on a larger screen.
Note: If you’re using an audio system or external speakers, make sure to connect them to the appropriate audio output on the projector or Wii console. This will ensure you have both video and audio output during gameplay.
Now that you have successfully connected the Wii to the projector, let’s move on to the next step: adjusting the projector settings for optimal gaming experience.
Step 4: Adjust the projector settings
After connecting your Wii console to the projector, it’s important to adjust the projector settings for optimal display quality. By making a few tweaks, you can enhance the gaming experience and ensure that the visuals are crisp and clear. Here are the steps to adjust the projector settings:
- Focus the image: Use the focus ring or menu options on the projector to adjust the focus of the projected image. Make sure the image is clear and sharp.
- Keystone correction: If your projector supports keystone correction, use it to ensure that the image is projected without any distortion. Adjust the keystone correction settings until the image appears rectangular and straight.
- Brightness and contrast: Use the projector’s menu options to adjust the brightness and contrast levels according to your preference. Ensure that the brightness is set to a comfortable level, and the contrast is adjusted for optimal visibility of details.
- Aspect ratio: Set the aspect ratio of the projector to match the aspect ratio of the Wii games you’ll be playing. Most Wii games are designed for a standard 4:3 aspect ratio, but some may support widescreen 16:9 aspect ratio. Adjust the projector’s aspect ratio accordingly for the best visual experience.
- Color calibration: Explore the color calibration options on the projector to fine-tune the color reproduction. Adjust the color saturation, temperature, and other color settings to achieve accurate and vibrant colors in the projected image.
- Input lag: Some projectors may introduce input lag, which can affect the responsiveness of the game controls. Check the projector’s specifications and enable any gaming or low-latency mode to minimize input lag.
By adjusting these settings, you can optimize the projector’s display to enhance your gaming experience. Experiment with different settings to find the perfect balance that suits your preferences and the game you’re playing.
It’s essential to note that every projector model may have slightly different menu options and settings. Consult the projector’s user manual for specific instructions on adjusting settings.
Now that you have fine-tuned the projector settings, it’s time to move on to the final step: testing the connection and gameplay.
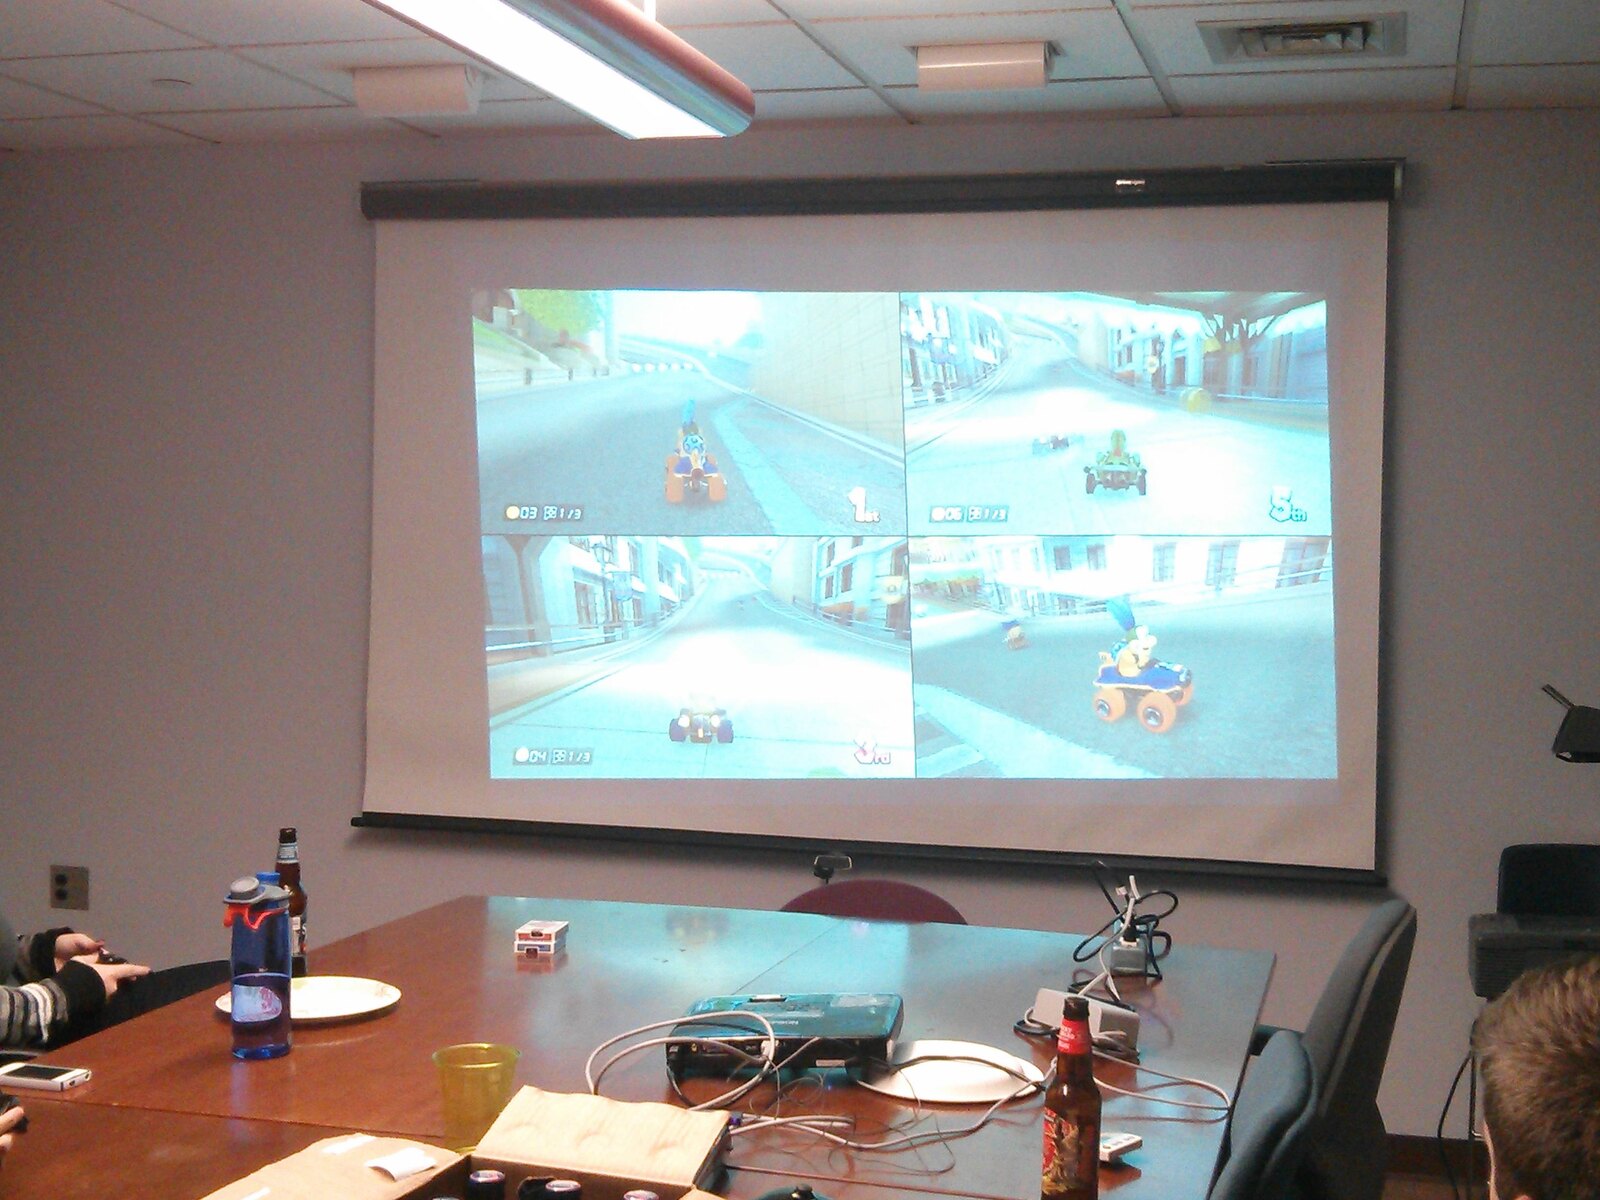
Step 5: Test the connection and gameplay
Now that you have set up and adjusted the projector, it’s time to test the connection and dive into the world of gaming! Follow these steps to ensure everything is working correctly:
- Select a Wii game: Insert a Wii game disc into the console or navigate to the digital game you want to play.
- Turn on the projector: Power on the projector and select the input source you connected the Wii console to.
- Position yourself: Stand or sit in a comfortable position within the range of the Wii sensor bar. Ensure that you have enough room to move around and play the game without any obstructions.
- Calibrate the Wii remote: Follow the on-screen instructions to calibrate the Wii remote. This step ensures accurate tracking and responsiveness during gameplay.
- Start gaming: Once everything is set up, navigate the game menu using the Wii remote and start playing your favorite Wii games. Enjoy the immersive experience on the big screen!
- Monitor performance: While playing, keep an eye on the performance and adjust any settings if necessary. Check for any lag, input delay, or visual issues that may affect gameplay.
During gameplay, immerse yourself in the world of Wii gaming on the large projection screen. Enjoy the vibrant visuals, exciting gameplay, and the social aspect of multiplayer games.
If you encounter any issues or notice any suboptimal performance, refer back to the previous steps to troubleshoot and make necessary adjustments. It may take a bit of experimentation and fine-tuning to achieve the best gaming experience.
Remember to take breaks and maintain a comfortable distance from the screen to avoid eye strain or fatigue. Gaming should always be an enjoyable and relaxing activity.
Congratulations! You have successfully connected your Wii console to the projector and tested the connection and gameplay. Now you can fully indulge in the immersive gaming experience offered by the combination of the Wii and a large projector screen.
Conclusion
Connecting a Wii console to a projector opens up a whole new realm of gaming possibilities. By following the steps outlined in this guide, you can easily set up and connect your Wii to a projector, allowing you to enjoy gaming on a larger and more immersive display.
Throughout the process, gathering the necessary equipment, setting up the Wii console, connecting it to the projector, adjusting the projector settings, and testing the connection and gameplay, you have learned how to create an optimal gaming setup.
With the Wii console connected to a projector, you can transform your gaming experience into something larger-than-life. Whether you’re playing solo or with friends and family, the visual impact and immersive feel of gaming on a larger screen can truly enhance the enjoyment and engagement.
Remember to take advantage of the projector’s settings to customize the visual experience to your liking. Adjust the focus, color calibration, brightness, and other features to achieve the best image quality for your gaming sessions.
Lastly, always prioritize comfort and safety while gaming. Take breaks, maintain a suitable distance from the screen, and consider using external audio equipment for an even more immersive audio experience.
Now that you have the knowledge and steps to connect your Wii console to a projector, it’s time to get started and enjoy gaming on the big screen. Gather your friends, family, or game night buddies and dive into the captivating world of Wii gaming!