Introduction
Welcome to our step-by-step guide on how to change your App Store password to Face ID. Face ID is a cutting-edge technology that allows you to securely access your apps and make purchases with just a glance. If you’re tired of typing in your password every time you download a new app or update an existing one, then Face ID is the solution you’ve been waiting for.
Changing your App Store password to Face ID is a simple process that can be done in just a few easy steps. Whether you have a new iPhone with Face ID capabilities or you’ve recently upgraded your device, our guide will walk you through the process and have you up and running in no time.
With Face ID, your biometric data is scanned and stored securely on your device, so there’s no need to worry about your personal information falling into the wrong hands. Plus, the convenience of Face ID makes it a popular choice among iPhone users worldwide.
So, if you’re ready to take advantage of this advanced security feature and make your app store experience more seamless, let’s dive into the step-by-step process of changing your App Store password to Face ID.
Step 1: Go to Settings
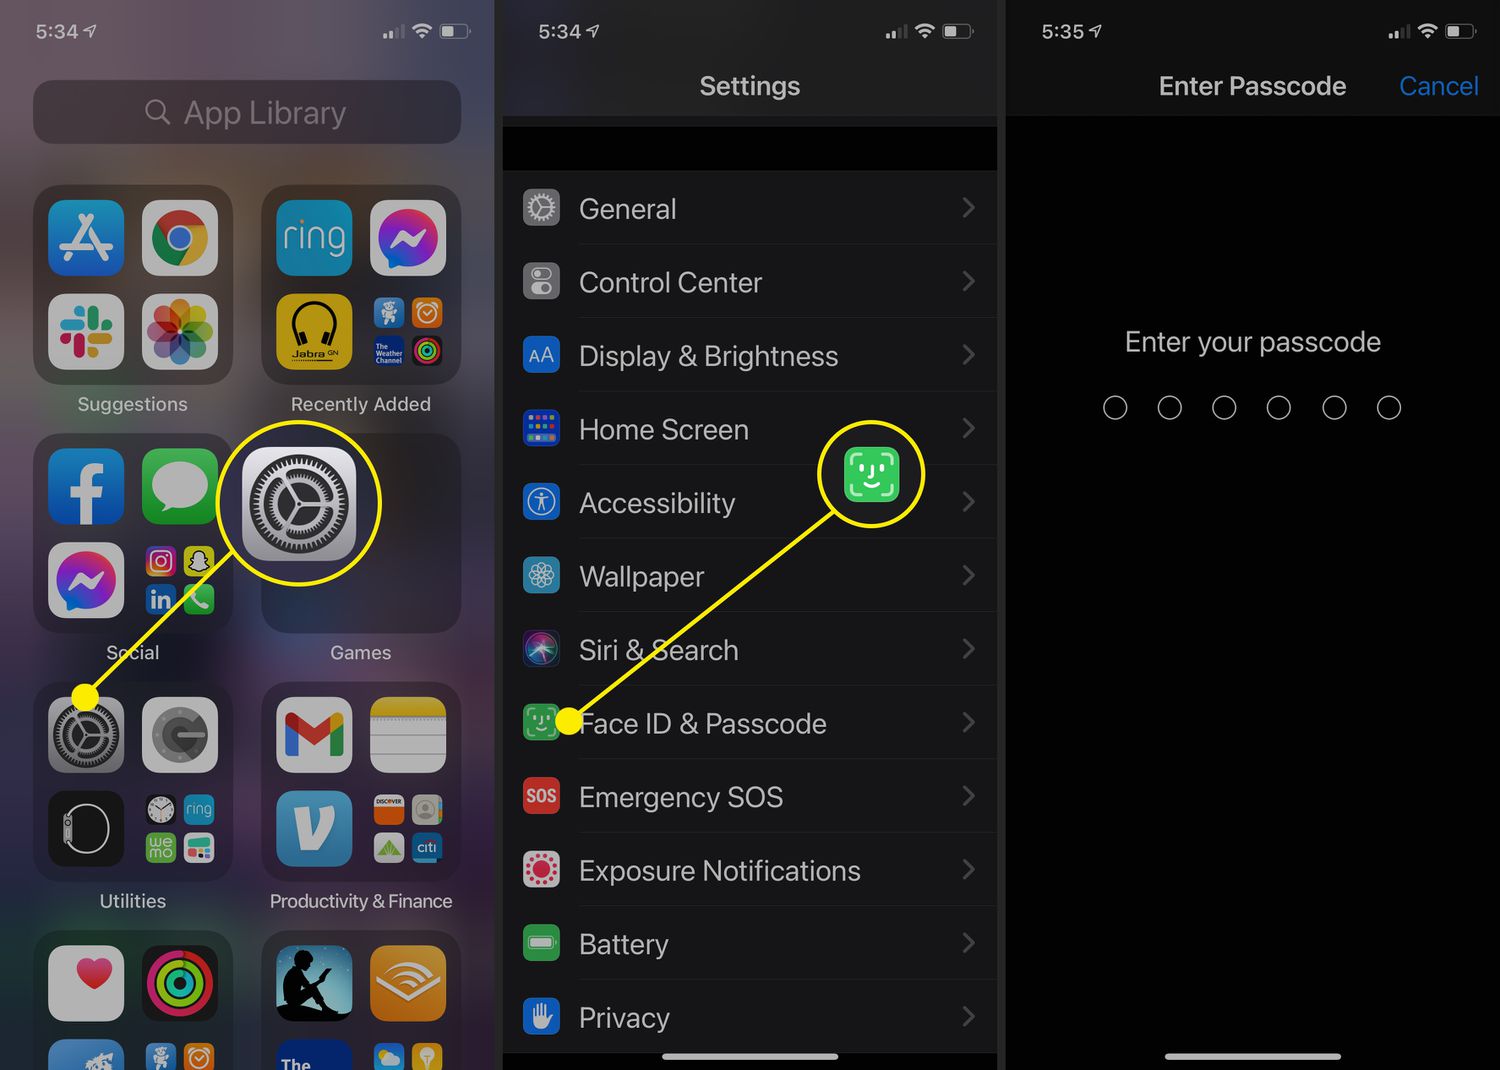
The first step in changing your App Store password to Face ID is to open the Settings app on your iPhone. Look for the app with a gear icon, usually located on your home screen or in your app library. Tap on it to open the Settings menu.
Once you’re in the Settings menu, you’ll see a list of options. Scroll down until you find the option labeled “Face ID & Passcode” or “Touch ID & Passcode,” depending on the model of your iPhone.
Tap on “Face ID & Passcode” or “Touch ID & Passcode” to proceed to the next step. You may be prompted to enter your current passcode or authenticate using your face or fingerprint, depending on your device’s security settings.
After successfully authenticating, you’ll gain access to the Face ID & Passcode settings, where you can change various security and authentication options for your device. This is where you’ll make the necessary changes to enable Face ID for the App Store.
Now that you’re in the Face ID & Passcode settings, let’s move on to the next step and configure Face ID specifically for the App Store.
Step 2: Tap on your Apple ID
Once you’re in the Face ID & Passcode settings, look for your Apple ID at the top of the screen. It should be displayed with your name and a small profile picture. Tap on your Apple ID to access the settings for your account.
Tapping on your Apple ID will open a new screen with various options related to your account settings. Here, you can manage your personal information, payment methods, and security settings.
Scroll down the page until you find the section labeled “Password & Security.” This section contains all the settings related to your Apple ID password and security measures. Tap on “Password & Security” to proceed with changing your App Store password.
In the “Password & Security” section, you’ll see the option to change your password, enable two-factor authentication, and more. This is where you can customize the security settings for your Apple ID, including the password used to access the App Store.
Before moving on to the next step, it’s important to ensure that you have a strong and unique password for your Apple ID. This helps protect your account from unauthorized access and ensures the security of your personal information and purchases.
Once you’re satisfied with your password strength, it’s time to move on to the next step and authenticate with Face ID to secure your App Store purchases.
Step 3: Tap on Password & Security
In the “Password & Security” section, you’ll find all the settings related to the security of your Apple ID. This includes the option to change your password, enable two-factor authentication, and manage app-specific passwords.
Scroll down the page until you locate the “Change Password” option. Tap on it to proceed with changing your App Store password.
Before proceeding, your device may prompt you to authenticate using either Face ID or your current passcode. This ensures that only you can make changes to your password and account security settings.
Once you’ve successfully authenticated, you’ll be taken to a new screen where you can update your password. Here, you’ll need to enter your current password, followed by your new desired password. Make sure to choose a strong and unique password that is not easily guessable.
After entering your new password, you’ll be prompted to verify it by typing it again. This step helps prevent any typing errors from occurring.
Once you’ve entered and verified your new password, tap on the “Change” or “Save” button to save your changes and update your App Store password to the new one.
After successfully changing your password, you’ll receive a confirmation message letting you know that your password has been updated. At this point, your App Store password will be the same as your newly updated password.
Now that your password is updated, the next step is to authenticate with Face ID to secure your App Store purchases. Let’s move on to the next step to complete the process.
Step 4: Authenticate with Face ID
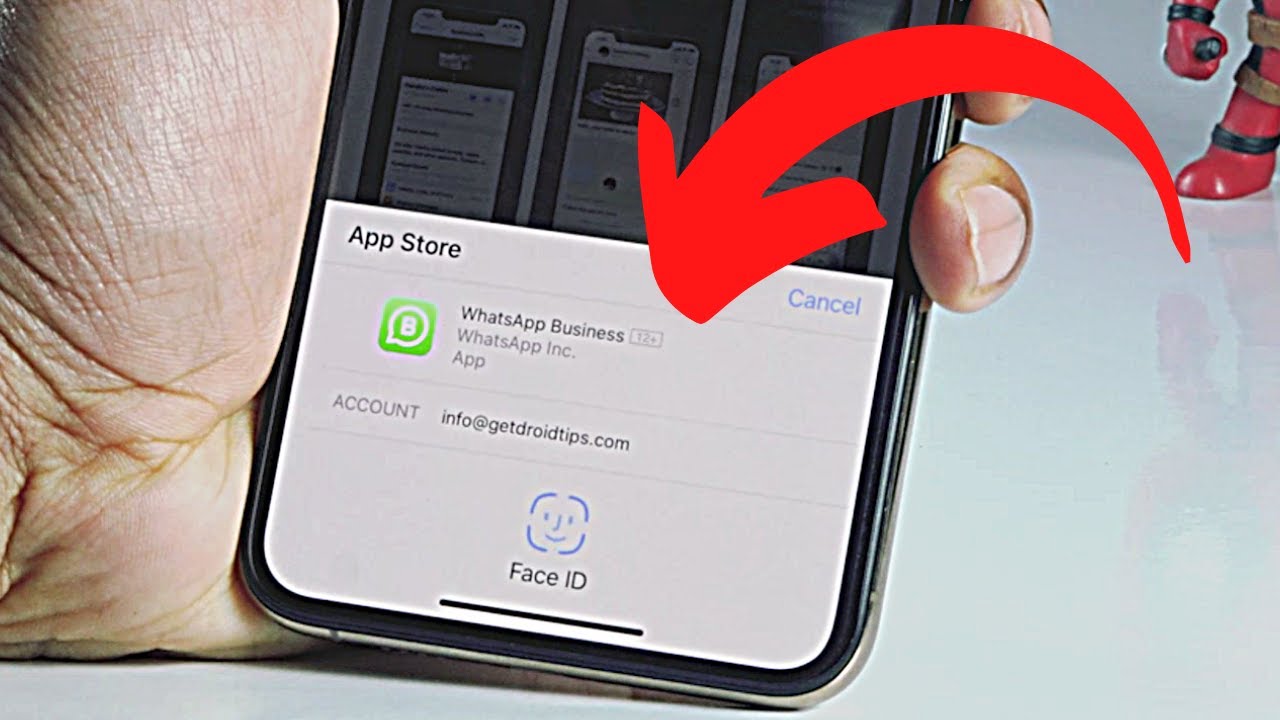
Now that you have changed your App Store password, it’s time to set up Face ID authentication specifically for the App Store. This will allow you to securely access and make purchases on the App Store without needing to enter your password.
Go back to the main settings menu by tapping on the back arrow in the top left corner of the screen. Look for the option labeled “Face ID & Passcode” or “Touch ID & Passcode,” depending on your iPhone model. Tap on it to access the Face ID settings.
In the Face ID settings, scroll down until you find the section titled “Other Apps.” Under this section, you’ll see a list of apps that can use Face ID for authentication.
Look for the App Store in the list and make sure the toggle switch next to it is turned on. This ensures that Face ID can be used to authenticate your identity when accessing the App Store.
If the toggle switch is already turned on, then you’re all set! Face ID is enabled for the App Store, and you can start using it to securely access your apps and make purchases.
If the toggle switch is turned off, simply tap on it to turn it on. You may be prompted to authenticate with Face ID or your device passcode to enable the feature.
Once you’ve successfully enabled Face ID for the App Store, you’re ready to enjoy the seamless and secure authentication process. From now on, you’ll be able to access the App Store with just a glance, without the need to enter your password.
Now that you’ve set up Face ID for the App Store, let’s move on to the final step to complete the process.
Step 5: Change App Store Password
Now that you have successfully enabled Face ID for the App Store, you may also want to change your App Store password for additional security. Changing your password regularly is a good practice to protect your account from unauthorized access.
To change your App Store password, open the App Store app on your iPhone. Tap on your profile picture or the “Account” icon located at the top-right corner of the screen. This will take you to your Account settings.
In the Account settings, scroll down until you find the section labeled “Security.” Tap on “Password” under this section.
You will be prompted to enter your current App Store password before proceeding. Enter your current password and tap “Next” or “Continue.”
Next, you’ll need to choose a new password. Enter a strong and unique password that meets the password requirements displayed on the screen. Take this opportunity to create a password that is not easily guessable and that you haven’t used before.
After entering your new password, you will be asked to verify it by typing it again. This step ensures that there are no typing errors and that you have entered the password correctly.
Once you have verified your new password, tap on the “Done” or “Save” button to save your changes. You will receive a confirmation message indicating that your App Store password has been successfully changed.
Congratulations! You have now changed your App Store password. It’s always a good idea to remember your new password or store it securely in a password manager.
With both Face ID enabled and a new App Store password, you’ve enhanced the security of your account and can now enjoy a seamless and protected app purchasing experience.
Remember, regularly updating your password and using biometric authentication like Face ID are crucial steps in maintaining the security of your App Store account.
Conclusion
Changing your App Store password to Face ID is a simple yet powerful way to enhance the security and convenience of accessing your favorite apps and making purchases. By following the step-by-step guide outlined above, you can easily set up Face ID authentication for the App Store and change your password to further safeguard your account.
Face ID provides a seamless and secure authentication method, allowing you to access your apps and make purchases with just a glance. It eliminates the need to remember and type in your password every time you want to download a new app or update an existing one.
In addition to enabling Face ID for the App Store, changing your App Store password regularly is an essential security practice. It helps protect your account from unauthorized access and ensures the safety of your personal information and purchases.
Remember to choose a strong and unique password that is not easily guessable and to store it securely. Regularly updating your password and combining it with Face ID authentication provides an extra layer of protection for your App Store account.
With stronger security measures in place, you can enjoy a worry-free app store experience, knowing that your information is safe and your purchases are protected.
We hope this guide has helped you understand the process of changing your App Store password to Face ID. Embrace the convenience and security that these features offer, and enjoy a seamless app store experience on your iPhone.
Start exploring all the incredible apps available on the App Store with the peace of mind that comes from knowing your account is well-protected!