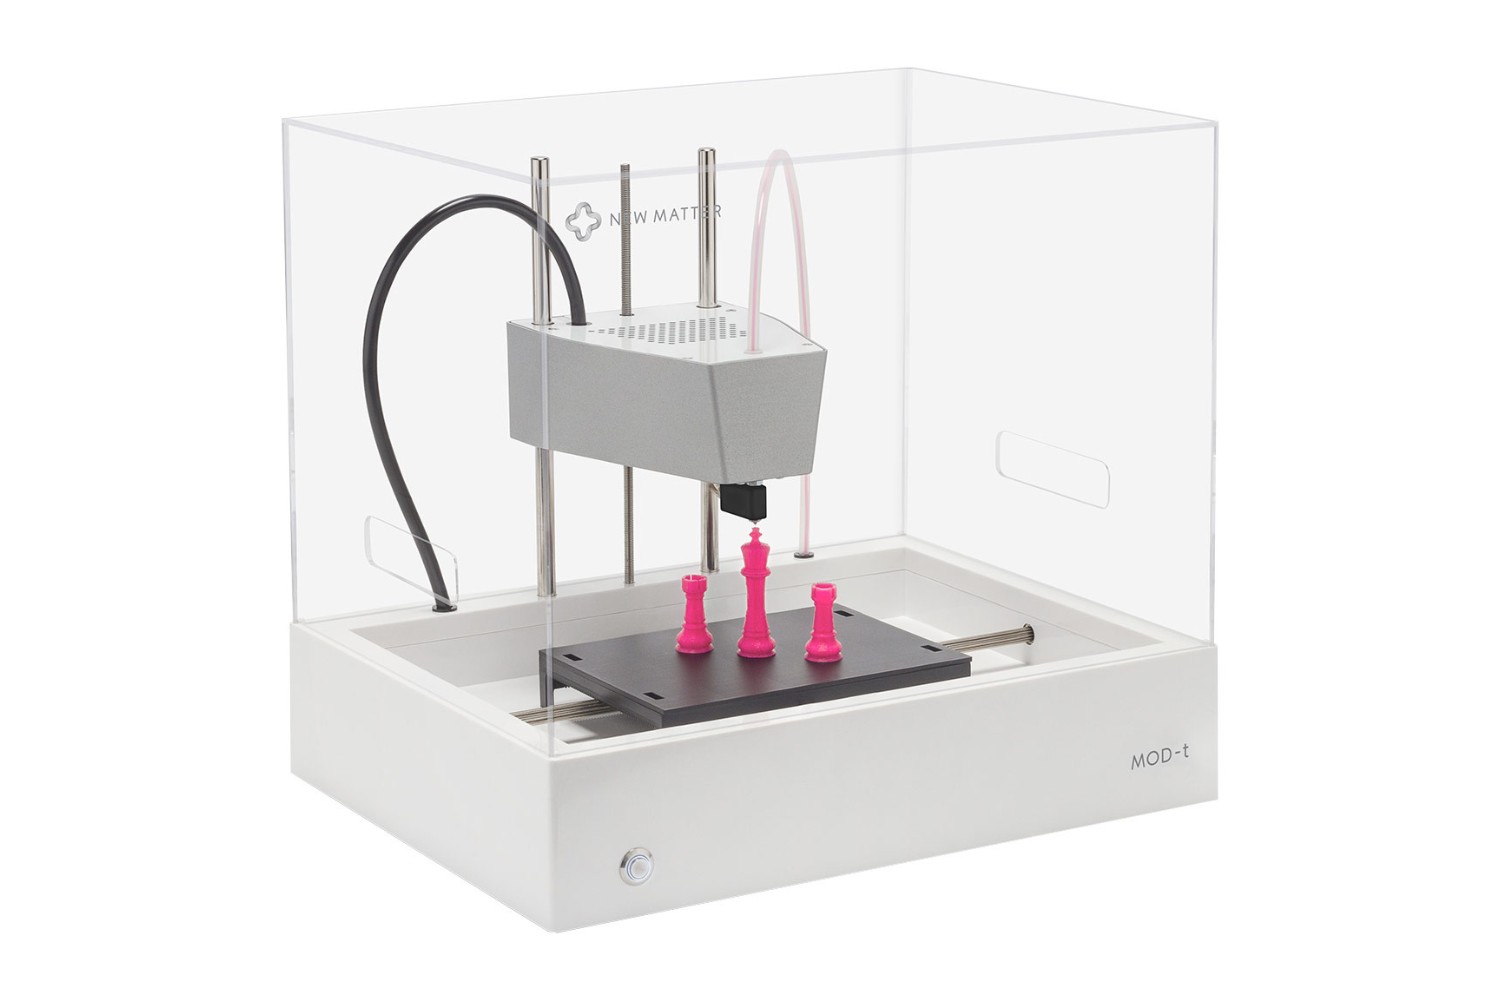
Introduction
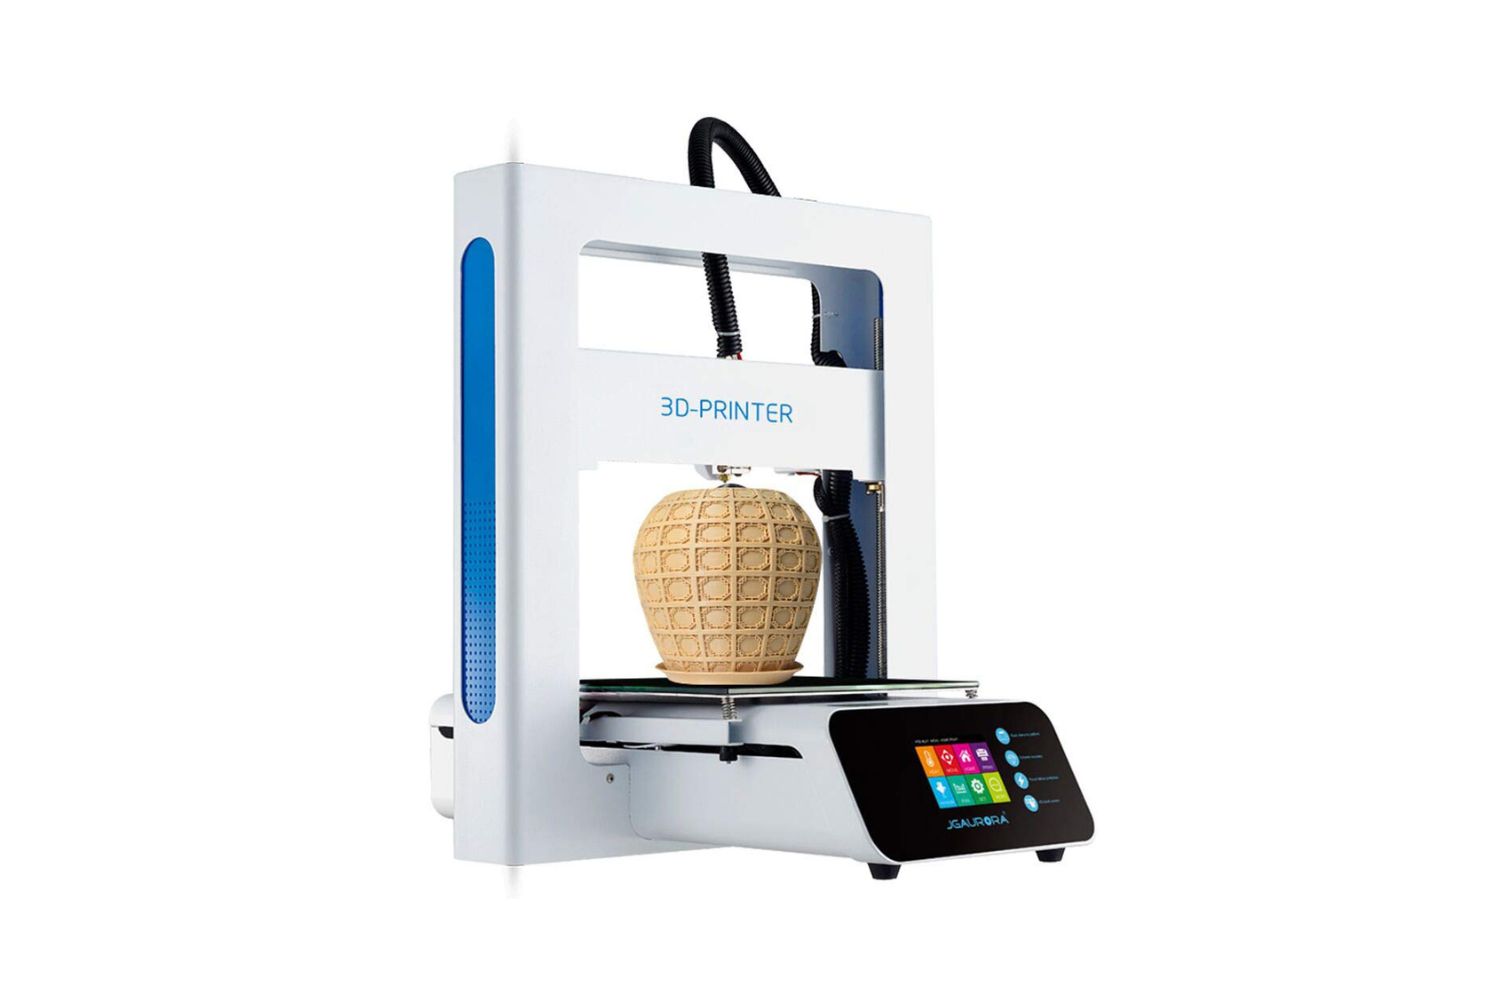
Welcome to the world of 3D printing, where you have the freedom to turn your ideas into tangible objects with just a few clicks. While there are plenty of pre-assembled 3D printers available in the market, building your own 3D printer from a kit can be a rewarding and cost-effective option. Not only does it give you a deeper understanding of how a 3D printer works, but it also allows you to customize and upgrade your printer according to your specific needs.
Building your own 3D printer may sound intimidating, but fear not – with the right guidance and a little bit of patience, you can embark on this exciting DIY journey. In this article, we will walk you through the step-by-step process of building your own 3D printer from a kit, ensuring that you have all the necessary tools and materials at your disposal.
One of the first things you need to consider is choosing the right 3D printer kit. There are various kits available in the market, ranging from beginner-friendly options to more advanced kits for experienced enthusiasts. It’s important to choose a kit that matches your skill level and fits your budget. Additionally, consider factors such as build volume, print quality, and support from the manufacturer when making your decision.
Once you have selected the right kit, it’s time to gather the necessary tools and materials. Most 3D printer kits come with all the essential components, but you may still need a few additional tools like screwdrivers, pliers, and wire cutters. Familiarizing yourself with the contents of the kit and ensuring that you have all the required tools will make the assembly process much smoother.
Assembling the frame and base of your 3D printer is the next step. This involves carefully following the instructions provided by the kit manufacturer. It may require tightening screws, attaching brackets, and aligning various parts to ensure a sturdy and stable structure. Pay attention to every detail during this stage, as a well-built frame forms the foundation of a reliable and accurate 3D printer.
Next, you will need to install the electronic components that power your 3D printer. This includes the main control board, stepper motor drivers, LCD screen, and power supply. Each component has its specific place and connections, so carefully refer to the instructions to avoid any errors. Take your time and double-check your work to ensure proper installation.
Wiring and connecting the different printer parts is the next crucial step. This involves connecting the motors, sensors, fans, and heaters to the control board using appropriate cables. It’s essential to follow the wiring diagrams provided by the kit manufacturer to avoid confusion. Proper wiring ensures that all the components communicate effectively and function as intended.
Once the wiring is complete, it’s time to mount and calibrate the extruder. The extruder is responsible for melting the filament and depositing it layer by layer to create your 3D prints. Correctly installing and calibrating the extruder ensures precise and accurate printing. Adjusting the tension, leveling the bed, and configuring the nozzle height are some of the critical steps to achieve optimal performance.
Configuring the software settings of your 3D printer is also an essential aspect of the building process. This involves installing the printer firmware and the slicing software on your computer. The firmware is responsible for controlling the printer’s movements and functions, while the slicing software converts your digital 3D models into printable instructions. Carefully follow the software setup instructions to ensure compatibility and proper functionality.
Like any DIY project, building your own 3D printer may encounter some challenges along the way. In the troubleshooting and fine-tuning stage, you may face issues such as filament jams, layer adhesion problems, or skewed prints. Don’t be discouraged – this is part of the learning process. Consult online forums, user groups, or reach out to the kit manufacturer’s support team for assistance. With time and practice, you’ll become more proficient at identifying and resolving these issues.
In summary, building your own 3D printer from a kit can be an exciting and fulfilling experience. It allows you to unleash your creativity, learn about the inner workings of 3D printing, and customize your printer to suit your specific needs. By following the step-by-step guide provided in this article, you’ll be well on your way to creating your very own 3D printer. So roll up your sleeves and get ready to embark on a journey of endless possibilities!
Choosing the Right 3D Printer Kit
When it comes to building your own 3D printer, choosing the right kit is a crucial first step. With a plethora of options available in the market, it can be overwhelming to make a decision. However, by considering a few key factors, you can narrow down your choices and find the perfect kit for your needs.
The first thing you need to assess is your skill level and experience with 3D printers. If you’re a beginner with little to no experience, it’s advisable to start with a beginner-friendly kit. These kits usually come with detailed instructions and have simpler assembly processes, making it easier for you to get started. As you gain more experience and confidence, you can then move on to more advanced kits that offer greater flexibility and customization options.
Another crucial factor to consider is your budget. 3D printer kits can vary significantly in price, so it’s important to set a budget that aligns with your financial constraints. Keep in mind that a higher price doesn’t always guarantee better quality. By researching and reading reviews from other users, you can find a kit that offers good value for money. Additionally, some kits may require you to purchase additional components separately, so factor in these costs when determining your budget.
Build volume, which refers to the maximum size of objects that can be printed, is another essential consideration. Determine the size of objects you plan to print most frequently and choose a kit that offers a build volume that caters to your needs. It’s always better to have a slightly larger build volume than what you initially anticipate to have room for future projects.
Print quality is also a critical factor to assess when choosing a 3D printer kit. Look for kits that have a reputation for producing high-quality prints with fine details and minimal imperfections. Reading customer reviews and examining print samples can provide valuable insights into the print quality offered by different kits.
Support from the manufacturer is another aspect to consider. Some companies provide excellent customer support, offering timely assistance and troubleshooting guidance. This can be beneficial, especially if you’re new to 3D printing and may encounter difficulties during the assembly process. Look for kits from manufacturers known for their responsive customer support and active user communities.
Finally, consider the future upgradeability of the kit. As you gain more experience and explore new possibilities in 3D printing, you may want to expand and upgrade your printer. Choosing a kit that is compatible with a wide range of upgrades and modifications will allow you to enhance your printer’s capabilities without having to start from scratch.
By taking into account your skill level, budget, build volume, print quality, manufacturer support, and upgradeability, you can make an informed decision when choosing the right 3D printer kit. Remember to do thorough research, read customer reviews, and seek advice from the 3D printing community. With the right kit in hand, you’ll be well on your way to building your very own 3D printer.
Gathering the Necessary Tools and Materials
Before diving into the assembly process of your 3D printer kit, it’s essential to gather all the necessary tools and materials. Most 3D printer kits come with the majority of the components you’ll need, but you may still require a few additional tools to ensure a smooth assembly experience. Here’s a comprehensive list of tools and materials you should have on hand:
- Screwdrivers: A set of Phillips and flathead screwdrivers in various sizes will come in handy for tightening screws and securing components.
- Pliers: Both needle-nose and regular pliers will be useful for gripping and manipulating small parts during assembly.
- Wire Cutters: You’ll need wire cutters to trim wires to the appropriate lengths and create clean connections.
- Tweezers: Tweezers can assist in handling small parts, especially when precise placement is required.
- Hex Keys: Hex keys, commonly known as Allen wrenches, are often used to tighten bolts and screws in 3D printer assembly.
- Leveling Tools: A spirit level or a digital level can help ensure that the frame and bed of your 3D printer are level for accurate prints.
- Cable Ties: Cable ties, also known as zip ties, are useful for organizing and securing cables and wires in a neat and tidy manner.
- Adhesive: Depending on the kit, you may need adhesive such as glue or heat-resistant tape for assembling certain parts.
Additionally, it’s crucial to thoroughly read through the instructions provided by the kit manufacturer. The instructions typically list any specific tools or materials that may be required but are not included in the kit. Take note of these items and ensure you have them ready before starting the assembly process.
Aside from tools, you should have a clear workspace with adequate lighting. A clutter-free area will make it easier to navigate through the assembly process and prevent any accidental damage to components. It’s also a good idea to have a clean and static-free surface to place the delicate electronic components during assembly.
If the instruction manual provided by the kit manufacturer suggests any additional safety equipment, such as safety goggles or gloves, be sure to have them readily available. Safety should always be a priority when working with tools and electronic components.
By gathering all the necessary tools and materials before starting the assembly of your 3D printer, you’ll be well-prepared to tackle each step without any interruptions. Taking the time to organize your workspace and ensure you have the right tools at hand will make the entire building process smoother and more enjoyable.
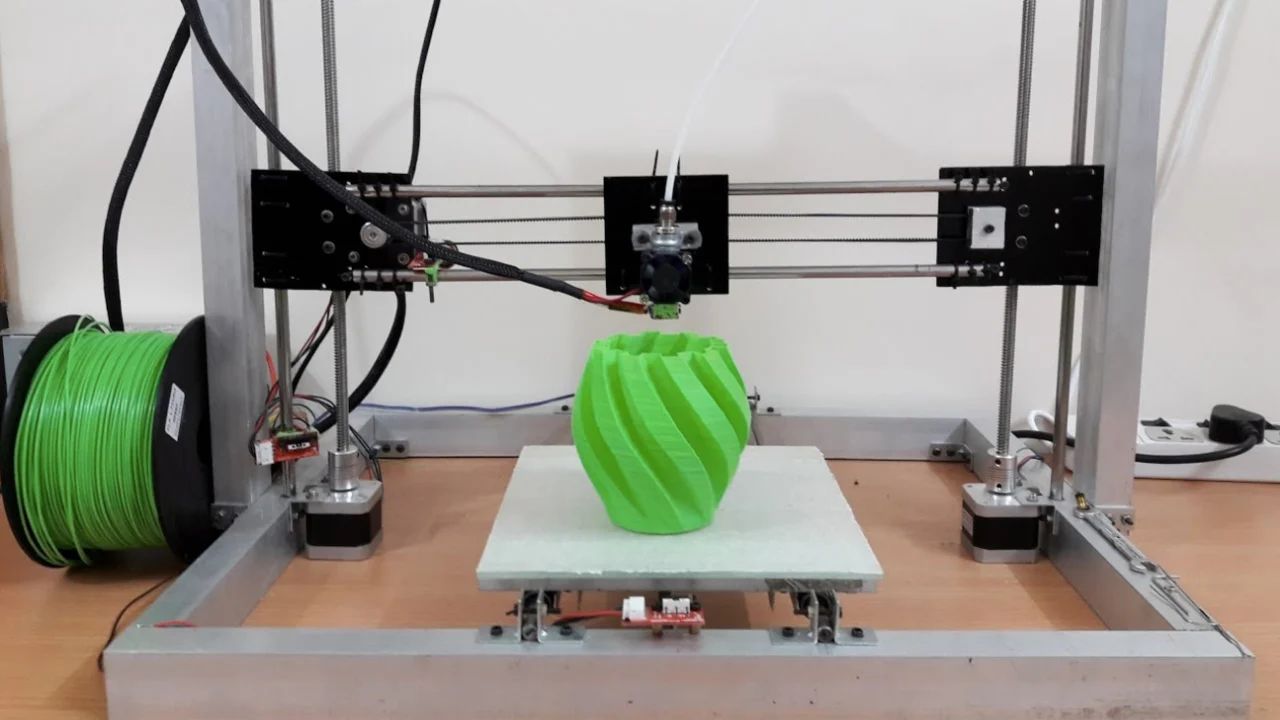
Assembling the Frame and Base
Assembling the frame and base of your 3D printer is a crucial step that forms the foundation of the machine. It’s essential to follow the instructions provided by the kit manufacturer carefully. Here’s a general overview of the process:
1. Prepare the workspace: Clear a clean and clutter-free area with adequate lighting to work on your 3D printer. Ensure you have all the necessary tools and materials readily available.
2. Identify the frame components: Familiarize yourself with the various frame components included in the kit. These may include aluminum or acrylic extrusions, brackets, and plates.
3. Assemble the base: Start by assembling the base structure of your printer. This typically involves slotting the extrusions together, securing them with brackets, and connecting the base plate. Follow the instruction manual to ensure proper alignment and tightness of the connections.
4. Attach the vertical uprights: Once the base is assembled, attach the vertical uprights to the designated locations on the base structure. Use the provided brackets and screws to securely fasten them in place.
5. Install the crossbars and support structures: Attach the crossbars and support structures as outlined in the instructions. These components provide stability and rigidity to the frame, ensuring precise movements during printing.
6. Check for squareness and alignment: Use a spirit level or a digital level to check that the frame is square and properly aligned. Adjustments may be necessary to ensure the frame is perfectly perpendicular and level.
7. Secure all connections: Once you are satisfied with the squareness and alignment of the frame, go through all the connections and tighten any loose screws or bolts. This will ensure a sturdy and stable structure.
8. Double-check the assembly: Take a moment to review the entire frame assembly to ensure that all components are securely attached and properly aligned. Look for any missing or incorrectly placed parts that may have been overlooked during the process.
Throughout the assembly of the frame and base, pay attention to the details outlined in the instruction manual. Follow the recommended torque for screws and bolts, as overtightening can cause damage to the parts, while undertightening may result in a wobbly frame.
It’s important to note that different 3D printer kits may have variations in the assembly process. Therefore, always refer to the specific instruction manual provided with your kit for detailed and accurate instructions.
By carefully assembling the frame and base of your 3D printer, you lay the groundwork for a stable and reliable machine. Take your time, follow the instructions closely, and ensure all connections are secure. Once you have successfully assembled the frame and base, you’re ready to move on to the next step in building your own 3D printer.
Installing the Electronic Components
Once the frame and base of your 3D printer are securely assembled, it’s time to proceed with installing the electronic components. These components are the heart of your printer, responsible for controlling its movements and functions. Follow these steps to install the electronic components correctly:
1. Review the instruction manual: Before you begin, carefully read through the instruction manual provided by the kit manufacturer. Familiarize yourself with the electronic components included in the kit and understand their functions.
2. Prepare a static-free work area: It’s crucial to create a static-free environment to handle the delicate electronic components. Anti-static mats or wristbands can help dissipate static electricity and protect the components from damage. Keep your workspace clean and free from any excess clutter.
3. Identify the electronic components: Lay out all the electronic components included in the kit and ensure you can recognize each item. Common electronic components include the main control board, stepper motor drivers, LCD screen, and power supply unit.
4. Mount the main control board: Begin by mounting the main control board to its designated location on the frame. Typically, the control board is attached using screws or standoffs. Ensure the board is oriented correctly and securely fastened in place.
5. Install the stepper motor drivers: The stepper motor drivers control the movement of the printer’s motors. Insert the stepper motor drivers into their corresponding slots on the control board. Ensure they are properly aligned and fully seated, and secure them in place as per the instructions provided.
6. Connect the wiring: Carefully refer to the wiring diagrams provided by the kit manufacturer to connect the various components to the control board. This includes connecting the motors, endstops, fans, and heaters. Take extra care to align the polarity correctly and secure the connections with appropriate connectors or soldering, if necessary.
7. Attach the LCD screen: If your kit includes an LCD screen, mount it to the front panel of the printer. Connect the ribbon cable from the LCD screen to the corresponding connector on the control board. Depending on the kit, the process for attaching and configuring the LCD screen may vary, so follow the provided instructions carefully.
8. Connect the power supply: Connect the power supply unit to the control board following the instructions. Take note of the polarity and ensure a secure connection. Be cautious when handling high voltage components and always work with the power supply turned off.
Throughout the installation process, it’s important to exercise caution and follow the instructions meticulously. Handle the electronic components with care, avoiding excessive force or mishandling that could cause damage.
Always remember to ground yourself and take precautions against static electricity. A small discharge of static electricity can potentially damage sensitive electronic components, so it’s essential to discharge any static buildup from your body before handling the components.
By methodically installing the electronic components of your 3D printer, you are setting the stage for the printer’s functionality. Take your time, double-check your connections, and ensure everything is securely mounted and correctly wired. With the electronic components in place, you are one step closer to completing your very own 3D printer.
Wiring and Connecting the Printer Parts
Once the electronic components have been installed in your 3D printer, the next step is to wire and connect the various printer parts. This stage is crucial for ensuring that all the components work together seamlessly. Follow these steps to successfully wire and connect your printer parts:
1. Refer to the wiring diagram: The wiring diagram provided by the kit manufacturer serves as a guide for connecting the different parts of your printer. Carefully study the diagram to understand how each component should be wired to the main control board.
2. Organize and route the cables: Before starting the actual wiring process, take a moment to organize and route the cables neatly. Use cable ties or wire wraps to bundle and secure the cables together. This will help prevent tangling and make it easier to trace and troubleshoot connections in the future.
3. Connect the motors: Start by connecting the stepper motors to their corresponding drivers on the control board. The motors typically have four or six wires, which need to be connected to the corresponding terminals on the drivers. Ensure that the motor wires are connected in the correct order and polarity, as specified in the wiring diagram.
4. Wire the endstops: Endstops are switches that help the printer detect the position of the print head. Connect the endstop wiring to the appropriate terminals on the control board. It’s important to wire the endstops according to the correct axis – X, Y, and Z – to ensure accurate positioning during printing.
5. Connect the fans: Many 3D printers have cooling fans that help regulate the temperature of the electronics and the printed object. Connect the cooling fans to the designated connectors on the control board. Ensure that the polarity is correct, as reversing the polarity can result in the fan not functioning properly.
6. Wire the heaters: If your printer has heated elements, such as a heated bed or a hotend, wire the heaters using the appropriate connections on the control board. Pay close attention to the wattage and voltage requirements of the heaters and ensure that the wiring is capable of handling the necessary power.
7. Check and double-check the connections: Once all the components are wired, carefully inspect each connection to ensure that it is secure and properly seated. Loose or improperly connected wires can cause functionality issues or even damage certain parts of the printer.
8. Test the connections: Once the wiring is complete, power on the 3D printer and test the connections. Check that the motors move correctly, the endstops are detected, the fans spin, and the heaters heat up to the desired temperatures. Make any necessary adjustments or corrections to ensure everything is functioning as it should.
Throughout the wiring process, take your time and exercise caution. Double-check each connection and refer to the wiring diagram whenever needed. Properly wired and connected printer parts will ensure the smooth operation and functionality of your 3D printer.
Remember, if you encounter any issues during the wiring process, consult the manufacturer’s documentation, reach out to the community, or contact customer support for assistance. Building a 3D printer is a learning process, and with practice, you’ll become more proficient in wiring and connecting the different printer parts.
Mounting and Calibrating the Extruder
The extruder is a critical component of your 3D printer responsible for melting the filament and depositing it layer by layer to create your prints. Properly mounting and calibrating the extruder ensures precise and accurate printing. Follow these steps to successfully mount and calibrate the extruder:
1. Gather the necessary tools: Before beginning, ensure you have the necessary tools, including a screwdriver and an adjustable wrench or pliers, as you may need to tighten or adjust certain components.
2. Locate the extruder assembly: Identify the extruder assembly, which consists of the extruder motor, hotend, and extruder body. Familiarize yourself with the individual components and their functions.
3. Position the extruder assembly: Mount the extruder assembly to its designated location on the printer carriage or gantry. Secure it in place using screws or other fasteners as directed by the manufacturer. Make sure the extruder is properly aligned to ensure smooth filament feeding.
4. Check the extruder tension: Adjust the tension of the extruder by tightening or loosening the springs or other tensioning mechanisms. The correct tension ensures that the filament is properly gripped and fed into the hotend without slipping or causing excessive pressure.
5. Level the print bed: Leveling the print bed is crucial for achieving accurate prints. Follow the instructions provided by the manufacturer to level the print bed, adjusting the bed’s height using screws or knobs until it is perfectly level. This ensures that the nozzle is at the correct distance from the bed during printing.
6. Set the nozzle height: Adjust the height of the nozzle to the correct distance from the print bed. This distance, known as the nozzle height or “Z-offset,” ensures proper adhesion of the first layer. Using a feeler gauge or a piece of paper, adjust the nozzle height until there is a slight resistance when sliding the gauge or paper under the nozzle.
7. Test extrusion and calibration: Using the printer’s control panel or software interface, initiate a manual extrusion command to test the extruder’s performance. Ensure that the filament feeds smoothly through the extruder and flows evenly from the nozzle. Adjust the extrusion rate or temperature if necessary to achieve optimal results.
8. Fine-tune the extruder calibration: Fine-tune the extruder calibration by printing a calibration object, such as a single-walled cube or a calibration test pattern. Analyze the print quality and make adjustments as needed to achieve the desired level of accuracy and reliability. This may involve adjusting extrusion multipliers or flow rates in the printer’s firmware or software.
Throughout the mounting and calibration process, take your time and make small adjustments as needed. It’s essential to pay attention to detail to ensure smooth and accurate extrusion. Keep in mind that the calibration process may require several iterations and adjustments to achieve the desired results.
If you encounter any issues such as under-extrusion, over-extrusion, or improper layer adhesion, consult troubleshooting resources, online forums, or seek guidance from the manufacturer or the 3D printing community. The extruder calibration is a crucial step in achieving high-quality prints and may require some fine-tuning based on your specific printer setup and filament choices.
With a correctly mounted and calibrated extruder, you’ll have a solid foundation for producing precise and reliable 3D prints. Take your time, follow the instructions, and make necessary adjustments to achieve optimal results.
Configuring the Software Settings
Configuring the software settings of your 3D printer is a crucial step that determines how your printer operates and produces prints. This involves installing the necessary software, setting up the printer firmware, and configuring specific settings to optimize your printing experience. Follow these steps to successfully configure the software settings:
1. Install the printer firmware: The printer firmware is the software installed on the control board that controls the printer’s movements, temperatures, and other functionalities. Follow the manufacturer’s instructions to download and install the appropriate firmware for your printer model. This may involve using specific firmware software or programming tools.
2. Adjust printer settings: Use the firmware software or configuration interface to adjust the printer settings. This includes parameters such as build volume, bed size, nozzle diameter, temperature settings, and speed settings. Refer to the printer’s documentation or online resources to understand the impact of each setting and adjust them to match your specific printer setup.
3. Configure slicing software: Install slicing software on your computer, which converts your digital 3D models into instructions that the printer can understand. Depending on your preferences, popular slicing software includes Ultimaker Cura, PrusaSlicer, or Simplify3D. Configure the slicing software with details specific to your printer, such as the printer model, bed size, filament type, and print settings.
4. Fine-tune print settings: Within the slicing software, you can adjust print settings to achieve the desired print quality and performance. This includes layer height, infill density, print speed, support structures, and cooling settings. Experiment with different settings to find the optimal balance between print quality, print time, and material usage for your specific projects.
5. Save and export G-code: Once you have adjusted the settings in the slicing software, save and export the G-code file, which contains the instructions for the printer. The G-code file specifies the exact movements, temperatures, and extrusion rates for each layer of the print. Transfer the G-code file to an SD card or connect your computer directly to the printer to send the instructions for printing.
6. Perform test prints: To ensure that the software settings are properly configured, perform test prints. Start with simple objects that highlight various aspects of print quality, such as overhangs, bridges, and small details. Analyze the results and make adjustments to the software settings as needed to achieve the desired print quality and functionality.
7. Update and optimize: As you gain more experience with your printer, continue to update and optimize the software settings. Stay informed about firmware updates, new printer profiles, and software improvements. By regularly reviewing and adjusting the settings, you can keep your printer up to date and maximize its capabilities.
Remember that software settings can vary depending on your printer model and personal preferences. It’s essential to consult the documentation provided by the printer manufacturer, as well as online resources and user communities, to understand the specific software settings and make informed decisions.
By configuring the software settings of your 3D printer, you can fine-tune its performance and achieve the desired print results. Take your time to understand the parameters and settings, experiment with different configurations, and continuously optimize the software settings for optimal print quality and functionality.
Troubleshooting and Fine-tuning
Building and fine-tuning your own 3D printer is a continuous learning process, and it’s common to encounter challenges along the way. However, with a systematic approach to troubleshooting and fine-tuning, you can overcome obstacles and improve the performance of your printer. Here are some tips and techniques to help you through this process:
1. Identify the problem: When encountering an issue with your 3D printer, first try to identify the specific problem. Is it related to print quality, extrusion, bed adhesion, or mechanical issues? Understanding the root cause of the problem is crucial for effective troubleshooting.
2. Consult resources: Take advantage of online forums, user communities, and manufacturer support resources. These platforms are filled with experienced users who can provide guidance and solutions to common problems. Search for similar issues and solutions to get a better understanding of possible fixes.
3. Calibrate and level the print bed: Properly leveling the print bed ensures that the first layer adheres well and ensures accurate prints. Revisit the leveling process and make adjustments as necessary. Consider using tools such as a feeler gauge or an auto-leveling sensor for more precise leveling.
4. Check filament quality: Poor quality or improperly stored filament can lead to print issues. Ensure that your filament is stored in a dry and dust-free environment. Consider using a filament dryer or dehumidifier to maintain the optimal moisture content. Also, check for any obstructions or blockages in the filament path.
5. Fine-tune temperature settings: Temperature plays a crucial role in successful 3D printing. Experiment with different temperatures for the hotend and heated bed to find the optimal settings for your filament type. Consider adjusting the printing speed as well, as higher speeds can sometimes lead to print defects.
6. Adjust retraction settings: Retraction settings control the retraction and priming of the filament during travel moves. Improper retraction can cause stringing or oozing of filament, resulting in poor print quality. Experiment with different retraction distances and speeds to minimize stringing and achieve cleaner prints.
7. Evaluate and adjust print settings: Fine-tuning print settings such as layer height, infill density, and print speed can significantly impact print quality. Make small adjustments to these settings and observe the effects on the print outcome. Consider using calibration prints or benchmark models to assess and compare the results.
8. Update firmware and software: Stay up to date with the latest firmware and software releases for your printer. These updates often contain bug fixes, feature improvements, and optimized print profiles. Updating the firmware can resolve known issues and enhance the overall functionality of your 3D printer.
9. Keep notes and document changes: Throughout the troubleshooting process, keep detailed notes of the changes you make, the results you observe, and the solutions that work. This documentation will serve as a valuable resource for future reference, saving you time and effort in resolving similar issues.
10. Embrace the learning process: Troubleshooting and fine-tuning your 3D printer can be challenging, but it’s an opportunity for growth and learning. Embrace the process, don’t be discouraged by setbacks, and celebrate small victories along the way.
Remember, every 3D printer is unique, and it may take time and persistence to achieve optimal performance. Be patient, be willing to experiment, and continue to refine your printer’s settings based on your specific needs and preferences.
Conclusion
Congratulations on successfully building your own 3D printer! By following the step-by-step process, gathering the necessary tools and materials, and fine-tuning the various components, you have embarked on a rewarding journey into the world of DIY 3D printing. As you continue to explore and experiment, you’ll find endless opportunities to bring your ideas to life.
Building a 3D printer not only gives you a deeper understanding of how these machines work but also offers the flexibility to customize and upgrade your printer to suit your specific needs. From choosing the right kit to assembling the frame and base, installing electronic components, and configuring the software settings, each step plays a critical role in setting up a reliable and high-performing 3D printer.
Throughout the process, you may face challenges, encounter troubleshooting scenarios, and fine-tune various aspects of your printer. Remember to consult resources, seek guidance from the community, and embrace the learning process. With practice and persistence, you’ll become more proficient at identifying and resolving issues, optimizing print quality, and pushing the boundaries of creative possibilities.
As you continue your journey with your newly built 3D printer, remember to keep learning, experimenting, and staying up to date with the latest advancements in the field. Embrace the opportunity to explore different filaments, experiment with new designs, and share your creations with the growing 3D printing community.
Building your own 3D printer is a gateway to a world of limitless imagination and innovation. Whether you use it for prototyping, personal projects, or even small-scale production, your 3D printer is a powerful tool that empowers you to turn ideas into reality. So, unleash your creativity, push the boundaries of what’s possible, and enjoy the incredible journey of being a 3D printing enthusiast.