Introduction
Welcome to our step-by-step guide on how to add a photo to your Apple Watch face. With this simple customization, you can truly make your watch uniquely yours, by displaying a favorite photo, a cherished memory, or even an inspiring image right on your watch face.
Adding a photo to your Apple Watch face is a fun and personal way to personalize your device and make it reflect your style and personality. Whether it’s a picture of your loved ones, a breathtaking scenery, or a motivational quote, having a customized watch face can bring a smile to your face every time you glance at your wrist.
In this article, we will walk you through the step-by-step process of adding a photo to your Apple Watch face. This guide is designed to be beginner-friendly, so even if you’re new to the Apple Watch or technology in general, you’ll have no trouble following along.
Before we begin, it’s important to note that adding a photo to your watch face does require a connection to your iPhone. So make sure your Apple Watch is paired with your iPhone and they are within Bluetooth range. Now, let’s dive into the process and turn your Apple Watch into a personalized timepiece.
Step 1: Prepare the photo
The first step in adding a photo to your Apple Watch face is to choose and prepare the photo you want to use. Here’s how:
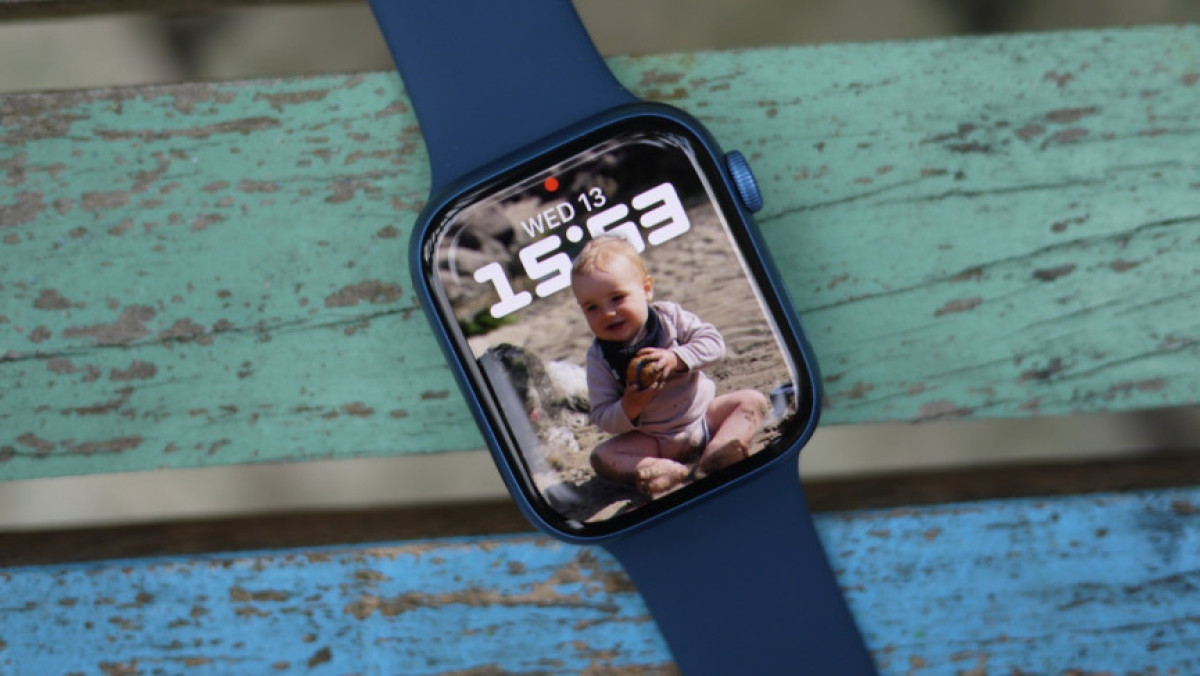
- Select a photo: Start by choosing the photo you want to display on your Apple Watch face. It could be a picture of your loved ones, a scenic landscape, a pet, or anything that brings you joy. Keep in mind that the photo will be resized and cropped to fit the watch face, so select a photo with a clear subject that will still be easily recognizable after resizing.
- Resize and crop: To ensure optimal display on the watch face, you’ll need to resize and crop the photo to fit the watch screen. You can use various photo editing apps or software to achieve this. Make sure to maintain the aspect ratio of the watch screen, which is rectangular in shape.
- Optimize for brightness: The Apple Watch screen is relatively small, so it’s important to optimize the brightness and contrast of the photo. Adjust the settings to enhance the visibility and clarity of the image on the watch face.
- Save the photo: Once you have resized, cropped, and adjusted the brightness, save the photo in a format compatible with your iPhone. Common formats like JPEG or PNG work fine for this purpose.
By following these steps, you will have a prepared photo that is ready to be added to your Apple Watch face. Next, we will guide you on how to connect your iPhone to your Apple Watch and access the customization options.
Step 2: Connect your iPhone to your Apple Watch
In order to customize the watch face on your Apple Watch, you’ll need to connect it to your iPhone. Follow these simple steps to establish the connection:
- Ensure Bluetooth is enabled: Make sure that Bluetooth is enabled on both your iPhone and your Apple Watch. You can check this in the settings menu of each device.
- Keep your devices close: Position your iPhone and Apple Watch within close proximity to ensure a stable Bluetooth connection. This will allow for seamless communication between the two devices.
- Open the Apple Watch app: On your iPhone’s home screen, locate and tap on the Apple Watch app. This app is pre-installed on most iPhones and has a white icon with an outline of an Apple Watch.
- Prompt pairing: Upon opening the Apple Watch app, it should detect your Apple Watch and prompt you to pair the devices. Follow the on-screen instructions to complete the pairing process.
- Enter passcode if necessary: Depending on your Apple Watch settings, you may be required to enter a passcode on your iPhone to confirm the pairing. Follow the prompts and enter the passcode when prompted.
- Wait for pairing to complete: Once the pairing process is initiated, your iPhone and Apple Watch will establish a connection. This process may take a few moments, so be patient and allow the devices to complete the pairing successfully.
Once the pairing is complete, you’ll be ready to access the Apple Watch customization options through the app on your iPhone and proceed to the next step of adding a photo to your watch face. Now let’s move on to the next step where we’ll delve into the Apple Watch app.
Step 3: Open the Apple Watch app on your iPhone
With your iPhone and Apple Watch connected, it’s time to open the Apple Watch app on your iPhone. This app will serve as the central hub for customizing your watch face. Follow these steps to open the app:
- Locate the Apple Watch app: On your iPhone’s home screen, look for the Apple Watch app icon. It’s a white icon with the outline of an Apple Watch.
- Tap on the Apple Watch app icon: Once you’ve located the app, simply tap on the icon to open it. The app will launch, displaying various options and settings for your Apple Watch.
- View the available watch faces: Within the Apple Watch app, you’ll find a range of watch face options to choose from. These include both pre-installed faces and customizable options.
- Explore the customization options: Take some time to explore the app and familiarize yourself with the customization options available. You’ll be able to tweak various aspects of your watch face, such as complications, colors, and, of course, adding a photo.
- Access the watch face settings: To add a photo to your watch face, access the settings for the specific face you want to customize. Tap on the Face Gallery tab to view the available face options.
Opening the Apple Watch app on your iPhone is the gateway to customizing your watch face. By following these steps, you’ll now be ready to select a watch face and begin the process of adding your favorite photo to it. In the next step, we’ll guide you through selecting a watch face that suits your style.
Step 4: Select a watch face
Now that you’ve opened the Apple Watch app on your iPhone, it’s time to choose a watch face for customization. The Apple Watch offers a wide range of watch face options to suit different styles and preferences. Here’s how you can select a watch face:
- Explore the available watch faces: Within the Apple Watch app, navigate to the Face Gallery tab. Here, you’ll find a selection of pre-installed watch faces, as well as additional options that can be downloaded.
- Browse through the options: Take some time to browse through the available watch faces. You can swipe left or right to view different styles, colors, and complications.
- Consider your preferences: Think about your personal style, the purpose of your watch, and what information you’d like to see at a glance. For example, if fitness is a priority, you might choose a watch face that includes health and activity complications.
- Select a watch face: Once you’ve found a watch face that appeals to you, tap on it to select it. This will open the customization options for that particular face.
Remember, you can always change your watch face later, so don’t worry too much about making the perfect choice right now. The goal is to find a watch face that you enjoy and can easily customize with your chosen photo. In the next step, we’ll guide you through the process of customizing the selected watch face with your photo.
Step 5: Customize the watch face
Now that you’ve selected a watch face, it’s time to customize it with your chosen photo. The Apple Watch app provides a variety of customization options to make your watch face truly unique. Follow these steps to personalize your watch face:
- Access the customization options: Within the Apple Watch app, navigate to the Face Gallery tab and select the watch face you want to customize.
- Tap on the “Customize” button: Once you’ve selected the watch face, look for the “Customize” button and tap on it. This will open the customization options for that specific face.
- Find the photo customization feature: Within the customization options, look for the option that allows you to add a photo to the watch face. This may be labeled as “Photo” or “Photo Album”.
- Select the photo source: Depending on the design of your watch face, you may have the option to choose a photo from your Photo Library or select a specific photo album.
- Choose the desired photo: Browse through your photo library or album and select the photo you prepared earlier for the watch face. It will be displayed on the watch face for preview.
- Preview and adjust settings: Take a moment to preview how the photo looks on the watch face. You may have the option to adjust the position, scale, or rotation of the photo to ensure it is displayed exactly as you want it.
By customizing the watch face with your photo, you’ll create a personalized timepiece that reflects your style and interests. Once you’re satisfied with the customization, it’s time to fine-tune the photo position and size, which we’ll guide you through in the next step.
Step 6: Add the photo to the watch face
With the watch face customization options open in the Apple Watch app, it’s time to add your chosen photo to the watch face. Follow these steps to seamlessly integrate the photo into your watch face:
- Locate the photo placement option: Within the customization options, find the setting that allows you to adjust the position and size of the photo on the watch face. This may be labeled as “Photo Position” or similar.
- Tap on the photo placement option: Tap on the appropriate setting to access the photo placement controls. This will usually display a preview of the watch face with the photo.
- Adjust the photo position: Use your finger to move the photo around the watch face preview. This will allow you to position the desired part of the photo within the boundaries of the watch face.
- Resize the photo if needed: If the photo appears too large or small, use pinch-to-zoom gestures to resize it. This will ensure that the photo fits perfectly within the allocated space on the watch face.
- Preview the finalized watch face: Once you’re happy with the photo placement and size, take a moment to preview the completed watch face. This will give you a clear idea of how the photo will appear when worn on your Apple Watch.
Adding your chosen photo to the watch face is the final step in creating a customized look that reflects your personal style and preferences. Take the time to perfect the positioning and size of the photo to ensure a visually appealing result. In the next step, we’ll guide you through saving the customized watch face for future use.
Step 7: Adjust the photo position and size
Once you have added the photo to your watch face, it’s important to adjust its position and size to achieve the desired appearance. Follow these steps to fine-tune the photo placement and ensure it looks just right on your Apple Watch:
- Access the photo customization options: Navigate to the section in the Apple Watch app that allows you to adjust the photo settings. This may be labeled as “Photo Position” or similar.
- Tap on the photo placement option: Once you have opened the photo customization options, tap on the setting that allows you to adjust the position and size of the photo on the watch face. This will bring up the photo placement controls.
- Move the photo: Use your finger to drag the photo within the boundaries of the watch face. This allows you to position the photo in your preferred location. Make sure to align it with any complications or elements on the watch face for a cohesive look.
- Resize the photo: If necessary, use pinch-to-zoom gestures to resize the photo. This will allow you to make it larger or smaller, ensuring it fits well on the watch face. Be mindful of maintaining the photo’s aspect ratio to prevent distortion.
- Preview the adjustments: Take a moment to preview the watch face with the adjusted photo. Pay attention to how it appears on the screen and make any necessary tweaks to achieve the desired placement and size.
- Refine as needed: Continuously adjust the photo’s position and size until you achieve the desired visual effect. Keep in mind that you want the photo to enhance your watch face without overpowering it.
By carefully adjusting the photo’s position and size, you’ll create a watch face that showcases your chosen image in the most aesthetically pleasing way. Once you are satisfied with the adjustments, it’s time to save your customized watch face for future use, which we’ll cover in the next step.
Step 8: Save the customized watch face
After fine-tuning the photo position and size, it’s time to save your customized watch face on your Apple Watch for easy access. Follow these simple steps to save and set your personalized watch face:
- Tap on the “Done” button: Once you are satisfied with the photo placement and size, locate the “Done” button in the Apple Watch app. This will finalize the customization process.
- Sync the changes: To apply the customized watch face to your Apple Watch, ensure that your iPhone and Apple Watch are connected and within Bluetooth range. The changes you made in the Apple Watch app will sync with your Apple Watch.
- Access the watch face on your Apple Watch: On your Apple Watch, press the digital crown to go to the watch face. From there, swipe left or right to find the customized watch face you created.
- Set the custom watch face: Once you’ve located the customized watch face, tap on it to set it as your current watch face. Your Apple Watch will now display your chosen photo, positioned and sized according to your preferences.
- Enjoy your personalized watch face: Now you can enjoy your custom watch face, featuring your favorite photo, every time you check the time or glance at your Apple Watch. It’s a unique and personal touch that sets your watch apart.
Remember, you can always return to the Apple Watch app on your iPhone to further customize or change your watch face. Explore different styles and experiment with different photos to suit your mood or the occasion. Have fun exploring the possibilities and make your Apple Watch truly yours!
Conclusion
Congratulations! You have successfully learned how to add a personalized photo to your Apple Watch face. By following the step-by-step guide we provided, you can now create a watch face that reflects your unique style and preferences.
Adding a photo to your watch face not only adds a personal touch but also allows you to carry cherished memories, inspiring images, or your loved ones with you wherever you go. Every time you check the time or catch a glimpse of your Apple Watch, you’ll be reminded of what matters most to you.
Remember to take your time in selecting the perfect photo and customizing the watch face to ensure it aligns with your vision. Experiment with different styles, colors, and photo placements to find the combination that speaks to you.
Furthermore, don’t be afraid to explore other customization options offered by the Apple Watch app. Try out different complications, colors, and watch faces to create a truly personalized device that suits your lifestyle and needs.
Now that you have the knowledge and skills to add a photo to your Apple Watch face, go ahead and unleash your creativity. Make your watch a conversation starter and a reflection of your individuality.
We hope you enjoyed this guide and that it has empowered you to make the most of your Apple Watch. Have fun customizing your watch face and enjoy the unique experience it brings!