Introduction
Welcome to the exciting world of 3D scanning! Are you fascinated by the ability to capture real-world objects and turn them into digital models? Do you want to bring your imagination to life with 3D printing? If so, you’ve come to the right place. In this article, we will explore the process of building and using a 3D scanner.
Advancements in technology have made 3D scanning more accessible than ever before. What was once a complex and expensive process reserved for professionals is now within the reach of hobbyists and enthusiasts. With the right hardware, software, and know-how, you can create detailed and accurate 3D scans of objects or even entire environments.
Whether you’re interested in creating 3D models for design and prototyping, virtual reality experiences, or archiving precious artifacts, having a 3D scanner provides endless possibilities. You can capture the intricate details of sculptures, replicate objects for preservation, or even create customized products. The creative potential is limited only by your imagination.
In this article, we will guide you through the process of making your own 3D scanner. We will cover the essential hardware components and discuss the technology behind 3D scanning. We will also explore the necessary software and tools to process and refine your scans. By the end, you will have a comprehensive understanding of the steps involved in building and operating a 3D scanner.
Whether you are a beginner or have some experience with 3D scanning, this article will provide you with the knowledge and guidance to embark on your scanning journey. So, let’s dive in and discover the fascinating world of 3D scanning!
Overview of 3D Scanning
3D scanning is the process of capturing the shape and geometry of real-world objects or environments and creating digital models of them. This technology has revolutionized numerous industries, such as manufacturing, healthcare, architecture, and entertainment. By using a combination of hardware and software, 3D scanning allows us to create accurate representations of physical objects in a digital format.
There are various methods used in 3D scanning, ranging from structured light and laser scanning to photogrammetry and time-of-flight scanning. Each method offers different advantages and is suitable for different applications. The basic principle behind most 3D scanners is to emit a light source or capture multiple images of an object from different angles, and then use algorithms to reconstruct a 3D model from this data.
One of the main benefits of 3D scanning is its ability to capture intricate details and complex geometries that may be challenging to replicate through traditional modeling methods. This makes it an invaluable tool for industries such as animation, video game development, and product design.
Furthermore, 3D scanning allows for the preservation and replication of valuable artifacts and historical monuments. By creating digital replicas, we can safeguard these objects against damage or deterioration and share their beauty and significance with a wider audience.
Another significant application of 3D scanning is in the medical field, where it is used for custom prosthetics, orthotics, and implants. By scanning a patient’s body or specific body parts, healthcare professionals can create personalized medical devices that fit perfectly and enhance patient comfort and treatment outcomes.
Moreover, 3D scanning plays a crucial role in reverse engineering, where existing objects are scanned and analyzed to recreate their digital models. This is especially useful in industries where parts or components need to be replaced or replicated, such as automotive and aerospace engineering.
As technology continues to advance, 3D scanning is becoming more accessible and affordable. With the availability of consumer-grade scanners and open-source software, individuals and small businesses can now harness the power of 3D scanning for various creative and practical purposes.
In the next sections, we will explore the necessary hardware, software, and techniques involved in building and using a 3D scanner. By gaining a deeper understanding of the technology, you will be able to make informed choices and achieve high-quality results in your scanning projects.
Choosing the Right Hardware
When it comes to building a 3D scanner, choosing the right hardware is crucial to ensure accurate and reliable results. There are several key components to consider, each playing a vital role in the scanning process.
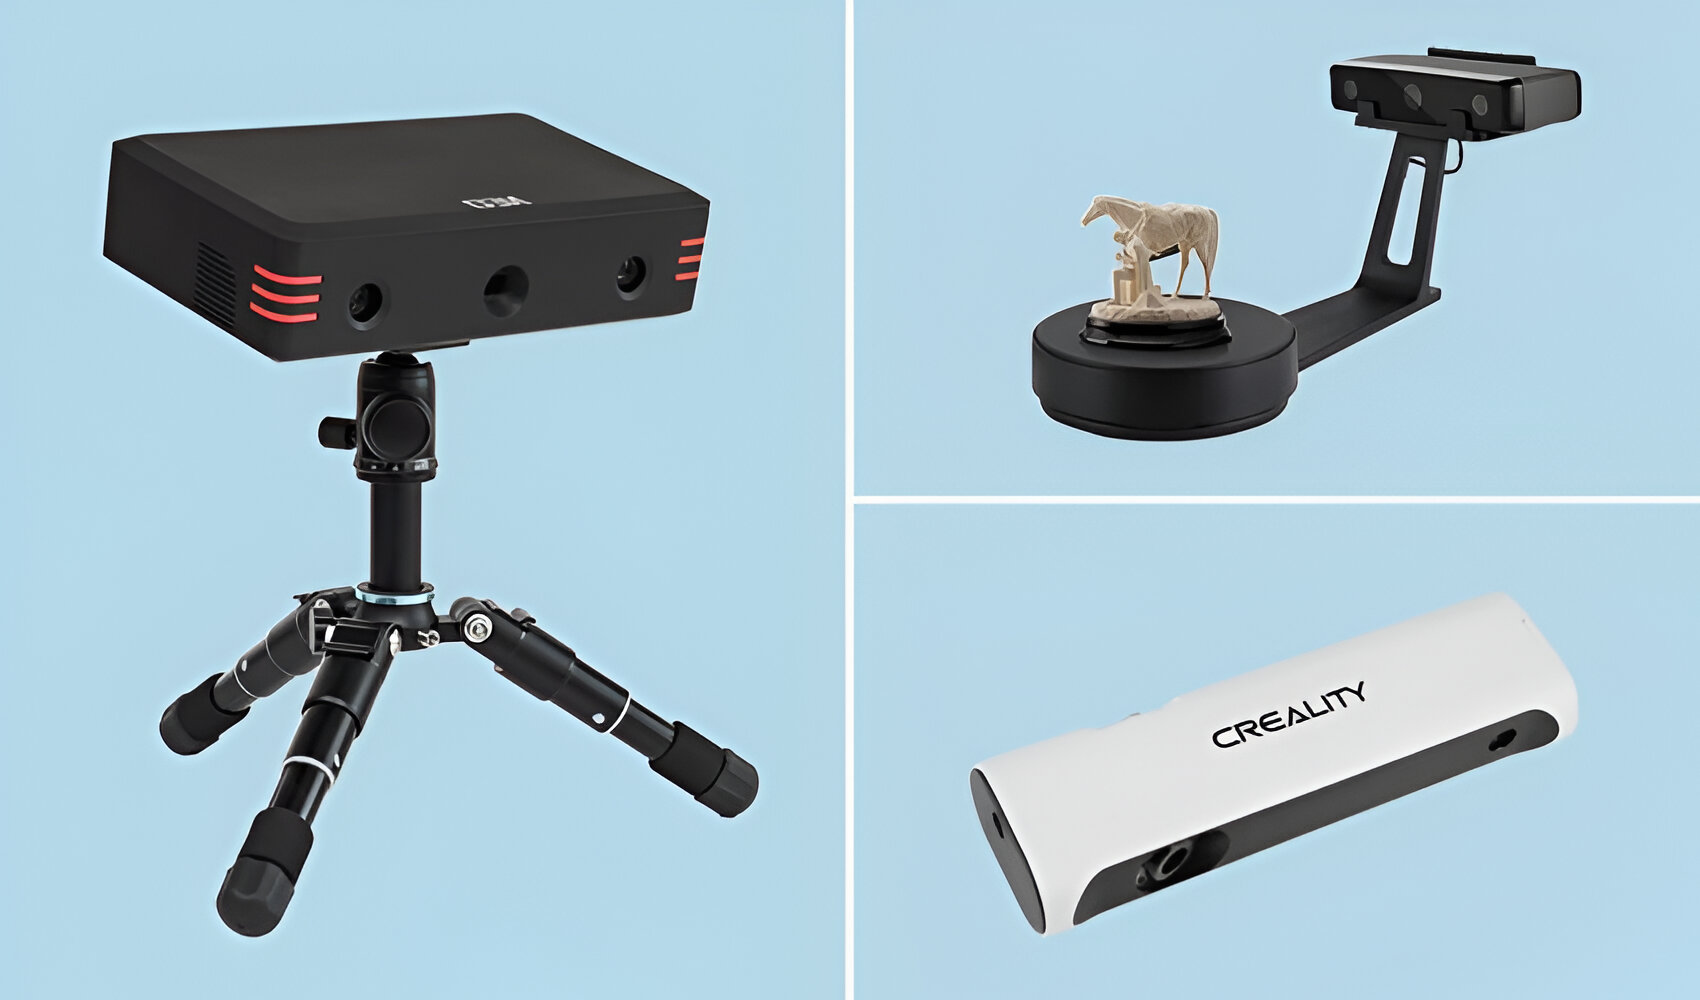
The first and most important hardware component is the sensor or scanner itself. There are various types of scanners available, including structured light scanners, laser scanners, and depth sensing cameras. Each type has its own strengths and limitations, so it’s important to choose one that suits your specific needs.
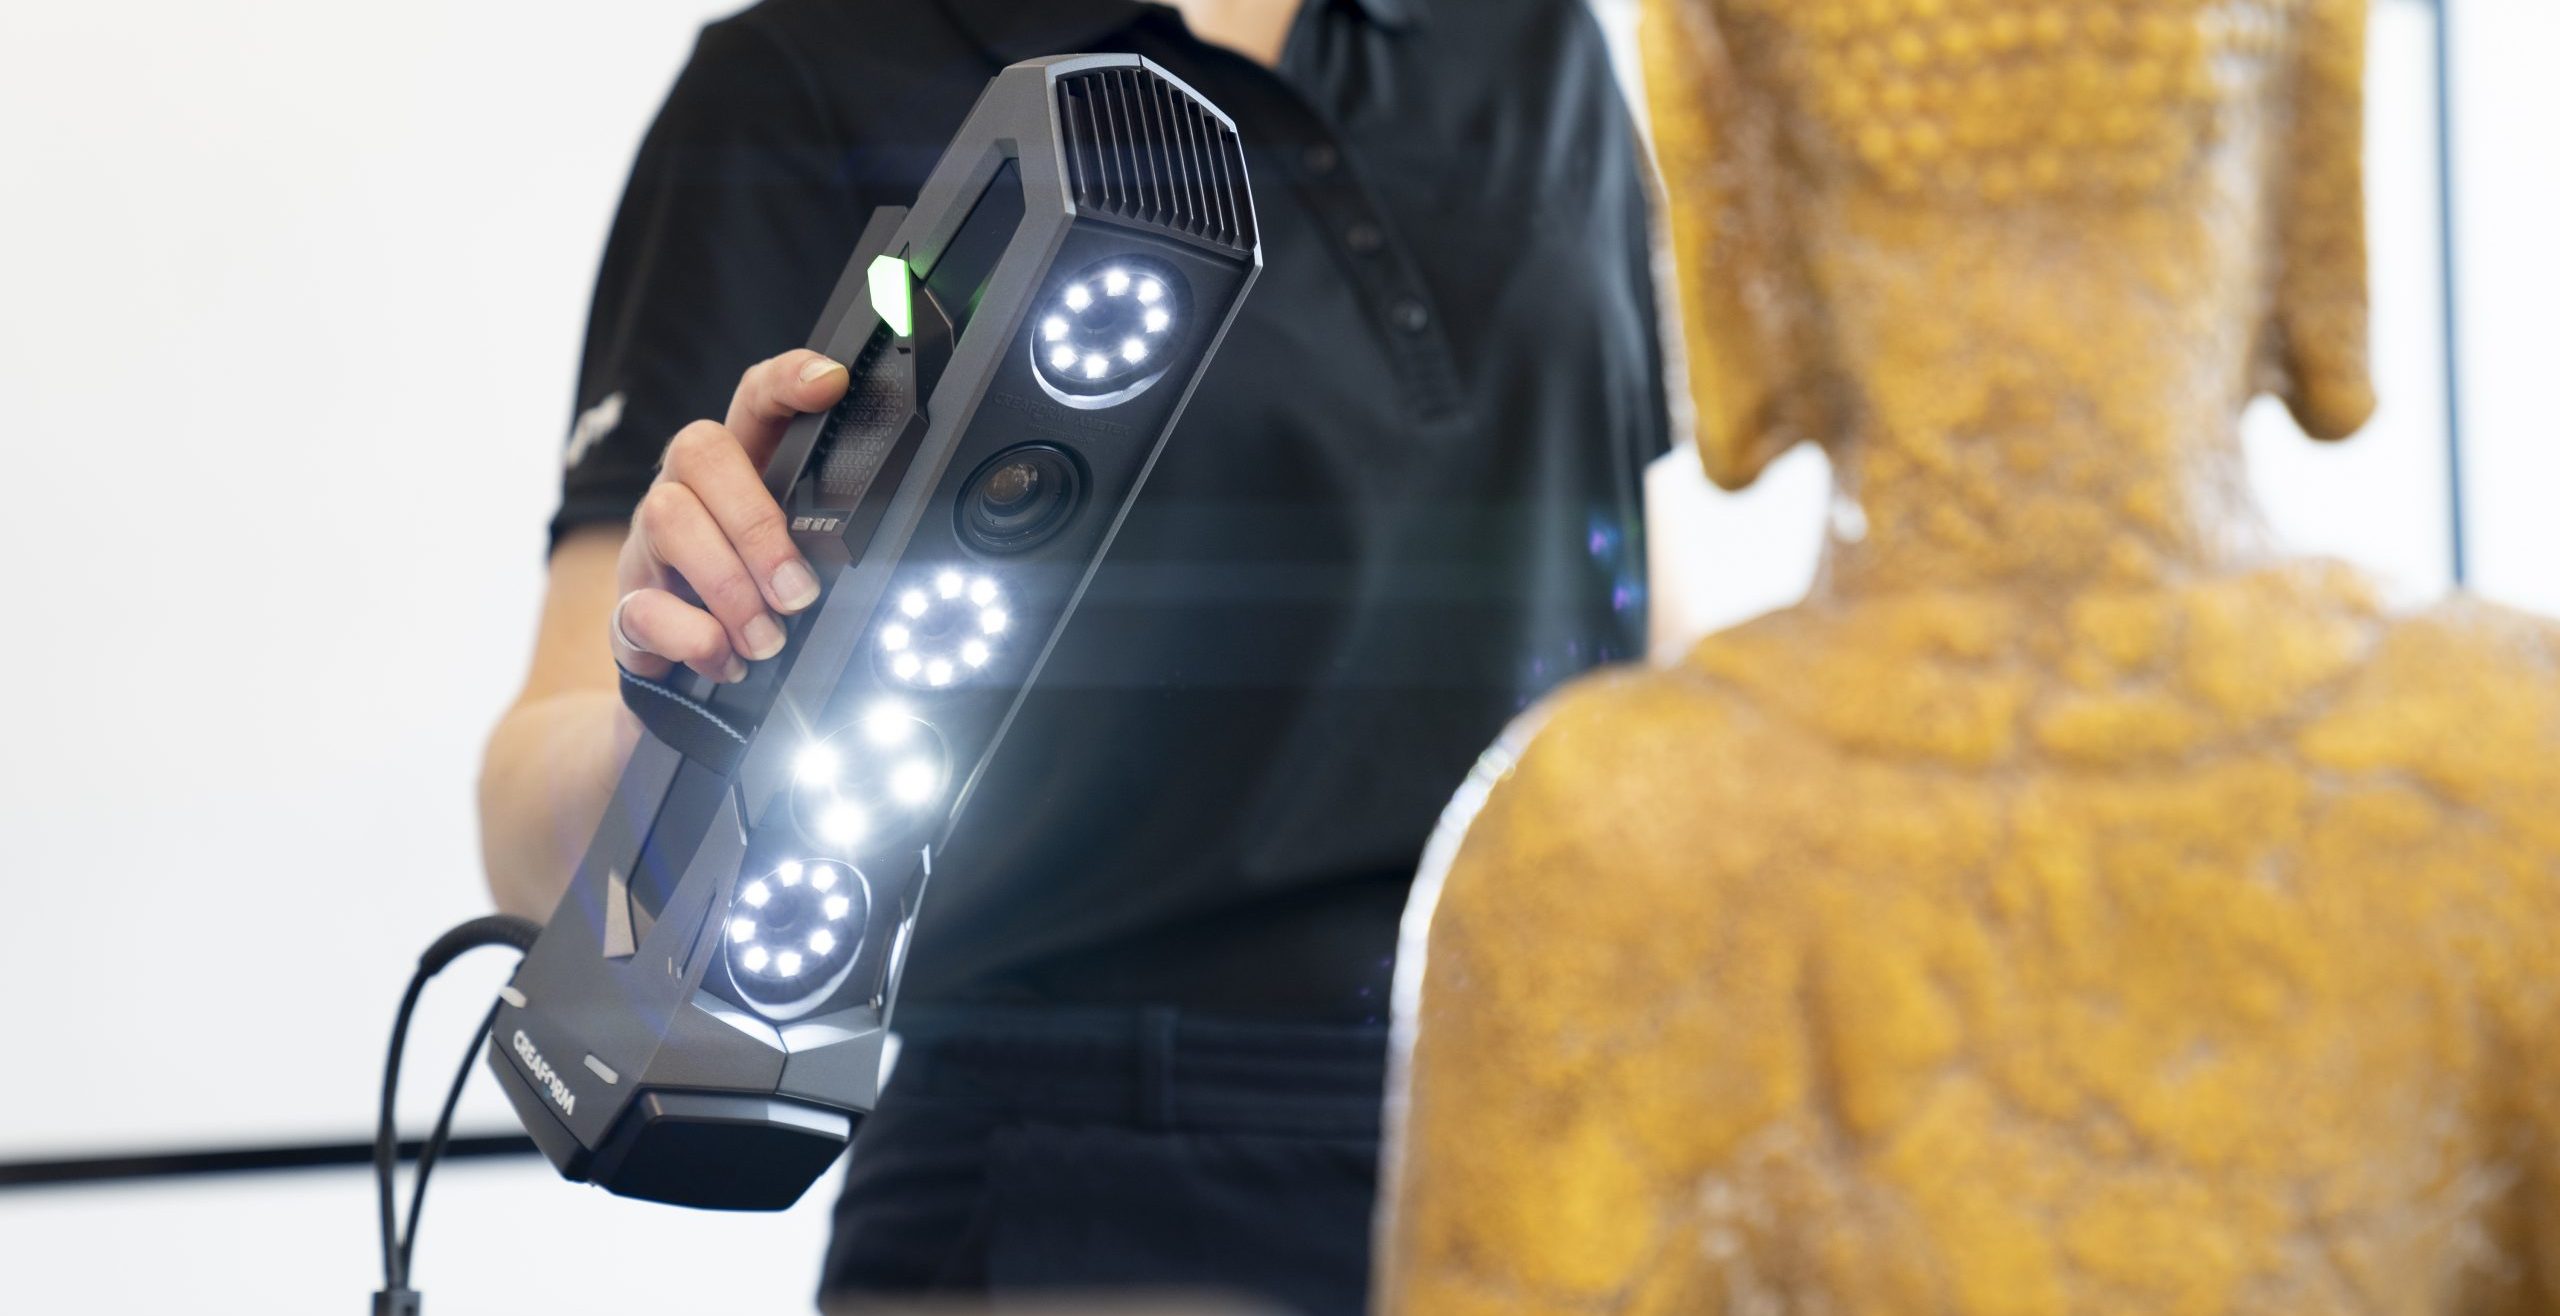
Structured light scanners use a projector and a camera to capture the object’s shape. They project a pattern of structured light onto the object and analyze the distortions in the pattern, allowing them to reconstruct a 3D model. These scanners are ideal for capturing fine details and are commonly used in industries such as art and archaeology.
Laser scanners, on the other hand, use laser beams to sweep across the object and measure the distance to create a 3D point cloud. They are known for their high accuracy and are widely used in industries like engineering and manufacturing where precision is crucial.
Depth sensing cameras, such as those found in smartphones and gaming consoles, use infrared technology to measure the distance between the camera and the object. These cameras offer a straightforward and cost-effective solution for basic 3D scanning tasks but may have limitations in terms of accuracy and resolution.
In addition to the scanner, you will also need a stable and adjustable scanning platform. This platform should be able to hold the object securely and allow for easy positioning and rotation during the scanning process. A turntable or a mechanical arm can be used to automate the scanning process and improve efficiency.
Depending on the type of scanner chosen, you may also need additional accessories such as calibration panels or targets. These tools help to ensure accurate measurements and eliminate any errors or distortions in the scanning process.
Lastly, it’s important to consider the compatibility and connectivity of the hardware with your computer or smartphone. Ensure that the scanner is compatible with the operating system and software you plan to use, and that it can connect via USB, Wi-Fi, or other available interfaces.
Before purchasing any hardware, research and compare different options to find the one that best suits your needs and budget. Consider factors such as scanning accuracy, resolution, ease of use, and available software support. Reading reviews and seeking advice from experts in the field can also provide valuable insights to help you make an informed decision.
Now that we have covered the essential hardware components, let’s move on to understanding the technology and techniques used in 3D scanning.
Understanding the Technology
To successfully build and operate a 3D scanner, it’s essential to have a solid understanding of the technology behind it. Let’s take a closer look at the key concepts and techniques involved in 3D scanning.
At its core, 3D scanning is a process of capturing the geometry and shape of a real-world object and converting it into a digital representation. This is achieved by using various sensing technologies, such as structured light, lasers, or depth sensing cameras, to measure the distance between the scanner and the object’s surface.
One of the fundamental techniques used in 3D scanning is triangulation. Triangulation involves projecting a known pattern of light or laser onto the object and capturing the deformation of the pattern as it interacts with the surface. By analyzing these deformations, the scanner can calculate the distance to different points on the object, thus creating a 3D point cloud.
Another common technique is photogrammetry, which involves capturing multiple images of the object from different angles and positions. By analyzing the overlapping features in these images, the software can reconstruct the 3D geometry of the object. Photogrammetry is widely used in applications where high accuracy and detail are required, such as digital preservation of cultural heritage artifacts.
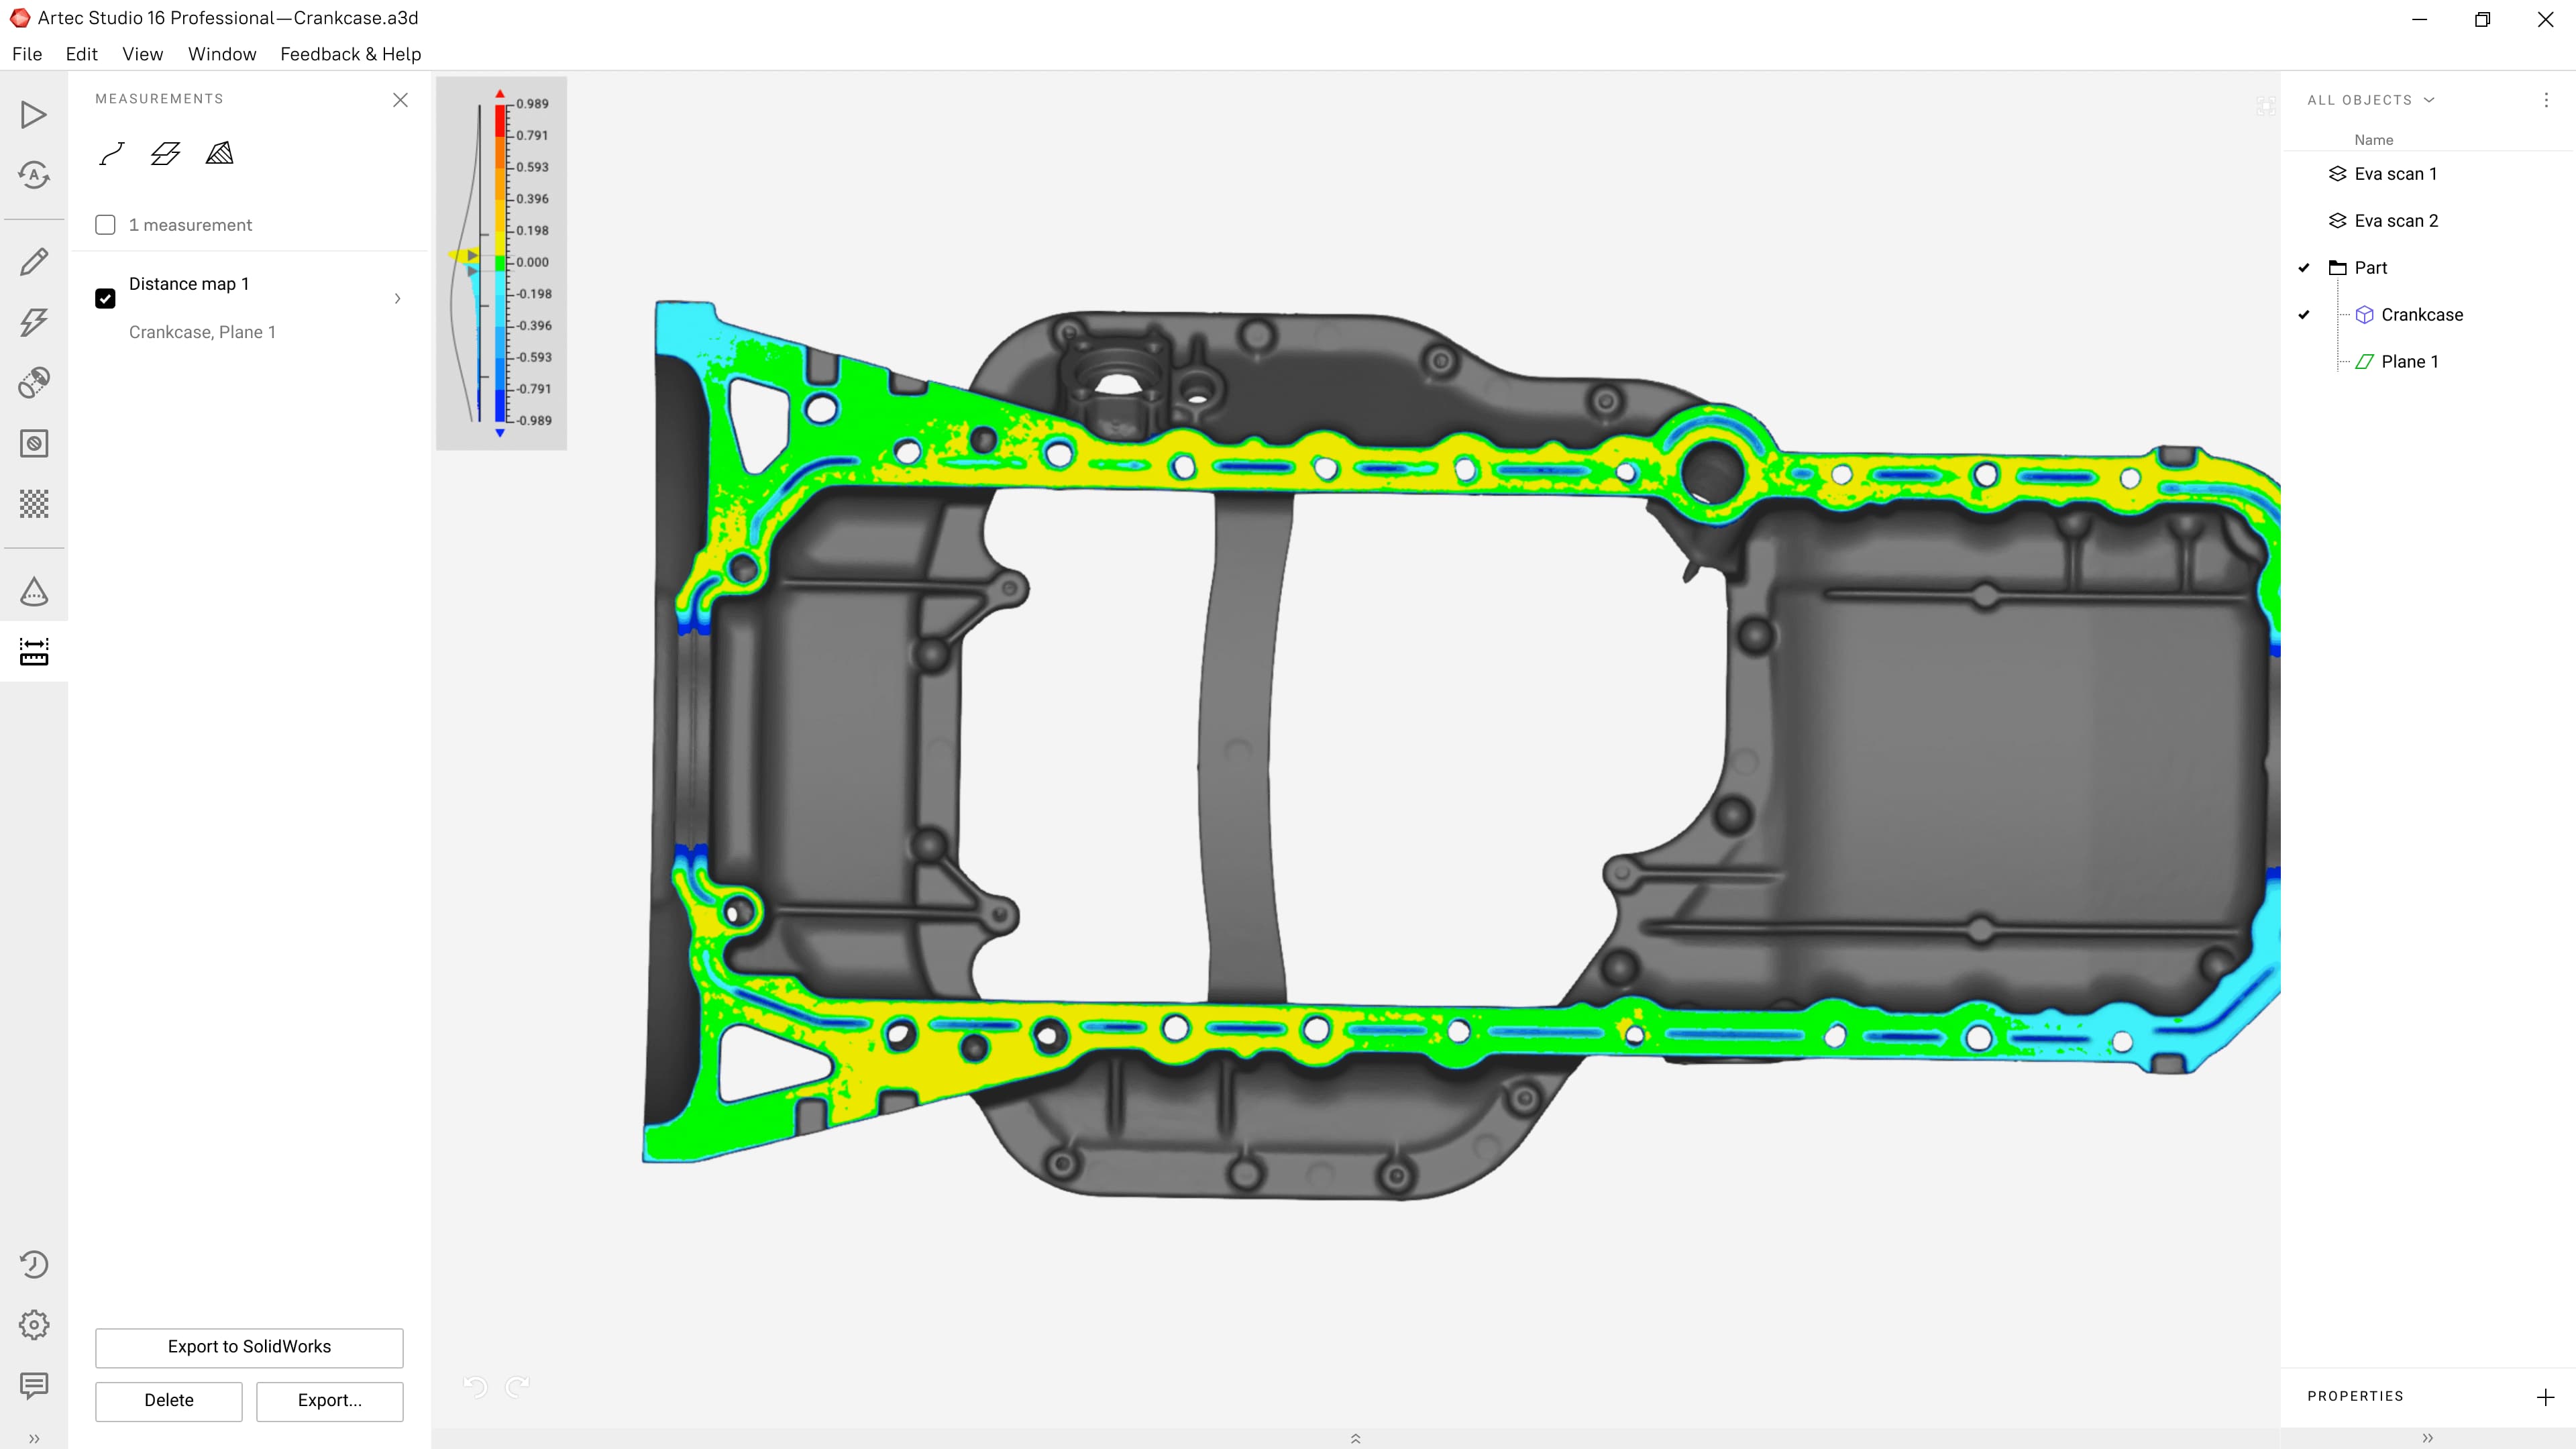
Regardless of the technique, the raw data collected during the scanning process needs to be processed and converted into a usable 3D model. This is done through a process called point cloud processing, which involves cleaning up and aligning the individual data points to create a coherent and accurate 3D representation of the object. Several software tools are available for point cloud processing, ranging from free open-source options to commercial software with advanced features.
It’s important to note that the level of accuracy and detail achieved in the 3D model depends on several factors, including the resolution of the scanner, the distance between the scanner and the object, and the quality of the calibration. Understanding these factors and how they impact the scanning process is crucial for obtaining high-quality results.
Moreover, the technology used in 3D scanning is continually evolving, with advancements such as real-time scanning, multi-sensor integration, and machine learning-based algorithms. These advancements are enabling faster scanning speeds, higher accuracy, and improved automation, making 3D scanning more accessible and efficient than ever before.
By understanding the underlying technology and techniques involved in 3D scanning, you will be better equipped to troubleshoot any issues that arise during the scanning process and optimize your workflow for the best results.
Now that we have explored the technology behind 3D scanning, let’s move on to discussing the necessary software and tools needed for the scanning process.
Necessary Software and Tools
When it comes to 3D scanning, having the right software and tools is essential for processing and refining the scanned data. In this section, we will discuss the necessary software and tools needed to achieve accurate and high-quality 3D scans.
First and foremost, you will need software that can process the raw data captured by the scanner and convert it into a usable 3D model. There are numerous software options available, ranging from beginner-friendly and free options to more advanced and commercial software. Some popular choices include MeshLab, Blender, Autodesk ReCap, and Artec Studio.
These software tools offer features for cleaning up the point cloud data, aligning multiple scans, and creating a watertight surface mesh. They also provide options for texture mapping, color correction, and exporting the final model in various file formats compatible with 3D printing or further editing in CAD software.
In addition to the software, you may also need specific tools to aid in the scanning process. These tools include calibration targets or panels, which are used to calculate and compensate for any distortions in the scanning system. Calibration targets provide known reference points for accurate measurements and alignment.
Furthermore, depending on the type of scanner and software used, you may require additional equipment such as color texture cameras or specialized lighting setups to capture color information and enhance the overall appearance of the 3D models.
When choosing the software and tools, consider factors such as the compatibility with your scanner, the learning curve involved, and the desired level of accuracy and functionality. It can be helpful to explore online forums and communities dedicated to 3D scanning to gather recommendations and insights from experienced users.
Lastly, staying updated with the latest software updates and advancements is important to ensure you are utilizing the most efficient and effective tools available. Developers are continually improving the capabilities and user experience of scanning software, so taking advantage of new features and optimizations can greatly enhance your scanning process.
By investing in reliable and capable software and tools, you can streamline your scanning workflow and produce professional-quality 3D models for your desired applications.
Now that we have covered the necessary software and tools, let’s move on to the exciting part – building your own 3D scanner!
Building Your 3D Scanner
Building your own 3D scanner can be a rewarding and cost-effective way to delve into the world of 3D scanning. In this section, we will outline the basic steps involved in building a 3D scanner.
1. Research and Planning: Start by researching different DIY 3D scanner projects and understanding the components and techniques involved. Determine the type of scanner you want to build based on your specific needs and budget. Identify the hardware components required and create a detailed plan for the construction process.
2. Acquire the Necessary Components: Once you have a clear plan, gather the required hardware components such as the scanner sensor, calibration panels, motorized turntable, and other accessories. Ensure that the components are compatible and of good quality.
3. Assemble the Hardware: Follow the instructions provided with the components and assemble the hardware according to the design. This may involve connecting the scanner sensor to a mount, attaching the turntable, and setting up any necessary cables or power sources.
4. Install and Configure the Software: Once the hardware is assembled, install the necessary software on your computer. Ensure that the software is compatible with your scanner and operating system. Follow the software instructions to configure the settings and calibrate the scanner if required.
5. Test and Calibrate: Before using the scanner on actual objects, it is important to run tests and calibrations to ensure accurate results. Scan a calibration target or panel and compare the scans with known measurements to identify any calibration issues. Make necessary adjustments to improve the accuracy of your scans.
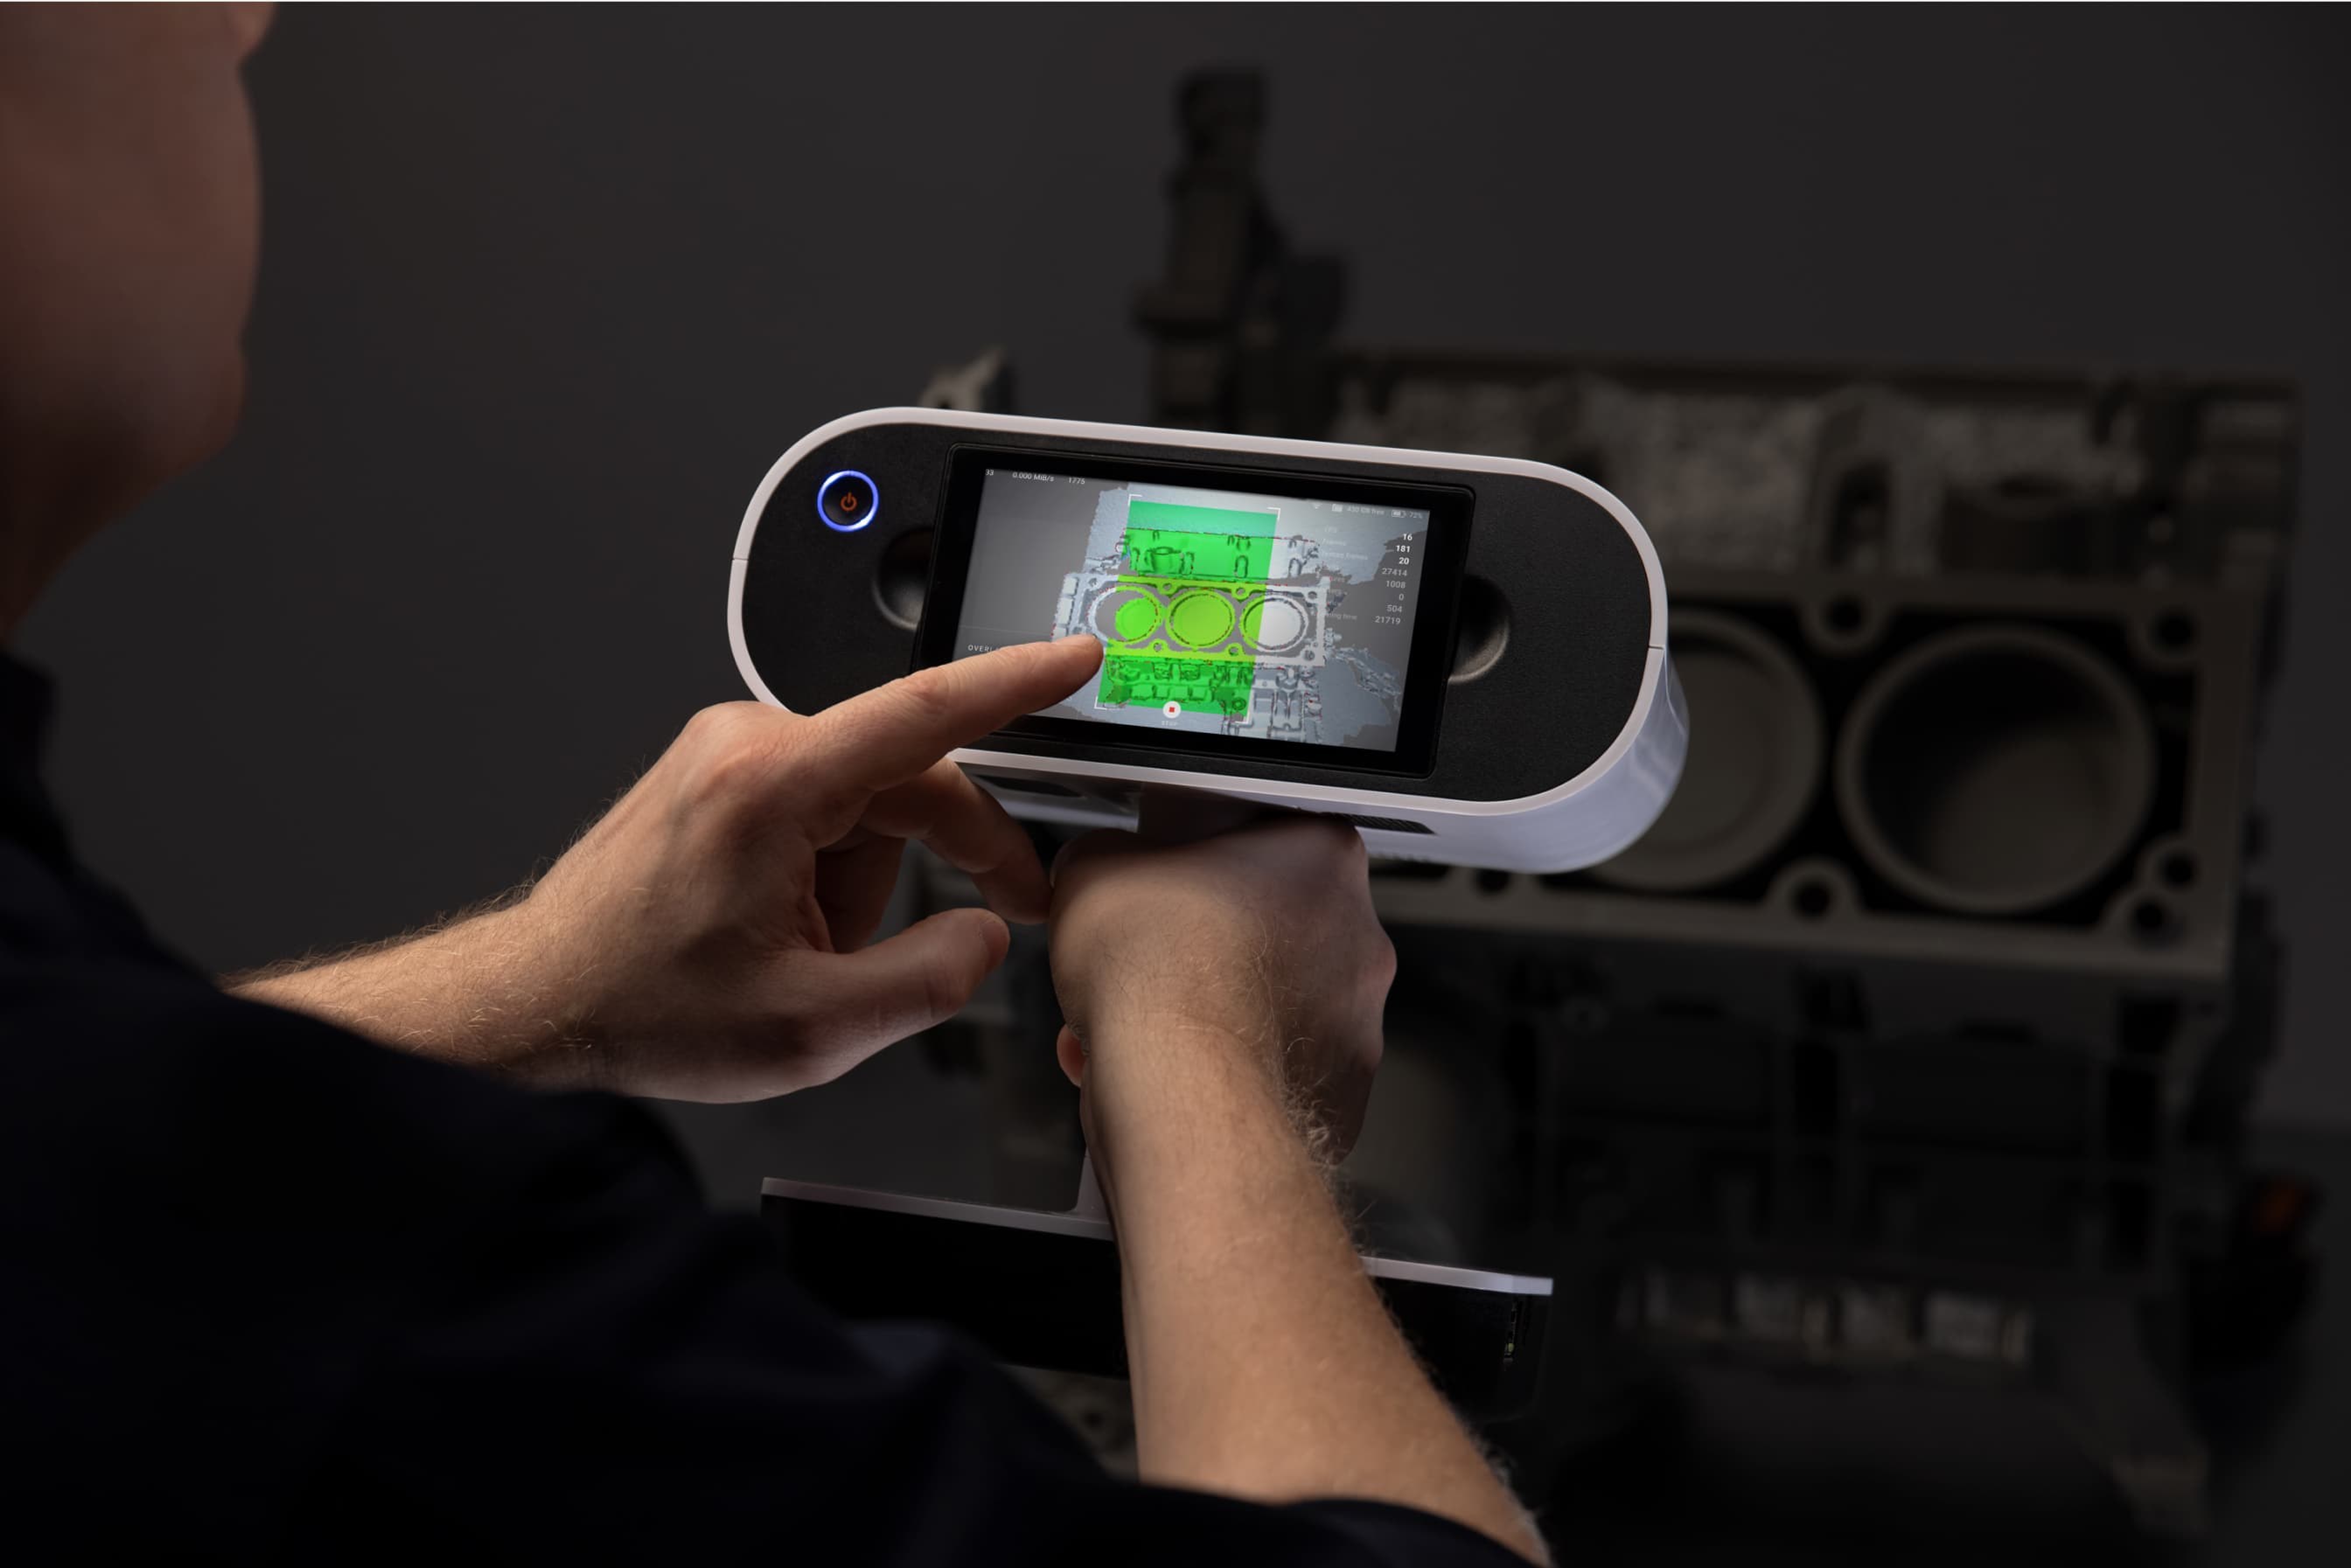
6. Start Scanning: Once your scanner is calibrated and tested, you are ready to start scanning. Position the object to be scanned on the turntable or scan it manually, depending on your setup. Control the scanning process through the software interface and capture multiple scans from different angles to ensure complete coverage.
7. Process and Refine the Scans: After capturing the scans, import them into the scanning software and align and merge the individual scans to create a complete 3D model. Use the software tools to clean up the data, remove any noise or errors, and refine the mesh. Remember to save your progress regularly.
8. Output and Use the 3D Models: Once your 3D model is processed and refined, export it in a suitable file format for further use. You can 3D print the model, import it into CAD software for modifications, or use it in virtual reality experiences and visualizations.
Building your own 3D scanner allows you to customize the hardware and software according to your needs and budget. It also provides a hands-on learning experience that helps deepen your understanding of 3D scanning principles and techniques.
Now that you have built your 3D scanner, it’s time to explore calibration and testing to ensure optimal performance. Let’s dive into the next section!
Calibration and Testing
Calibration and testing are essential steps in ensuring the accuracy and reliability of your 3D scanner. In this section, we will explore the importance of calibration and provide guidance on how to perform tests to validate your scanner’s performance.
Calibration is the process of aligning and adjusting your 3D scanner to minimize any systematic errors or distortions in the captured data. Proper calibration is crucial for achieving accurate and consistent results in your scans.
One common calibration method is the use of calibration panels or targets. These panels consist of known geometric patterns that are scanned using the 3D scanner. By comparing the scanned data with the known reference measurements, you can determine any calibration issues and make the necessary adjustments in your scanning software.
During the calibration process, pay attention to factors such as the distance between the scanner and the panel, the lighting conditions, and the quality of the scanning surface. Making sure these factors are consistent and controlled will help improve the accuracy of your scanner.
Once your scanner has been calibrated, it’s important to perform tests to validate its performance. These tests can help identify any remaining errors or limitations in the scanning system.
One common test is the resolution test, which determines the level of detail that your scanner can capture. You can use a test object with known features of different sizes and scan it at various distances to analyze how accurately the scanner captures the details. This will give you an understanding of the resolution capabilities of your scanner.
Another important test is the accuracy test, which evaluates how closely the scanner measurements match the true dimensions of an object. You can do this by scanning an object with known dimensions and comparing the scanned data with the actual measurements. This test allows you to identify any systematic errors and make necessary adjustments to improve the accuracy of your scanner.
In addition to resolution and accuracy tests, you may want to perform tests for other aspects of your scanner’s performance, such as noise levels, scanning speed, and color accuracy (if applicable).
Document any calibration procedures and test results for future reference. This will help you track the performance of your scanner over time and troubleshoot any issues that may arise in the future. Regular calibration and testing will ensure that your scanner continues to deliver accurate and reliable results.
By performing proper calibration and testing, you can have confidence in the accuracy of your 3D scans and use them effectively for your desired applications.
Next, we will discuss some useful tips and troubleshooting techniques to help you optimize your 3D scanning process.
Tips and Troubleshooting
As you embark on your 3D scanning journey, it’s helpful to keep some tips and troubleshooting techniques in mind to ensure smooth and successful scanning sessions. In this section, we will provide you with some valuable tips and strategies to optimize your 3D scanning process and troubleshoot common issues that may arise.
1. Lighting: Adequate lighting is crucial for capturing accurate and detailed scans. Ensure that the object is evenly illuminated, minimizing shadows and reflections that can affect scan quality. Consider using diffused lighting techniques or specialized lighting setups for challenging objects or environments.
2. Surface Preparation: Before scanning, prepare the object’s surface to ensure optimal results. Clean the object to remove dust, fingerprints, or any other debris that may affect the scan quality. For reflective or transparent objects, consider using anti-glare sprays or applying temporary markers to improve scan accuracy.
3. Stability and Alignment: Ensure that both the scanner and the object are stable and properly aligned during the scanning process. Any movement or misalignment can result in inaccurate scans. A tripod or stable platform can help minimize vibrations and maintain consistent positioning.
4. Overlapping Scans: Capturing multiple scans from different angles is essential to capture complete and detailed 3D models. Ensure that each scan overlaps with the previous one to allow for accurate alignment during post-processing. Overlapping by around 30-50% is generally recommended.
5. Scan in Small Sections: If scanning larger objects, consider breaking them down into smaller sections for better control and accuracy. Scanning smaller sections allows for easier manipulation of the object and reduces the potential for errors in aligning and merging the scans.
6. Post-processing: Take the time to learn and experiment with different post-processing techniques to refine your 3D models. This may involve cleaning up the mesh, filling in gaps or holes, and enhancing the overall appearance of the model using software tools. Each software may have its own set of tools and techniques, so explore the options available and practice to improve your skills.
7. Troubleshooting: If you encounter issues during the scanning process, take a methodical approach to troubleshooting. Check the calibration of your scanner, examine the scanning environment for any interfering factors, and ensure that all hardware components are functioning properly. Check for software updates or compatibility issues and consult online communities or support forums for assistance.
8. Practice and Patience: Like any skill, 3D scanning takes practice and patience to master. Experiment with different settings, objects, and techniques to improve your scanning skills. Learn from each scan and refine your process over time.
By implementing these tips and techniques, you can overcome common challenges in 3D scanning and achieve higher quality and more accurate results.
As we conclude this article, we hope the information shared has provided you with valuable insights into the world of 3D scanning. Remember to stay curious, explore new technologies and techniques, and continue to push the boundaries of what is possible with your own 3D scanner.
Conclusion
Building and operating a 3D scanner opens up a world of possibilities and creativity. Throughout this article, we have explored the various aspects of 3D scanning, from understanding the technology to choosing the right hardware, software, and tools. We’ve also discussed the importance of calibration, testing, and troubleshooting to ensure accurate and reliable scans.
By building your own 3D scanner, you have the freedom to customize it according to your specific needs and budget. It allows you to delve into the fascinating world of 3D scanning, capturing real-world objects and turning them into digital models that can be used for a wide range of applications.
Remember to research and choose the right hardware and software for your project, considering factors such as accuracy, resolution, and compatibility. Take the time to calibrate your scanner and perform tests to validate its performance. This will ensure that your scans are accurate and reliable.
Don’t forget to implement our tips and strategies to optimize your scanning process. Pay attention to lighting, surface preparation, stability, and overlapping scans to achieve the best results. And in case you encounter any issues, approach troubleshooting with a systematic approach and seek advice from fellow enthusiasts and experts in the field.
Building and using a 3D scanner is a continuous learning process, requiring practice, patience, and a willingness to explore new techniques. Embrace the challenges and keep expanding your skills and knowledge in the field of 3D scanning.
So, are you ready to embark on your 3D scanning journey? Unleash your creativity, capture the world around you, and bring your imagination to life with the power of 3D scanning!