Introduction
A Uninterruptible Power Supply (UPS) is an essential device that provides backup power to your electronic equipment during power outages or fluctuations. It acts as a protective shield against sudden power failures, preventing potential damage or data loss. However, over time, the UPS battery may start to deteriorate, leading to a decrease in backup time and compromised performance.
Repairing a UPS battery is a cost-effective solution that can extend the lifespan of the battery and restore its functionality. In this step-by-step guide, we will walk you through the process of repairing your UPS battery, ensuring that it continues to provide reliable backup power when you need it the most.
Before diving into the repair process, it’s crucial to understand the basics of UPS batteries. These batteries are typically sealed lead-acid (SLA) batteries, commonly known as valve-regulated lead-acid (VRLA) batteries. Unlike conventional lead-acid batteries, VRLA batteries are maintenance-free, eliminating the need for regular fluid checks and top-ups.
A UPS battery operates by converting stored chemical energy into electrical energy when the main power supply is interrupted. This conversion takes place through a chemical reaction within the battery, releasing electrons to produce electricity. Over time, this process can lead to the accumulation of sulfation and corrosion on the battery terminals, reducing its overall performance.
Recognizing the signs of a failing UPS battery is essential for identifying whether repair is necessary. Common symptoms include a decrease in backup time, frequent alarms or beeping from the UPS, or the inability to hold a charge. If you notice any of these warning signs, it’s likely that your UPS battery needs attention.
Before starting the repair process, it’s crucial to prioritize safety to avoid any potential mishaps. Make sure to wear protective gloves and goggles to shield yourself from any battery acid or chemical spills. Additionally, gather the necessary tools for the repair, including a multimeter, distilled water, battery terminal cleaner or a mixture of baking soda and water, a soft brush, and a charger capable of supplying the correct voltage to the UPS battery.
Now that you have a basic understanding of UPS batteries and the signs of a failing battery, let’s move on to the step-by-step process of repairing your UPS battery and restoring its functionality.
Understanding UPS Batteries
Before diving into the process of repairing a UPS battery, it’s important to have a solid understanding of how these batteries work and the different types available in the market. UPS batteries are typically categorized as sealed lead-acid (SLA) batteries, specifically valve-regulated lead-acid (VRLA) batteries, which are maintenance-free and commonly used in UPS systems.
VRLA batteries are designed to be sealed, preventing the escape of gases and electrolyte, making them ideal for use in UPS systems where ventilation may be limited. These batteries are also known for their excellent cycle life, which refers to the number of charge and discharge cycles the battery can endure before it starts to deteriorate.
There are two main types of VRLA batteries used in UPS systems: absorbed glass mat (AGM) batteries and gel batteries. AGM batteries use a sponge-like material made of fiberglass between the plates to hold and distribute the electrolyte. This design allows AGM batteries to have a higher power density and faster recharging capabilities compared to traditional flooded lead-acid batteries.
Gel batteries, on the other hand, use a gelled electrolyte that immobilizes the electrolyte and reduces the risk of leakage or spills. These batteries have a longer float life and are more resistant to higher temperatures compared to AGM batteries. However, gel batteries tend to have a lower power density and may require a slower recharge rate.
Understanding the type of battery used in your UPS system is crucial, as it can determine the specific maintenance and repair procedures required. It’s important to refer to the manufacturer’s guidelines and specifications to ensure that you are following the correct procedures for your particular UPS battery.
Additionnaly, it’s important to note that UPS batteries have a finite lifespan and will eventually degrade over time. The typical lifespan of a UPS battery ranges from 3 to 5 years, depending on factors such as usage, temperature, and environmental conditions. Regular maintenance and periodic testing can help extend the lifespan of the battery and ensure its reliable performance.
Overall, having a solid understanding of UPS batteries and their different types is essential before attempting any repairs. By familiarizing yourself with the specific characteristics and maintenance requirements of your UPS battery, you can effectively troubleshoot and address any potential issues, prolonging the battery’s lifespan and maximizing its performance.
Signs of a Failing UPS Battery
A failing UPS battery can cause significant disruptions and potential damage to your electronic devices. It’s important to be able to recognize the signs of a failing UPS battery so that you can take appropriate actions to address the issue. Here are some common indicators that your UPS battery may be failing:
- Decrease in backup time: One of the most obvious signs of a failing UPS battery is a decrease in the amount of time it can provide backup power. If you notice a significant reduction in the backup time compared to the original specifications, it could indicate that the battery is no longer holding a proper charge.
- Constant beeping or alarms: UPS systems are equipped with audible alarms that alert you to any potential issues or problems. If you constantly hear beeping or alarms coming from your UPS, it could be a sign that the battery needs attention.
- Inability to hold a charge: If your UPS battery has trouble holding a charge and requires frequent recharging, it could be a sign of internal damage or degradation. A healthy UPS battery should be able to hold a charge for an extended period without any issues.
- Visible signs of physical damage: Inspect the UPS battery for any visible signs of physical damage, such as bulging or leaking. Physical damage can indicate a more severe problem with the battery and may require immediate attention.
- Overheating: A failing UPS battery may generate excessive heat during charging or discharging. If you notice that the battery feels unusually hot to the touch or if the surrounding area becomes excessively warm, it’s a clear indication that there is an issue with the battery.
- Foul odor: In some cases, a failing UPS battery may emit a foul odor. If you detect a strong, sulfurous smell coming from the battery, it could be a sign of internal damage and electrolyte leakage.
It’s important to note that while these signs can indicate a failing UPS battery, they may also be symptomatic of other underlying issues. It’s recommended to properly diagnose the UPS system and battery using appropriate testing equipment to confirm if the battery is indeed the cause of the problem.
By being vigilant and proactive in identifying these signs, you can take appropriate steps to repair or replace the failing UPS battery, ensuring that your electronic devices remain protected and operational during power outages or fluctuations.
Safety Precautions and Tools Needed
Before you begin repairing your UPS battery, it’s important to prioritize safety by following proper precautions and having the necessary tools on hand. Working with batteries involves some risks, so it’s essential to take the following safety measures:
- Protective Gear: Wear protective gloves and goggles to shield yourself from any battery acid or chemical spills. This will help prevent any contact with harmful substances and minimize the risk of injury.
- Well-Ventilated Area: Work in a well-ventilated area to ensure proper air circulation. This will help dissipate any fumes that may be emitted during the process and minimize the risk of inhaling harmful gases.
- Disconnect Power: Before starting any repairs, disconnect the UPS system from the power source to avoid electric shocks or accidents. This will ensure that there is no live electrical current flowing through the system while you work on it.
- Tools: Gather the necessary tools for the repair, including a multimeter, distilled water, battery terminal cleaner or a mixture of baking soda and water, a soft brush, and a charger capable of supplying the correct voltage to the UPS battery. These tools will assist you in testing, cleaning, and recharging the battery.
The multimeter will be used to measure the battery voltage, ensuring that it is within the acceptable range. Distilled water is essential for replenishing any electrolyte lost during the repair process. Battery terminal cleaner or a mixture of baking soda and water will help clean any corrosion or sulfation build-up on the battery terminals. A soft brush can be used to gently scrub away the residue. Finally, a charger capable of supplying the correct voltage is necessary for recharging the UPS battery.
By adhering to these safety precautions and having the proper tools, you can minimize the risks associated with UPS battery repair and work in a safe and controlled manner. Always prioritize safety to protect yourself and avoid any accidents or injuries.
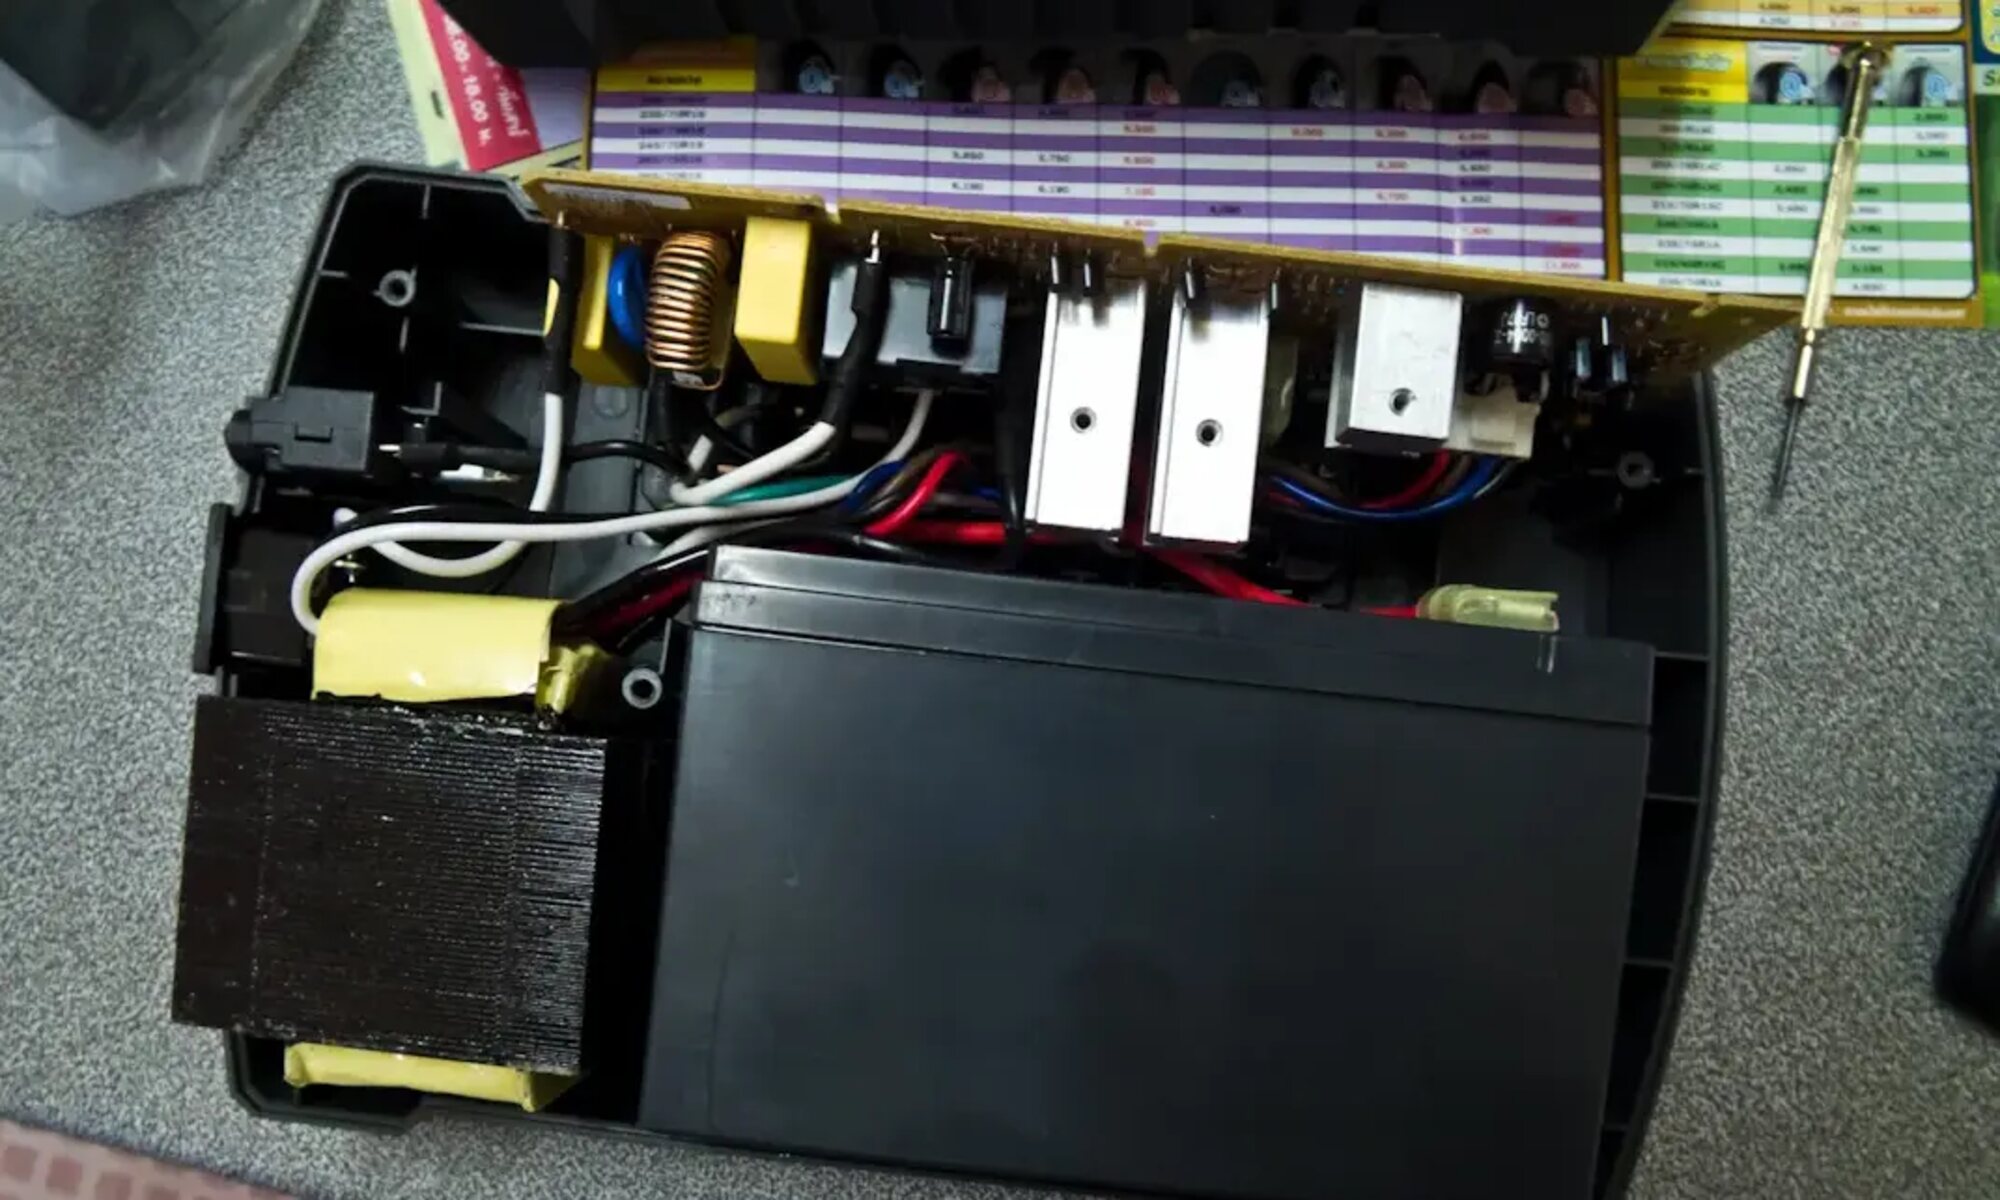
Step 1: Disconnect and Inspect the UPS Battery
The first step in repairing a UPS battery is to disconnect it from the power source and thoroughly inspect it for any signs of damage or degradation. Here’s how to perform this crucial initial step:
- Disconnect the UPS: Begin by disconnecting the UPS system from the power source to ensure your safety. This will prevent any live electrical current from flowing through the system as you work on the battery.
- Power Off the UPS: Make sure the UPS is turned off before proceeding. This will prevent any accidental discharges or electrical shocks during the inspection process.
- Remove the Battery Compartment Cover: Depending on the UPS model, you may need to remove the battery compartment cover to access the battery. Refer to the manufacturer’s instructions for your specific UPS model to determine the correct procedure.
- Inspect for Physical Damage: Carefully examine the UPS battery for any signs of physical damage, such as bulging, leaking, or corroded terminals. Physical damage can indicate a more severe problem with the battery and may require immediate attention or replacement.
- Check Battery Connections: Ensure that the battery terminals are securely connected and not loose. Loose connections can cause erratic behavior or poor performance. If you find any loose connections, tighten them appropriately.
- Inspect for Sulfation or Corrosion: Look for any signs of sulfation or corrosion on the battery terminals. Sulfation appears as a whitish powder or crystal-like substance, while corrosion may appear as a greenish or powdery substance. Use a soft brush or battery terminal cleaner to gently remove any buildup.
- Check for Battery Seal Integrity: Examine the battery case to ensure that the seal is intact and there are no cracks or leaks. A compromised seal can lead to electrolyte leakage and damage internal components.
By disconnecting and inspecting the UPS battery, you can identify any visible damage or issues that may be affecting its performance. This step will help you determine the appropriate course of action for repairs or replacement. If you encounter any major physical damage or if the battery looks severely degraded, it may be necessary to replace the battery entirely. However, if the battery appears to be in good condition with only minor issues, you can proceed with the subsequent steps to repair and restore its functionality.
Step 2: Cleaning the Battery Terminals
Cleaning the battery terminals is an essential step in the UPS battery repair process as it helps remove any sulfation or corrosion buildup that may be affecting the battery’s performance. Here’s how you can effectively clean the battery terminals:
- Gather the Necessary Materials: Prepare a mixture of baking soda and water or use a commercial battery terminal cleaner. You will also need a soft brush or toothbrush, gloves, and safety goggles for protection.
- Put on Protective Gear: Before beginning the cleaning process, put on gloves and safety goggles to protect yourself from any potential contact with battery acid or cleaning chemicals.
- Disconnect the Battery Cables: Ensure that the UPS is powered off and safely disconnect the battery cables from the terminals. Take note of the positive and negative markings on the battery terminals.
- Dip the Brush in the Cleaning Solution: Depending on the chosen method, either dip the brush in the baking soda and water mixture or apply the battery terminal cleaner to the brush. Ensure that the brush is adequately saturated but not dripping with the cleaning solution.
- Scrub the Battery Terminals: Gently scrub the battery terminals with the brush to remove any corrosion or sulfation buildup. Pay close attention to all areas of the terminals, including the clamps and posts, to ensure thorough cleaning.
- Rinse with Distilled Water: After scrubbing, rinse the battery terminals with distilled water to remove any residual cleaning solution or debris. This will prevent any potential chemical reactions or residue from affecting the battery’s performance.
- Dry the Terminals: Once rinsed, use a clean cloth or paper towel to thoroughly dry the battery terminals. Ensure that no moisture remains on the terminals to avoid any potential short circuits or damage.
- Reconnect the Battery Cables: Once the terminals are completely dry, safely reconnect the battery cables to the appropriate terminals, ensuring that the positive and negative connections are correct.
- Perform a Visual Inspection: After cleaning and reconnecting the terminals, visually inspect them to ensure that they are clean and securely connected. Confirm that there is no visible corrosion or sulfation remaining.
By cleaning the battery terminals, you remove any obstacles that may hinder the battery’s performance. This step is particularly important in maintaining good electrical conductivity and ensuring a solid connection between the battery and the UPS. Remember to exercise caution and wear protective gear throughout the cleaning process to minimize any potential risks.
Step 3: Testing the Battery Voltage
Testing the battery voltage is an essential step in the UPS battery repair process. It allows you to determine the current state of the battery and whether it is holding a proper charge. Here’s how you can effectively test the voltage of your UPS battery:
- Gather the Necessary Tools: You will need a multimeter capable of measuring DC voltage and a proper set of probes to perform the test.
- Set the Multimeter: Set the multimeter to measure DC voltage within an appropriate range for your battery. Typically, the range will be between 0 and 20 volts.
- Connect the Probes: Connect the multimeter probes to the positive and negative terminals of the battery. Ensure that the red probe is connected to the positive terminal and the black probe is connected to the negative terminal.
- Read the Voltage: Once the probes are securely connected, read the voltage displayed on the multimeter. A healthy UPS battery should read around 12 volts or slightly higher. Lower readings may indicate a weak or discharged battery.
- Measure Open-Circuit Voltage: For a more accurate assessment, disconnect the battery from the UPS system and let it rest for a few hours. Afterward, repeat the voltage measurement to obtain the open-circuit voltage. A fully charged battery should read around 12.6 volts or slightly higher.
- Compare with Manufacturer’s Specifications: Consult the manufacturer’s specifications for your specific UPS battery model and compare the measured voltage with the recommended range. This will give you a better understanding of the battery’s condition and whether it falls within acceptable parameters.
- Interpret the Results: If the measured voltage falls significantly below the manufacturer’s specified range, it indicates a discharged or weak battery that may require recharging or replacement. However, if the voltage is within the acceptable range, you can proceed with the repair process.
Testing the battery voltage provides valuable information about the overall health and capacity of the UPS battery. If it falls below the recommended range, it is an indication that the battery may be unable to provide sufficient backup power. In such cases, the next step would involve recharging the battery to restore its functionality and extend its lifespan.
Step 4: Recharging the UPS Battery
Recharging the UPS battery is a crucial step in the repair process as it helps restore the battery’s charge and capacity. Here’s how you can effectively recharge your UPS battery:
- Gather a Compatible Charger: Ensure that you have a charger capable of supplying the correct voltage and current for your UPS battery. Using an incompatible charger can lead to overcharging or damage to the battery.
- Connect the Charger: Safely connect the charger to the battery terminals, ensuring that the positive and negative connections are correct. Double-check the manufacturer’s instructions or guidelines to ensure proper polarity.
- Set the Charging Parameters: Configure the charger settings to match the specifications of your UPS battery. This includes setting the appropriate voltage and charging current, which can typically be found in the battery’s documentation.
- Initiate the Charging Process: Once the charger is properly connected and set, initiate the charging process by turning on the charger. Monitor the charging progress and ensure that it proceeds smoothly without any signs of overheating or unusual behavior.
- Monitor the Charging Time: The charging time will vary depending on the capacity and condition of the battery. Refer to the battery manufacturer’s guidelines for the recommended charging duration. Avoid overcharging the battery, as it can lead to cell damage or reduced lifespan.
- Perform Regular Voltage Checks: Periodically check the voltage of the battery during the charging process using a multimeter. Once the voltage reaches the recommended level specified by the manufacturer, disconnect the charger and proceed to the next step.
- Allow a Rest Period: After disconnecting the charger, allow the battery to rest for a few hours before proceeding. This rest period helps stabilize the charge and ensures accurate voltage readings during the next steps.
Recharging the UPS battery is essential for restoring the battery’s capacity and functionality. The duration of the charging process will depend on the specific battery model and its current state. Proper monitoring of the charging progress and adherence to the manufacturer’s guidelines will help ensure a successful recharge.
Remember, recharging is not a guaranteed solution if the battery is severely damaged or degraded. If you notice that the battery does not hold a charge even after the recharging process, it may be necessary to replace the battery entirely.
Step 5: Reconnecting the UPS Battery
After successfully recharging the UPS battery, the next step is to reconnect it to the UPS system. Here’s a step-by-step guide on how to effectively reconnect the battery:
- Turn off the UPS System: Before reconnecting the battery, make sure that the UPS system is powered off to prevent any electric shock or damage.
- Locate the Battery Compartment: Open the battery compartment or access panel of the UPS system to find the terminals where the battery connects.
- Identify the Battery Terminals: Take note of the positive (+) and negative (-) terminals on both the UPS system and the battery itself. This will ensure proper polarity during the reconnection process.
- Connect the Positive Terminal: Carefully attach the positive cable or wire from the UPS system to the positive terminal of the battery. This may involve sliding the connector over the terminal or tightening a screw or bolt.
- Connect the Negative Terminal: Similarly, connect the negative cable or wire from the UPS system to the negative terminal of the battery. Ensure a secure connection to avoid any loose or unstable connections.
- Check for Proper Polarity: Double-check that the positive and negative terminals are correctly aligned and securely connected. Incorrect polarity can cause damage to the UPS system or the battery.
- Secure the Battery Compartment: Once the battery is properly connected, secure the battery compartment or access panel of the UPS system. This will protect the battery and ensure its stability during operation.
- Power on the UPS System: Finally, power on the UPS system and monitor the status indicators to ensure that it recognizes the reconnected battery. The system should indicate that the battery is in a healthy state and ready to provide backup power.
Reconnecting the UPS battery completes the repair process and allows the battery to resume its role in providing backup power during outages or fluctuations. Make sure to double-check the polarity and the secureness of the connections to avoid any potential issues or damage. With the battery properly reconnected, your UPS system will be ready to provide reliable power protection for your electronic devices.
Step 6: Verifying the UPS Battery Status
After reconnecting the UPS battery, it’s important to verify its status to ensure that the repair process was successful and the battery is functioning as expected. Here’s how you can effectively verify the UPS battery status:
- Power on the UPS System: Turn on the UPS system and ensure that it operates correctly. Verify that the battery backup function is enabled and that the system recognizes the reconnected battery.
- Check the UPS Indicators: Monitor the indicators or display panel on the UPS system to see if it indicates that the battery is charging or in a healthy state. Some UPS systems provide specific status indicators for the battery.
- Run a System Test: Most UPS systems have a built-in self-test or diagnostic feature. Initiate a system test to evaluate the battery’s performance and ensure that it can sustain the load during a simulated power outage. Observe the results to confirm that the battery is functioning properly.
- Monitor Runtime: Check the UPS system’s runtime or battery backup time during normal operation. Compare it to the specifications provided by the manufacturer. If the runtime aligns with the expected backup time, it indicates that the battery is functioning as intended.
- Perform Regular Maintenance: To ensure the longevity and optimal performance of the UPS battery, schedule regular maintenance tasks such as checking for signs of physical damage, cleaning the battery terminals, and monitoring the battery voltage periodically.
- Keep an Eye on Warning Signs: After verifying the UPS battery status, remain vigilant for any warning signs of potential issues in the future. Be attentive to changes in backup time, increased alarm frequency, or any significant drops in battery performance, as they may indicate a need for further maintenance or battery replacement.
By verifying the UPS battery status, you can ensure that the repair process was successful and that the battery is functioning as expected. Regular monitoring and maintenance will help prolong the battery’s lifespan and ensure that it continues to provide reliable backup power when needed.
It’s important to note that even with repair and maintenance, UPS batteries have a limited lifespan. If you notice significant degradation in performance or if the battery fails to charge or hold a charge even after repair attempts, it may be necessary to replace the battery to maintain reliable backup power for your electronic devices.
Conclusion
Repairing a failing UPS battery is a cost-effective solution that can help restore its functionality, extend its lifespan, and ensure reliable backup power for your electronic devices. By following the step-by-step guide outlined in this article, you can effectively diagnose, repair, and verify the status of your UPS battery.
Begin by understanding the basics of UPS batteries, including their types and operation. Familiarize yourself with the signs of a failing battery to identify when repair is necessary. Prioritize safety by wearing protective gear and gathering the necessary tools before starting the repair process.
Through the step-by-step process, disconnect and inspect the UPS battery for any physical damage or degradation. Clean the battery terminals to remove any sulfation or corrosion buildup. Test the battery voltage using a multimeter to assess its condition and capacity. Recharge the battery using a compatible charger, ensuring it reaches the recommended voltage. Reconnect the battery to the UPS system, double-checking proper polarity. Finally, verify the UPS battery status by monitoring the system indicators and performing tests to confirm its performance.
Regular maintenance and monitoring of the UPS battery are crucial in ensuring its longevity and optimal functionality. Perform routine checks for signs of damage, clean the battery terminals periodically, and monitor the voltage and runtime to assess its ongoing performance.
Remember that while battery repair can restore functionality, there may come a time when a battery replacement is necessary if it exhibits severe degradation or fails to hold a charge. Consult the manufacturer’s guidelines for specific recommendations regarding battery lifespan and replacement.
By successfully repairing and maintaining your UPS battery, you can rely on its consistent backup power, ensuring the safety and protection of your electronic devices in the event of power outages or fluctuations.