Introduction
Crafting lanyards is a delightful and rewarding activity that allows you to create personalized accessories for yourself or thoughtful gifts for others. Whether you are a novice or an experienced crafter, making lanyards can be a fun and fulfilling endeavor. This step-by-step guide will walk you through the process of crafting your own lanyards, providing you with the knowledge and inspiration to embark on this creative journey.
Lanyards are versatile items that serve both practical and decorative purposes. From holding ID badges and keys to adding a touch of style to your outfit, lanyards have become a popular accessory in various settings, including schools, workplaces, and events. By crafting your own lanyards, you have the freedom to choose your preferred colors, patterns, and embellishments, allowing you to express your unique style and creativity.
As you delve into the world of lanyard crafting, you will discover the joy of working with different materials and experimenting with diverse designs. Whether you prefer vibrant paracord, elegant satin cord, or rustic leather thong, the possibilities are endless. Additionally, you can incorporate various techniques, such as weaving, braiding, and knotting, to create lanyards that reflect your individuality.
Furthermore, crafting lanyards provides an opportunity to engage in a mindful and meditative activity. As you focus on each stitch and weave, you can experience a sense of tranquility and accomplishment. This process can be particularly therapeutic, offering a peaceful respite from the hustle and bustle of daily life.
Through this guide, you will learn the essential steps to create lanyards from start to finish. From gathering materials and choosing designs to adding final touches, each stage is an integral part of the crafting journey. By following these steps, you will gain the confidence and skills needed to produce beautiful and functional lanyards that are tailored to your preferences.
Embark on this creative endeavor with an open mind and a spirit of curiosity. Whether you are crafting lanyards for practical use, self-expression, or as heartfelt gifts, this guide will equip you with the knowledge and inspiration to bring your lanyard-making aspirations to life. Let's dive into the enchanting world of lanyard crafting and unleash our creativity!
Step 1: Gather Materials
Before diving into the creative process of making lanyards, it's essential to gather the necessary materials. The selection of materials will depend on your preferred lanyard design, and having a well-rounded assortment of supplies will set the stage for a successful crafting experience. Here's a comprehensive list of materials to consider:
1. Cord or Lanyard Material:
The primary component of any lanyard is the cord or lanyard material. You can choose from a wide range of options, including paracord, satin cord, leather thong, nylon cord, or cotton twine. Each material offers distinct characteristics in terms of texture, thickness, and flexibility. Consider the intended use of the lanyard and your personal preferences when selecting the cord material.
2. Scissors:
A reliable pair of scissors is indispensable for cutting the cord and ensuring clean, precise edges. Choose a sharp pair of scissors that can effortlessly trim the cord without fraying or causing uneven cuts.
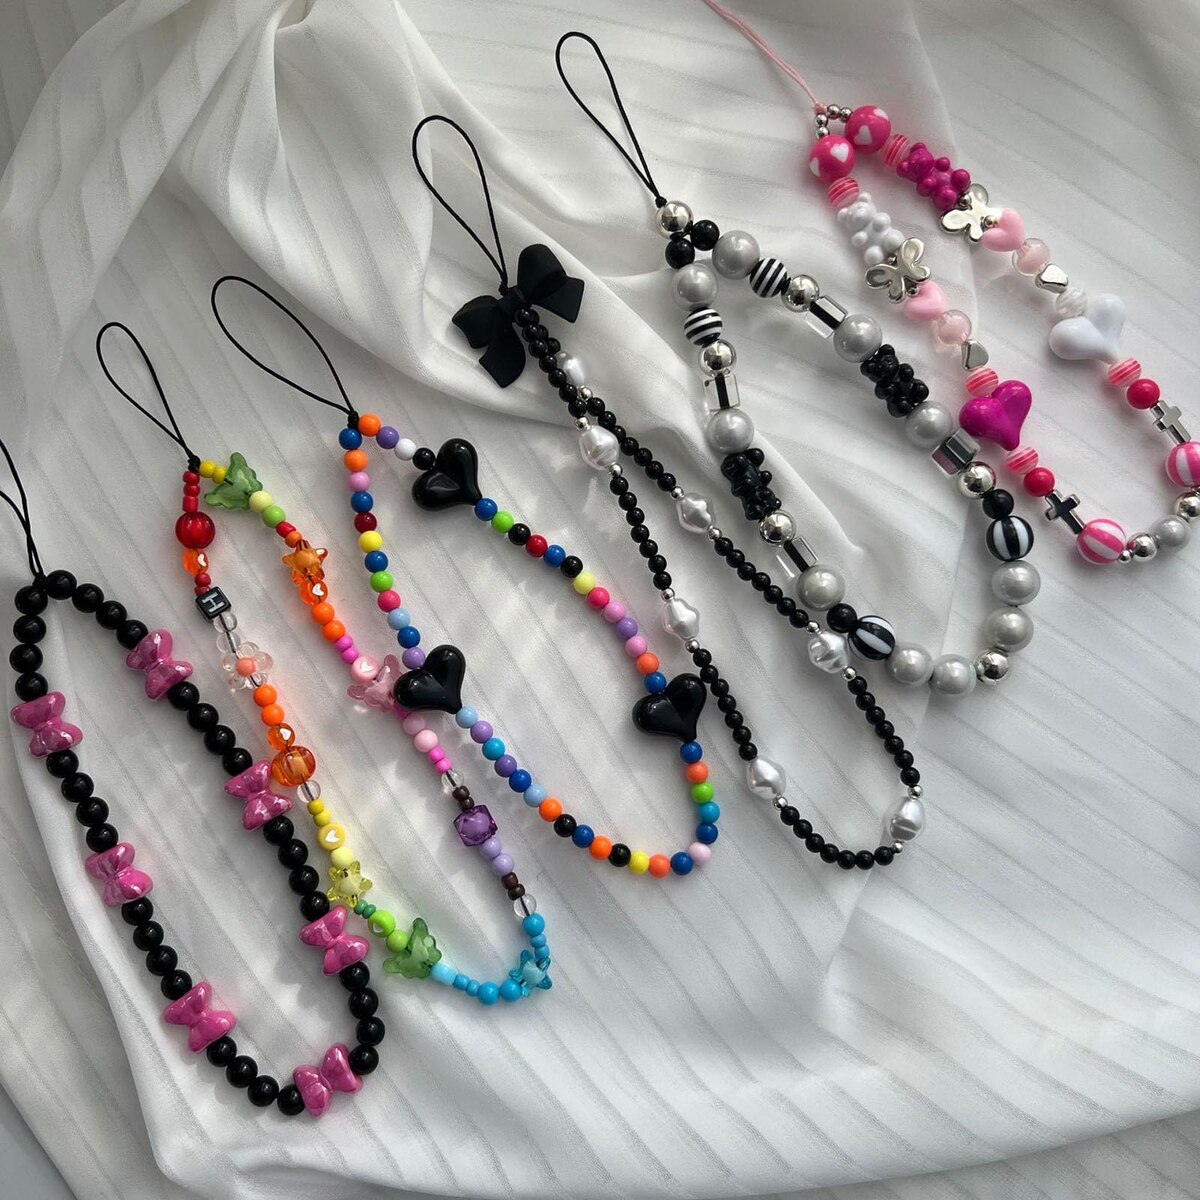
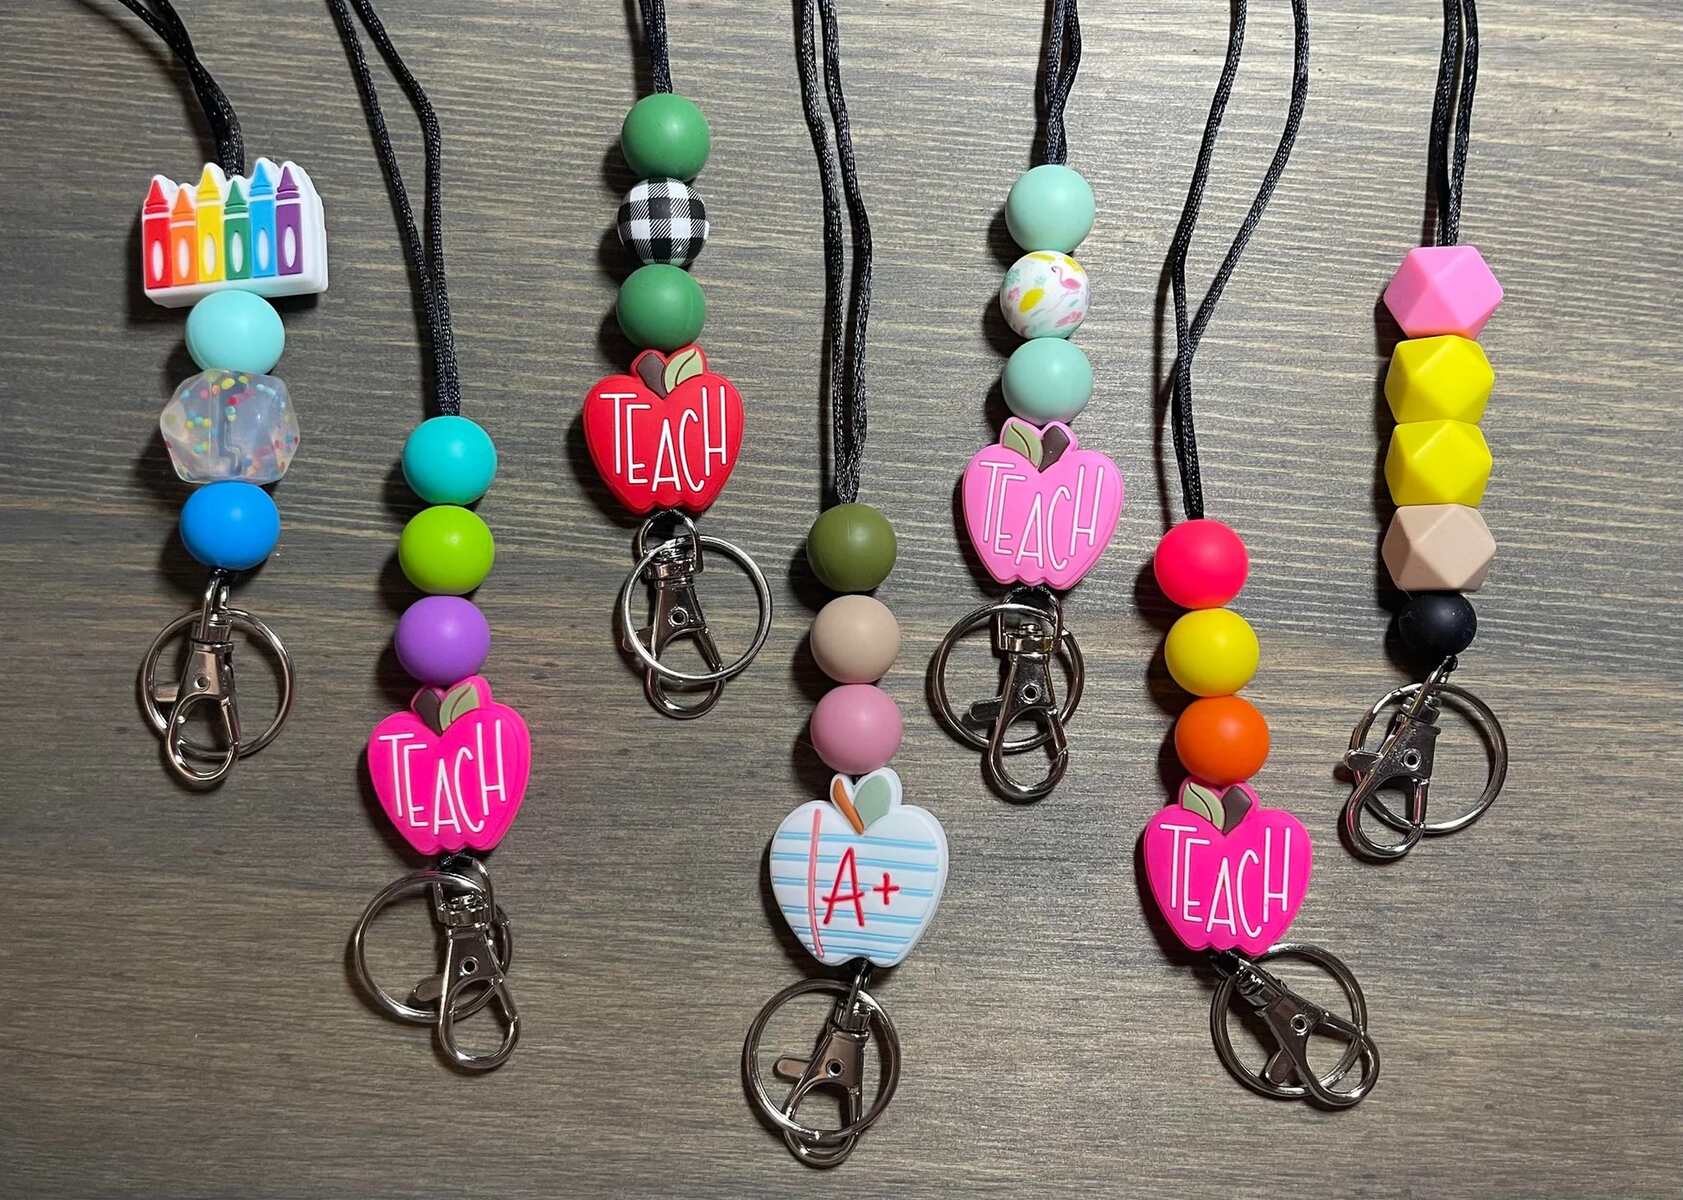
3. Beads or Charms (Optional):
If you wish to embellish your lanyard with beads or charms, gather an assortment of decorative elements. Beads come in various shapes, sizes, and colors, allowing you to customize the lanyard to your liking. Charms, such as miniature pendants or trinkets, can add a touch of personalization to the lanyard.
4. Clipboard or Safety Pin:
To secure the lanyard during the crafting process, a clipboard or safety pin can be used to hold the cord in place. This ensures stability and prevents the cord from unraveling as you work on the lanyard.
5. Ruler or Measuring Tape:
Accurate measurements are crucial for achieving the desired length and proportions of the lanyard. A ruler or measuring tape will aid in determining the appropriate length of the cord, especially if you are creating lanyards of specific dimensions.
6. Optional Embellishments:
Depending on your design preferences, you may consider additional embellishments such as ribbons, decorative threads, or unique findings to add flair to the lanyard.
By assembling these materials, you will be well-prepared to embark on the lanyard-making journey. The careful selection of materials ensures that you have everything you need to bring your creative vision to life. With the materials in hand, you are ready to move on to the next step of choosing your lanyard design.
Step 2: Choose Your Design
Selecting a design is a pivotal step in the lanyard-crafting process, as it sets the tone for the overall aesthetic and functionality of the final product. The design you choose will dictate the style, pattern, and embellishments of the lanyard, allowing you to infuse it with your personal flair. Here are some design considerations to guide your decision-making process:
-
Purpose and Function: Consider the intended use of the lanyard. Are you creating it for practical purposes, such as holding keys or ID badges, or is it primarily a decorative accessory? The purpose of the lanyard will influence the design elements you incorporate.
-
Color Scheme: Determine the color palette that resonates with your preferences and complements your style. Whether you opt for a monochromatic scheme, vibrant hues, or subtle pastel tones, the color selection will play a significant role in defining the lanyard's visual appeal.
-
Pattern and Technique: Explore various weaving, braiding, and knotting techniques to achieve different patterns and textures. From classic braided designs to intricate macramé patterns, the choice of technique can add depth and character to the lanyard.
-
Embellishments: Decide whether you want to incorporate beads, charms, or other embellishments into the design. These decorative elements can infuse the lanyard with personality and serve as eye-catching focal points.
-
Length and Width: Determine the ideal length and width of the lanyard based on your preferences and practical needs. Whether you prefer a longer lanyard for versatility or a narrower width for a sleek look, these dimensions will contribute to the overall design.
-
Personalization: Consider adding personalized touches, such as initials, symbols, or meaningful motifs, to imbue the lanyard with sentimental value.
As you deliberate on these design aspects, envision how each element will harmonize to create a cohesive and visually appealing lanyard. Your design choices will reflect your creativity and style, resulting in a lanyard that is uniquely yours.
By carefully considering these design elements, you can embark on the crafting journey with a clear vision of the lanyard you aim to create. The design phase sets the stage for the subsequent steps, guiding the crafting process towards the realization of your creative vision. With your design in mind, you are ready to proceed to the next step of measuring and cutting the cord to bring your design to life.
Step 3: Measure and Cut the Cord
Accurate measurements and precise cutting of the cord are crucial steps in the lanyard-making process, as they lay the foundation for the lanyard's length and overall appearance. Before proceeding with the measurements, it's essential to consider the intended use and design of the lanyard. Whether it's a functional lanyard for holding keys and ID badges or a decorative accessory, the measurements will be tailored to fulfill the specific purpose.
To begin, lay out the selected cord material on a flat surface, ensuring that it is free from tangles or kinks. Using a ruler or measuring tape, determine the desired length of the lanyard based on your design preferences and practical needs. If you are crafting multiple lanyards, ensure consistency in the measurements to maintain uniformity across the finished products.
Once the length is determined, carefully mark the cord at the designated point using a pen or marker. This mark will serve as a guide for cutting the cord to the precise length. With the cord securely held in place, use a sharp pair of scissors to make a clean and straight cut at the marked point. It's important to execute the cut with precision to ensure that the ends are even and free from fraying.
If your design calls for multiple cords of varying lengths, repeat the measuring and cutting process for each individual cord, maintaining accuracy and attention to detail. Additionally, if you plan to incorporate different colors or types of cord in your design, ensure that each cord is measured and cut according to the specifications outlined in your design plan.
By meticulously measuring and cutting the cord to the required lengths, you are setting the stage for the subsequent stages of the lanyard-making process. These precise preparations will contribute to the overall quality and visual appeal of the finished lanyard, ensuring that it meets your design expectations and functional requirements.
With the cord accurately measured and cut, you are now ready to progress to the next step of initiating the basic lanyard stitch, where the intricate weaving and crafting of the lanyard will come to life.
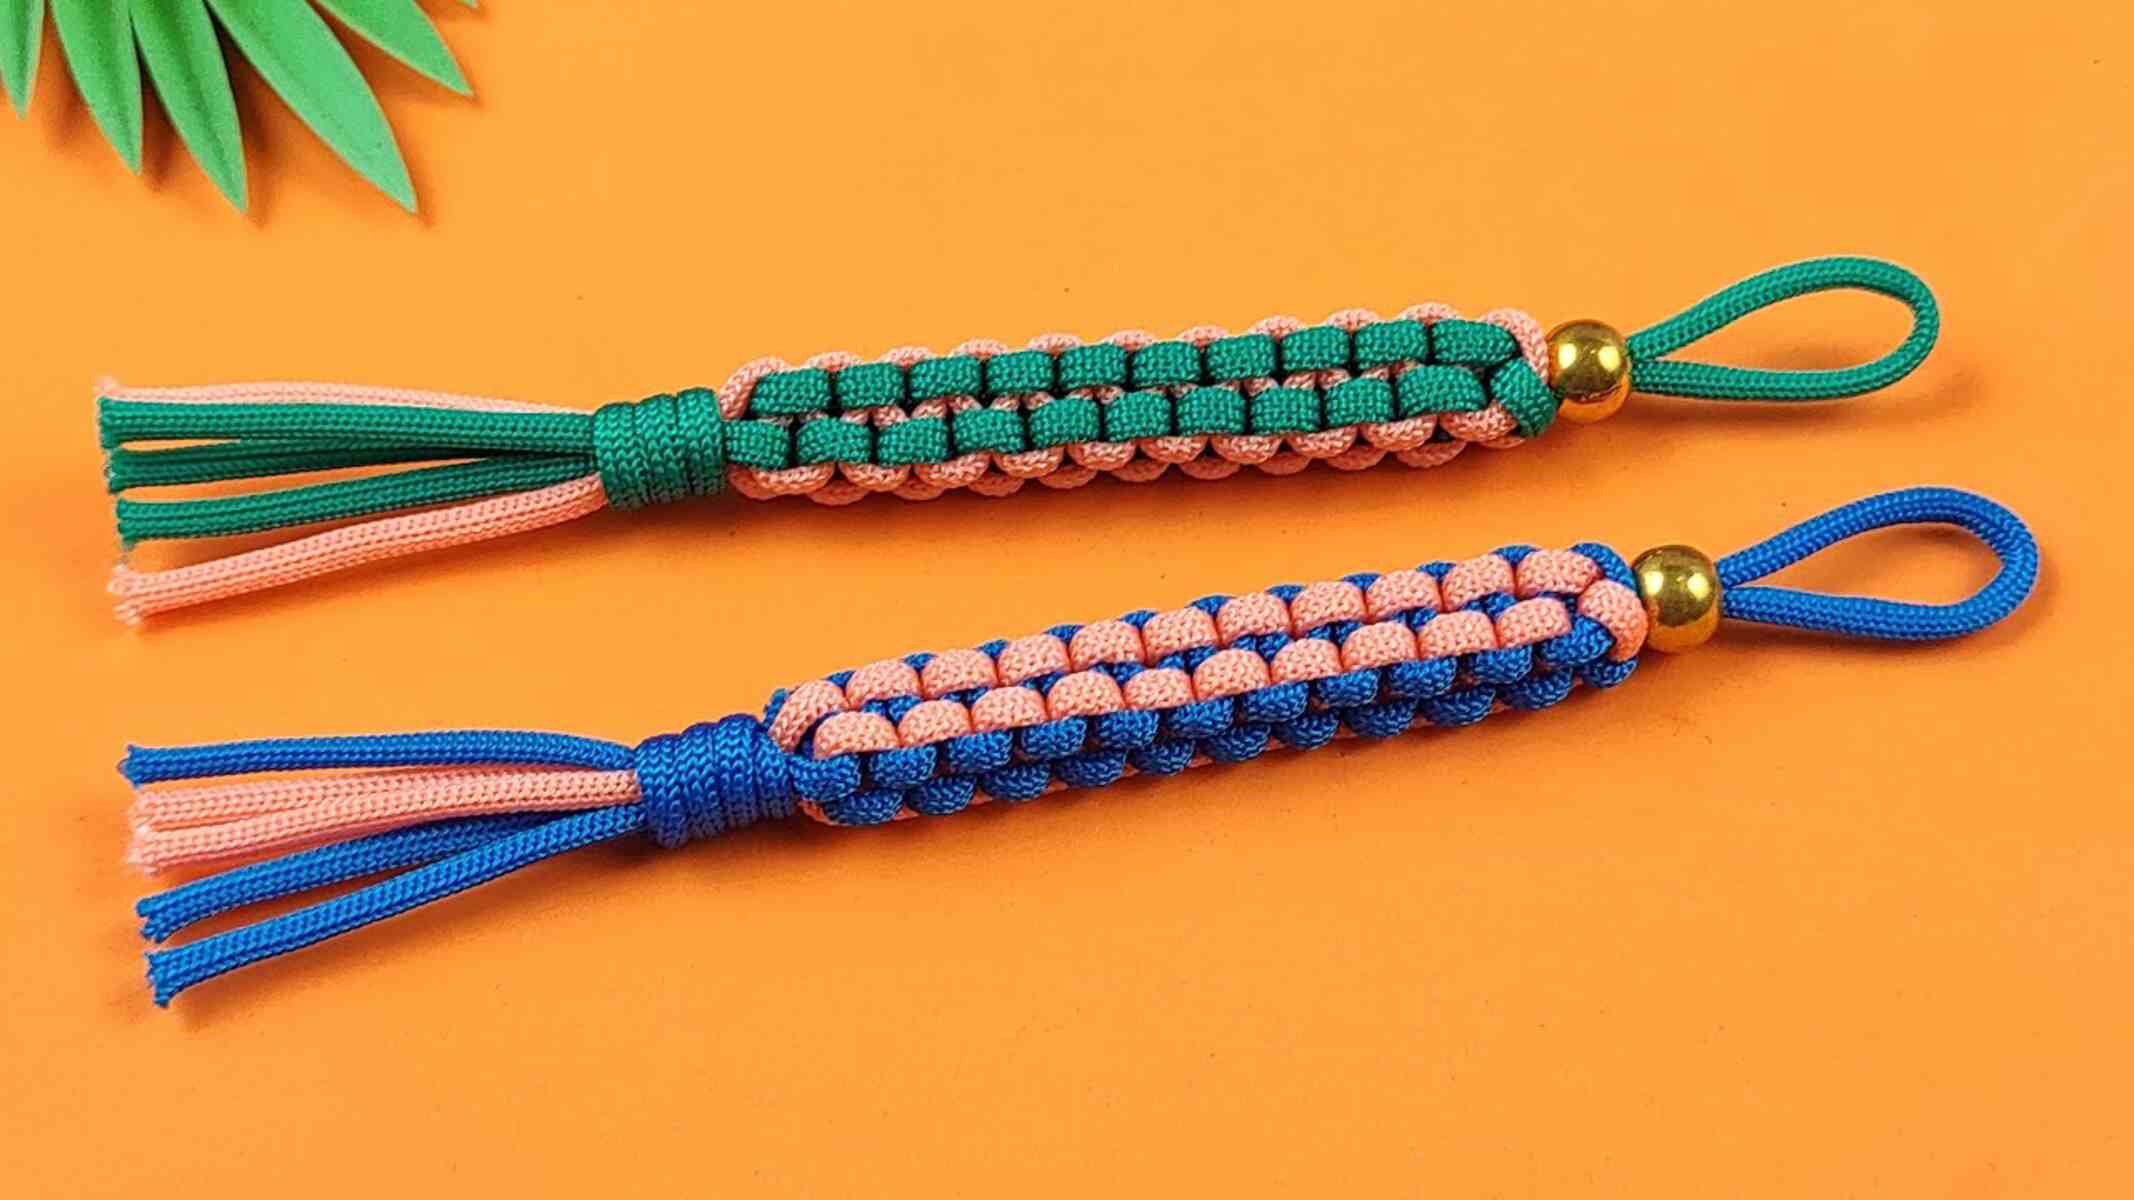
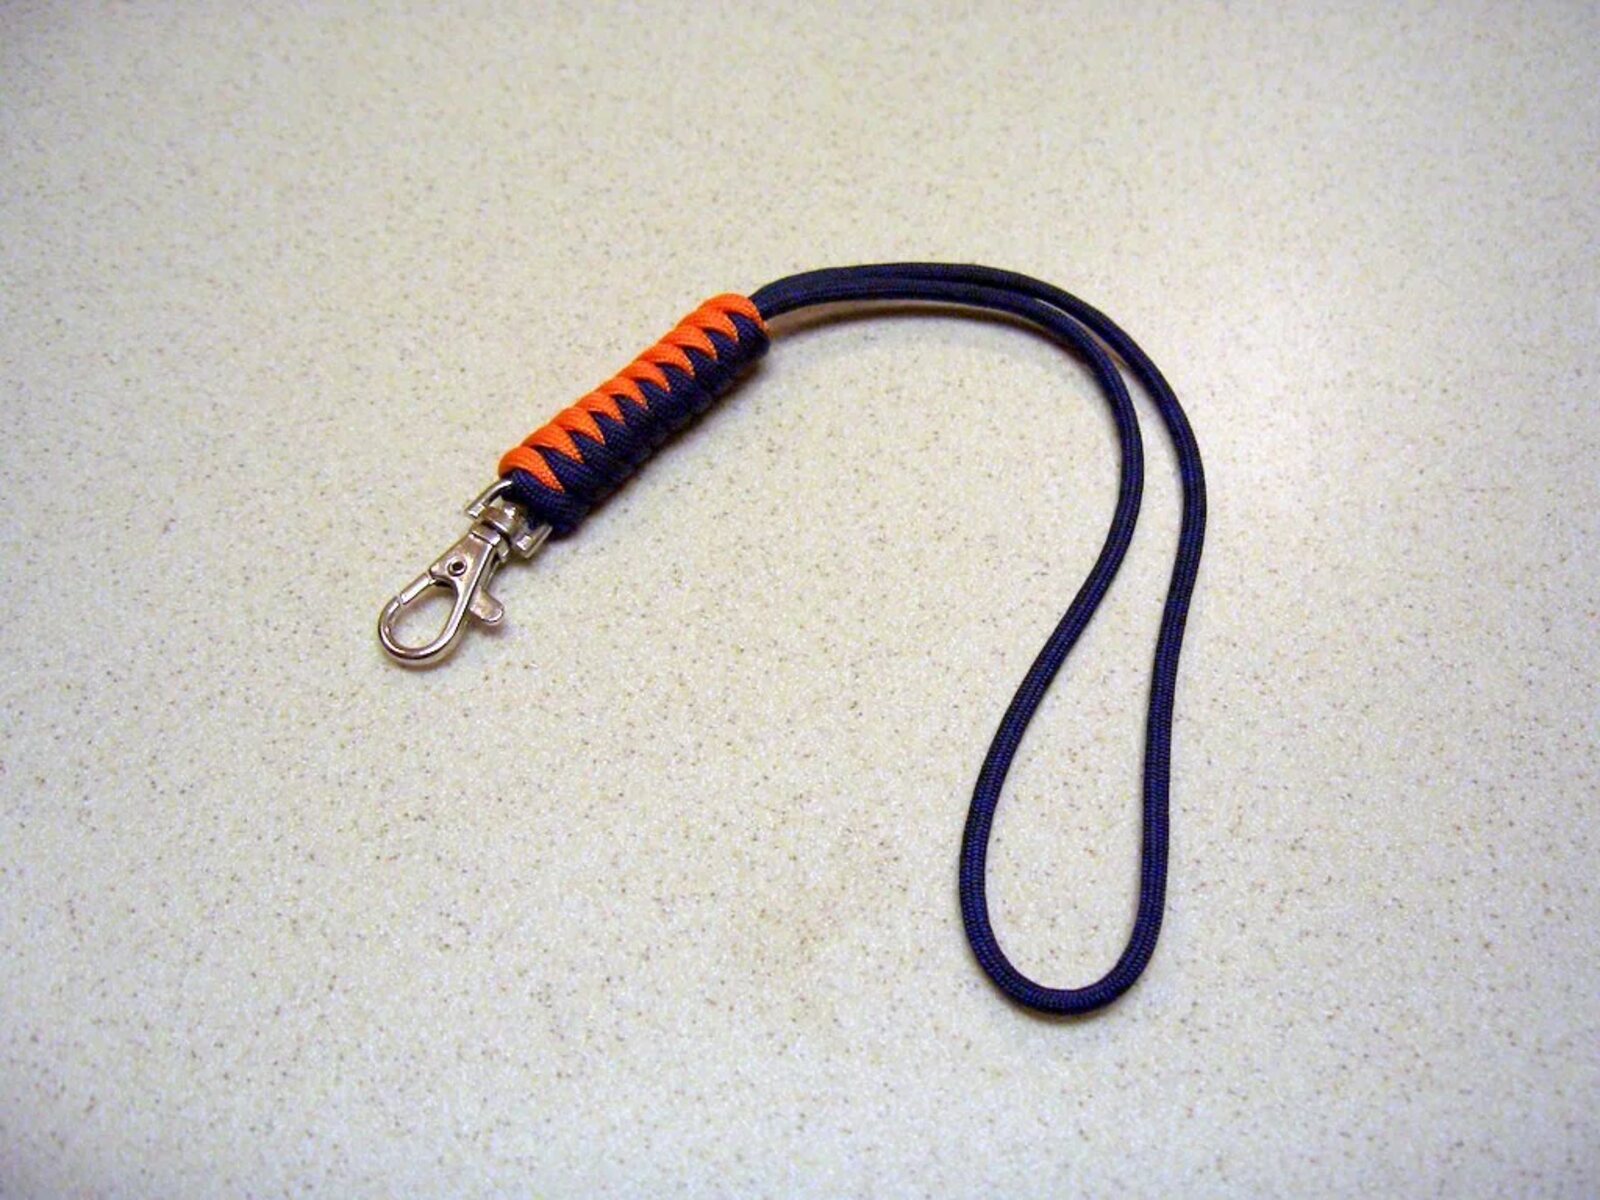
Step 4: Start the Basic Lanyard Stitch
Initiating the basic lanyard stitch marks the pivotal moment when the lanyard begins to take shape, showcasing the intricate weaving technique that forms the foundation of the design. This fundamental stitch, also known as the box stitch or square stitch, lays the groundwork for the lanyard's structure and provides a sturdy framework for further embellishments and variations.
To commence the basic lanyard stitch, gather the cut cords and align them parallel to each other. If you are using multiple cords, ensure that they are arranged in the desired order and sequence according to your design plan. Next, secure the cords at the top with a clip or safety pin, maintaining their alignment and preventing any shifting during the stitching process.
The basic lanyard stitch involves a repetitive pattern of weaving the cords over and under each other, creating a series of interlocking loops that form the characteristic square pattern. Begin by identifying the cord positioned at the far left as the "working cord," which will be used to weave over and under the adjacent cords. The adjacent cords serve as the "filler cords," remaining stationary as the working cord interlaces with them.
With the working cord positioned over the first filler cord and under the second filler cord, carefully pull it through to create the initial knot. Subsequently, alternate the positioning of the working cord, guiding it under the first filler cord and over the second filler cord, and pull it through to form the second knot. Repeat this alternating pattern, ensuring that each knot is snug and aligned with the preceding ones, resulting in a neat and uniform appearance.
As the weaving progresses, the distinctive box pattern emerges, showcasing the interwoven cords and the structural integrity of the lanyard. Consistency and attention to detail are paramount during this stage, as they contribute to the overall craftsmanship and visual appeal of the lanyard.
By mastering the basic lanyard stitch, you lay the groundwork for the subsequent stages of the lanyard-making process, setting the stage for further embellishments and customization. This foundational stitch serves as the cornerstone of the lanyard's construction, embodying the artistry and precision inherent in the craft of lanyard-making.
With the basic lanyard stitch underway, the lanyard begins to manifest its unique character and charm, reflecting the intricate interplay of cords and the artisanal touch infused into each meticulously woven knot.
Step 5: Continue the Stitch
As the foundational framework of the lanyard takes shape through the basic lanyard stitch, the next step entails the seamless continuation of the intricate weaving process. Building upon the initial knots and interlaced cords, the continuation of the stitch solidifies the structural integrity of the lanyard while allowing for further customization and embellishment.
With the basic lanyard stitch established, the working cord and filler cords maintain their designated positions, forming a cohesive pattern that serves as the canvas for creative expression. The repetitive weaving motion, characterized by the alternating over-and-under technique, creates a rhythmic progression that embodies the artistry and precision inherent in lanyard-making.
As the stitch unfolds, the lanyard begins to manifest its unique character and charm, reflecting the interplay of cords and the artisanal touch infused into each meticulously woven knot. Consistency and attention to detail are paramount during this stage, ensuring that each knot is snug and aligned with the preceding ones, resulting in a neat and uniform appearance.
The continuation of the stitch presents an opportunity to infuse personal creativity into the lanyard, whether through subtle variations in the weaving pattern, the incorporation of decorative elements, or the introduction of contrasting colors. This stage allows for artistic exploration and individual expression, enabling crafters to imbue the lanyard with their unique style and flair.
As the weaving process progresses, the lanyard gradually evolves, revealing the intricate texture and visual appeal that emerge from the meticulous interlacing of cords. The meditative rhythm of the stitch fosters a sense of tranquility and focus, allowing crafters to immerse themselves in the creative flow and witness the transformation of raw materials into a functional and aesthetically pleasing accessory.
Continuing the stitch is a testament to the dedication and craftsmanship invested in the lanyard-making process, culminating in a work of art that embodies the fusion of skill, creativity, and personal expression. With each knot and weave, the lanyard becomes a testament to the craftsperson's commitment to excellence and the pursuit of beauty in the art of lanyard-making.
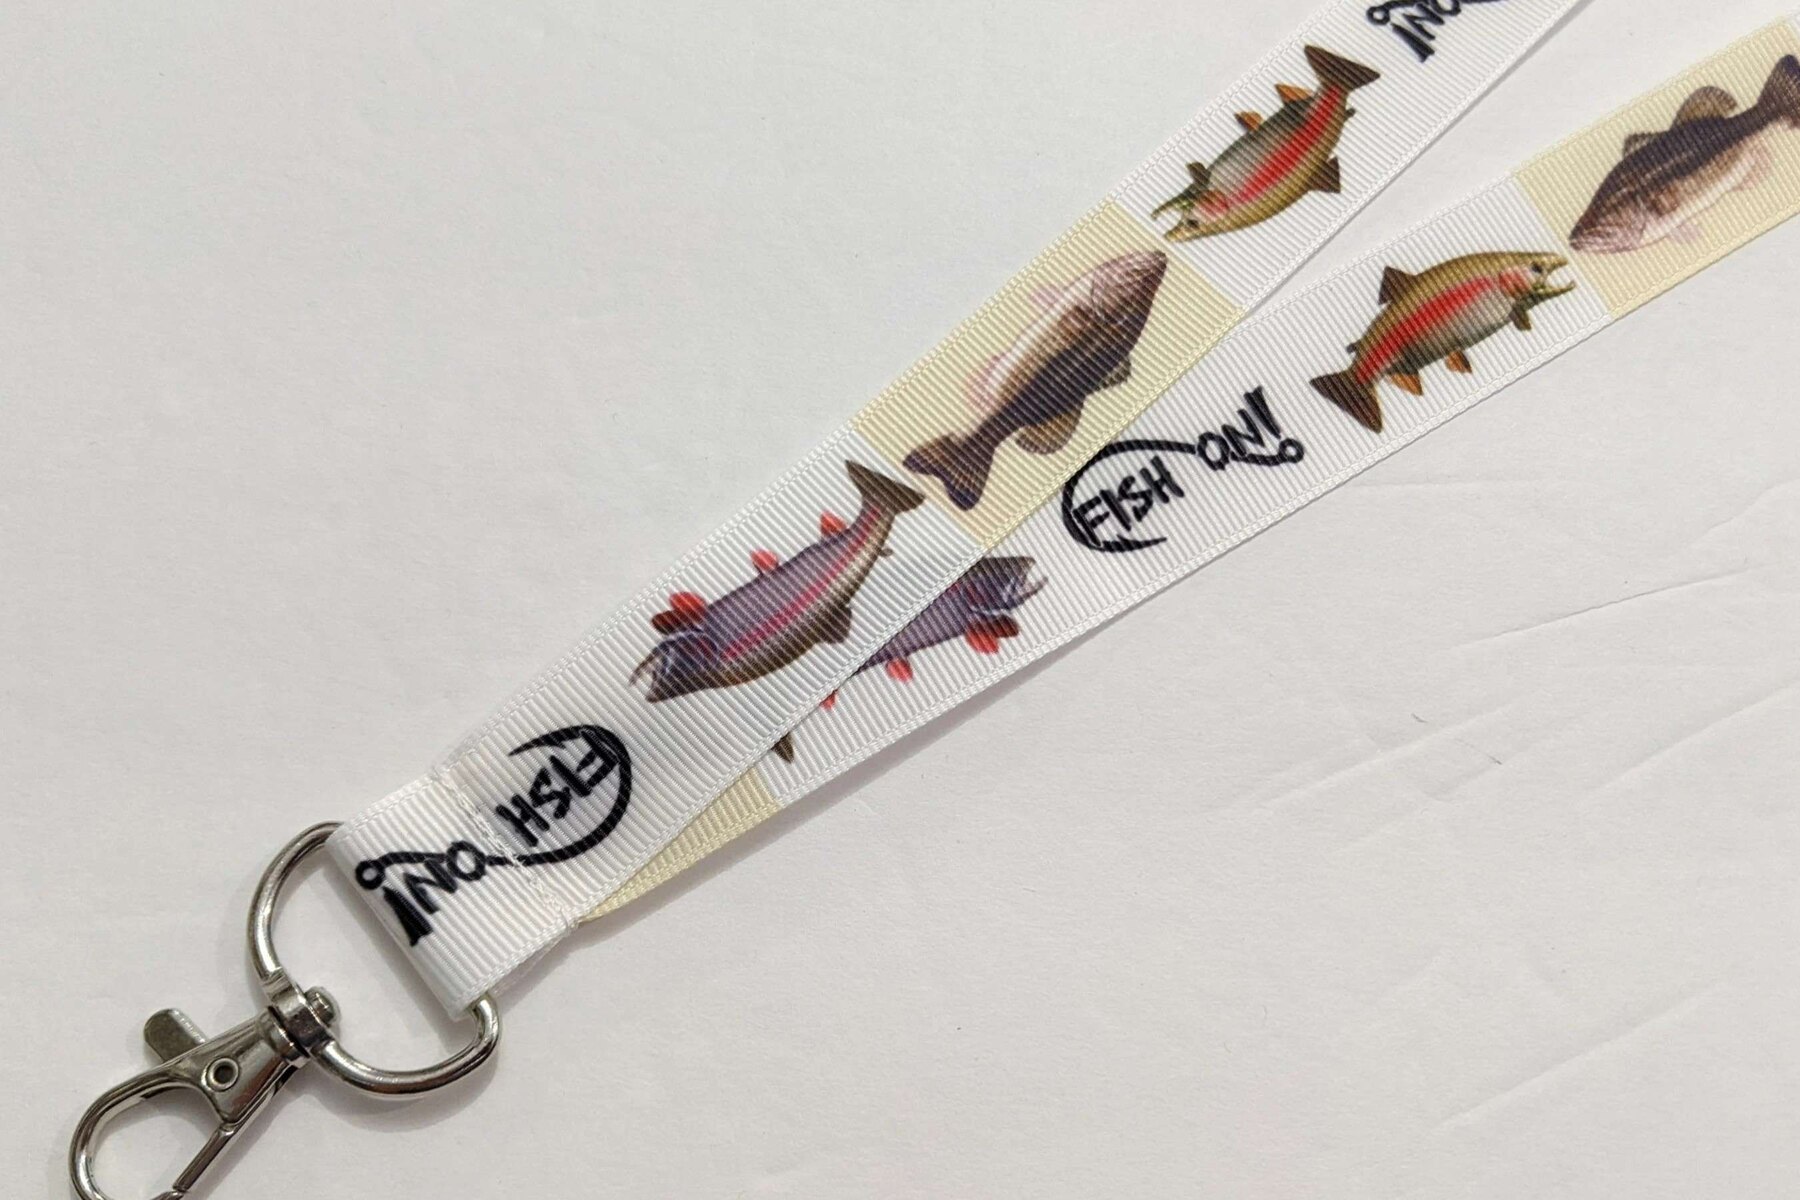
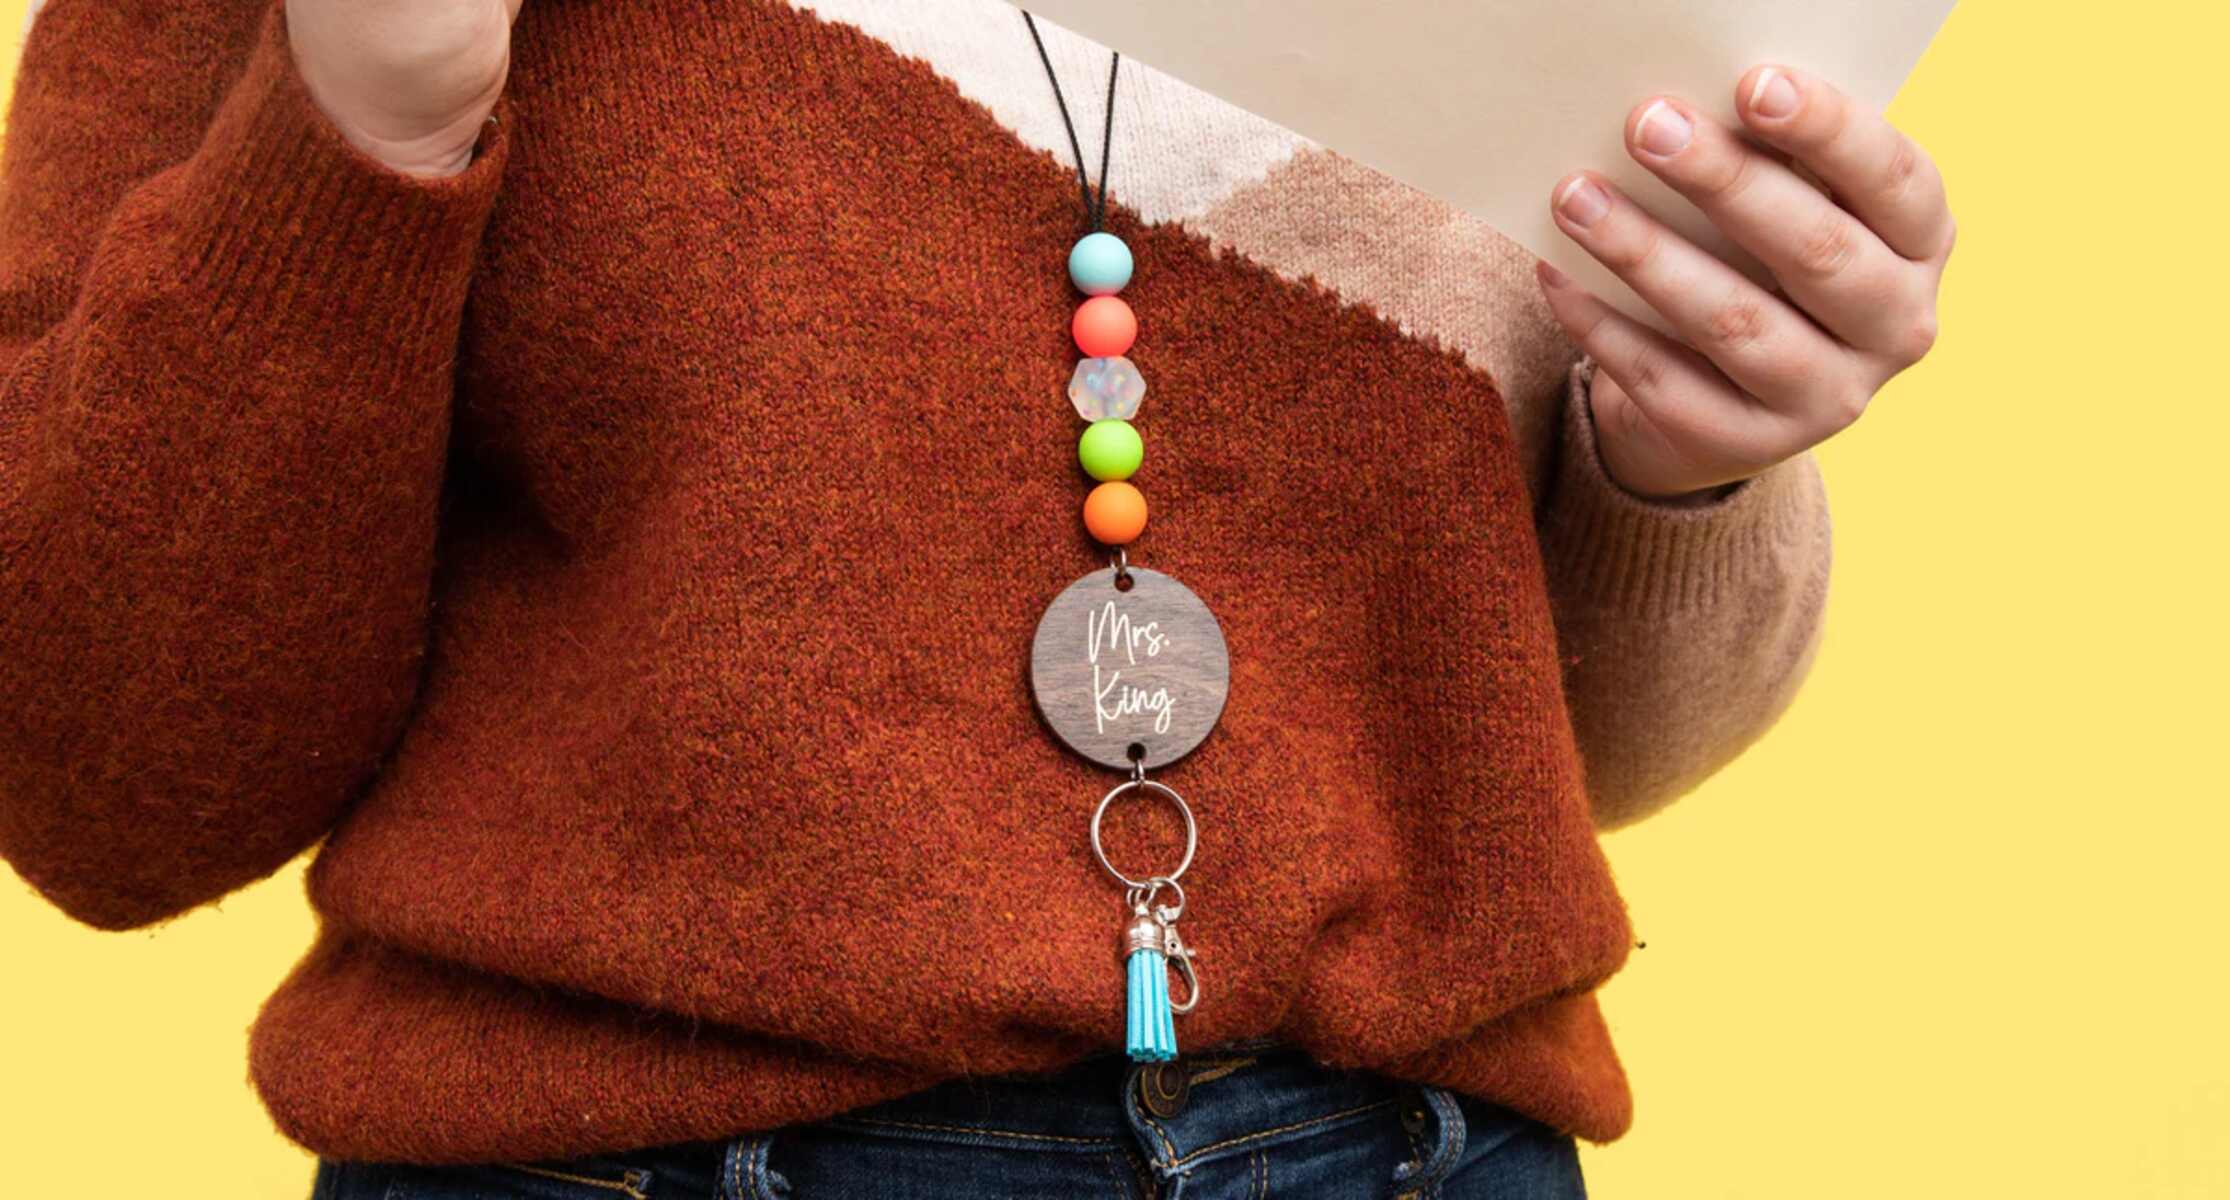
Step 6: Add Beads or Charms (Optional)
The optional addition of beads or charms presents a captivating opportunity to elevate the visual allure and personalization of the lanyard. This stage allows crafters to infuse their unique style and creativity, transforming the lanyard into a bespoke accessory that reflects individual tastes and preferences.
When incorporating beads or charms, consider the overall design and color scheme of the lanyard to ensure harmonious integration. Select beads or charms that complement the aesthetic of the lanyard, whether it's a whimsical assortment of colorful beads, elegant metallic charms, or intricately designed embellishments. The choice of beads or charms serves as a means of self-expression, allowing crafters to imbue the lanyard with symbolic significance or decorative flair.
To integrate beads, carefully thread them onto the working cords before securing them in place with subsequent knots. The strategic placement of beads at regular intervals or as focal points along the lanyard adds visual interest and a tactile dimension, enhancing its overall appeal. Similarly, attaching charms involves affixing them to designated points within the weaving pattern, creating eye-catching accents that imbue the lanyard with character and charm.
The addition of beads or charms not only embellishes the lanyard but also imbues it with personal significance. Crafters may choose beads that hold sentimental value or charms that symbolize meaningful themes, infusing the lanyard with a touch of individuality and emotional resonance. This optional stage fosters a sense of creative expression, allowing crafters to curate a lanyard that resonates with their unique identity and aesthetic sensibilities.
Furthermore, the inclusion of beads or charms presents an opportunity for artistic experimentation. Whether it involves exploring diverse bead shapes and textures, incorporating thematic charms, or experimenting with asymmetrical arrangements, this stage invites crafters to unleash their imagination and artistic ingenuity. The creative freedom afforded by this optional embellishment stage enriches the lanyard-making process, culminating in a personalized creation that exudes charm and allure.
In essence, the addition of beads or charms serves as a transformative element in the lanyard-making process, elevating the lanyard from a functional accessory to a captivating work of wearable art. By infusing the lanyard with beads or charms, crafters impart a touch of their personality and creativity, resulting in a bespoke creation that transcends mere utility, embodying the fusion of craftsmanship and individual expression.
Step 7: Finish the Lanyard
As the lanyard nears completion, the finalizing step is essential to ensure a polished and professional finish. This stage serves as the culmination of the meticulous crafting process, where attention to detail and precision are paramount. The finishing touches not only contribute to the lanyard's overall aesthetic appeal but also reinforce its durability and functionality.
To complete the lanyard, carefully examine the woven pattern and ensure that the desired length has been achieved. Trim any excess cord at the end of the lanyard, using sharp scissors to create a clean and uniform edge. Paying close attention to the finishing cuts is crucial, as they determine the neatness and symmetry of the lanyard's termination point.
Following the trimming process, secure the loose ends of the cords to prevent unraveling and maintain the integrity of the lanyard. This can be achieved by carefully melting the cord ends with a lighter or heat source, fusing them together to form a sealed tip. Exercise caution and precision during this step to avoid excessive melting or damage to the cords.
Additionally, consider incorporating a finishing knot or loop at the termination point of the lanyard, providing a secure attachment point for clasps or key rings. A well-executed finishing knot not only enhances the lanyard's functionality but also adds a professional touch to the overall presentation.
The finishing stage also presents an opportunity to inspect the lanyard for any imperfections or irregularities. By conducting a thorough quality check, crafters can address any weaving inconsistencies or loose knots, ensuring that the lanyard meets the highest standards of craftsmanship.
Furthermore, consider the overall presentation of the lanyard, evaluating its visual appeal and structural integrity. Straighten and adjust the woven pattern as needed, ensuring that the lanyard maintains a uniform and aesthetically pleasing appearance.
By meticulously attending to the finishing details, crafters elevate the lanyard to a refined and professional standard, embodying the dedication and artistry invested in its creation. The completion of this stage marks the fulfillment of the lanyard-making journey, resulting in a meticulously crafted accessory that is ready for practical use or gifting.
With the lanyard now finished, the crafting journey culminates in a remarkable creation that showcases the fusion of skill, creativity, and attention to detail. Each meticulously woven knot and carefully executed finishing touch exemplifies the craftsperson's commitment to excellence, resulting in a lanyard that is both functional and visually captivating.
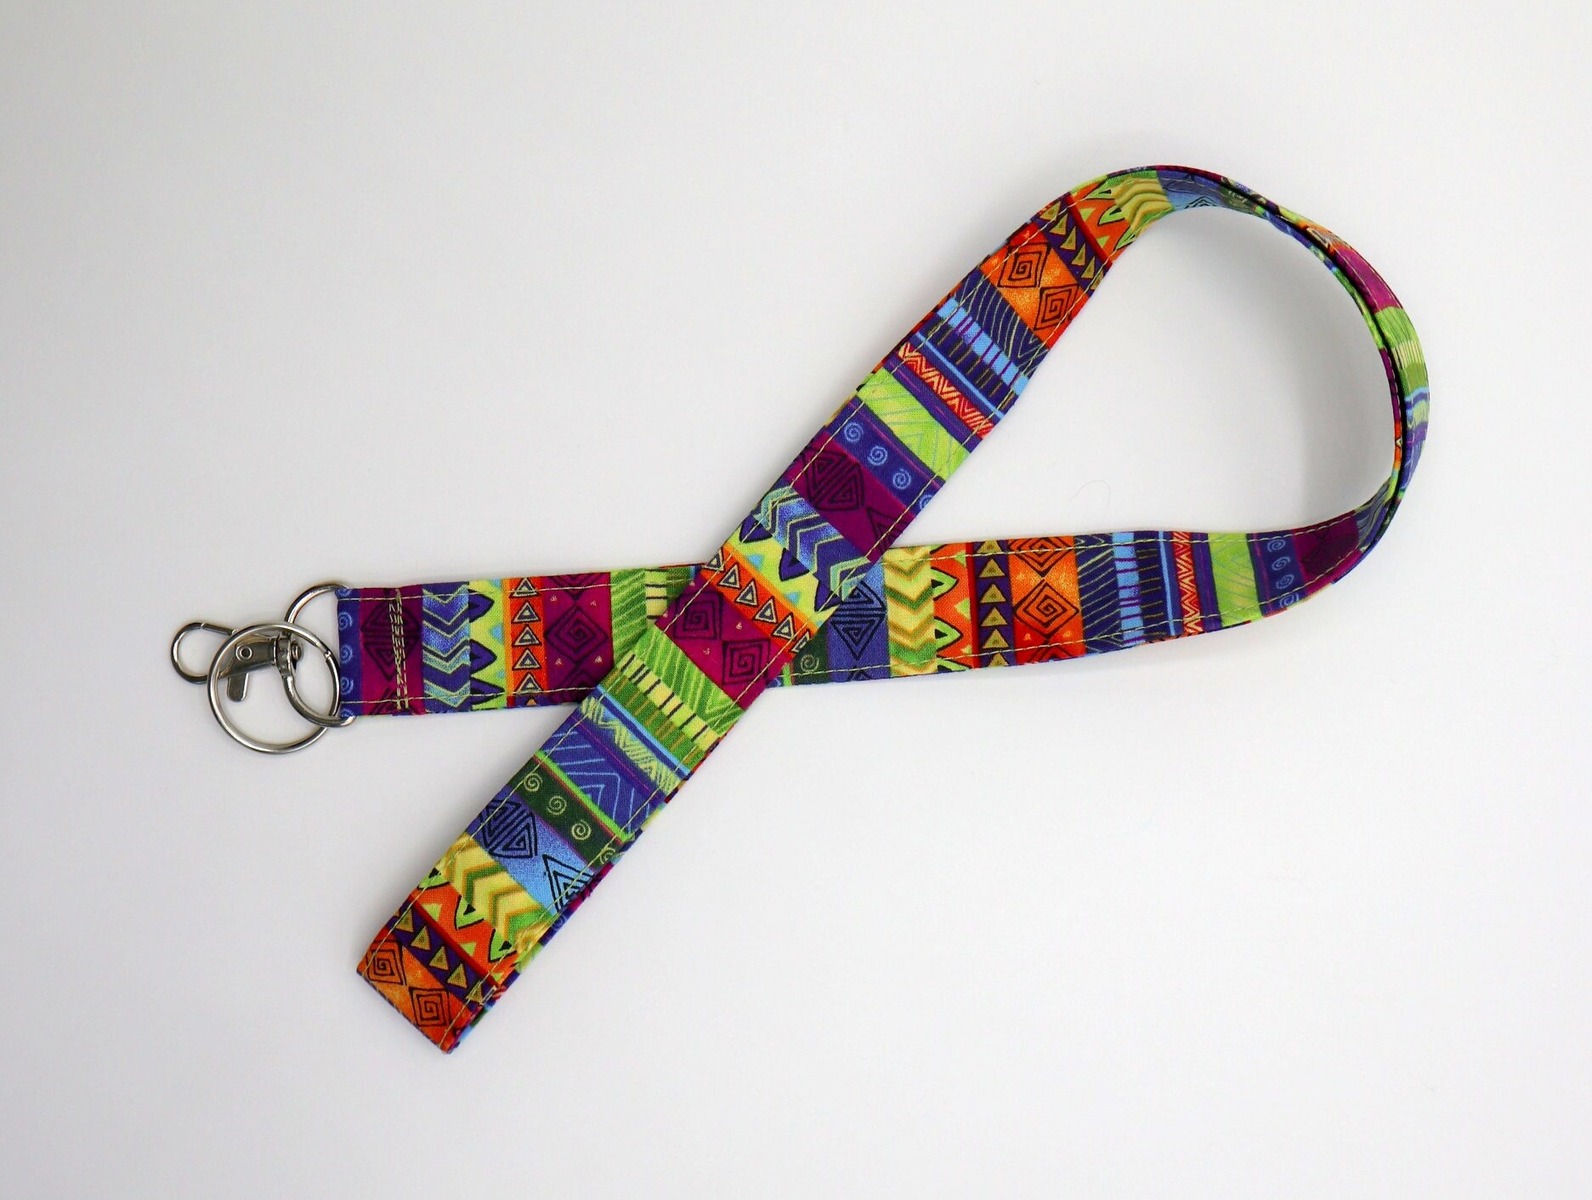
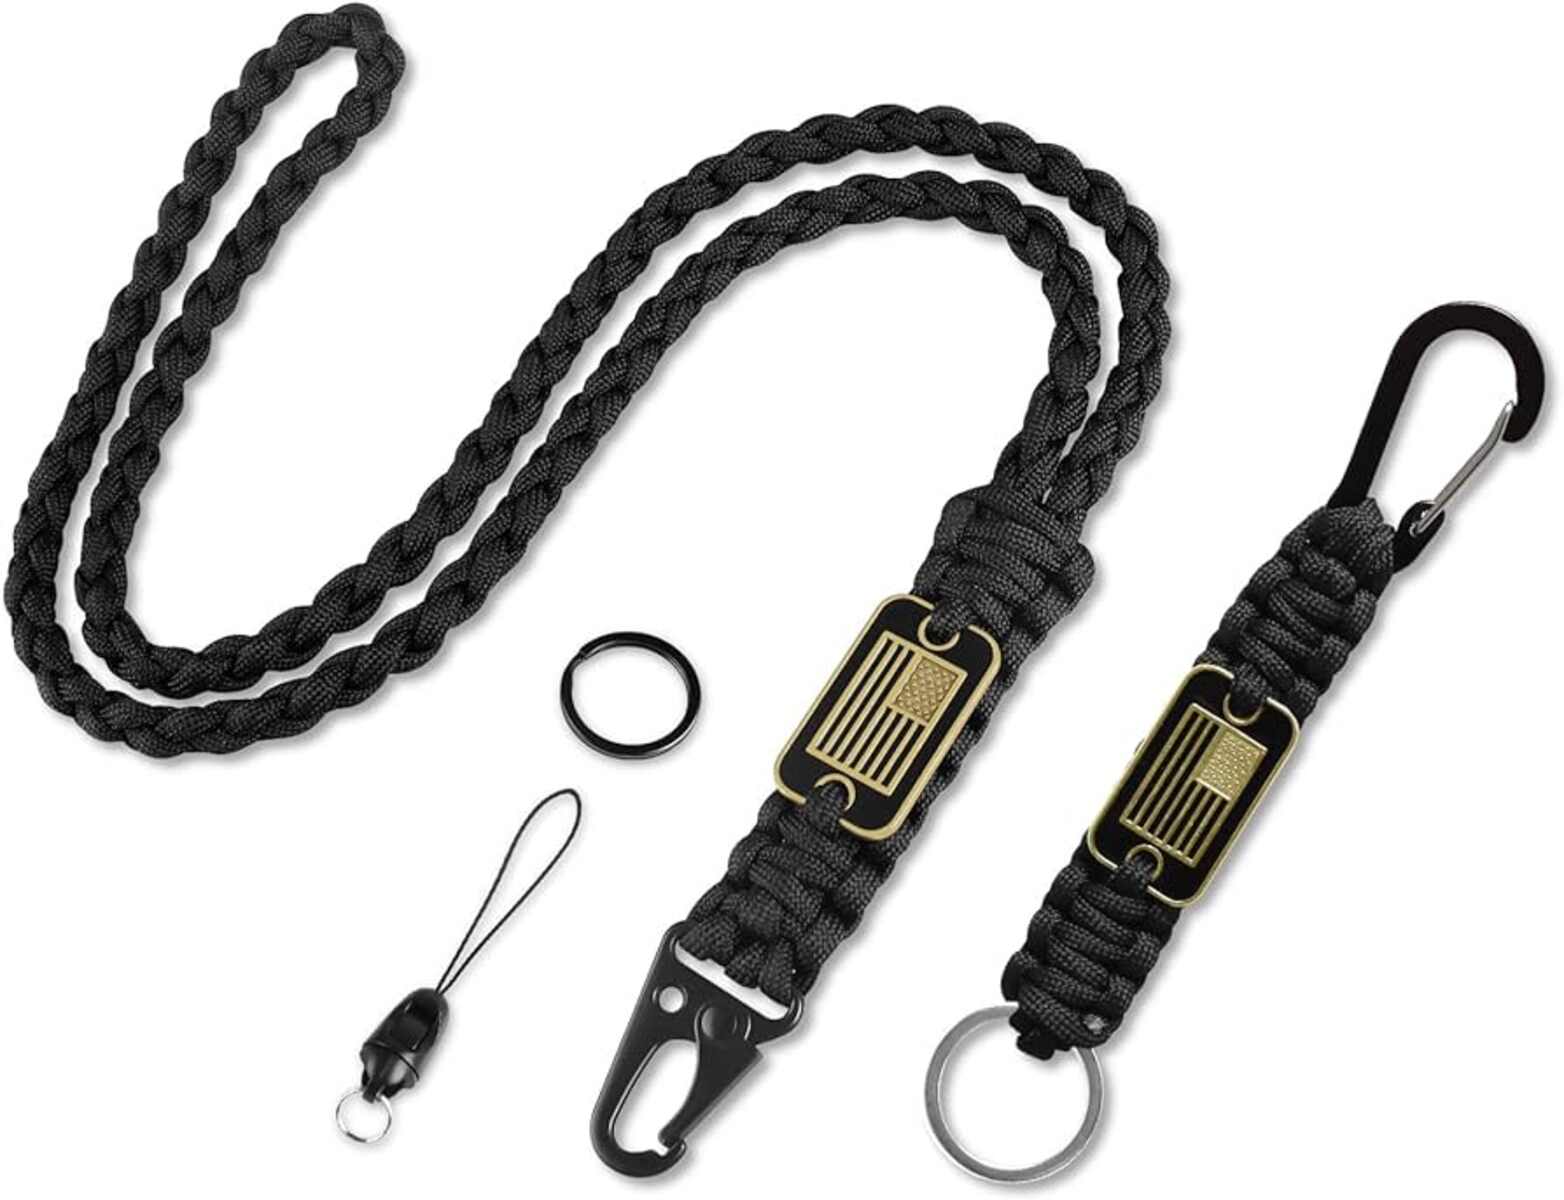
Step 8: Attach Clasps or Key Rings
Attaching clasps or key rings is a crucial step that adds functionality and versatility to the lanyard, enabling it to securely hold keys, ID badges, or other essentials. This stage marks the transition from a meticulously woven cord to a fully functional accessory, ready for everyday use. The process of attaching clasps or key rings involves precision and attention to detail to ensure a secure and reliable attachment.
To begin, select the appropriate clasp or key ring based on the intended use and design of the lanyard. Clasps come in various styles, including lobster clasps, swivel clasps, and trigger clasps, each offering distinct features such as ease of attachment and swiveling capabilities. Key rings also offer versatility, with options ranging from standard split rings to quick-release key rings. Consider the practical requirements and aesthetic preferences when choosing the attachment hardware.
Once the clasp or key ring is selected, carefully affix it to the termination point of the lanyard. This can be achieved by creating a secure loop or knot at the end of the lanyard, allowing for the attachment of the hardware. The loop should be meticulously crafted to ensure a snug fit around the clasp or key ring, preventing any slippage or detachment during use.
For added reinforcement, consider applying a small amount of adhesive or clear glue to the knot or loop, further securing the attachment and preventing unraveling. This additional measure enhances the durability of the attachment, particularly for lanyards that will be subject to frequent use and movement.
Once the clasp or key ring is firmly attached, test the functionality and strength of the connection, ensuring that it can withstand everyday wear and usage. Gently tug on the lanyard and inspect the attachment point to verify its resilience and stability. This quality check is essential to guarantee the reliability of the attachment, providing peace of mind for the lanyard's practical utility.
By attaching clasps or key rings with precision and care, crafters elevate the lanyard to a fully functional and dependable accessory. The seamless integration of the attachment hardware complements the artistry of the woven lanyard, resulting in a harmonious union of form and function. With the clasps or key rings securely in place, the lanyard is now prepared to fulfill its practical role while exuding a touch of personalized style and craftsmanship.
Step 9: Add Final Touches
As the lanyard nears completion, the addition of final touches serves as the culminating stage in the lanyard-making process. This pivotal step allows crafters to impart a unique and personal flair to the lanyard, elevating it from a meticulously woven accessory to a bespoke creation that exudes charm and individuality.
The final touches encompass a range of creative embellishments and refinements that enhance the lanyard's visual appeal and symbolic significance. Crafters may consider incorporating decorative elements such as ribbons, tassels, or unique findings to infuse the lanyard with added flair and character. These embellishments serve as captivating focal points, adding a tactile dimension and a sense of whimsy to the lanyard.
Furthermore, the addition of thematic motifs or personalized accents presents an opportunity to imbue the lanyard with sentimental value and symbolic meaning. Whether through the inclusion of meaningful charms, symbolic pendants, or intricately woven patterns, these final touches reflect the craftsperson's individual narrative and creative expression, resulting in a lanyard that resonates with personal significance.
The meticulous arrangement and placement of final touches require a discerning eye and a thoughtful approach, ensuring that each embellishment harmonizes with the overall design and contributes to the lanyard's cohesive aesthetic. Crafters may experiment with different arrangements and combinations, allowing their creativity to flourish as they curate a lanyard that reflects their unique identity and artistic sensibilities.
Additionally, the final touches serve as a means of refining the lanyard's presentation, ensuring that it exudes a polished and professional allure. Attention to detail is paramount, as crafters meticulously inspect the lanyard for any imperfections or irregularities, addressing them with precision and care. Straightening and adjusting the woven pattern, as well as refining the placement of embellishments, contribute to the lanyard's overall visual appeal and craftsmanship.
In essence, the addition of final touches encapsulates the craftsperson's dedication to excellence and artistic vision, resulting in a lanyard that transcends mere functionality to become a captivating work of wearable art. With each carefully curated embellishment and refined detail, the lanyard becomes a testament to the fusion of skill, creativity, and individual expression, embodying the craftsperson's commitment to creating a lanyard that is as unique and remarkable as they are.
Conclusion
In conclusion, the journey of crafting lanyards is a testament to the fusion of creativity, skill, and dedication. From the initial gathering of materials to the meticulous weaving and the addition of personalized touches, each step in the lanyard-making process embodies the craftsperson's commitment to excellence and the pursuit of beauty in functional artistry.
As the lanyard nears its completion, it transforms from a mere assortment of cords into a captivating accessory that reflects the craftsperson's unique style and individuality. The culmination of the lanyard-making process represents a remarkable achievement, where raw materials have been transformed into a tangible manifestation of creativity and craftsmanship.
Furthermore, the act of crafting lanyards transcends the mere production of a functional accessory; it serves as a meditative and enriching pursuit that fosters a sense of mindfulness and creative expression. The rhythmic weaving, deliberate knotting, and thoughtful design considerations contribute to a deeply immersive and rewarding crafting experience.
Moreover, the personalized nature of lanyard-making allows crafters to infuse their creations with sentimental value, symbolic meaning, and artistic ingenuity. Whether the lanyard is crafted for personal use, gifted to a loved one, or utilized as a means of self-expression, each completed lanyard becomes a tangible representation of the craftsperson's passion and artistry.
As the lanyard-making journey draws to a close, the finished creations stand as testaments to the craftsperson's dedication to excellence and the pursuit of beauty in the art of lanyard-making. Each meticulously woven knot, carefully selected embellishment, and thoughtfully executed finishing touch reflects the craftsperson's unwavering commitment to creating a lanyard that is both functional and visually captivating.
In essence, the act of crafting lanyards is a celebration of creativity, individuality, and the transformative power of artisanship. With each completed lanyard, the craftsperson leaves behind a legacy of skillfully crafted accessories that embody the fusion of artistry and personal expression, leaving an indelible mark on the world of wearable art.