Common Issues with Headset Microphones
Headset microphones have become indispensable tools for communication, gaming, and remote work. However, users often encounter common issues that can disrupt their experience. Understanding these issues and learning how to address them is crucial for maintaining the functionality of your headset microphone.
-
Connection Problems: One of the most prevalent issues users face is related to the connection between the headset and the device. Loose or damaged connectors can lead to intermittent audio, distorted sound, or no sound at all. It's essential to check the connections and ensure that the headset is properly plugged into the correct ports. Additionally, inspect the cable for any signs of wear and tear that may be affecting the connection.
-
Microphone Sensitivity: Some users may experience issues with the sensitivity of their headset microphones. This can manifest as overly quiet or excessively loud input, making it challenging for others to hear them clearly. Adjusting the microphone sensitivity settings in the system preferences can often resolve this issue. It's also advisable to test the microphone on different devices to determine if the problem is specific to a particular setup.
-
Compatibility Concerns: Incompatibility between the headset microphone and the device or software being used can lead to various issues. This may result in the microphone not being recognized, or the audio input being distorted or garbled. Ensuring that the headset is compatible with the intended device and that the necessary drivers or software are up to date is essential for optimal performance.
-
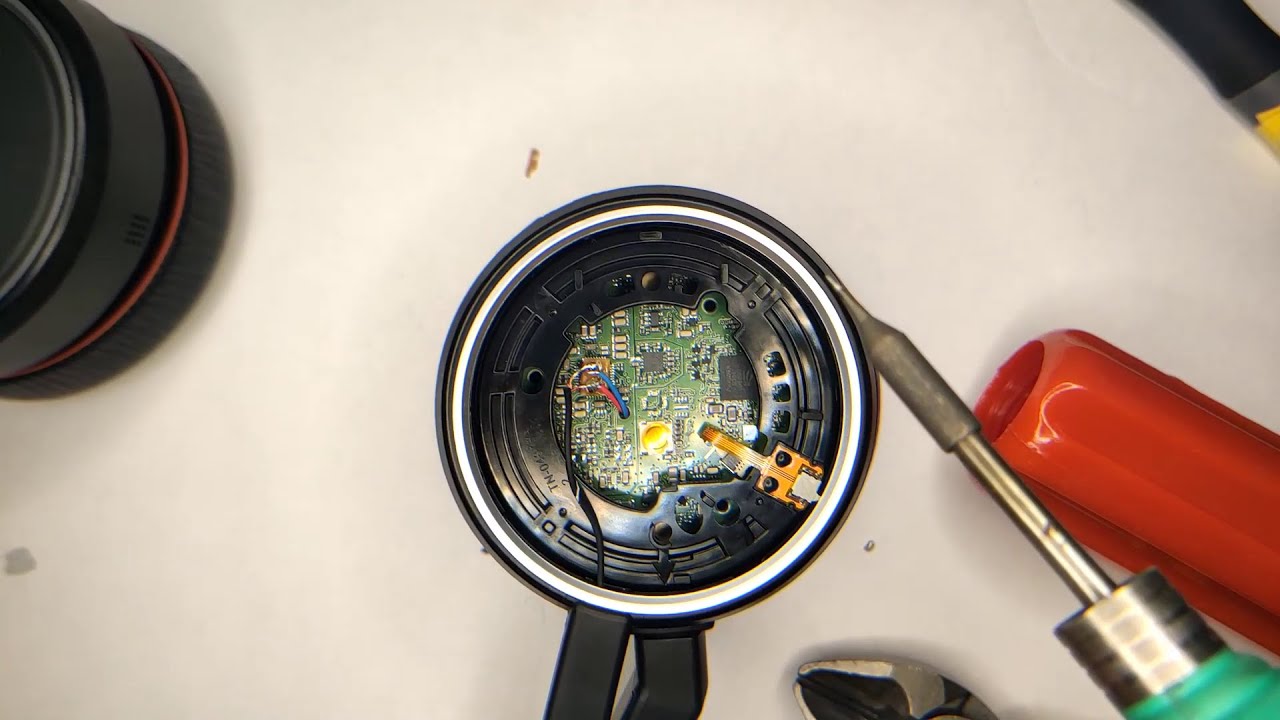
Physical Damage: Over time, physical wear and tear can take a toll on headset microphones. Damage to the microphone boom, such as bending or kinking, can impact audio quality. Similarly, exposure to moisture or extreme temperatures can lead to internal damage. Inspecting the physical condition of the headset and handling it with care can prevent such issues from arising.
-
Software and Driver Issues: Outdated or corrupted drivers, as well as software conflicts, can result in malfunctioning headset microphones. Regularly updating the device drivers and ensuring that the software is compatible with the operating system can mitigate these issues.
Understanding these common issues with headset microphones empowers users to address and resolve them effectively. By troubleshooting these issues, users can optimize the performance of their headset microphones and enjoy clear, uninterrupted audio input during their activities.
How to Identify and Fix Distorted Audio
Distorted audio from a headset microphone can be frustrating and detrimental to effective communication. Identifying and addressing the root cause of this issue is essential for restoring clear and high-quality audio input. Here are some steps to help diagnose and rectify distorted audio from your headset microphone:
1. Check the Physical Connection
Begin by inspecting the physical connection of your headset to the device. Ensure that the connectors are securely plugged into the appropriate ports. If the connection appears loose, reseating the connectors can help establish a stable connection and eliminate potential audio distortion caused by a faulty connection.
2. Adjust Microphone Sensitivity
The sensitivity of the microphone can significantly impact audio quality. In some cases, overly high sensitivity can lead to distortion, especially when speaking loudly or when ambient noise is present. Conversely, low sensitivity may result in faint or muffled audio. Adjusting the microphone sensitivity settings in the system preferences or audio control panel can help mitigate distortion and ensure optimal audio input levels.
3. Evaluate Environmental Factors
Consider the environment in which you are using the headset microphone. Background noise, echoes, or reverberations can contribute to distorted audio. Minimizing environmental noise and ensuring that the microphone is positioned correctly can help reduce distortion and improve audio clarity.
4. Update Drivers and Software
Outdated or incompatible drivers and software can lead to audio distortion. Check for updates for the device drivers and ensure that the software used for audio input is compatible with the operating system. Updating drivers and software to the latest versions can resolve potential compatibility issues and improve audio performance.
5. Test on Different Devices
To isolate the source of the distortion, test the headset microphone on different devices. If the audio remains distorted across multiple devices, the issue is likely related to the headset or its settings. Conversely, if the audio quality improves on a different device, the original device may be the source of the problem.
By following these steps, users can effectively identify and address distorted audio from their headset microphones, restoring clear and crisp audio input for seamless communication and enhanced user experience. Regular maintenance and troubleshooting can help prevent audio distortion and ensure consistent high-quality performance from the headset microphone.
Troubleshooting Problems with Low Volume
Dealing with low volume issues from a headset microphone can hinder effective communication and productivity. When encountering low volume problems, it's essential to perform thorough troubleshooting to identify and address the underlying causes. Here's a comprehensive guide to troubleshooting problems with low volume on your headset microphone:
-
Check Microphone Settings: Start by examining the microphone settings on your device. Ensure that the input volume or gain for the microphone is appropriately configured. Adjusting the input volume to a higher level can potentially resolve low volume issues.
-
Inspect Physical Connections: Verify that the headset microphone is securely connected to the correct audio input port on your device. Loose or improper connections can lead to reduced volume output. Reconnecting the headset and ensuring a snug connection can help alleviate low volume problems.
-
Microphone Sensitivity Adjustment: Some headset microphones feature adjustable sensitivity settings. If applicable, check the microphone's sensitivity control and make adjustments to increase the input volume. Experiment with different sensitivity levels to find the optimal setting for clear and audible audio output.
-
Evaluate Environmental Factors: Consider the ambient environment in which you are using the headset microphone. Background noise, echoes, or acoustics within the surroundings can impact the perceived volume of the microphone. Minimizing ambient noise and positioning the microphone closer to the sound source can enhance volume levels.
-
Software and Driver Updates: Outdated or incompatible drivers and software can contribute to low volume output from the headset microphone. Ensure that the device drivers and audio-related software are up to date. Updating drivers and software can rectify compatibility issues and potentially improve volume performance.
-
Test on Alternative Devices: To isolate the low volume issue, test the headset microphone on alternative devices. If the low volume persists across different devices, the problem is likely related to the headset or its settings. Conversely, if the volume improves on a different device, the original device may be the source of the low volume problem.
By systematically troubleshooting low volume issues with your headset microphone, you can identify and address the root causes, thereby restoring optimal volume levels for clear and effective audio input. Regular maintenance and proactive troubleshooting are essential for ensuring consistent and reliable performance from your headset microphone.
Dealing with Background Noise and Static
Background noise and static can significantly detract from the clarity and quality of audio captured by a headset microphone, posing challenges in communication and recording scenarios. Addressing these issues requires a systematic approach to identify and mitigate the sources of unwanted noise and static interference.
-
Environmental Assessment: Begin by evaluating the ambient environment where the headset microphone is being used. Identify potential sources of background noise, such as fans, air conditioning units, or nearby conversations. Additionally, assess the presence of electromagnetic interference from electronic devices, which can contribute to static and unwanted audio artifacts.
-
Positioning and Acoustic Treatment: Proper positioning of the headset microphone can help minimize background noise and static. Position the microphone away from sources of ambient noise and ensure that it is oriented towards the primary sound source. Furthermore, implementing acoustic treatment in the recording or communication space, such as sound-absorbing materials or acoustic panels, can reduce reverberations and external noise infiltration.
-
Noise Reduction Software: Utilize noise reduction and audio processing software to mitigate background noise and static during audio capture or communication. These software tools offer features that can intelligently identify and suppress unwanted noise, enhancing the clarity of the microphone's audio output. Experiment with the settings to achieve an optimal balance between noise reduction and preserving the natural audio characteristics.
-
Use of Pop Filters and Windscreens: In scenarios where airflow or plosive sounds contribute to background noise, employing pop filters and windscreens can prove effective. These accessories act as physical barriers to attenuate plosive sounds and wind noise, resulting in cleaner audio input with reduced interference from environmental factors.
-
Grounding and Shielding: Ensure that the headset microphone and associated audio equipment are properly grounded to minimize the impact of electromagnetic interference and static. Additionally, consider using shielded cables to reduce the susceptibility of the audio signal to external electromagnetic fields, thereby mitigating static and interference.
-
Regular Maintenance and Inspection: Periodically inspect the headset microphone for any physical damage or wear that may contribute to static or unwanted noise. Clean the microphone's components and connectors to prevent dust or debris from affecting audio quality, ensuring consistent performance over time.
By implementing these strategies, users can effectively address background noise and static issues associated with headset microphones, resulting in clearer and more professional audio output for communication, content creation, and recording purposes. Proactive management of environmental factors and the application of appropriate tools and techniques are essential for optimizing the performance of headset microphones in diverse usage scenarios.
Tips for Maintaining Your Headset Microphone
Maintaining your headset microphone is essential for preserving its functionality and ensuring consistent performance over time. By incorporating regular maintenance practices, you can prolong the lifespan of your headset microphone and prevent potential issues from arising. Here are valuable tips for maintaining your headset microphone:
-
Proper Storage: When not in use, store your headset microphone in a protective case or pouch to shield it from dust, moisture, and physical damage. Avoid leaving the microphone exposed to harsh environmental conditions, such as extreme temperatures or humidity, which can adversely affect its components.
-
Gentle Handling: Handle your headset microphone with care, especially when adjusting the microphone boom or connectors. Avoid applying excessive force or bending the microphone boom, as this can lead to structural damage and impact audio quality. Additionally, refrain from pulling or tugging on the microphone cable to prevent strain on the connectors.
-
Regular Cleaning: Periodically clean the microphone boom, ear cushions, and connectors using a soft, lint-free cloth and mild cleaning solution. Remove any accumulated debris or residue that may impede the microphone's performance. Ensure that the microphone's openings are free from obstructions to maintain clear audio capture.
-
Cable Management: Pay attention to the management of the microphone cable to prevent tangling and potential cable damage. When coiling the cable for storage, use gentle loops to avoid kinks or twists that can compromise the integrity of the cable over time. Utilizing cable organizers or clips can help maintain the cable's condition.
-
Avoid Moisture Exposure: Protect your headset microphone from exposure to moisture, such as rain or spills. Moisture can infiltrate the microphone's components, leading to corrosion and electrical issues. Be mindful of the environment where you use your headset microphone and take precautions to shield it from moisture.
-
Firmware and Software Updates: Stay informed about firmware updates and software enhancements provided by the manufacturer. Regularly updating the firmware of your headset microphone, as well as any associated software or drivers, can introduce performance improvements and address potential compatibility issues.
-
Professional Inspection: Consider having your headset microphone professionally inspected and serviced periodically, especially if you rely on it for professional applications. A qualified technician can conduct thorough diagnostics, identify any underlying issues, and perform maintenance to optimize the microphone's performance.
By adhering to these maintenance tips, you can safeguard the functionality and longevity of your headset microphone, ensuring that it continues to deliver clear and reliable audio input for your communication, gaming, recording, and professional needs. Incorporating these practices into your routine maintenance regimen can help you derive maximum value from your headset microphone while minimizing the risk of performance degradation.