How to Set Up a Minecraft Server 1.8.8: A Complete Guide for Gamers
Welcome to our “Gaming” category, where we delve into the exciting world of video games! Today, we’re going to take a deep dive into Minecraft and share a comprehensive guide on how to set up a Minecraft server version 1.8.8. Whether you’re a seasoned player or a beginner looking to explore the multiplayer aspect of Minecraft, this step-by-step tutorial will help you create an immersive gaming experience for you and your friends. Ready? Let’s get started!
Key Takeaways:
- Setting up a Minecraft server 1.8.8 allows you to play with friends and create unique multiplayer experiences.
- Before starting the setup process, ensure you have a strong internet connection and a computer that meets the game’s system requirements.
The Setup Process
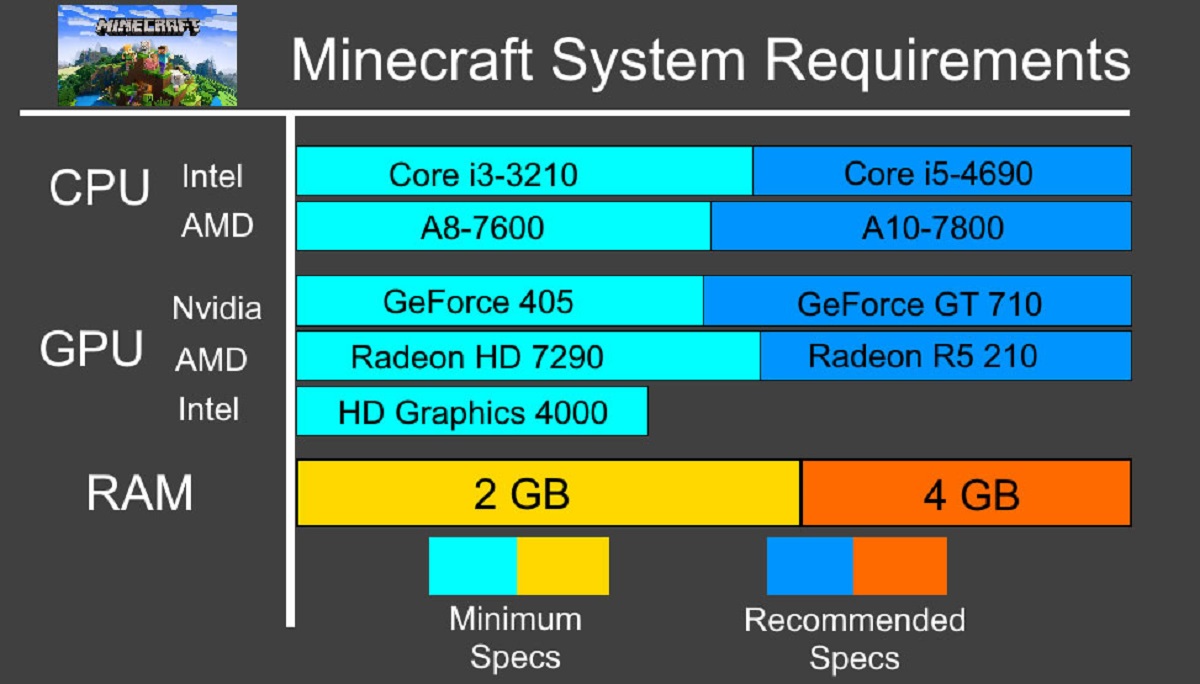
Step 1: Check System Requirements
- Confirm that your computer meets the system requirements for running a Minecraft server. These include a reliable internet connection, sufficient RAM, and a capable processor.
- Make sure to install the latest version of Java on your computer, as Minecraft requires Java to run.
Step 2: Download Minecraft Server Software
- Visit the official Minecraft website and navigate to the “Downloads” section.
- Scroll down and select the version “1.8.8” from the available options.
- Download the server software and save it to a folder on your computer.
Step 3: Create a Server Directory
- Choose a suitable location on your computer where you want to store the server files.
- Create a new folder and name it something easily recognizable, such as “Minecraft Server 1.8.8”.
- Move the downloaded server software into this folder.
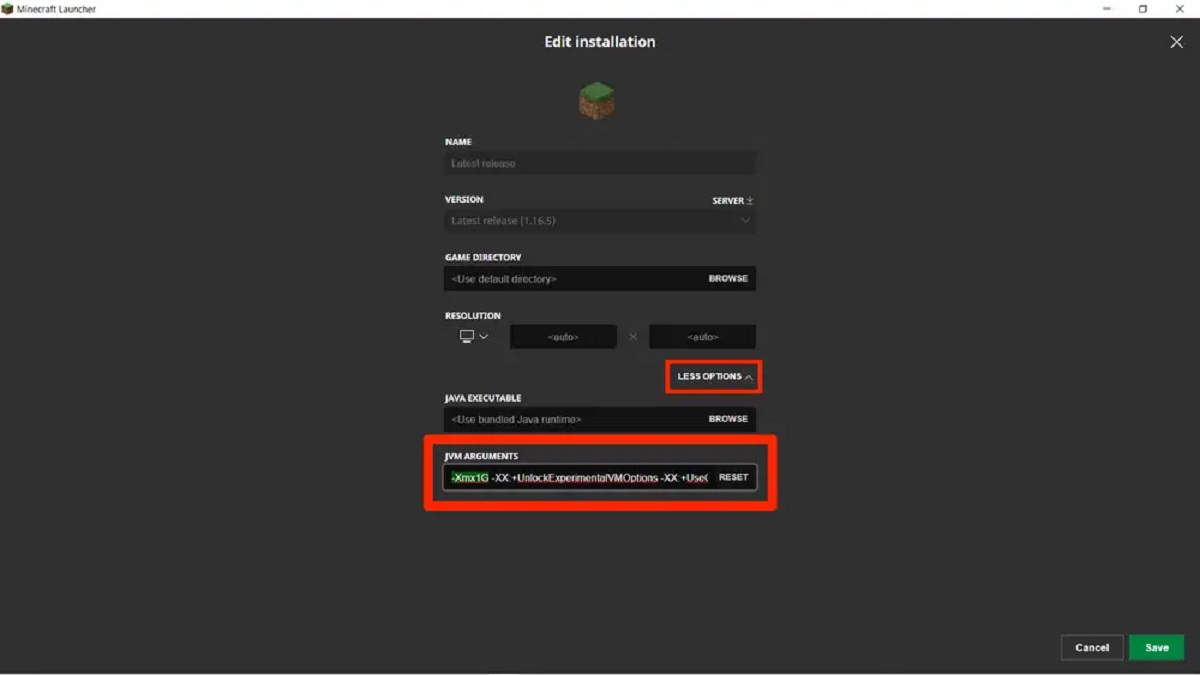
Step 4: Configure Server Settings
- Open the server folder and locate the “server.properties” file.
- Open the file using a text editor (e.g., Notepad).
- Adjust the server settings according to your preferences, such as server name, game mode, maximum players, and difficulty level.
- Save the changes and close the file.
Step 5: Launch the Server
- Double-click the “start.bat” or “minecraft_server.1.8.8.jar” file to launch the server.
- A command prompt window will appear, indicating that the server is starting up.
- Wait until you see the message “Done!” to ensure that the server has successfully started.
Step 6: Invite Players to Join
- Share your server’s IP address with your friends to allow them to connect.
- Create a whitelist if you want to restrict server access to specific players.
- Inform your friends about any additional plugins or mods they need to install to join your server.
In Conclusion
Setting up a Minecraft server 1.8.8 is an excellent way to enjoy multiplayer gameplay and create lasting memories with your friends. By following our step-by-step guide, you’ll have your server up and running in no time.
Remember, having a stable internet connection and ensuring your computer meets the necessary system requirements are important factors for a smooth gaming experience. So, gather your fellow gamers, jump into the vast world of Minecraft, and have a fantastic time exploring and building together!