Introduction
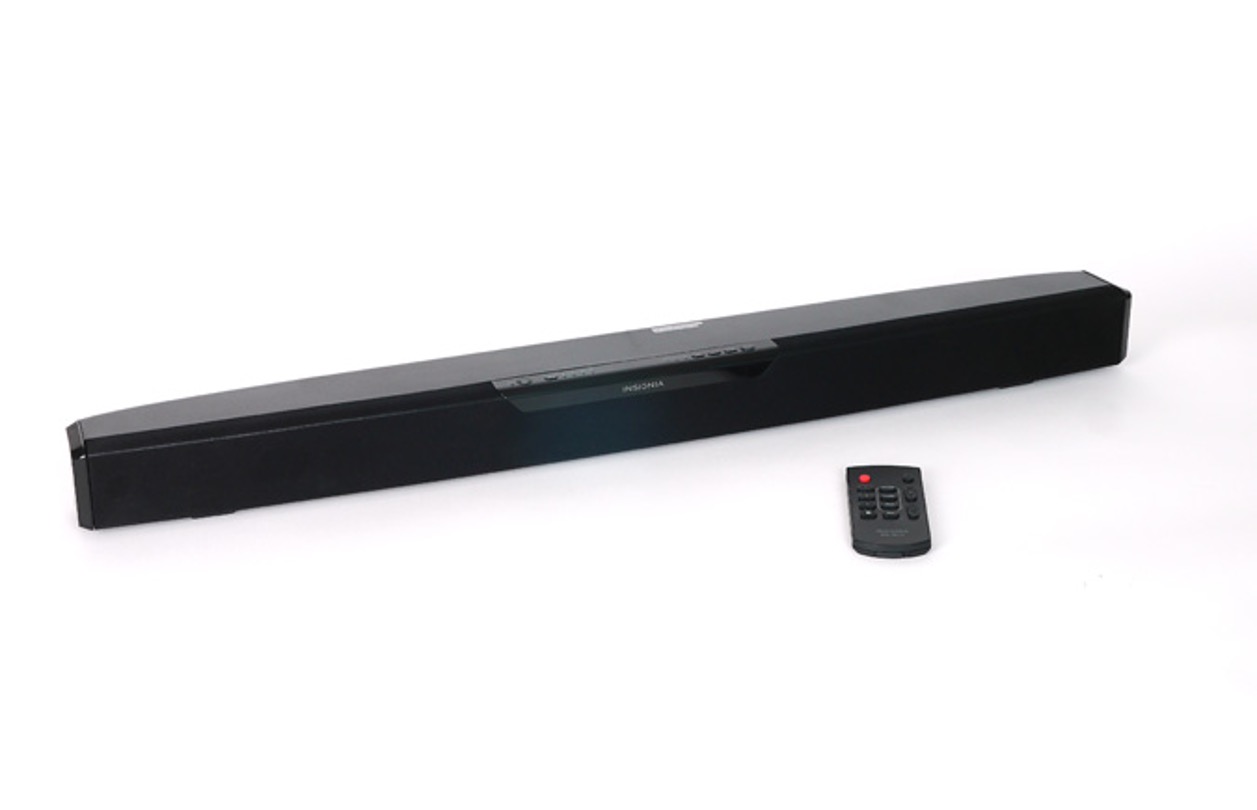
When it comes to enhancing your TV’s audio quality, a soundbar can make a significant difference. The Insignia Soundbar is a popular choice for its sleek design and impressive sound performance. Whether you’re a movie enthusiast wanting a cinematic experience or a music lover seeking immersive audio, connecting your Insignia Soundbar to your TV is a crucial step.
This article will guide you through the process of connecting your Insignia Soundbar to your TV, ensuring that you can maximize its capabilities with ease. Whether you have an older TV or the latest model, we’ll cover the necessary steps and provide helpful tips to make the setup a breeze.
Before diving into the step-by-step process, it is essential to note that the specific steps may vary depending on the TV model and Soundbar you have. However, the basic principles remain the same, and this guide will serve as a helpful reference regardless of the specific devices you own. So, let’s get started and transform your TV’s audio experience!
Step 1: Check compatibility between your Insignia Soundbar and TV
Before proceeding with the connection process, it is essential to ensure that your Insignia Soundbar is compatible with your TV. Checking compatibility will help avoid any potential issues or connectivity problems.
Start by referring to the user manual or specification sheet of both your Insignia Soundbar and your TV. Look for information regarding the supported audio inputs and outputs. Pay particular attention to the type of audio cables or connections required for your specific devices.
If your TV has HDMI ARC (Audio Return Channel) capability, it is highly recommended to utilize this feature for the most streamlined audio connection. HDMI ARC allows for two-way communication between the TV and Soundbar, eliminating the need for a separate audio cable.
In case your TV lacks HDMI ARC compatibility, check if it has an optical audio output. This connection method also provides high-quality audio but requires the use of an optical audio cable. If both HDMI ARC and optical audio connections are unavailable, you may need to explore other options like utilizing the analog audio output or HDMI to RCA converter.
Once you have determined the compatibility between your Insignia Soundbar and TV, you’re ready to move on to the next step. Remember, it’s crucial to ensure compatibility before proceeding to avoid any frustration or inconvenience during the setup process.
Step 2: Gather the necessary cables and accessories
Before connecting your Insignia Soundbar to your TV, it’s important to gather all the required cables and accessories. Having everything prepared beforehand will make the setup process much smoother.
Firstly, check the user manual or specification sheet of your Insignia Soundbar and TV to identify the specific cables needed for the connection. The most common cables used are HDMI and optical audio cables. Ensure that you have the appropriate length of cables to reach between your TV and Soundbar without any tension or strain.
In addition to the cables, make sure you have the power cords for both the Insignia Soundbar and your TV readily available. It’s essential to have the appropriate power adapters and ensure that the outlets you’ll be using are easily accessible.
Consider using cable ties or cable management solutions to keep the cables organized and reduce clutter. This will not only make the setup visually appealing but also help with future maintenance or any changes you may need to make.
Lastly, have a clean and clutter-free workspace to perform the setup comfortably. Gather any additional tools or accessories, such as a screwdriver or tape measure, if required for your specific TV or Soundbar model.
By ensuring you have all the necessary cables and accessories beforehand, you’ll be well-prepared to proceed with the connection process smoothly. Let’s move on to the next step and bring your Insignia Soundbar and TV together seamlessly.
Step 3: Locate the audio output ports on your TV
Before connecting your Insignia Soundbar to your TV, it’s crucial to locate the audio output ports on your TV. These ports will determine how you can establish the audio connection with your Soundbar.
The location and availability of audio output ports may vary depending on your TV’s make and model. Commonly, these ports are found on the back or side panel of the TV, labeled as “audio out” or “audio output.”
There are different types of audio output ports to look out for:
- HDMI ARC: If your TV supports HDMI ARC, look for an HDMI port labeled specifically for ARC. This port allows for both audio and video signals to be transmitted, simplifying the connection process.
- Optical audio: Look for a square-shaped port labeled “optical audio” or “TOSLINK.” This port is used for digital audio transmission and requires an optical audio cable for connection.
- Analog audio: If your TV has older connectivity options, you may find analog audio output ports labeled as “RCA,” “composite,” or “headphone.” These ports use traditional red and white connectors.
Take note of the audio output options available on your TV and ensure that your Insignia Soundbar is compatible with one of these options. Familiarize yourself with the location and types of ports to proceed with the connection process smoothly.
Once you have located the audio output ports on your TV, it’s time to move on to the next step and establish the physical connection between your TV and Insignia Soundbar.
Step 4: Connect the HDMI or optical cable to your TV
Now that you have located the audio output ports on your TV, it’s time to establish the physical connection between your TV and Insignia Soundbar. The type of cable you choose will depend on the available audio output ports on your TV and the compatibility with your Soundbar.
If your TV supports HDMI ARC, this is the preferred method for establishing the audio connection. Here’s how to connect the HDMI cable:
- Insert one end of the HDMI cable into the HDMI ARC port on your TV.
- Connect the other end of the HDMI cable to the HDMI ARC or HDMI input port on your Insignia Soundbar.
If your TV doesn’t have HDMI ARC but has an optical audio output, you can use an optical audio cable for the connection:
- Insert one end of the optical audio cable into the optical audio output port on your TV.
- Connect the other end of the optical audio cable to the optical audio input port on your Insignia Soundbar.
Ensure that the connections are secure and tight to avoid any signal loss or disconnection issues. If you’re using an HDMI cable, you may also need to enable the HDMI ARC function in your TV settings. Consult the user manual or online resources for your specific TV model to find the appropriate settings.
Remember, if you’re using an HDMI ARC connection, the audio and video signals will be transmitted through a single cable, simplifying the setup. However, if you’re using an optical audio cable, you may need to use a separate HDMI cable to connect your TV with other devices, such as a cable box or game console.
With the HDMI or optical cable successfully connected to your TV, it’s time to move on to the next step and complete the connection with your Insignia Soundbar.
Step 5: Connect the other end of the cable to the Insignia Soundbar
Now that you have successfully connected one end of the cable to your TV, it’s time to connect the other end to your Insignia Soundbar. This step will complete the physical audio connection between the two devices.
Depending on the type of cable you are using (HDMI ARC or optical), follow the appropriate instructions below:
If using an HDMI cable:
- Locate the HDMI ARC or HDMI input port on your Insignia Soundbar.
- Insert the other end of the HDMI cable into the corresponding HDMI ARC or HDMI input port on the Soundbar.
If using an optical audio cable:
- Locate the optical audio input port on your Insignia Soundbar.
- Insert the other end of the optical audio cable into the optical audio input port.
Ensure that the cable is securely and firmly connected to the Soundbar to establish a stable audio connection. A loose connection can result in audio distortion or loss.
If your Insignia Soundbar has multiple HDMI or optical audio input ports, make sure to connect the cable to the appropriate input port as specified in the user manual or indicated on the Soundbar itself. This ensures that the audio signal from your TV is correctly routed to the Soundbar for optimal performance.
Once you have connected the cable to your Insignia Soundbar, it’s time to power on both devices and make some necessary adjustments to ensure proper functionality and audio settings.
Step 6: Power on your Insignia Soundbar and TV
With the physical audio connection established between your Insignia Soundbar and TV, it’s time to power on both devices. Properly powering on your Soundbar and TV ensures that they can recognize and communicate with each other.
Begin by plugging in the power cords of your Insignia Soundbar and TV into appropriate power outlets. Make sure the outlets are easily accessible and turned on.
Once the power cords are plugged in, locate the power buttons on your Insignia Soundbar and TV. Press the power button on your TV to turn it on. If your Soundbar has a separate power button, turn it on as well.
Wait for your TV and Soundbar to power up completely. You may see the LED lights or an indicator on the Soundbar that indicates it is on and ready.
During the startup process, the TV may identify the newly connected Soundbar and prompt you to confirm the audio output source. Follow the on-screen instructions to select the appropriate audio output, such as HDMI ARC or optical audio.
Check the input source on your TV and switch to the appropriate HDMI input or audio input that corresponds to the connection you made with your Soundbar.
Once both devices are powered on and the audio input is selected, you should start hearing the audio from your TV being played through the Insignia Soundbar. If you don’t hear any sound, proceed to the next step to adjust the audio settings on your TV.
By successfully powering on your Insignia Soundbar and TV, you are one step closer to enjoying enhanced audio quality and immersive sound experience. Now, let’s fine-tune the audio settings to ensure optimal performance.
Step 7: Adjust the audio settings on your TV
After powering on your Insignia Soundbar and TV, it’s essential to adjust the audio settings on your TV to optimize the sound output through the Soundbar. Tweaking these settings will ensure that you get the best audio performance and tailor it to your preferences.
Access the audio settings menu on your TV. The steps to do this may vary depending on your TV’s brand and model, but you can typically find the audio settings by navigating through the TV’s menu or using a dedicated “Settings” button on your remote control.
In the audio settings menu, explore the available options to fine-tune the audio output. Some common settings you may come across include:
- Sound Mode: Select the mode that matches your preferred sound profile, such as “Standard,” “Movie,” “Music,” or “Sports.” Experiment with different modes to find the one that suits your listening preferences.
- Equalizer: Adjust the equalizer settings to enhance specific frequency ranges, such as bass, treble, or midrange. This allows you to customize the audio according to your taste.
- Surround Sound: If your TV supports it, enable the surround sound feature for a more immersive audio experience. This mode expands the soundstage, creating a sense of depth and directionality.
- Volume Leveling: Activate Volume Leveling to ensure a consistent volume level across different content. This feature can help balance the audio and prevent sudden volume changes between commercials or different programs.
Take your time to adjust these settings according to your preferences and the capabilities of your Insignia Soundbar. It’s a good idea to play some audio or video content to test the changes you make and ensure they deliver the desired audio performance.
Remember that the available settings and options may vary depending on your TV model. Consult the user manual or online resources specific to your TV for more detailed instructions.
Once you have adjusted the audio settings on your TV, it’s time to put your Insignia Soundbar to the test and enjoy the enhanced audio quality it provides.
Step 8: Test the soundbar and adjust settings if necessary
Now that you have completed the setup and adjusted the audio settings on your TV, it’s time to test the Insignia Soundbar and ensure everything is working as expected. Testing the soundbar will help you identify any issues and make further adjustments if necessary.
Play different types of audio content, such as music, movies, or TV shows, to gauge the performance of your Insignia Soundbar. Pay attention to the clarity, volume, and overall audio quality. If the sound seems unbalanced or lacks depth, you can make further adjustments to enhance the audio experience.
Here are some additional adjustments you can make:
- Volume control: Use the Soundbar’s remote control or the TV’s volume control to adjust the volume to your desired level.
- Bass and treble settings: Fine-tune the bass and treble settings to achieve the desired balance. Increasing the bass can add depth and richness to the audio, while adjusting the treble can enhance clarity and crispness.
- Surround sound: If your Insignia Soundbar supports virtual or simulated surround sound, experiment with enabling or disabling this feature to determine the effect it has on the audio experience.
Continuously test and make adjustments until you are satisfied with the sound quality and performance of your Insignia Soundbar. Don’t be afraid to try different settings and configurations to find your preferred audio setup.
If you encounter any issues or are unsure about specific settings or adjustments, consult the user manual or refer to online resources specific to your Insignia Soundbar model. Additionally, you can reach out to Insignia customer support for further assistance.
Once you have thoroughly tested and adjusted the soundbar, you can sit back, relax, and enjoy an enhanced audio experience that elevates your TV viewing or listening pleasure.
Conclusion
Connecting your Insignia Soundbar to your TV opens up a world of enhanced audio quality and immersive sound. By following the step-by-step guide outlined in this article, you have successfully set up your Insignia Soundbar and ensured a seamless audio connection with your TV.
Starting with checking the compatibility between your Insignia Soundbar and TV, gathering the necessary cables and accessories, and locating the audio output ports on your TV, you laid the foundation for a successful setup. Then, by connecting the HDMI or optical cable to your TV and Soundbar, you established the physical audio connection.
Powering on both devices and adjusting the audio settings on your TV allowed you to fine-tune the audio output according to your preferences. Finally, by testing the soundbar and making necessary adjustments, you ensured optimal audio performance.
Now, sit back and enjoy the enhanced audio quality, whether you’re indulging in your favorite movies, streaming music, or watching your beloved sporting events. With your Insignia Soundbar seamlessly integrated with your TV, you can experience a true surround sound-like experience from the comfort of your home.
If you have any further questions or encounter any issues during the setup process, don’t hesitate to consult the user manual, reach out to Insignia customer support, or explore online resources specific to your Insignia Soundbar model.
Embrace the power of superior audio quality with your Insignia Soundbar and elevate your entertainment experience to new heights!


