Introduction
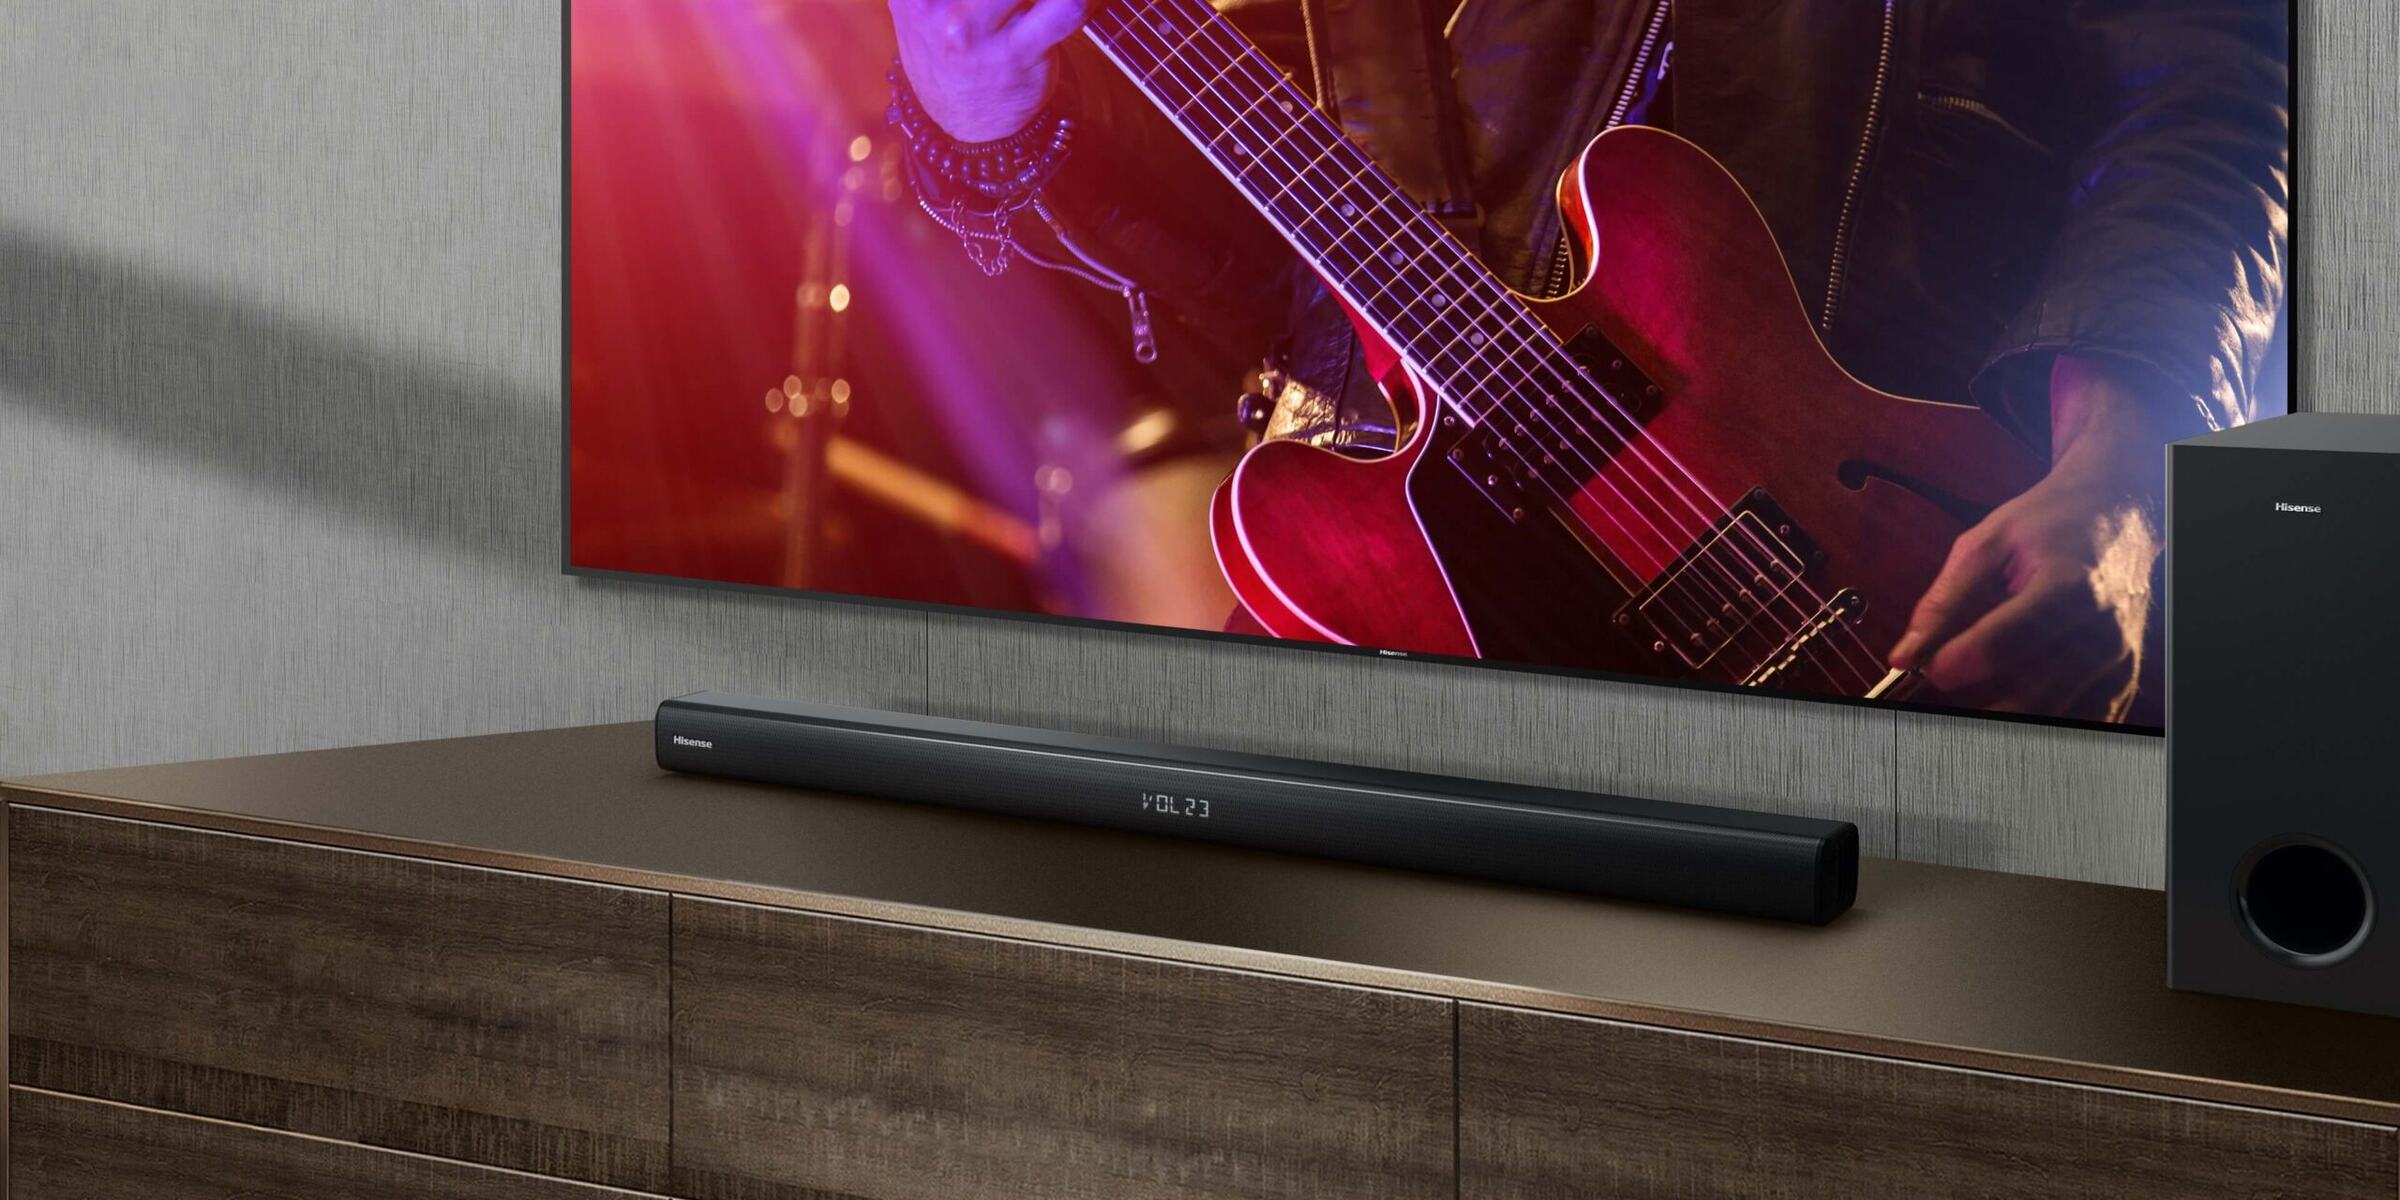
Are you looking to enhance your TV viewing experience by connecting a soundbar to your Hisense TV? Soundbars are a popular choice for improving audio quality and creating a cinematic sound experience right in your own living room. By connecting a soundbar to your Hisense TV, you can enjoy clearer dialogue, richer bass, and immersive surround sound.
However, the process of connecting a soundbar to a Hisense TV may seem daunting if you’re not familiar with the setup. But fear not! In this guide, we will take you through the step-by-step process to help you successfully connect a soundbar to your Hisense TV.
Before we dive into the technical details, it’s important to mention that the steps outlined here are generally applicable to most Hisense TV and soundbar models. However, keep in mind that specific instructions may vary depending on the specific models and features of your devices. Make sure to refer to the user manuals provided with your TV and soundbar for any model-specific instructions.
So, if you’re ready to elevate your audio experience and bring your TV viewing to a whole new level, let’s get started on connecting a soundbar to your Hisense TV!
Step 1: Check the compatibility
Before diving into the setup process, it’s important to ensure that your Hisense TV and the soundbar you intend to connect are compatible. This will save you time and frustration later on. Here are a few compatibility factors to consider:
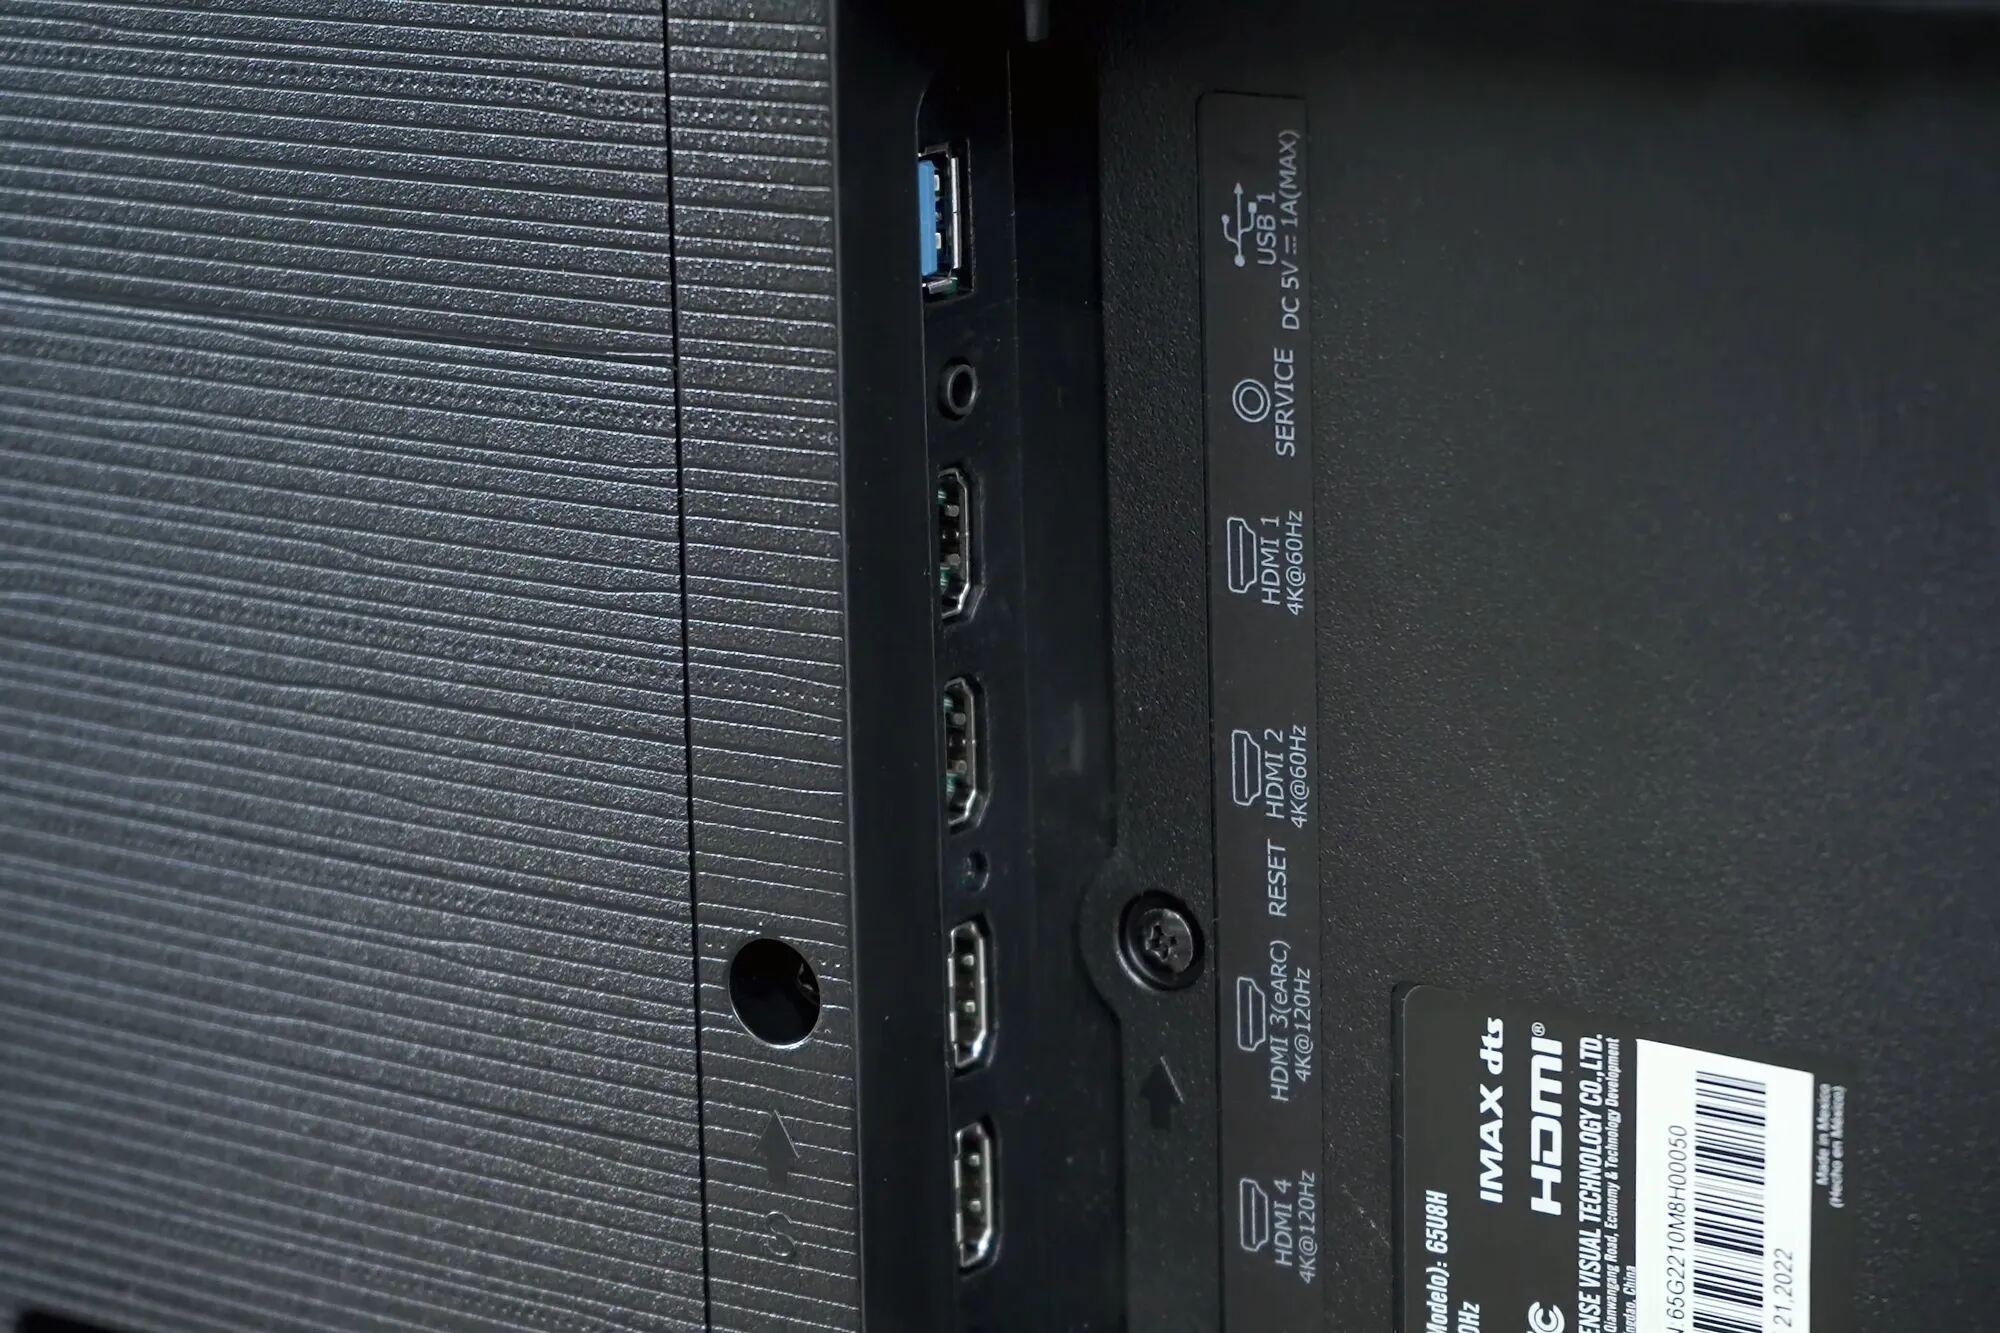
- Audio Output: Check if your Hisense TV has an audio output option. Most modern TVs have an HDMI ARC (Audio Return Channel) port, which is the most convenient option for connecting a soundbar. Alternatively, your TV may have an optical audio output or a 3.5mm headphone jack.
- Soundbar Inputs: Take a look at the inputs available on your soundbar. Ensure that it has a compatible input option that matches the output options of your Hisense TV. The most common inputs on soundbars are HDMI, optical, and AUX.
- Audio Formats: Consider the audio formats supported by both the TV and the soundbar. This is especially important if you plan on using your soundbar for streaming services or external devices. Look for compatibility with formats such as Dolby Digital, DTS, and others.
Checking the compatibility of your devices will save you the frustration of realizing they are not compatible after going through the setup process. If you are unsure about the compatibility, refer to the user manuals of your TV and soundbar or consult the manufacturers’ websites for more information.
Step 2: Gather the necessary cables and equipment
Once you have ensured the compatibility of your Hisense TV and soundbar, the next step is to gather the necessary cables and equipment. Here are the items you will need:
- HDMI cable: If your TV and soundbar both have HDMI ARC ports, you will need an HDMI cable to connect them. Make sure to choose a high-quality HDMI cable that supports ARC functionality.
- Optical cable: If your TV has an optical audio output and your soundbar has an optical input, you will need an optical cable. This type of cable can transmit high-quality audio signals.
- AUX cable: In case your TV and soundbar have 3.5mm headphone jack options, you can use an AUX cable to connect them. This is a simple and straightforward option, but keep in mind that it may not provide the same audio quality as HDMI or optical connections.
- Remote control: Make sure to have the remote control for your soundbar handy, as you may need it during the setup process to adjust settings and control the audio output.
- Power cables: Ensure that you have the appropriate power cables for both your TV and soundbar to connect them to a power source.
It’s a good idea to double-check the inputs and outputs on your TV and soundbar to determine which cables are necessary. Having the required cables and equipment ready beforehand will streamline the setup process and ensure a smooth connection between your Hisense TV and soundbar.
Step 3: Set up the soundbar
Before you connect the soundbar to your Hisense TV, it’s crucial to properly set up the soundbar itself. Here’s how you can do it:
- Choose the ideal location: Find a suitable location for your soundbar. It’s commonly placed below or above the TV, but make sure it doesn’t obstruct the TV’s remote sensor or any important vents. Also, ensure that the soundbar is positioned on a stable surface.
- Mount the soundbar (if applicable): If your soundbar comes with a wall-mounting kit, you can mount it on the wall using the provided brackets and screws. Follow the instructions in the soundbar’s user manual to securely mount it.
- Connect the power: Plug the power cable of the soundbar into a power socket or surge protector. Ensure that the power cable is securely connected.
- Turn on the soundbar: Use the power button on the soundbar or its remote control to turn it on. You may see an indicator light or display on the soundbar to indicate that it’s powered on.
- Adjust the settings: Use the soundbar’s remote control or buttons to adjust its settings as per your preferences. You can adjust the volume, sound modes, equalizer settings, and other audio options based on your listening preferences.
By setting up your soundbar correctly, you’ll ensure that it’s ready to be connected to your Hisense TV and provide optimal sound quality for your TV viewing experience. Once you’ve completed the setup process, you’re ready to move on to the next step of connecting the soundbar to your Hisense TV.
Step 4: Connect the soundbar to the TV
With the soundbar properly set up, it’s time to connect it to your Hisense TV. Follow these steps:
- Identify the audio output on your TV: Look for the audio output options on your Hisense TV. As mentioned earlier, it could be an HDMI ARC port, an optical audio output, or a 3.5mm headphone jack. Take note of the specific port you will use for the connection.
- Connect the soundbar using an HDMI cable: If both your Hisense TV and soundbar have HDMI ARC ports, this is the most convenient option. Connect one end of an HDMI cable to the HDMI ARC port on your TV and the other end to the HDMI ARC port on your soundbar. Make sure the cable is securely inserted.
- Connect the soundbar using an optical cable: If your TV has an optical audio output and your soundbar has an optical input, you can use an optical cable. Insert one end of the optical cable into the optical audio output on your TV and the other end into the optical input on your soundbar.
- Connect the soundbar using an AUX cable: If your TV and soundbar both have 3.5mm headphone jack options, you can use an AUX cable. Insert one end of the AUX cable into the headphone jack on your TV and the other end into the AUX input on your soundbar.
Once the soundbar is connected to your Hisense TV using the appropriate cable, you should ensure that the connections are secure and tight. Avoid pulling or putting excessive strain on the cables to prevent any potential damage.
Remember to refer to the user manuals of your TV and soundbar for specific instructions on connecting them, as the process might vary slightly based on the models. With the soundbar connected to your Hisense TV, you’re ready to move on to the next step of adjusting the settings for optimal audio performance.
Step 5: Adjust the settings on the soundbar
After connecting the soundbar to your Hisense TV, it’s time to fine-tune the settings on the soundbar for optimal audio performance. Here’s what you need to do:
- Select the correct input source: Use the remote control or buttons on the soundbar to select the input source corresponding to the connection you made. For example, if you connected the soundbar using HDMI ARC, select the HDMI ARC input source.
- Adjust the volume: Set the volume on your TV to a comfortable level and then use the volume controls on the soundbar to adjust its volume output. You may also be able to use the TV remote control to control the soundbar’s volume if the devices are properly connected.
- Explore sound modes and equalizer settings: Depending on your soundbar model, you may have access to different sound modes and equalizer settings. Take some time to explore these options and adjust them according to your preferences. These settings can enhance certain audio frequencies and create a more immersive sound experience.
- Enable virtual surround sound: Some soundbars offer virtual surround sound technology, which can simulate a surround sound experience using only the soundbar speakers. If this feature is available, enable it to enhance the audio immersion while watching movies or playing games.
- Configure audio sync: If you notice any audio delay or synchronization issues between the soundbar and the TV, refer to the soundbar’s user manual for instructions on adjusting the audio sync settings. This will ensure that the audio is properly synced with the on-screen visuals.
Remember to refer to the user manual of your soundbar for specific instructions on adjusting the settings, as the options and controls may vary between different models.
By taking the time to adjust the settings on your soundbar, you can achieve the best audio performance and tailor the sound according to your preferences. With the settings adjusted, it’s time to move on to the final step of testing the soundbar with your Hisense TV.
Step 6: Test the soundbar with your Hisense TV
After completing the setup and adjusting the settings on your soundbar, it’s important to test the audio performance to ensure everything is working as expected. Follow these steps to test the soundbar with your Hisense TV:
- Play audio or video content: Choose a movie, TV show, or any other audio/video content on your Hisense TV that you’re familiar with. Play it to test the soundbar’s audio output.
- Listen for clear dialogue: Pay attention to the dialogue in the content you’re playing. The soundbar should improve the clarity of dialogue and make it more distinct, ensuring an immersive viewing experience.
- Notice the presence of bass: Listen for the presence of deep, rich bass in the audio. A good soundbar should add depth to low-frequency sounds, enhancing the overall audio quality.
- Experience surround sound: If your soundbar supports virtual surround sound or offers a surround sound experience, listen for the immersive effect of sounds coming from various directions. It should create a more spacious and lifelike audio experience.
- Check for synchronization: Observe the synchronization between the audio and video. The sound should be in perfect sync with the visuals on the screen, without any noticeable delays or latency.
While testing, adjust the volume and explore different sound modes or settings to find the configuration that suits your preferences and delivers the best audio experience.
If you notice any issues or inconsistencies with the sound quality or synchronization, refer to the troubleshooting section in the user manual of your soundbar or consult the manufacturer’s support for further assistance.
Once you’re satisfied with the soundbar’s performance, you can now sit back, relax, and enjoy your favorite movies, shows, and games with enhanced audio quality on your Hisense TV.
Conclusion
Connecting a soundbar to your Hisense TV can significantly enhance your audio experience and bring your entertainment to life. By following the step-by-step process outlined in this guide, you can successfully connect and set up a soundbar with your Hisense TV.
We started by checking the compatibility of your devices, ensuring that the audio outputs and inputs match. Then, we gathered the necessary cables and equipment to make the connection. We proceeded to set up the soundbar, considering its placement and power connections. After that, we connected the soundbar to the TV using HDMI, optical, or AUX cables, depending on the available ports.
Adjusting the settings on the soundbar allowed us to fine-tune the audio output to our preferences. We explored sound modes, equalizer settings, and even virtual surround sound options. Finally, we tested the soundbar with our Hisense TV, paying attention to dialogue clarity, bass presence, surround sound, and audio-video synchronization.
Remember, always refer to the user manuals of your Hisense TV and soundbar for model-specific instructions and troubleshooting steps, if needed.
Now that you have successfully connected a soundbar to your Hisense TV, sit back, relax, and enjoy the immersive and superior audio experience that will elevate your TV viewing to new heights. Enjoy your favorite movies, shows, and games with enhanced sound quality!