Introduction
Removing a SIM card from a Galaxy S9 may seem like a simple task, but it's essential to do it correctly to avoid any potential damage to the device. Whether you're switching to a new phone, troubleshooting network issues, or replacing your SIM card, knowing how to safely remove the SIM card from your Galaxy S9 is crucial. In this guide, we will walk you through the step-by-step process to ensure that you can perform this task with confidence and ease.
Ensuring that your Galaxy S9 is powered off before removing the SIM card is the first step in safeguarding your device. Once the device is powered off, locating the SIM card tray and carefully removing it will allow you to access the SIM card. Taking out the SIM card from the tray and reinserting the tray into the device will complete the process.
By following these steps, you can safely remove the SIM card from your Galaxy S9 without causing any damage to the device or the SIM card itself. This guide aims to provide you with clear and concise instructions to make the process as straightforward as possible. Let's dive into the step-by-step guide to safely remove the SIM card from your Galaxy S9.
Step 1: Power off the Galaxy S9
Before you begin the process of removing the SIM card from your Galaxy S9, it's crucial to ensure that the device is powered off. This step is essential to prevent any potential damage to the device and to guarantee a safe removal of the SIM card.
To power off your Galaxy S9, simply press and hold the power button located on the right side of the device. A menu will appear on the screen, prompting you to either power off, restart, or enable emergency mode. To power off the device, tap on the "Power off" option and then confirm the action by tapping "Power off" again. After confirming, the Galaxy S9 will begin the shutdown process.
It's important to wait for the device to completely power down before proceeding to the next step. This ensures that the SIM card and the device's internal components are not active during the removal process, minimizing the risk of any potential damage.
By powering off your Galaxy S9 before removing the SIM card, you are taking a proactive step to safeguard the device and the SIM card itself. This simple yet crucial precaution can prevent any potential issues and ensure a smooth and safe SIM card removal process.
Ensuring that your Galaxy S9 is powered off sets the foundation for a successful SIM card removal process. With the device safely powered down, you can proceed with confidence to the next step, which involves locating the SIM card tray.
Taking the time to power off your Galaxy S9 demonstrates a responsible approach to device maintenance and care. This simple step reflects your commitment to preserving the integrity of your device and handling the SIM card removal process with diligence.
Now that your Galaxy S9 is powered off, let's move on to the next step of locating the SIM card tray and initiating the SIM card removal process.
Step 2: Locate the SIM card tray
Locating the SIM card tray on your Galaxy S9 is the next crucial step in the process of removing the SIM card. The SIM card tray houses the SIM card and is designed to secure it within the device. To proceed with the removal, you need to identify the precise location of the SIM card tray on your Galaxy S9.
The SIM card tray on the Galaxy S9 is typically located on the top edge of the device. It is essential to handle the device with care and attention as you prepare to locate the SIM card tray. Take a moment to familiarize yourself with the physical layout of the device, paying close attention to the edges and any visible slots or compartments.
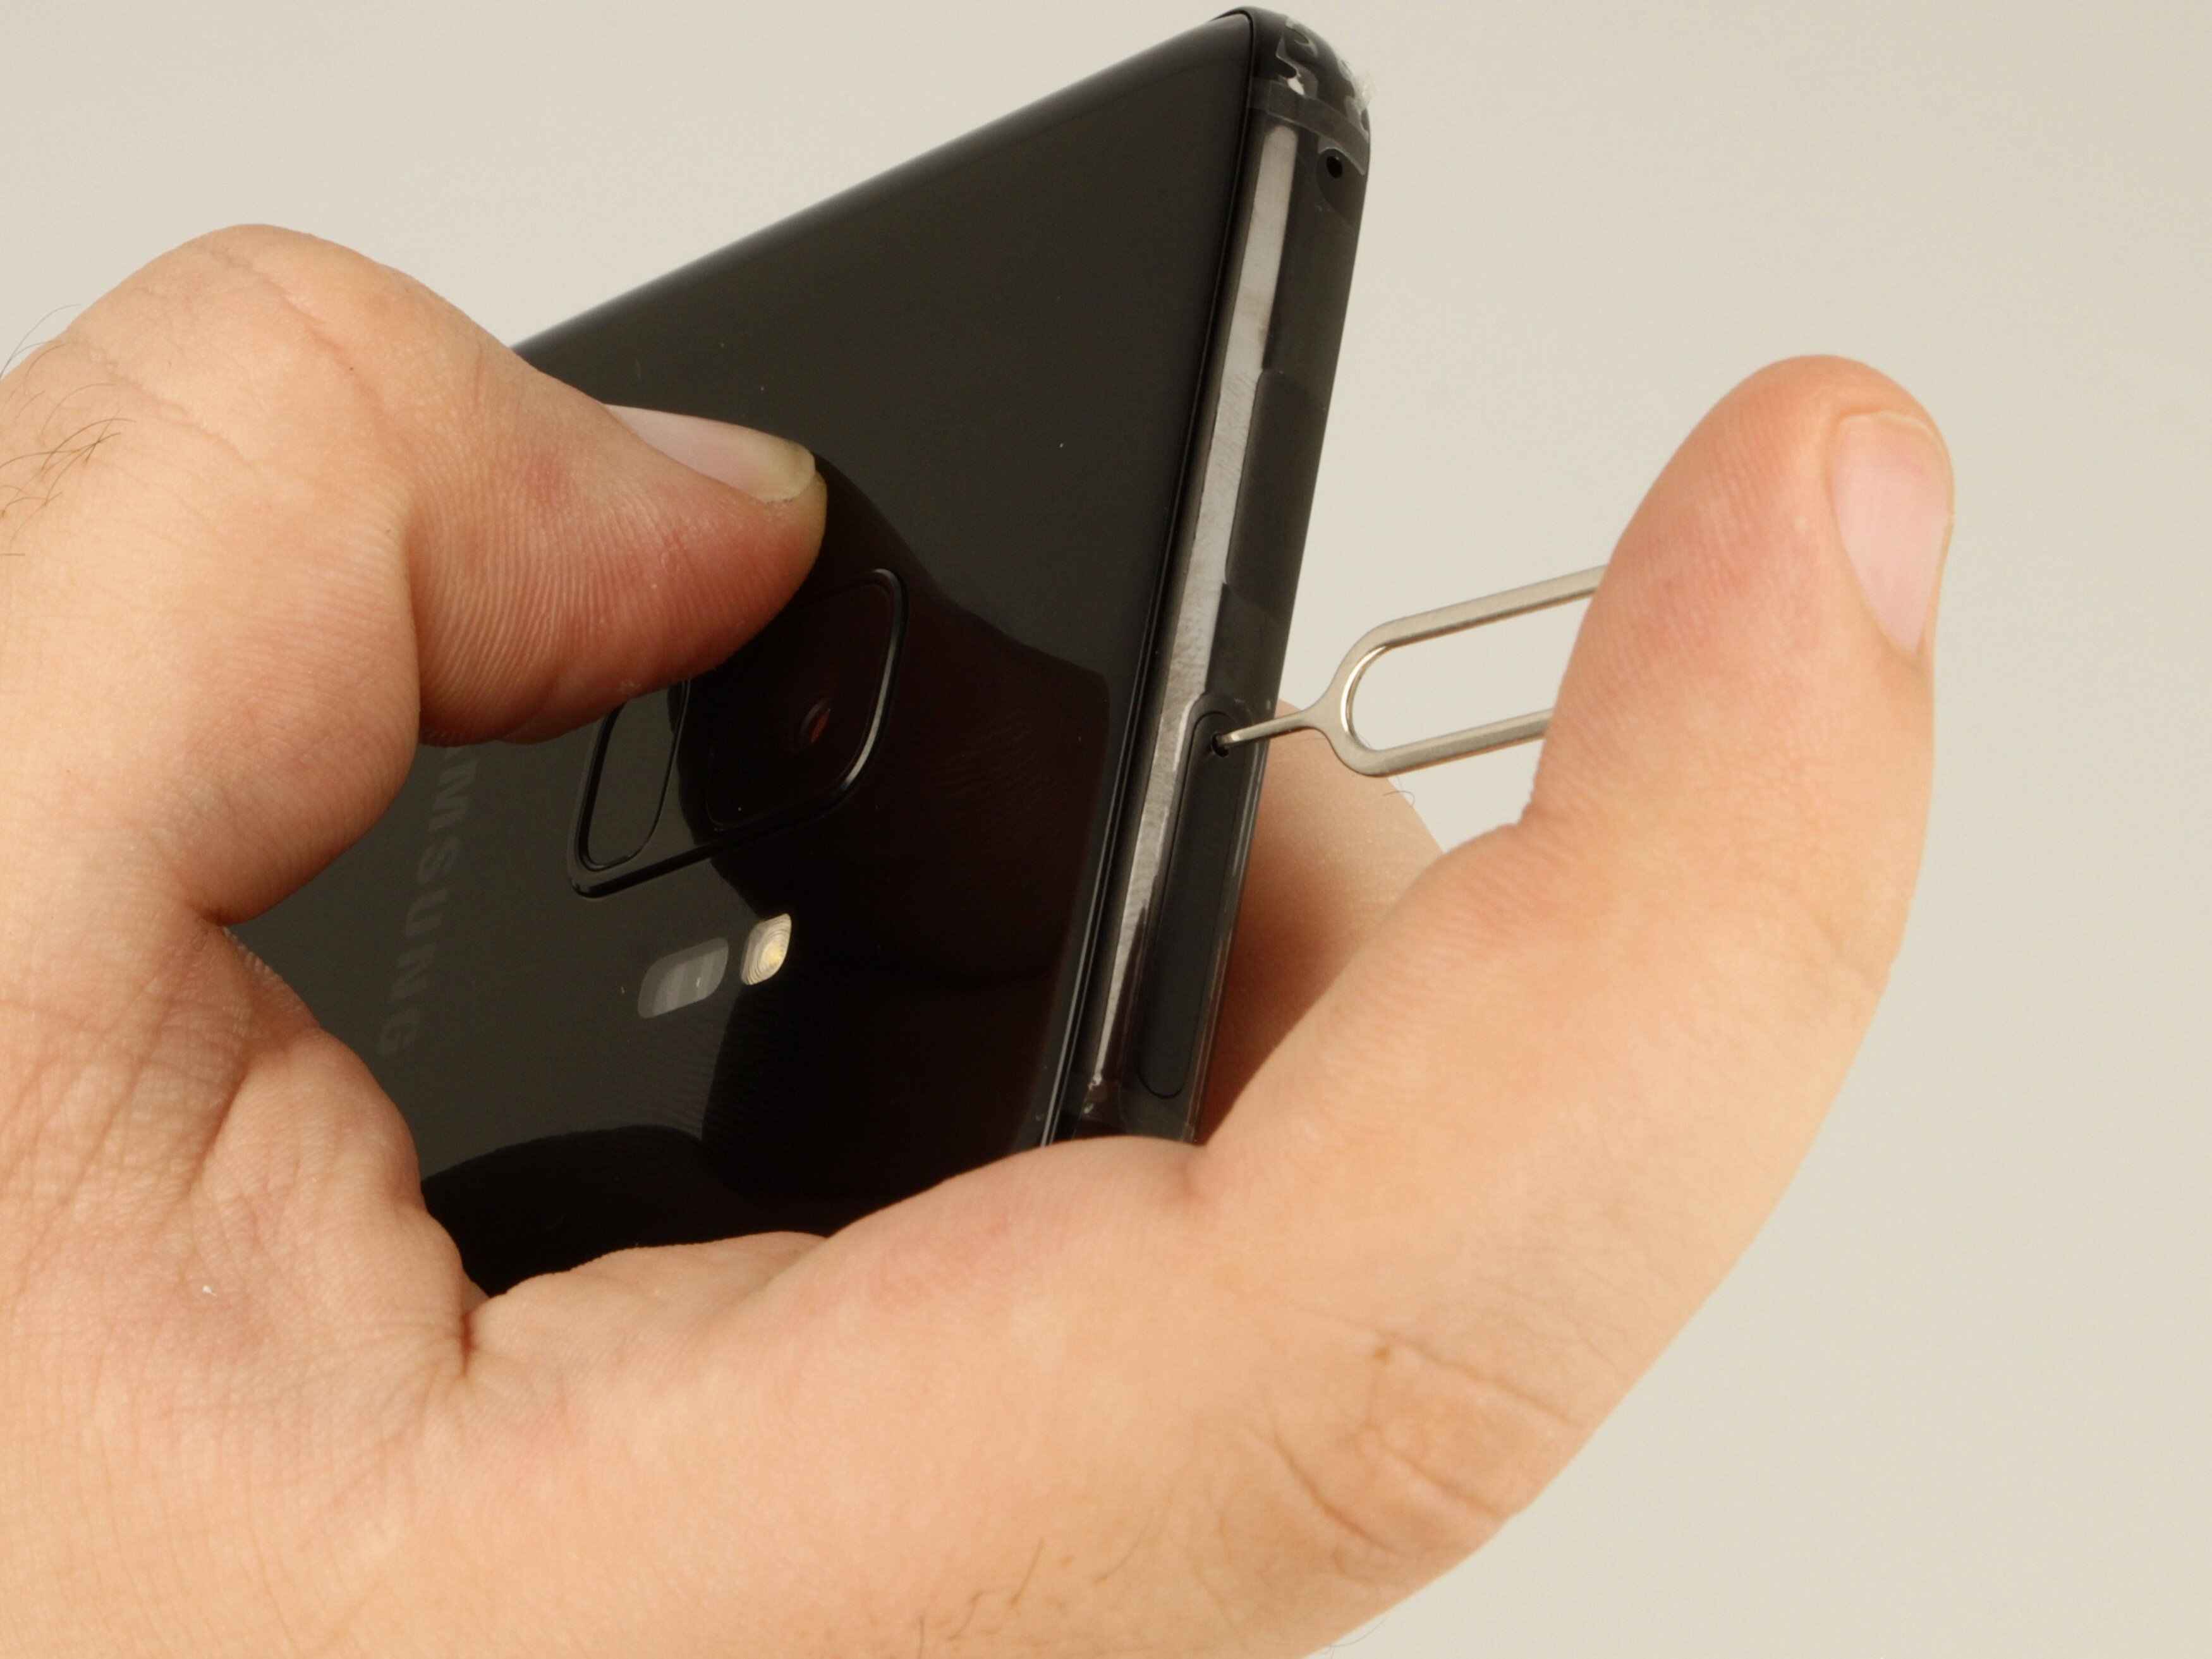
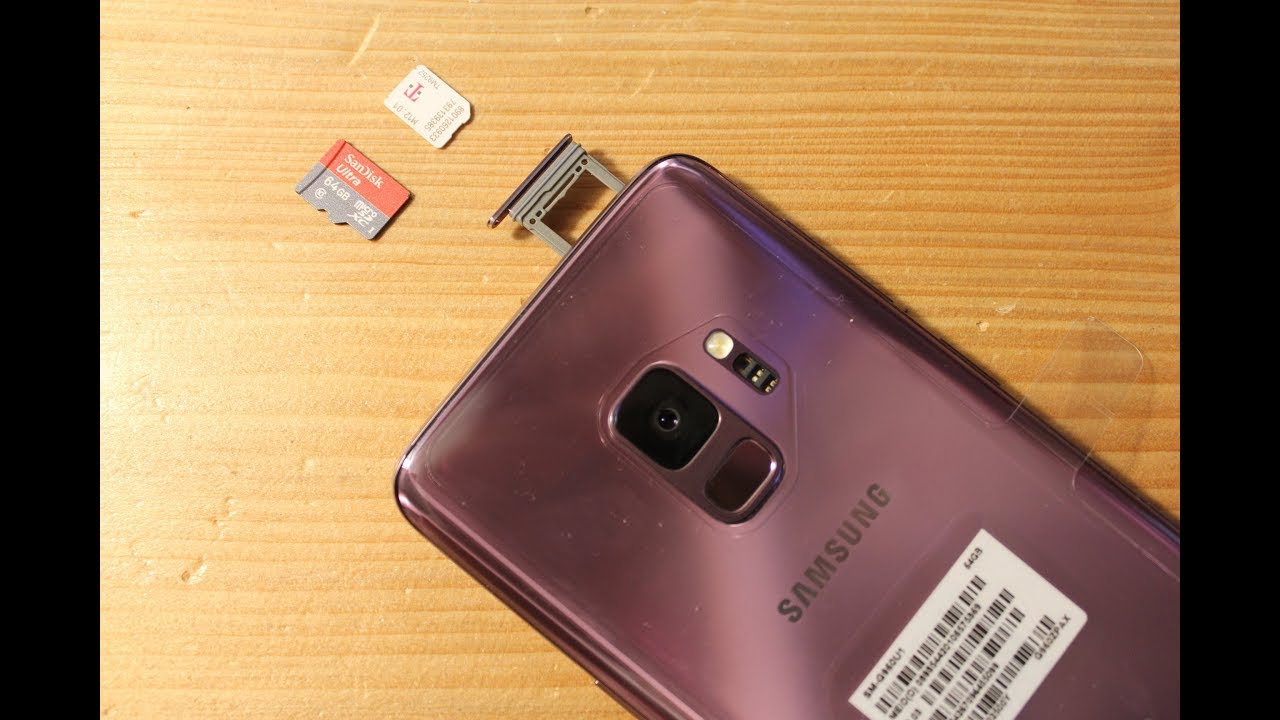
Upon close inspection, you will notice a small pinhole or a tiny slot on the top edge of the Galaxy S9. This pinhole or slot indicates the presence of the SIM card tray. It is usually positioned adjacent to the volume buttons or the secondary microphone on the device. The slot may be accompanied by a small, discreet outline, indicating the location of the SIM card tray.
Once you have identified the slot or pinhole, gently insert the SIM eject tool into the designated opening. The SIM eject tool is typically provided with the Galaxy S9 and is specifically designed for this purpose. If the tool is not readily available, a paperclip can be used as an alternative, ensuring that it is straightened out to fit into the pinhole or slot.
Carefully apply pressure to the SIM eject tool, ensuring that it aligns with the internal mechanism of the SIM card tray. With a gentle push, you will feel the tray start to disengage from the device. It's important to exercise caution and apply even pressure to avoid any damage to the tray or the device.
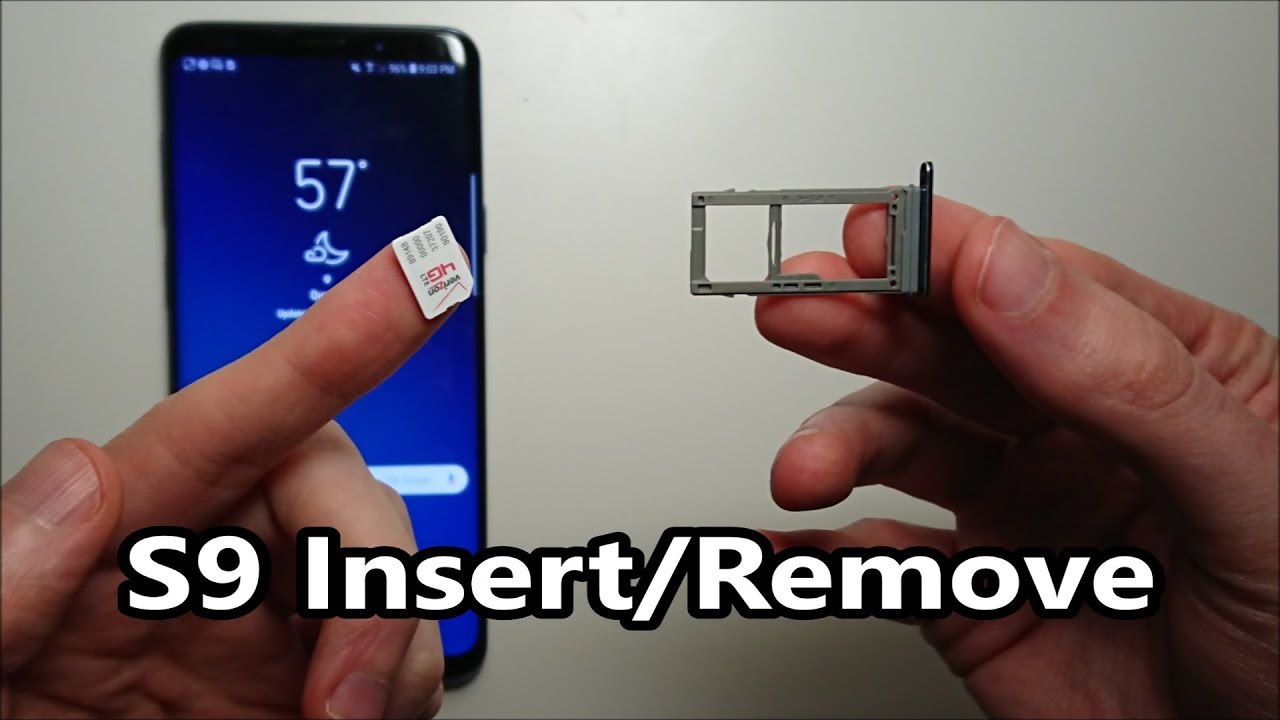
As the SIM card tray begins to emerge from the device, use your fingers to carefully pull it out completely. The tray should slide out smoothly, allowing you to access the SIM card housed within it. Once the tray is fully removed, you can proceed to the next step of removing the SIM card from the tray.
Successfully locating the SIM card tray on your Galaxy S9 is a pivotal milestone in the SIM card removal process. By exercising care and attention, you have set the stage for a seamless and safe removal of the SIM card. With the tray in hand, you are now ready to proceed to the subsequent steps of the removal process, ensuring that each step is approached with precision and diligence.
Step 3: Remove the SIM card tray
With the SIM card tray in hand, the next step is to carefully remove the SIM card from within the tray. The SIM card tray serves as a secure housing for the SIM card, and it's essential to handle it with care to avoid any damage to the card or the tray itself.
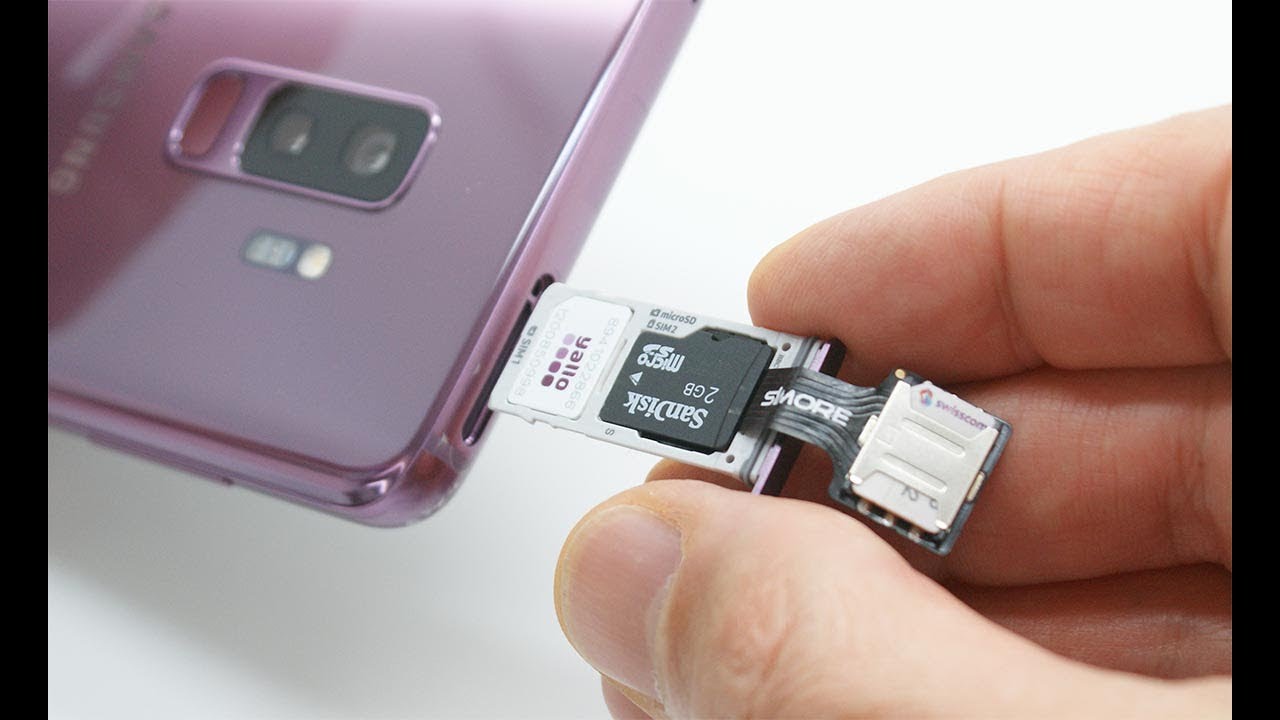
Upon removing the SIM card tray from your Galaxy S9, you will notice that it contains one or two slots, depending on the specific model of the device. One of these slots will accommodate the SIM card, while the other may be designated for a microSD card, if applicable. It's important to identify the correct slot that houses the SIM card to proceed with the removal process.
Inspect the SIM card tray closely to locate the SIM card slot. The slot will be of a specific size and shape, designed to match the dimensions of the SIM card. With the tray positioned securely in your hand, gently place it on a flat surface to ensure stability as you prepare to remove the SIM card.
Using your fingers, carefully maneuver the SIM card tray to expose the SIM card slot. Once the slot is accessible, observe the orientation of the SIM card within the tray. Most SIM cards have a notched corner, indicating the correct positioning for insertion into the device. Take note of this orientation as it will guide you in removing the SIM card correctly.
With a steady hand, gently push the SIM card from the tray, applying light pressure to ease it out of the slot. It's crucial to exercise caution and avoid using excessive force to prevent any damage to the SIM card or the tray. The SIM card should slide out smoothly from the slot, allowing you to grasp it securely with your fingers.
As you remove the SIM card from the tray, take note of its positioning and orientation. This will ensure that you can easily reinsert the SIM card into the tray when necessary. Handle the SIM card with care, avoiding any bending or mishandling that could potentially cause damage.
Successfully removing the SIM card from the tray signifies a significant milestone in the SIM card removal process. By approaching this step with precision and attention to detail, you are ensuring the safe extraction of the SIM card from your Galaxy S9. With the SIM card in hand, you are now ready to proceed to the next step of reinserting the SIM card tray into the device.
With the SIM card safely removed from the tray, let's move on to the subsequent step of reinserting the SIM card tray into your Galaxy S9.
Step 4: Take out the SIM card
With the SIM card now removed from the tray, the next step is to ensure that it is handled with care and attention. The SIM card is a delicate component that requires gentle handling to prevent any damage or malfunction.
Once the SIM card is securely in your hand, take a moment to examine its surface. Ensure that there are no visible signs of damage, such as scratches, dents, or discoloration. It's essential to verify the integrity of the SIM card before proceeding with any further steps.
Inspect the metal contacts on the back of the SIM card. These contacts facilitate the connection between the SIM card and the device, enabling it to communicate with the network. It's crucial to ensure that the contacts are clean and free from any debris or obstruction. If necessary, use a soft, dry cloth to gently wipe the contacts, removing any potential buildup or dirt.
Take note of the orientation of the SIM card. Most SIM cards have a notched corner or a specific shape that indicates the correct positioning for insertion into the device. This orientation is vital for ensuring that the SIM card is reinserted correctly into the device's SIM card tray when needed.
As a proactive measure, consider placing the SIM card in a safe and secure location. This will prevent the risk of misplacing or damaging the SIM card during the removal process. A protective case or a designated SIM card holder can serve as an ideal storage solution, safeguarding the SIM card from any potential harm.
By taking these precautionary steps, you are demonstrating a responsible approach to handling the SIM card. Your attention to detail and care for the SIM card's well-being reflect your commitment to maintaining the integrity of your Galaxy S9 and its associated components.
With the SIM card securely in your possession and its condition verified, you have successfully completed the crucial step of taking out the SIM card from your Galaxy S9. Your diligence and focus on ensuring the safe handling of the SIM card signify your dedication to preserving the functionality of your device.
Now that the SIM card has been safely removed and safeguarded, you can proceed to the final step of reinserting the SIM card tray into your Galaxy S9. This will complete the SIM card removal process, allowing you to carry out the necessary actions, such as replacing the SIM card or troubleshooting network issues with confidence and ease.
Step 5: Reinsert the SIM card tray
After safely removing the SIM card from your Galaxy S9, the final step is to reinsert the SIM card tray back into the device. This step is crucial to ensure that the SIM card is securely placed within the device, allowing for seamless functionality and connectivity. By following the reinsertion process with care and precision, you can complete the SIM card removal and replacement procedure with confidence.
To reinsert the SIM card tray, begin by carefully aligning the tray with the corresponding slot on the top edge of your Galaxy S9. It's essential to position the tray correctly to avoid any potential misalignment or damage to the device. Take a moment to ensure that the tray is oriented in the correct direction, with the SIM card slot facing outward.
Once the tray is aligned, gently slide it back into the device, applying even pressure to ensure a smooth and secure fit. It's important to exercise caution and avoid forcing the tray into the slot, as this could lead to damage to the tray or the device itself. With a steady hand, guide the tray into place, ensuring that it sits flush with the device's edge.
As the SIM card tray is reinserted, you will feel it seamlessly slotting back into position within the device. Take a moment to verify that the tray is securely inserted, with no protrusions or misalignments. This visual confirmation ensures that the tray is properly seated and that the SIM card is safely housed within the device.
Once the SIM card tray is securely reinserted, power on your Galaxy S9 to initiate the device's startup process. As the device powers up, it will establish the necessary connections with the network, allowing you to resume normal usage and functionality. By reinserting the SIM card tray with care and attention, you have successfully completed the SIM card removal and replacement process.
With the SIM card securely reinserted into your Galaxy S9, you can proceed with confidence, knowing that the device is ready to deliver seamless connectivity and performance. Whether you're replacing the SIM card, troubleshooting network issues, or transitioning to a new device, the reinsertion process ensures that your Galaxy S9 is equipped to meet your communication needs effectively.
By following these step-by-step instructions, you have demonstrated a proactive approach to maintaining your device and handling the SIM card removal process with diligence and precision. Your commitment to safeguarding the integrity of your Galaxy S9 and its components reflects your dedication to ensuring a seamless and trouble-free user experience.
With the SIM card tray securely reinserted, you have successfully completed the process of safely removing the SIM card from your Galaxy S9. Your attention to detail and careful execution of each step ensure that the device is ready for optimal performance and connectivity, allowing you to make the most of its capabilities with confidence and ease.
Conclusion
In conclusion, the process of safely removing the SIM card from your Galaxy S9 is a fundamental aspect of device maintenance and management. By following the step-by-step guide outlined in this article, you have gained valuable insights into the precise and careful approach required to ensure the safe extraction and reinsertion of the SIM card. Each step, from powering off the device to reinserting the SIM card tray, has been meticulously crafted to provide you with a comprehensive understanding of the process.
By powering off your Galaxy S9 before initiating the SIM card removal process, you established a crucial foundation for ensuring the safety and integrity of both the device and the SIM card. This proactive step reflects your commitment to responsible device management and care, setting the stage for a successful SIM card removal experience.
The meticulous process of locating the SIM card tray and carefully removing it from the device demonstrated your attention to detail and precision. By identifying the precise location of the tray and executing the removal process with care, you ensured that the SIM card was safely accessed without any risk of damage to the device.
With the SIM card tray in hand, you proceeded to remove the SIM card with caution and diligence. By handling the SIM card with care and verifying its condition, you showcased a proactive approach to safeguarding the integrity of this essential component. Your focus on ensuring the safe extraction of the SIM card from the tray reflects your dedication to maintaining the functionality of your Galaxy S9.
The subsequent step of taking out the SIM card from the tray allowed you to verify its condition and orientation, ensuring that it is ready for reinsertion when needed. By handling the SIM card with care and attention, you demonstrated a responsible approach to managing this critical component of your device.
Finally, the reinsertion of the SIM card tray back into your Galaxy S9 completed the SIM card removal and replacement process. By guiding the tray back into place with precision and care, you ensured that the SIM card was securely housed within the device, ready to facilitate seamless connectivity and performance.
In essence, the process of safely removing the SIM card from your Galaxy S9 encompasses a series of meticulous steps that collectively contribute to the overall well-being and functionality of your device. Your proactive and careful approach to each step signifies your dedication to maintaining the integrity of your Galaxy S9 and its associated components, ensuring a seamless and trouble-free user experience.