Introduction
Welcome to our comprehensive tutorial on extracting the SIM card from your iPhone Xs. Whether you're upgrading to a new device, switching carriers, or troubleshooting connectivity issues, knowing how to access and remove the SIM card is a valuable skill for any iPhone user. In this guide, we'll walk you through the process step by step, ensuring that you can confidently and safely manage your device's SIM card.
The SIM card, which stands for Subscriber Identity Module, is a small, essential component that connects your iPhone to your mobile network. It stores crucial information, such as your phone number, carrier details, and contacts, making it integral to the functionality of your device. Understanding how to handle the SIM card with care is essential to prevent damage and ensure seamless operation of your iPhone Xs.
By following this tutorial, you'll gain the knowledge and confidence needed to handle your iPhone Xs with ease. Whether you're a tech enthusiast, a casual user, or someone encountering this process for the first time, this guide is designed to empower you with the skills to manage your device effectively. So, let's dive in and learn how to extract the SIM card from your iPhone Xs.
Step 1: Gather necessary tools
Before beginning the process of extracting the SIM card from your iPhone Xs, it's important to gather the necessary tools to ensure a smooth and hassle-free experience. Here's what you'll need:
-
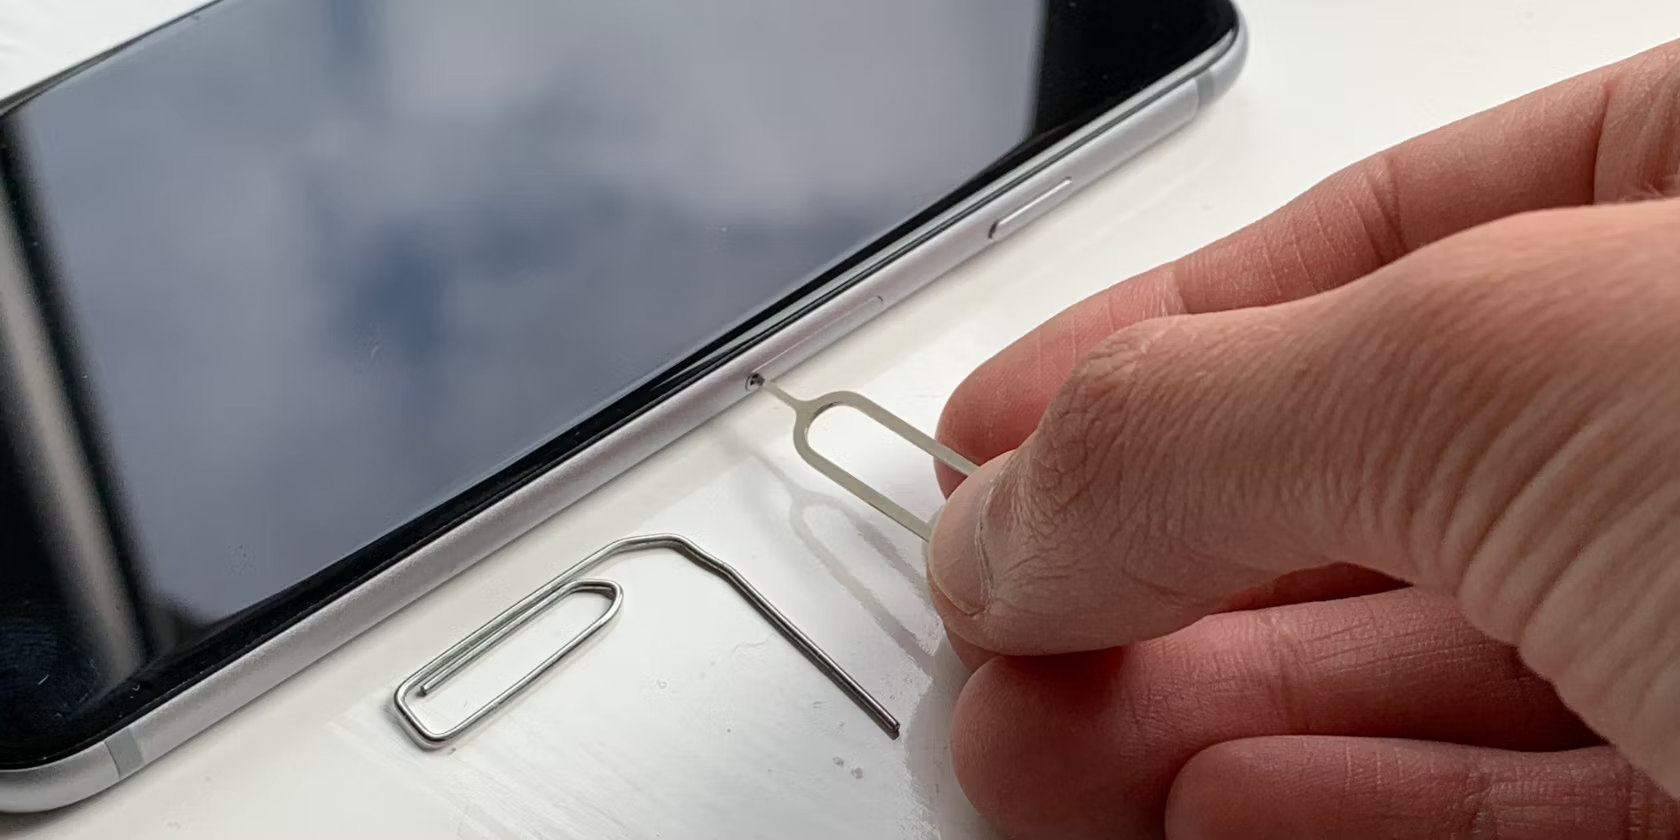
SIM Card Ejector Tool: This small, metal pin-like tool is specifically designed for ejecting the SIM card tray from your iPhone Xs. It's usually included in the original packaging of your device. If you can't locate the ejector tool, a paperclip can serve as an alternative, but it's important to exercise caution to avoid damaging the SIM card tray.
-
Good Lighting: Clear and adequate lighting is essential for identifying the location of the SIM card tray on your iPhone Xs. Whether you're indoors or outdoors, ensure that the area is well-lit to avoid any potential mishaps during the extraction process.
-
Stable Work Surface: Find a flat and stable surface to work on, such as a table or desk, to prevent any accidental drops or slips of the SIM card or the iPhone Xs itself.
-
Patience and Care: While not physical tools, these attributes are crucial for a successful SIM card extraction. Patience will help you navigate the process calmly, while exercising care will ensure that the delicate components of your iPhone Xs remain undamaged.
By gathering these tools and attributes, you'll be well-prepared to proceed with confidence to the next step of the tutorial. Remember, taking the time to set up for the task ahead will contribute to a positive and successful SIM card extraction experience.
Step 2: Locate the SIM card tray
Locating the SIM card tray on your iPhone Xs is the crucial first step in the process of extracting the SIM card. The SIM card tray is a small, discreet component of the iPhone Xs, and identifying its precise location is essential for a smooth extraction process.
To locate the SIM card tray, you'll need to position your iPhone Xs in a well-lit environment, ensuring that you have a clear view of the device's exterior. The SIM card tray on the iPhone Xs is typically situated on the right-hand side of the device, adjacent to the device's power button. It's important to note that the specific location may vary slightly depending on the model and design of your iPhone Xs.
Once you've identified the general area of the SIM card tray, look for a small pinhole or slot on the side of the device. This pinhole is where the SIM card ejector tool or alternative tool, such as a paperclip, will be inserted to initiate the ejection of the SIM card tray.
When handling your iPhone Xs to locate the SIM card tray, it's advisable to hold the device securely and orient it so that the side with the SIM card tray is facing you. This will provide a clear view and easy access to the slot or pinhole where the ejector tool will be inserted.
By taking the time to locate the SIM card tray with precision and care, you'll set the stage for a successful SIM card extraction process. Remember, patience and attention to detail are key as you prepare to move on to the next step of the tutorial.
With the SIM card tray now located, you're ready to proceed to the next step, where we'll guide you through the process of ejecting the SIM card tray from your iPhone Xs.
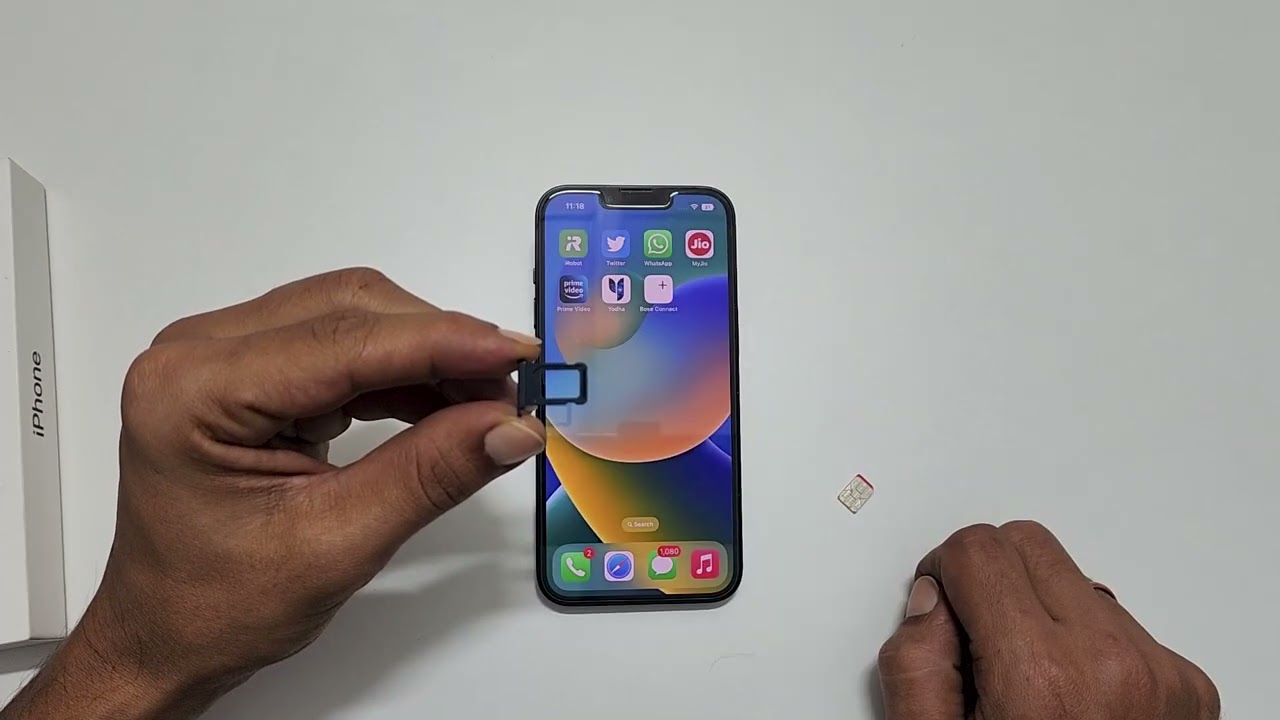
Step 3: Eject the SIM card tray
With the SIM card tray located, it's time to proceed with ejecting the tray from your iPhone Xs. This step requires precision and care to ensure the safe removal of the SIM card. Here's a detailed guide on how to eject the SIM card tray:
-
Prepare the SIM Card Ejector Tool: Take the SIM card ejector tool, or an alternative tool such as a paperclip, and hold it firmly between your fingers. Ensure that you have a secure grip on the tool to prevent any accidental slippage during the ejection process.
-
Insert the Tool into the Ejection Hole: Position the tip of the SIM card ejector tool into the small pinhole or slot located adjacent to the SIM card tray on your iPhone Xs. Apply gentle pressure and insert the tool into the hole until you feel a slight resistance. It's important to exert steady and controlled force to avoid any damage to the device.
-
Initiate the Ejection Process: Once the tool is inserted into the ejection hole, apply a steady and straight outward force to activate the ejection mechanism. You should feel the SIM card tray gradually protruding from the side of your iPhone Xs. Avoid applying excessive force, as this may cause damage to the SIM card tray or the device itself.
-
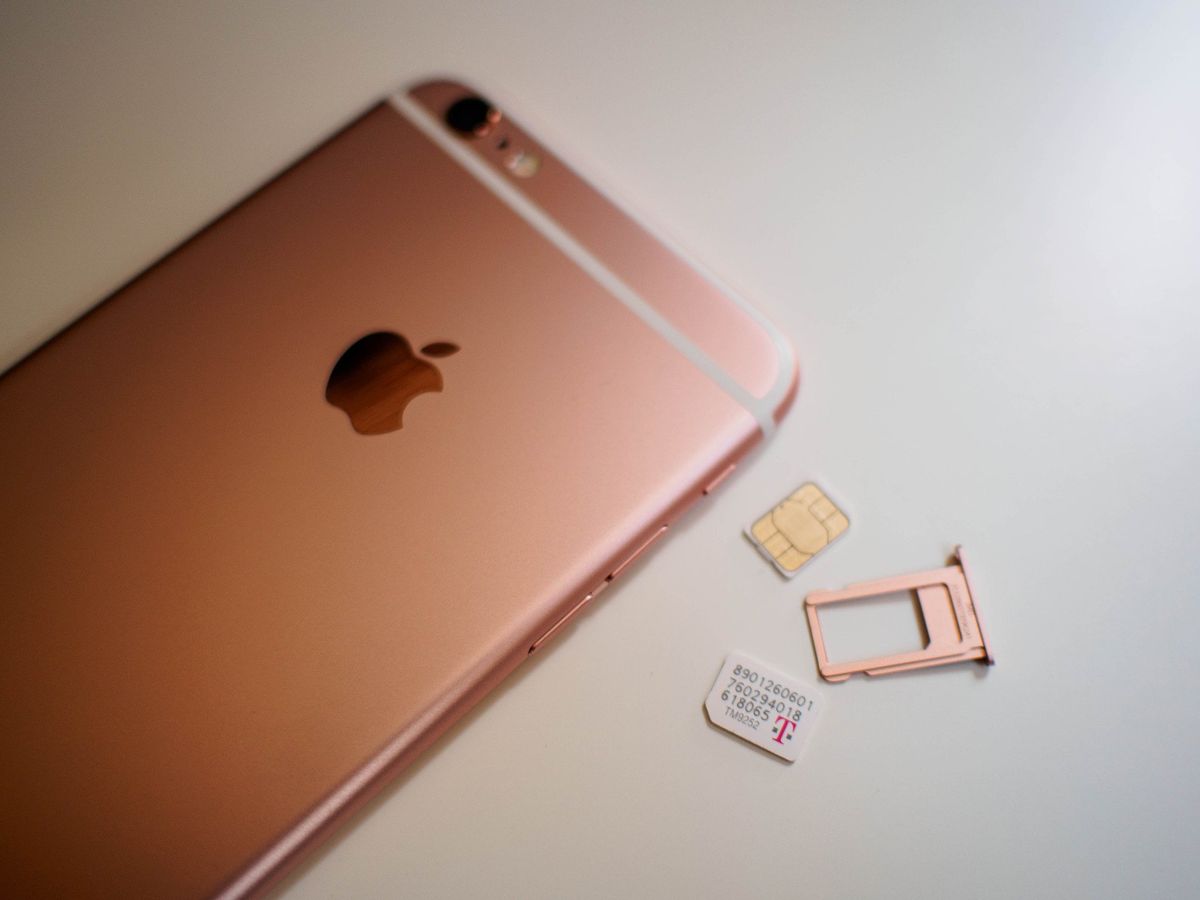
Remove the SIM Card Tray: Once the SIM card tray is partially ejected, carefully grasp it with your fingers and pull it out gently from the device. Take your time to ensure that the tray slides out smoothly and without any resistance. Avoid tilting or angling the tray excessively, as this may lead to the SIM card dislodging from its position.
-
Inspect the SIM Card Tray: With the SIM card tray removed, take a moment to inspect it for any signs of damage or debris. Ensure that the tray is clean and free from any obstructions before proceeding to remove the SIM card itself.
By following these detailed steps, you'll successfully eject the SIM card tray from your iPhone Xs, setting the stage for the final step of removing the SIM card. Remember, patience and precision are essential during this process to ensure the safety of your device and the SIM card itself.
With the SIM card tray ejected, you're now ready to move on to the next step, where we'll guide you through the process of removing the SIM card from the tray.
Step 4: Remove the SIM card
Now that the SIM card tray is successfully ejected from your iPhone Xs, the next step is to carefully remove the SIM card from the tray. This process requires a delicate touch to avoid damaging the SIM card or the tray. Here's a detailed guide on how to remove the SIM card:
-
Inspect the SIM Card Tray: Before proceeding with the removal of the SIM card, take a moment to inspect the SIM card tray. Ensure that it's clean and free from any debris or foreign objects that may interfere with the safe removal of the SIM card.
-
Identify the SIM Card: Within the SIM card tray, you'll notice a small slot that holds the SIM card. The SIM card is a small, rectangular chip that contains vital information related to your mobile network subscription. It's crucial to handle the SIM card with care to prevent any damage to its delicate components.
-
Gently Remove the SIM Card: Using your fingers, carefully grasp the SIM card and gently slide it out from the slot within the SIM card tray. Exercise caution to avoid bending or scratching the SIM card, as these actions may compromise its functionality.
-
Inspect the SIM Card: Once the SIM card is removed from the tray, take a moment to inspect it for any visible damage or signs of wear. Ensure that the metallic contacts on the SIM card are clean and free from any residue that may hinder its connection with the device.
-
Prepare for Reinstallation: If you're planning to reinsert the SIM card into the same or a different device, it's advisable to store it in a safe and secure location. A SIM card holder or a small, labeled container can help protect the SIM card from physical damage and loss.
By following these steps with precision and care, you've successfully removed the SIM card from your iPhone Xs. Handling the SIM card delicately is essential to maintain its integrity and functionality. Whether you're replacing the SIM card, transferring it to a new device, or troubleshooting network issues, knowing how to safely extract and handle the SIM card is a valuable skill for any iPhone Xs user. With the SIM card safely removed, you've completed the essential process of managing your device's connectivity with confidence and precision.
Conclusion
Congratulations! You've successfully navigated the process of extracting the SIM card from your iPhone Xs. By following this comprehensive tutorial, you've gained valuable insights into the essential steps required to manage the SIM card with precision and care. As you reflect on this experience, it's important to recognize the significance of these skills in maintaining the seamless operation of your device and managing your connectivity effectively.
By gathering the necessary tools and attributes, you set the stage for a successful SIM card extraction process. The careful preparation and attention to detail ensured that you approached the task with confidence and readiness. Locating the SIM card tray, initiating the ejection process, and delicately removing the SIM card all contributed to a thorough and well-executed procedure.
As you reflect on this experience, it's important to acknowledge the value of patience and care in handling delicate device components. The knowledge gained from this tutorial empowers you to confidently manage your iPhone Xs, whether it's for routine maintenance, upgrading to a new device, or troubleshooting network-related issues. Your newfound proficiency in SIM card management enhances your overall device ownership experience and equips you with essential skills in the realm of mobile device maintenance.
Furthermore, this tutorial serves as a testament to the empowerment that comes with understanding the intricacies of your device. By mastering the process of SIM card extraction, you've demonstrated your ability to engage with and manage the fundamental components of your iPhone Xs. This level of proficiency enhances your overall user experience and contributes to a deeper sense of connection with your device.
As you conclude this tutorial, you're not only equipped with the practical knowledge of SIM card extraction but also the confidence to engage with future device-related tasks. Whether it's exploring advanced device features, troubleshooting technical issues, or simply maintaining your device, the skills honed through this tutorial will continue to serve you as you navigate the dynamic landscape of mobile device ownership.
In conclusion, the successful extraction of the SIM card from your iPhone Xs marks a significant milestone in your journey as a device user. The knowledge and skills gained through this process position you as a capable and empowered device owner, ready to tackle new challenges and opportunities with confidence and precision.