Introduction
A Venmo QR code is a unique barcode-like image that allows you to securely send and receive money using the Venmo app. It is a convenient and contactless way to make payments, eliminating the need for physical cash or card transactions. With just a simple scan, you can quickly transfer funds to friends, family, or even merchants.
As the world becomes increasingly digital and cashless, Venmo has gained popularity as a trusted and user-friendly payment platform. Whether you are splitting a bill at a restaurant, paying your share of rent, or buying goods and services, having a Venmo QR code provides a hassle-free payment experience.
In this article, we will guide you through the process of setting up a Venmo QR code on your smartphone, as well as creating a Venmo QR code for others to scan. By following the steps outlined below, you’ll be ready to effortlessly make and receive payments through Venmo within minutes.
Additionally, we will explore the benefits of using a Venmo QR code and the convenience it brings to your daily transactions. With its secure and user-friendly interface, Venmo has become a favored choice for many individuals and businesses alike, making it an essential tool for seamless payment experiences.
What is a Venmo QR Code?
A Venmo QR code is a specialized barcode that contains information necessary for a Venmo transaction. It is generated within the Venmo app and can be scanned by other Venmo users to quickly and securely transfer funds.
The Venmo QR code acts as a digital representation of your Venmo account, eliminating the need for manual entry of usernames or other personal information during transactions. When scanned, the Venmo app retrieves the necessary details, such as the recipient’s username and transaction amount, allowing for a seamless payment process.
The QR code technology used by Venmo has revolutionized the way we make payments. With just a simple scan, users can transfer funds without the need for physical cash or complicated banking details. This makes it a versatile tool for various payment scenarios, including split bills, shared expenses, and even business transactions.
One of the key benefits of using a Venmo QR code is its convenience. Instead of manually entering recipient details or searching for usernames, users can simply scan the QR code and initiate a transaction within seconds. This eliminates the need for tedious and error-prone processes, making payments quick and hassle-free.
Furthermore, Venmo QR codes provide an added layer of security. Each transaction initiated through a QR code must be verified by the user, ensuring that the funds are being sent to the intended recipient. This helps prevent unauthorized transactions and enhances the overall security of Venmo transactions.
Overall, a Venmo QR code streamlines the payment process by simplifying the exchange of funds between users. Whether you’re sending money to a friend, paying for goods and services, or even receiving payments as a merchant, having a Venmo QR code makes the transaction process smooth, efficient, and secure.
Why do you need a Venmo QR Code?
A Venmo QR code offers several advantages that make it a valuable tool for your payment needs. Let’s explore some of the compelling reasons why you should consider having a Venmo QR code:
1. Convenience: The primary reason to use a Venmo QR code is the convenience it provides. Instead of manually typing in usernames or searching for recipients, you can simply scan the QR code and initiate a transaction. This saves time and effort, especially when you need to make quick payments or split bills with friends.
2. Contactless Payments: With the increasing focus on hygiene and social distancing, contactless payments have become more crucial than ever. Venmo QR codes allow for seamless, touch-free transactions, eliminating the need for physical cash or exchanging credit cards. This not only provides a safer payment option but also promotes a hygienic payment experience.
3. Secure Transactions: Venmo QR codes utilize advanced encryption technology, ensuring the security of your transactions. Each payment initiated through a QR code requires verification to authorize the transfer, minimizing the risk of unauthorized transactions. Additionally, Venmo employs security measures such as PIN codes and fingerprint authentication to protect your account.
4. Versatility: A Venmo QR code can be used in various scenarios, making it a versatile payment tool. Whether you are paying back a friend, splitting bills at a restaurant, contributing to group gifts, or making purchases from local merchants, having a Venmo QR code simplifies the payment process. It allows you to quickly and securely transfer funds without the need for physical currency or lengthy account details.
5. Business Transactions: Venmo QR codes are not limited to personal payments. They can also be used by businesses to accept payments. By displaying your Venmo QR code at your establishment, customers can conveniently scan and pay for products or services. It eliminates the need for cash transactions or the hassle of exchanging credit cards.
6. Personalized Payment Experience: Venmo allows you to customize your QR code by adding a personalized profile picture or name. This personal touch adds a sense of familiarity and authenticity, making it easier for others to identify and transact with you. It enhances the overall payment experience and builds trust between users.
Overall, a Venmo QR code offers a convenient, secure, and versatile solution for your payment needs. Whether you’re making personal payments or running a business, having a Venmo QR code simplifies transactions and provides a seamless payment experience.
How to set up Venmo QR Code on your smartphone
Setting up a Venmo QR code on your smartphone is a straightforward process that requires only a few simple steps. Follow the instructions below to get started:
Step 1: Download and install the Venmo app: If you haven’t already, go to your smartphone’s app store and search for the Venmo app. Download and install it on your device.
Step 2: Open the Venmo app on your smartphone: Launch the Venmo app by tapping on its icon on your home screen or app drawer.
Step 3: Go to your profile: Once you’re in the Venmo app, tap on the “Profile” tab located at the bottom of the screen. This will take you to your personal profile page.
Step 4: Tap on “Scan Code”: On your profile page, you’ll see a “Scan Code” button. Tap on it to access the QR code scanning feature.
Step 5: Add a QR code scanner app if necessary: Depending on your smartphone, you may need to install a QR code scanner app if it’s not already built into your device. Follow the prompts and install the necessary app from your app store.
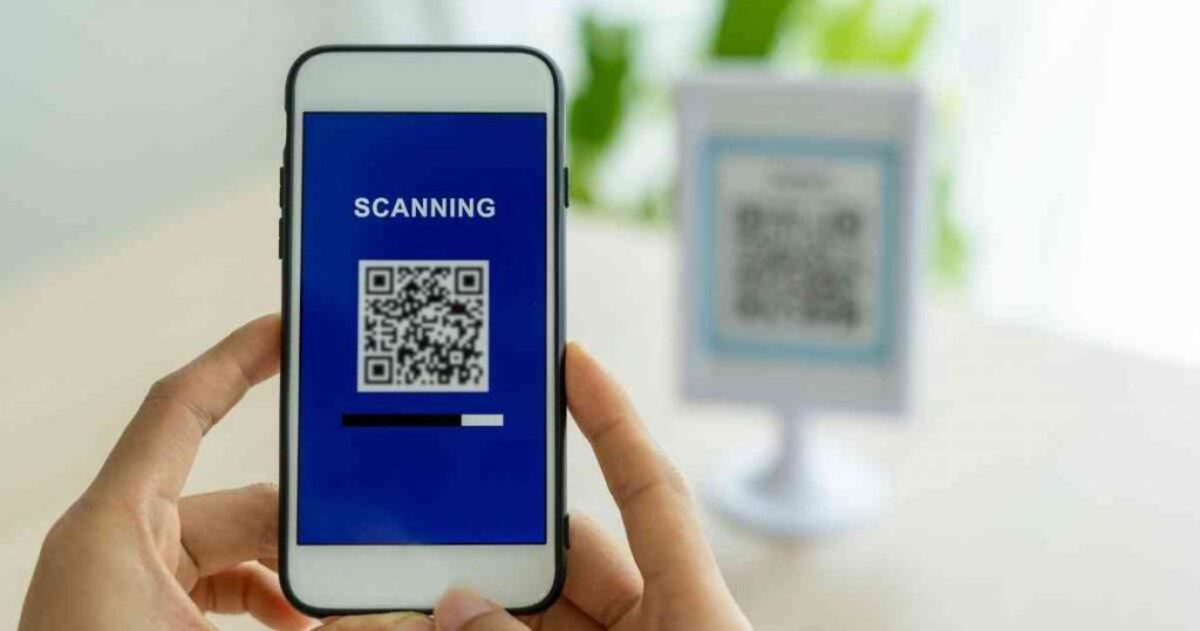
Step 6: Scan a Venmo QR code: With the QR code scanner app open, point your smartphone’s camera at the Venmo QR code you wish to scan. Ensure that the QR code is clear and well-lit, and align it within the viewfinder of the scanner app. The app will automatically recognize and scan the QR code.
Step 7: Verify the recipient’s information: After scanning the QR code, you’ll be directed to a page displaying the recipient’s information, such as their Venmo username and profile picture. Double-check this information to ensure that you’re sending money to the correct person.
Step 8: Complete the transaction: Once you’ve verified the recipient’s information, enter the amount you wish to send and add any relevant notes or memos. Finally, tap on the “Pay” or “Send” button to complete the transaction. You may be required to confirm the payment using your PIN or biometric authentication.
That’s it! You have now successfully set up your Venmo QR code on your smartphone and made a payment using it. You can repeat these steps any time you need to scan a Venmo QR code or make a payment through the app.
Step 1: Download and install the Venmo app
The first step to setting up a Venmo QR code on your smartphone is to download and install the Venmo app. Venmo is available for both iOS and Android devices, and you can find it in the respective app stores for your device.
For iOS users:
- Open the App Store on your iPhone or iPad.
- Tap on the search icon at the bottom of the screen.
- Type “Venmo” in the search bar and tap the Search button.
- Locate the Venmo app in the search results and tap on it.
- Tap on the “Get” or “Download” button to start the installation process.
- If prompted, authenticate the download with your Apple ID password or Face ID/Touch ID.
- Wait for the installation to complete, and the Venmo app icon will appear on your home screen.
For Android users:
- Open the Google Play Store on your Android phone or tablet.
- Tap on the search bar at the top of the screen.
- Type “Venmo” and tap the Search button.
- Select the Venmo app from the search results.
- Tap on the “Install” button to begin the installation process.
- Review and accept the permissions required by the app.
- Wait for the installation to complete, and the Venmo app icon will appear on your home screen or app drawer.
Once you have successfully downloaded and installed the Venmo app, you are ready to move on to the next steps to set up your Venmo QR code.
Note: It is important to ensure that you download the official Venmo app from the authorized app store to keep your account and transactions secure. Be cautious of unofficial or third-party apps claiming to be Venmo, as they may pose a security risk.
Step 2: Open the Venmo app on your smartphone
After successfully installing the Venmo app on your smartphone, it’s time to open the app and start setting up your Venmo QR code. Follow these steps to access the Venmo app:
For iOS users:
- Locate the Venmo app icon on your home screen. It appears as a light blue and white icon with the Venmo logo, which resembles the letter “V”.
- Tap on the Venmo app icon to launch the app.
For Android users:
- Find the Venmo app icon on your home screen or in your app drawer. It is a light blue and white icon with the Venmo logo.
- Tap on the Venmo app icon to open the app.
Once you open the Venmo app, you will be greeted with the login screen. If you already have a Venmo account, you can log in using your email address, mobile number, or username, followed by your password. If you’re new to Venmo, you can sign up for an account by tapping on the “Sign Up” or “Create Account” button. Follow the prompts to provide the necessary information and create your Venmo account.
Remember to keep your Venmo account credentials secure and avoid sharing them with anyone. If you’re using a shared device, it’s recommended to log out of Venmo after each use to protect your account.
By opening the Venmo app on your smartphone, you have successfully completed the second step in setting up your Venmo QR code. Proceed to the next steps to continue the setup process and start utilizing the convenience of Venmo QR codes for your transactions.
Step 3: Go to your profile
After opening the Venmo app on your smartphone and logging in to your account, the next step in setting up your Venmo QR code is to navigate to your profile. Follow these instructions to access your profile:
For iOS users:
- Once logged in to the Venmo app, you will be directed to the “Home” tab by default. Look for the icon of a house at the bottom left corner of the screen.
- Tap on the “Profile” tab located at the bottom right corner of the screen. It is represented by an icon that resembles a person’s silhouette.
For Android users:
- Upon logging in, the Venmo app will open to the “Home” screen. Look for the icon of a house at the bottom left corner of the screen.
- Tap on the “Profile” tab situated at the bottom right corner of the screen. It is symbolized by an icon of a person’s silhouette.
After successfully selecting the “Profile” tab, you will be taken to your personal profile page. Here, you can view your username, profile picture, and other relevant account information. This page allows you to manage your Venmo account settings, add payment methods, and more.
It is important to ensure that your profile information, including your username and profile picture, is accurate and up to date. This ensures that others can recognize and verify your account when scanning your Venmo QR code for payments.
By going to your profile within the Venmo app, you have completed the third step in setting up your Venmo QR code. Move on to the next step to continue the setup process and make the most of this convenient payment feature.
Step 4: Tap on “Scan Code”
Once you have accessed your profile in the Venmo app, the next step in setting up your Venmo QR code is to tap on the “Scan Code” option. Follow these instructions to proceed:
For iOS users:
- On your profile page, look for the “Scan Code” option. It is located just below your profile picture and username.
- Tap on the “Scan Code” option to proceed.
For Android users:
- Navigate to your profile page in the Venmo app, where you can view your profile picture and username.
- Locate the “Scan Code” option, which is situated just below your username.
- Tap on the “Scan Code” option to continue.
By tapping on the “Scan Code” option, you will activate the QR code scanning feature within the Venmo app. This feature allows you to scan Venmo QR codes belonging to other users or businesses.
It’s important to note that if your smartphone already has a built-in QR code scanner, the app may direct you to the device’s native scanner. In this case, simply follow the on-screen prompts to use your smartphone’s QR code scanning functionality. If you don’t have a built-in scanner, you may be prompted to download a QR code scanning app from your device’s app store. Follow the instructions to install the app and then return to the Venmo app to proceed.
By tapping on the “Scan Code” option, you are one step closer to utilizing your Venmo QR code for seamless payments. Continue to the next step to complete the setup process and start enjoying the convenience of Venmo QR codes.
Step 5: Add a QR Code scanner app if necessary
When setting up your Venmo QR code, it’s important to ensure that you have a QR code scanner app installed on your smartphone. Depending on your device, you may need to add a QR code scanner app if it is not already built into your device. Follow these steps to install a QR code scanner app:
For iOS users:
- If prompted to add a QR code scanner app, tap on the provided link or button.
- You will be redirected to the App Store to choose a QR code scanning app.
- Explore the available options and choose a QR code scanner app that suits your preferences.
- Tap on the “Get” or “Download” button to install the QR code scanner app.
- Once the installation is complete, return to the Venmo app to continue setting up your Venmo QR code.
For Android users:
- If instructed to add a QR code scanner app, tap on the provided link or button.
- You will be redirected to the Google Play Store to select a QR code scanning app.
- Browse through the available options and choose a QR code scanner app that meets your needs.
- Tap on the “Install” button to download and install the QR code scanner app.
- Once the installation is complete, return to the Venmo app to continue the setup of your Venmo QR code.
Adding a QR code scanner app to your smartphone ensures that you can efficiently scan Venmo QR codes during transactions. These apps utilize your device’s camera to read QR codes and provide the necessary information to complete the payment process.
It’s important to note that if your smartphone already has a built-in QR code scanner, you may not need to install an additional app. In such cases, the Venmo app will seamlessly integrate with the device’s built-in QR code scanning functionality. Simply follow the on-screen prompts and grant the necessary permissions to allow Venmo to access the camera.
By adding a QR code scanner app if necessary, you’re ready to continue setting up your Venmo QR code and enjoy the convenience of quick and easy payments.
Step 6: Scan a Venmo QR Code
With the Venmo app open and the necessary QR code scanner app installed (if required), you’re now ready to scan a Venmo QR code. Follow these steps to scan a Venmo QR code:
- Position the QR code you want to scan within the viewfinder of the QR code scanner app or the built-in scanner in the Venmo app.
- Ensure that the QR code is well-lit and clearly visible to ensure accurate scanning.
- Once the QR code is in focus, the QR code scanner app or the Venmo app will automatically detect and process the code.
- Wait for a moment while the app retrieves the necessary information from the QR code.
- The Venmo app will then display the recipient’s information, such as their username and profile picture, along with any additional details about the payment or transaction.
It’s important to review the recipient’s information displayed on the screen to ensure that you are sending the payment or conducting the transaction with the correct person. Double-check the username and any other relevant details before proceeding.
If you encounter any issues with scanning the QR code, ensure that you are holding your device steady and that the QR code is not obstructed or damaged. Additionally, make sure that the camera lens is clean and free from any smudges or obstructions that may impact the scanning process.
By successfully scanning a Venmo QR code, you have completed another step in the setup process. Proceed to the next step to verify the recipient’s information and continue with the transaction process using Venmo.
Step 7: Verify the recipient’s information
After scanning a Venmo QR code, it is essential to carefully review and verify the recipient’s information displayed on the Venmo app. This step ensures that you are sending the payment to the correct recipient. Follow these instructions to verify the recipient’s information:
- Observe the recipient’s username, which is typically displayed prominently on the screen. Ensure that it matches the person or business you intend to send the payment to.
- Check the recipient’s profile picture or any other identifying information provided to confirm their identity.
- Read any additional details about the payment or transaction, which may include a description or purpose for the payment.
It is crucial to exercise caution while verifying the recipient’s information. Pay close attention to usernames and other identifying details to avoid transferring funds to the wrong individual or entity inadvertently.
If you discover any discrepancies or have doubts about the recipient’s identity, it is recommended to double-check and seek clarification before proceeding with the payment. Venmo transactions are typically irreversible once completed, so taking the time to ensure accuracy is essential.
Additionally, if you encounter any suspicious or unfamiliar information during the verification process, consider aborting the transaction and reporting it to Venmo’s customer support. This helps maintain the integrity and security of the Venmo payment system and protects users from potential fraudulent activity.
By diligently verifying the recipient’s information, you can proceed with confidence to the next step, which involves completing the transaction securely through Venmo.
Step 8: Complete the transaction
After verifying the recipient’s information, you’re now ready to complete the transaction securely through Venmo. Follow these instructions to finish the payment process:
- Enter the amount you wish to send to the recipient. You can either type in the specific amount or use the provided options for common denominations.
- Add any relevant notes or memos to accompany the payment. This is optional but can be helpful for both you and the recipient to identify the purpose of the transaction.
- Double-check the recipient, payment amount, and transaction details on the screen to ensure accuracy.
- Tap on the “Pay” or “Send” button to initiate the transfer of funds.
- Depending on your Venmo account security settings, you may be prompted to confirm the payment using your PIN code, fingerprint, or face recognition. Follow the instructions on the screen to complete the verification process.
- Once the transaction is successfully processed, you should receive a confirmation message indicating that the payment has been sent.
It is crucial to review the transaction details carefully before proceeding to ensure that you are sending the correct amount to the intended recipient. Taking a moment to double-check the payment information can help prevent any errors or mistakes.
After completing the transaction, Venmo will securely transfer the funds from your account to the recipient’s account. The transaction details, including the payment amount, recipient, and any associated notes, will be recorded and available for your reference within the Venmo app.
If at any point during the transaction process you encounter any issues or have concerns, it’s recommended to reach out to Venmo’s customer support for assistance. They can address any questions or problems you may have and ensure a smooth and secure payment experience.
By successfully completing the transaction, you have now utilized your Venmo QR code to send funds securely to the intended recipient. Congratulations, you are now familiar with the process of setting up and using Venmo QR codes for seamless payments!
How to create a Venmo QR Code for others to scan
If you want to allow others to easily scan your Venmo QR code for payments, you can create your own Venmo QR code within the Venmo app. Follow these steps to generate and share your Venmo QR code:
- Open the Venmo app on your smartphone and ensure that you are logged in to your Venmo account.
- Go to your profile page by tapping on the “Profile” tab at the bottom right corner of the screen.
- Locate and tap on the “Scan Code” option, which is typically displayed below your profile picture and username.
- On the “Scan Code” screen, tap on the “Show Code” button. This will generate your personalized Venmo QR code.
- Customize your Venmo QR code (optional): Venmo provides options to personalize your QR code by adding a profile picture or choosing a background color. You can also choose to leave it with the default appearance.
- To share your Venmo QR code with others, you have a few options. You can:
- Show the QR code on your smartphone screen, allowing others to scan it.
- Save the QR code as an image on your device and share it via messaging apps or social media platforms.
- Tap on the “Share” button within the Venmo app to send the QR code to others using your preferred communication method.
By following these steps, you have successfully created your own Venmo QR code to share with others. This allows people to easily scan your QR code and make payments directly to your Venmo account without the need to type in your username or search for your profile.
Keep in mind that when sharing your Venmo QR code, it’s important to take precautions to protect your information. Only share your QR code with trusted individuals and avoid making it publicly accessible to strangers.
Creating and sharing your Venmo QR code enhances your payment convenience by simplifying transactions and making it easier for others to make payments to you.
Step 1: Open the Venmo app on your smartphone
To begin the process of creating a Venmo QR code, you’ll first need to open the Venmo app on your smartphone. Follow these steps to access the app:
For iPhone and iPad users:
- Locate the Venmo app on your home screen. The app icon is light blue with the Venmo logo, which resembles the letter “V”.
- Tap on the Venmo app icon to launch the app.
For Android users:
- Find the Venmo app icon on your home screen or in your app drawer. The app icon is also light blue with the Venmo logo.
- Tap on the Venmo app icon to open the app.
Upon opening the Venmo app, you will be directed to the home screen or the last page you accessed. If you are prompted to log in, enter your Venmo account credentials using your email address, mobile number, or username, and your password. If you’re a new user, tap on the “Sign Up” or “Create Account” option to create a new Venmo account.
Make sure to keep your Venmo account credentials secure and avoid sharing them with anyone. If you’re using a shared device, it’s recommended to log out of Venmo after each use to protect your account.
To proceed with creating your Venmo QR code, ensure that you have successfully opened the Venmo app on your smartphone. Ready for the next steps? Continue reading to learn how to navigate to the appropriate section within the app.
Step 2: Go to your profile
After opening the Venmo app on your smartphone, the next step in creating a Venmo QR code is to navigate to your profile. Follow these instructions to access your profile:
For iPhone and iPad:
- At the bottom of the screen, you’ll find a toolbar with various tabs. Tap on the “Profile” tab, which is represented by an icon resembling a person’s silhouette.
For Android:
- Look for the toolbar at the bottom of the screen, where you’ll find different icons representing various options. Tap on the “Personal” tab, which is usually located in the middle or at the bottom of the toolbar and may be labeled as “Profile” or display your username.
Upon accessing your profile, you’ll be able to view and manage your Venmo account details. This page typically displays your profile picture, username, balance, transaction history, and other relevant information.
While on your profile page, take a moment to review your account information and settings to ensure everything is accurate and up to date. You may also want to explore additional customization options, such as adding a profile picture or updating your personal details, to enhance your Venmo experience.
By successfully navigating to your profile, you’re just a step away from creating your Venmo QR code. Continue reading to learn how to proceed to the next step and generate your personalized QR code for others to scan.
Step 3: Tap on “Scan Code”
Once you have accessed your profile in the Venmo app, the next step in creating your Venmo QR code is to tap on the “Scan Code” option. Follow these instructions to proceed:
For iPhone and iPad:
- On your profile page, locate the “Scan Code” option. It is usually displayed below your profile picture and username.
- Tap on the “Scan Code” option to access the QR code scanning feature.
For Android:
- While on your profile page, look for the “Scan” button, typically found near the bottom of the screen. The button may be labeled as “Scan Code” or simply display a QR code icon.
- Tap on the “Scan” button to activate the QR code scanning feature of the Venmo app.
After tapping on the “Scan Code” or “Scan” option, your smartphone’s camera will open, ready to scan Venmo QR codes. If prompted for camera permissions, allow the Venmo app to access your camera to proceed with scanning QR codes.
It’s important to ensure that you have good lighting conditions and that the QR code you want to scan is clear and unobstructed for successful scanning. Hold your smartphone steady, align the QR code within the camera viewfinder, and ensure that the entire QR code is visible on the screen.
By tapping on the “Scan Code” or “Scan” option, you have activated the QR code scanning feature of the Venmo app. You are now ready to proceed to the next step, where your smartphone will begin scanning and processing Venmo QR codes.
Step 4: Tap on “Show Code”
Once you have accessed the QR code scanning feature in the Venmo app, the next step is to tap on the “Show Code” option to generate your Venmo QR code. Follow these simple instructions:
For iPhone and iPad:
- In the QR code scanning screen, you should see a button labeled “Show Code.” Tap on this button to generate your personalized Venmo QR code.
For Android:
- In the QR code scanning screen, locate the option to “Show Code.” Tap on this option to generate your Venmo QR code.
After tapping on the “Show Code” option, the Venmo app will generate your unique Venmo QR code. This code represents your Venmo account and can be used by others to easily scan and send payments to you.
Depending on your device and settings, you may have the option to customize your Venmo QR code further. For example, you can choose to add a profile picture or choose from different background color options. Customizing your QR code adds a personal touch and makes it more recognizable and unique to you.
Remember, your Venmo QR code is a representation of your Venmo account, so it’s important to keep it secure and share it only with trusted individuals. Consider keeping your QR code private and sharing it only with friends, family members, or individuals with whom you wish to receive payments.
By tapping on the “Show Code” option, you have successfully generated your Venmo QR code. You’re nearly done with the process of creating a Venmo QR code. Continue reading to learn how to share your QR code with others for easy payment transactions.
Step 5: Customize your Venmo QR Code, if desired
After generating your Venmo QR code, you have the option to customize it further, adding a personal touch to make it more recognizable and unique to you. Follow these steps to customize your Venmo QR code:
- Open the Venmo app on your smartphone and navigate to the QR code display screen. This screen is typically accessed by tapping on the “Scan Code” or “Show Code” option from your profile page.
- Once you’re on the QR code display screen, look for customization options. These options may include adding a profile picture, choosing a background color, or selecting a design element for your QR code.
- If available, tap on the customization options to make changes to your Venmo QR code. You may have the option to select an image from your photo library as your profile picture or choose from predefined backgrounds provided by Venmo.
- Experiment with different customization choices until you find the look that best reflects your personal style or branding.
- Once you’re satisfied with the customization, review your changes and ensure that your Venmo QR code still displays accurately.
While customization is optional, it can be a fun way to personalize your Venmo QR code and make it easily recognizable to others. For example, adding a profile picture or choosing a background color that represents your personality or brand can make your QR code stand out.
It’s important to note that while customizing your Venmo QR code adds a personal touch, ensure that it remains scannable and recognizable as a Venmo QR code. Avoid making significant modifications that may obscure or interfere with the scanability of the code.
Remember to exercise caution when sharing your customized Venmo QR code, as it contains your personal information. Share it only with trusted individuals or within secure and private communication channels to maintain the security of your Venmo account.
By customizing your Venmo QR code, you’ve added a personal touch that makes it uniquely yours. You’re now ready to share your QR code with others for quick and convenient payment transactions.
Step 6: Share your Venmo QR Code with others
Now that you’ve generated and customized your Venmo QR code, it’s time to share it with others so they can easily scan it for payments. Follow these steps to share your Venmo QR code:
- If you haven’t done so already, open the Venmo app on your smartphone and navigate to the QR code display screen by tapping on the “Scan Code” or “Show Code” option from your profile page.
- On the QR code display screen, you have a few options to share your Venmo QR code:
- Show the QR code on your smartphone screen: This is the simplest method where you can simply display your Venmo QR code on your smartphone screen. Others can then use their Venmo app to scan the code directly from your device.
- Save the QR code as an image: Tap on the “Save” or “Download” option to save the QR code as an image file on your smartphone. You can then share this image file via messaging apps, email, or social media platforms.
- Tap on the “Share” option within the Venmo app: Venmo may provide a built-in “Share” button, allowing you to share your QR code directly from the app. This option usually presents a list of sharing methods, such as messaging apps, email, or even direct social media sharing.
- Choose the sharing method that suits your needs and preferences.
- Ensure that you share your Venmo QR code with trusted individuals or within secure communication channels to maintain the privacy and security of your Venmo account.
When sharing your Venmo QR code, it’s important to provide clear instructions to the recipient on how to scan the code using the Venmo app. This helps ensure a smooth payment process and prevents any confusion or errors.
Remember to share your QR code responsibly and avoid making it publicly accessible to strangers. Only share it with individuals with whom you wish to receive payments or conduct transactions.
By successfully sharing your Venmo QR code, you allow others to scan it effortlessly for quick and convenient payment transactions. Enjoy the convenience of receiving payments through your customized Venmo QR code!
Conclusion
Venmo QR codes have become a valuable tool for seamless and convenient payment transactions. Whether you’re making payments to friends, splitting bills at a restaurant, or conducting business transactions, Venmo QR codes offer a secure and efficient way to send and receive money using the Venmo app on your smartphone.
In this guide, we explored the step-by-step process of setting up and using Venmo QR codes. We learned how to download and install the Venmo app, navigate to our profile, and access the QR code scanning feature. We also discovered how to scan Venmo QR codes, verify recipient information, and complete transactions with ease.
Furthermore, we explored how to create and customize your own Venmo QR code for others to scan. By personalizing your QR code with a profile picture or color scheme, you can make it easily recognizable and reflect your personal style or branding.
It’s important to remember that when using Venmo QR codes, we should exercise caution and share them only with trusted individuals. Keeping our account information secure and double-checking recipient details are essential to ensure accurate and secure transactions.
By following the steps outlined in this guide, you’re now equipped with the knowledge to confidently set up and use Venmo QR codes for convenient and contactless payment transactions. Enjoy the ease and simplicity of sending and receiving money with Venmo QR codes!