Introduction
Welcome to the fascinating world of 3D scanning! Gone are the days of relying solely on professional equipment and specialized software to create 3D models. With just your smartphone, you can now transform everyday objects into digital replicas in a matter of minutes. The advancements in technology have made 3D scanning accessible to everyone, and in this article, we will guide you through the process of using your phone as a 3D scanner.
3D scanning is the process of capturing the geometry and texture of real-world objects to create digital representations. These digital models can be used for a wide range of applications, such as prototyping, virtual reality, animation, and even 3D printing. Traditionally, 3D scanners were expensive and required specialized knowledge to operate. However, with the advent of powerful smartphones and intuitive scanning apps, the barrier to entry has been significantly lowered.
By turning your smartphone into a 3D scanner, you can unleash your creativity and explore the endless possibilities of 3D modeling. Whether you’re an artist looking to capture the intricate details of a sculpture, a hobbyist wanting to create custom accessories, or a student interested in digital design, using your phone as a 3D scanner opens up a whole new world of innovation.
Throughout this guide, we will walk you through the step-by-step process of using your phone as a 3D scanner. We will cover everything from preparing your phone, choosing the right app, setting up your subject, and refining and editing your final scan. Additionally, we will provide some useful tips and tricks to help you achieve the best results.
So, grab your smartphone and get ready to embark on an exciting journey into the world of 3D scanning. By the end of this article, you’ll be equipped with all the knowledge you need to confidently use your phone as a 3D scanner and bring your ideas to life.
Understanding 3D Scanning
Before we dive into the practical steps of using your phone as a 3D scanner, it’s important to have a solid understanding of how 3D scanning works. Essentially, 3D scanning is the process of capturing the physical attributes of an object and converting them into a digital 3D model. This allows you to recreate the object in a virtual space and manipulate it in various ways.
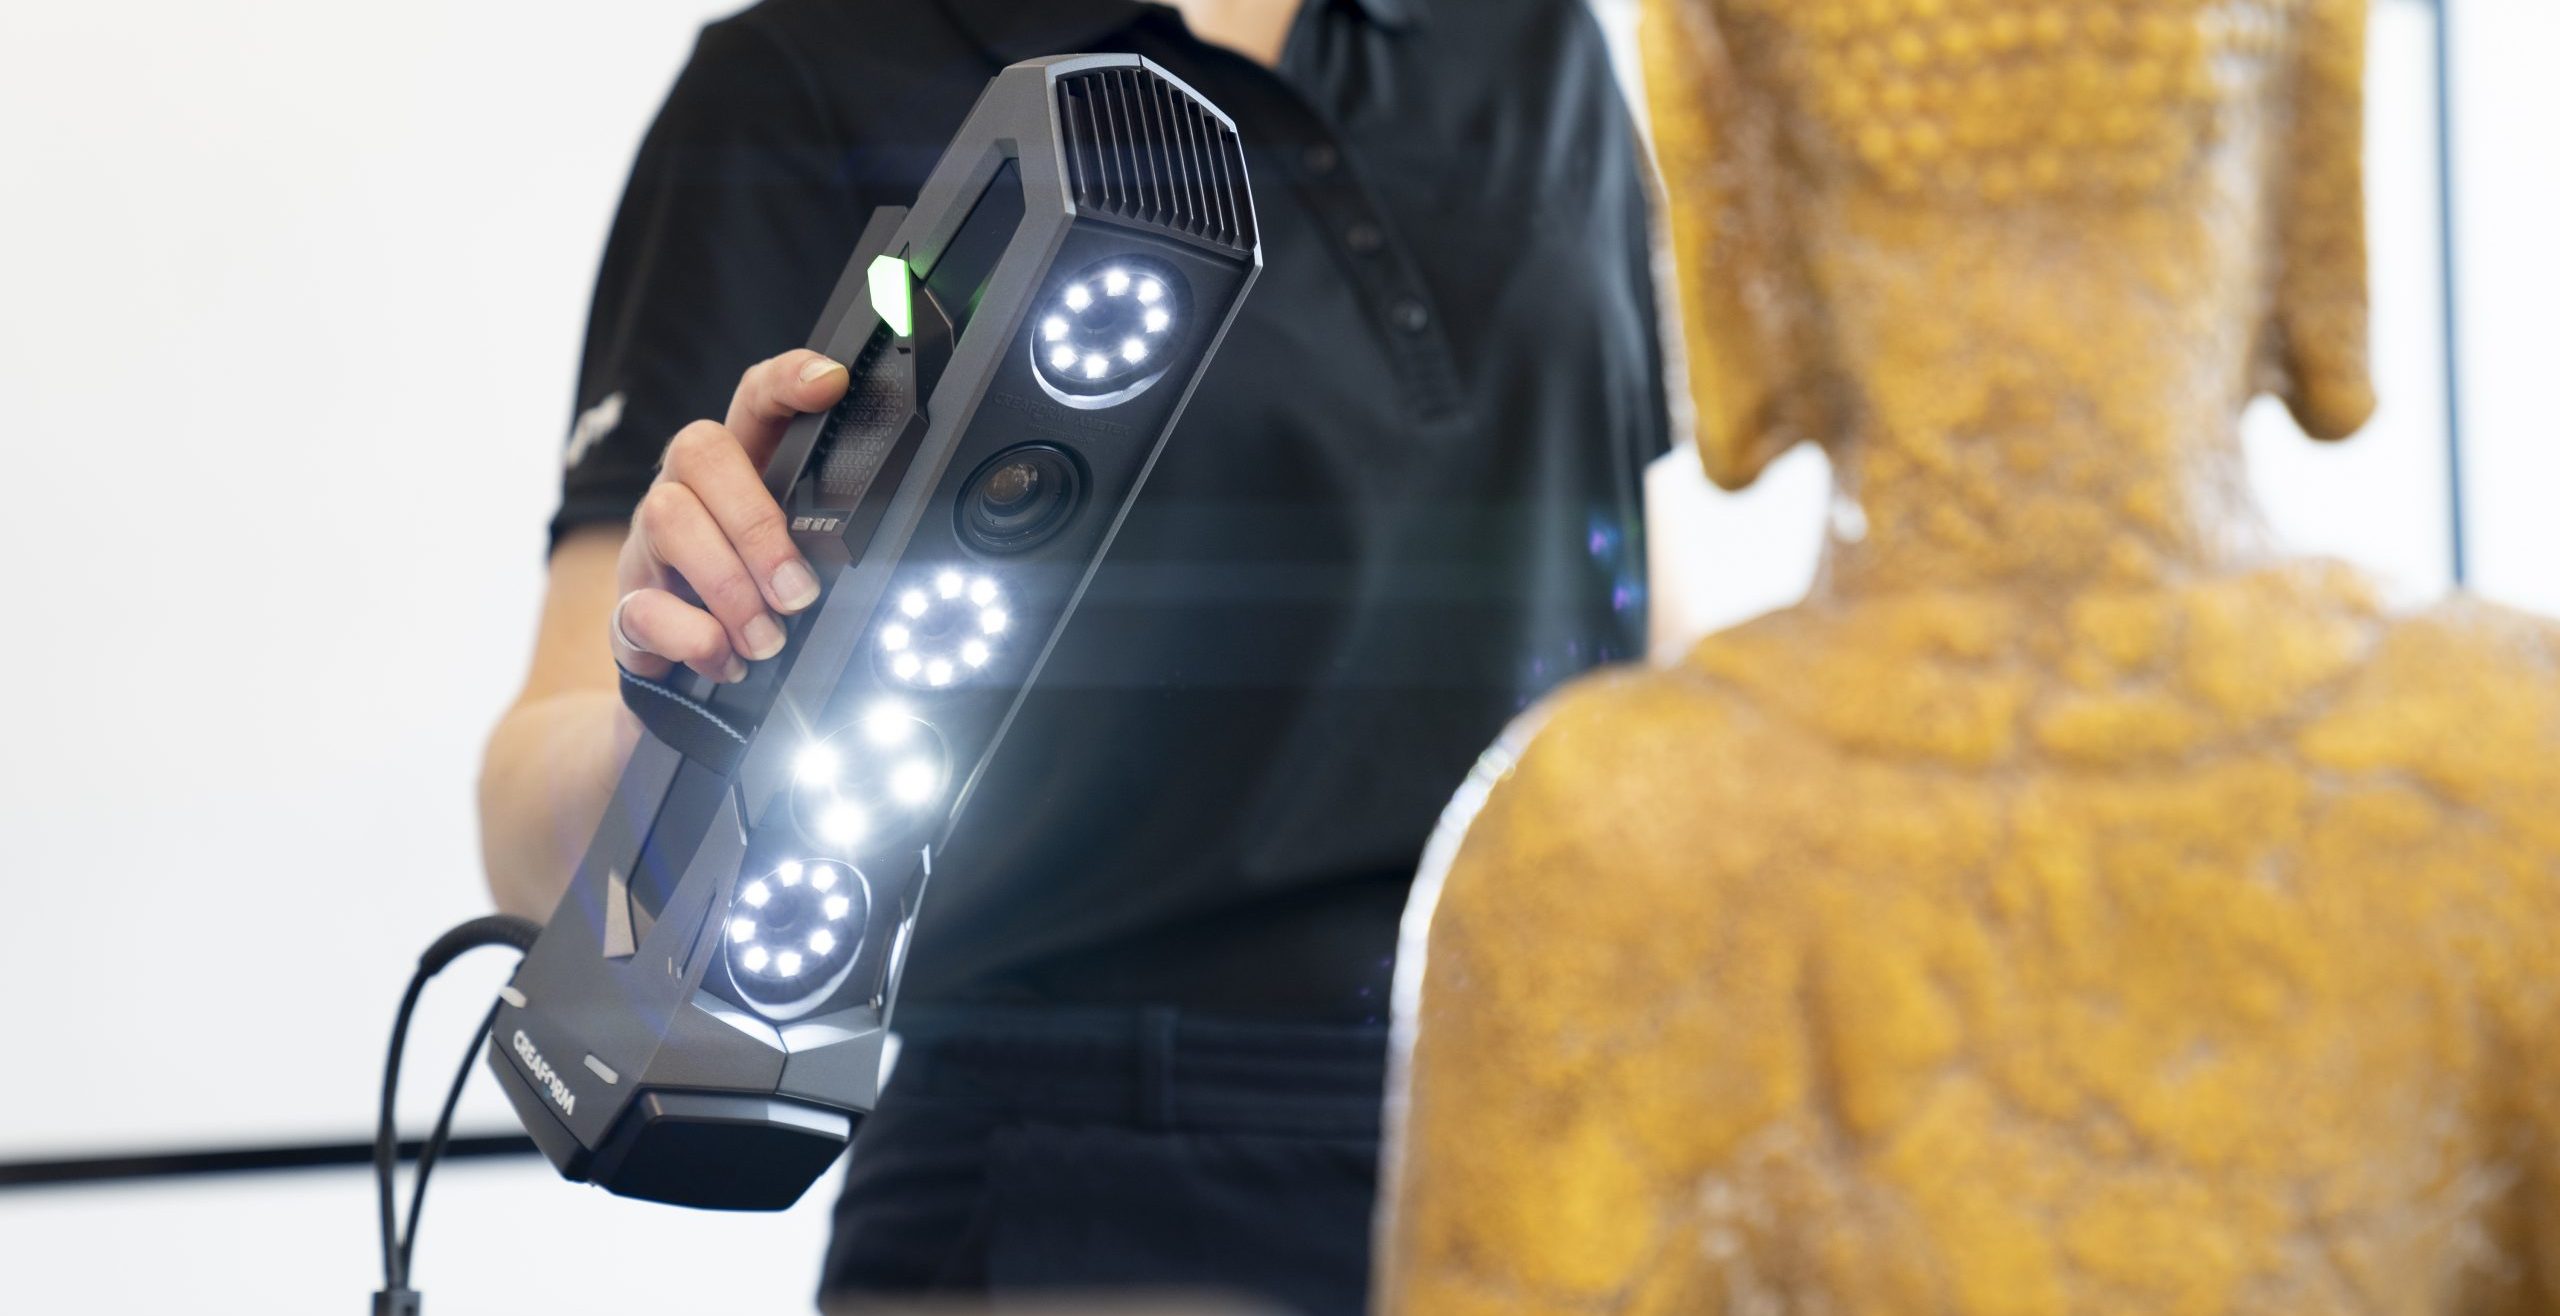
There are different methods of 3D scanning, including laser scanning, structured light scanning, and photogrammetry. Laser scanning involves using lasers to measure the distance between the scanner and the object, creating a point cloud that represents the object’s surface. Structured light scanning projects a pattern onto the object and analyzes how the pattern is distorted to determine its shape. Photogrammetry, on the other hand, utilizes multiple photographs taken from different angles to reconstruct the object in 3D.
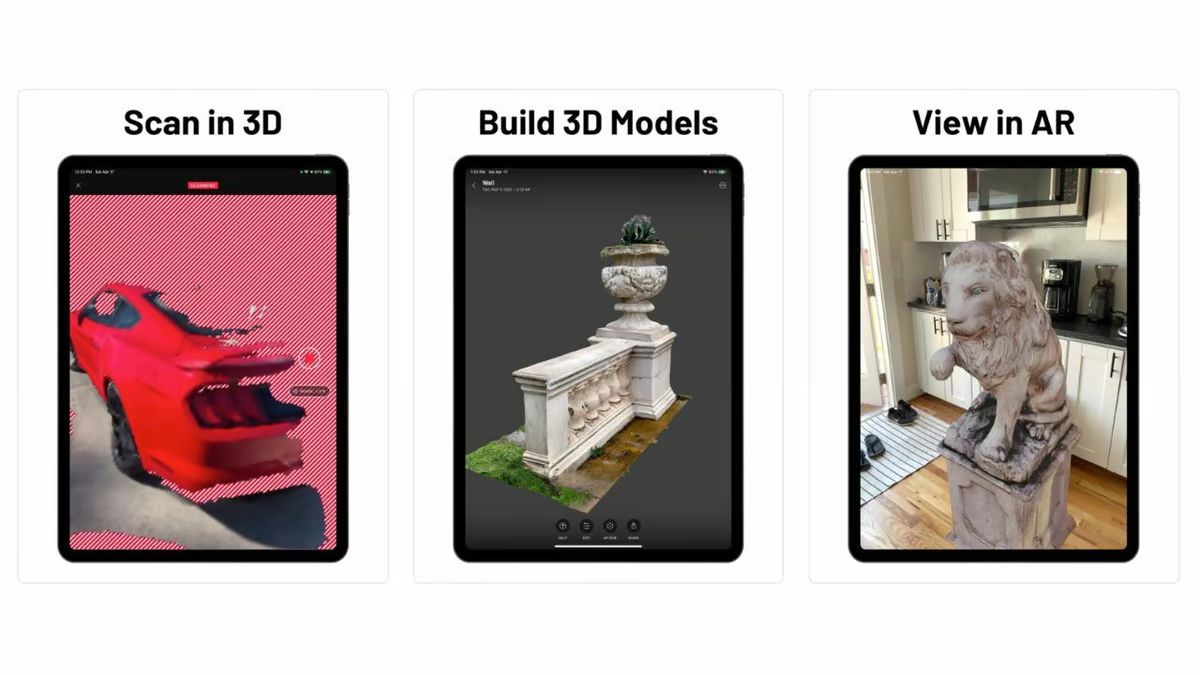
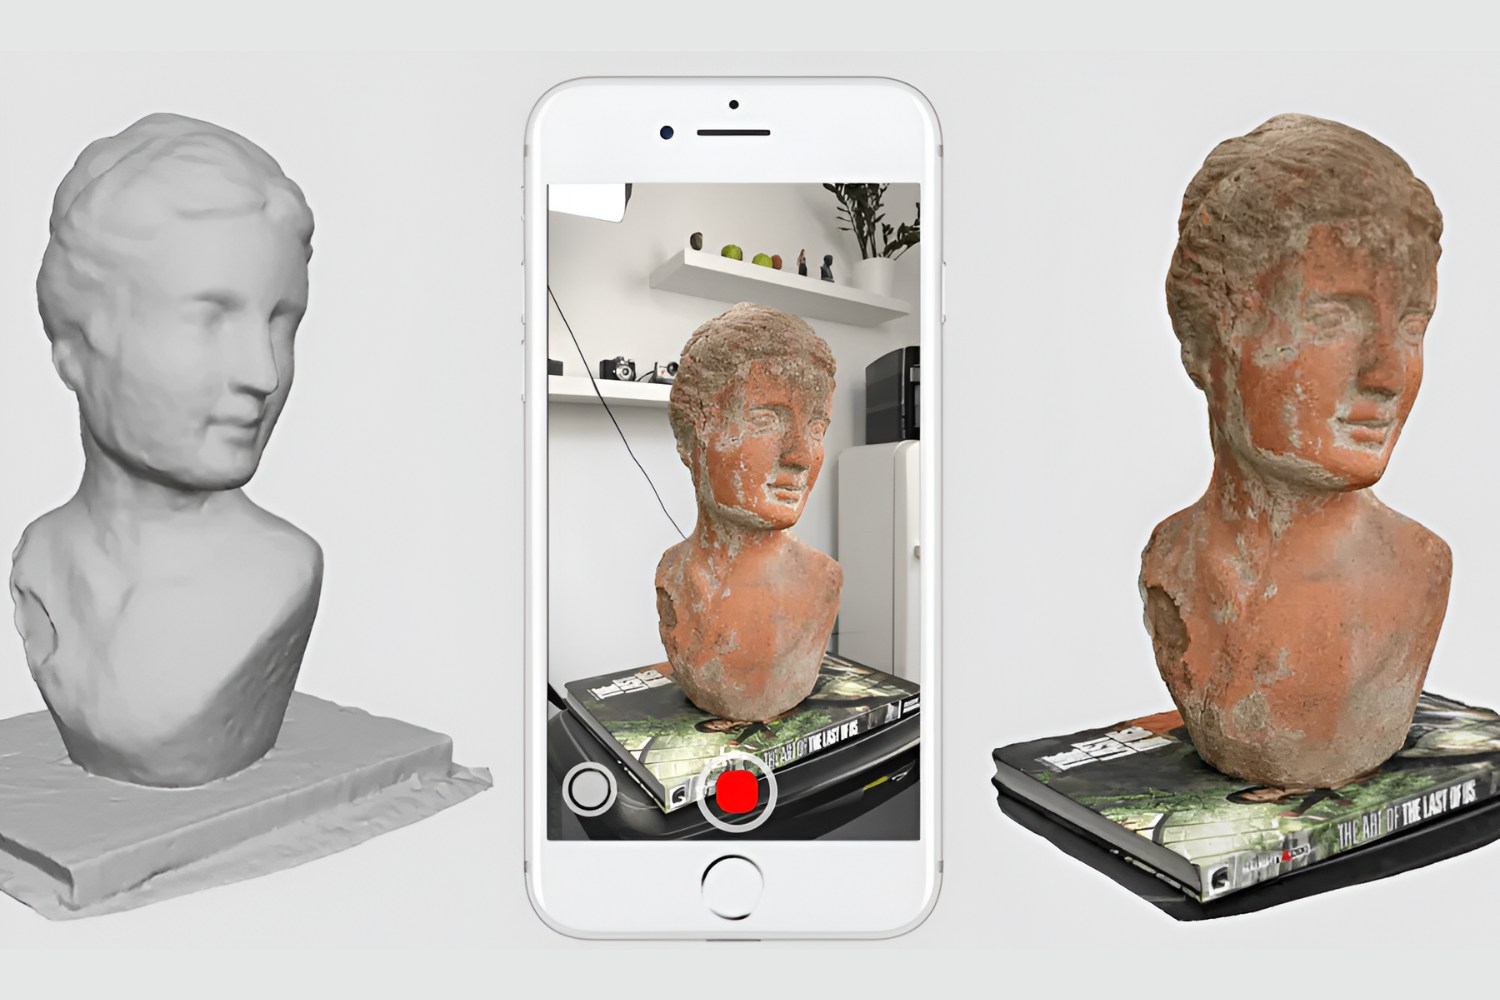
With the advancements in smartphone technology, photogrammetry has become the most accessible method for 3D scanning using your phone. By capturing multiple photos of an object from various angles, specialized apps can analyze the images and create a 3D model. Some apps also utilize augmented reality technology to guide you through the scanning process, ensuring accurate results.
It’s important to note that the quality of your 3D scan will depend on factors such as lighting conditions, camera resolution, and the stability of your hand while scanning. While smartphone-based 3D scanning may not be as precise as professional equipment, it still provides excellent results for most applications.
Now that you have a basic understanding of how 3D scanning works, you’re ready to turn your phone into a powerful tool for capturing the world in 3D. In the following sections, we will guide you through the step-by-step process of using your phone as a 3D scanner, from preparing your phone and choosing the right app to editing and sharing your final 3D scan. So let’s get started!
Step 1: Prepare your Phone
Before you begin using your phone as a 3D scanner, it’s important to make sure that your device is properly prepared. Here are some key steps to follow:
- Clean the camera lens: Start by cleaning the lens of your phone’s camera. Use a soft cloth or lens cleaning solution to remove any fingerprints or smudges that could affect the quality of your scans.
- Free up storage space: 3D scans can take up a significant amount of storage space on your phone. Make sure you have enough free space to store your scans by deleting any unnecessary files or transferring them to a computer or cloud storage.
- Charge your phone: Scanning can be a battery-intensive task, so it’s important to ensure that your phone is fully charged or connected to a power source to avoid running out of battery in the middle of a scan.
- Enable airplane mode: To avoid interruptions or notifications during the scanning process, it’s a good idea to enable airplane mode or turn off any incoming calls or messages that could distract you.
- Use a tripod or stabilizer: While not mandatory, using a tripod or stabilizer can help you maintain a steady hand and reduce shaking while capturing your scans. This can result in higher-quality and more accurate 3D models.
By following these simple steps, you can ensure that your phone is ready to perform at its best as a 3D scanner. Now that your phone is prepared, it’s time to move on to the next step: choosing the right app for your scanning needs.
Step 2: Choose the Right App
Choosing the right app is crucial in maximizing the potential of your phone as a 3D scanner. There are several apps available on both iOS and Android platforms that offer different features and capabilities. Here are some factors to consider when selecting the app:
- Compatibility: Ensure that the app is compatible with your phone’s operating system. Check the app store or official website for compatibility information.
- Features: Look for apps that offer a range of features such as automatic alignment, real-time visualization, and editing tools. Some apps also offer additional features like texture mapping and exporting in various file formats.
- Usability: Consider the user interface and ease of use. Look for apps that provide clear instructions and intuitive controls, making the scanning process smooth and efficient.
- Reviews and ratings: Read reviews and ratings from other users to get an idea of their experience with the app. Look for apps with positive feedback and high ratings, indicating reliability and user satisfaction.
- Cost: Evaluate whether the app is free or requires a purchase. Some apps have a free basic version with limited features, while others offer a premium version with additional functionality.
Some popular 3D scanning apps include Qlone, Scann3D, and Catchoom. These apps offer a range of features and have garnered positive reviews from users.
Once you have selected the app that best suits your needs, download and install it on your phone. Familiarize yourself with the app’s interface and features before proceeding to the next steps.
With the right app at your disposal, you are now ready to move on to the exciting part – capturing your first 3D scan! In the following steps, we will guide you through the process of setting up your subject and capturing the 3D model using your phone as a scanner.
Step 3: Set up your Subject
Setting up your subject properly is key to achieving accurate and high-quality 3D scans. Here are some important considerations to keep in mind:
- Choose the right subject: Select an object that you want to scan. It can be anything from a small household item to a larger sculpture. Keep in mind that objects with intricate details are more challenging to scan, so consider starting with a simpler object until you gain more experience.
- Consider the environment: Ensure that the scanning environment has sufficient lighting. Natural light or well-diffused artificial light works best, as harsh shadows can affect the quality of your scan. Avoid areas with excessive glare or reflections as they can make it difficult for the app to capture accurate texture information.
- Position the subject: Place your subject on a stable surface or use a turntable if available. This will allow you to capture the object from all angles without having to physically move around it. Ensuring that the subject remains stationary during the scanning process is essential for accurate alignment and seamless merging of images.
- Clear the background: Make sure the background behind the subject is free from clutter or distractions. A plain, neutral-colored backdrop will help the app focus on the object and reduce any potential confusion during the scanning process.
- Consider texture: If the object has a smooth or reflective surface, applying a matte spray or powder can enhance the scan’s accuracy. This helps eliminate reflections and provides more texture information, resulting in a better 3D model.
Take your time to properly set up your subject and create an environment that promotes accurate and successful scanning. Once you are satisfied with the setup, you’re ready to move on to the exciting part – capturing your first 3D scan!
In the next step, we will guide you through the process of using your chosen app to scan and capture a 3D model of your subject. Stay tuned!
Step 4: Start Scanning
Now that your subject is set up and you have chosen the right app, it’s time to start the scanning process. Follow these steps to capture your first 3D scan:
- Launch the app: Open the 3D scanning app on your phone and ensure that you have familiarized yourself with its interface and controls.
- Select the scanning mode: Depending on the app, you may have different scanning modes available, such as automatic or manual. Choose the mode that best suits your needs and experience level.
- Start scanning: Follow the instructions provided by the app to begin the scanning process. In most cases, you will need to move your phone around the subject, capturing it from different angles. The app may provide visual guides or overlays to assist you in aligning your scans.
- Maintain consistency: Make sure to move your phone smoothly and at a steady pace while scanning. Avoid sudden movements or jerks that may introduce blurring or misalignment in your scans.
- Capture all angles: Aim to capture the subject from all sides, including the top and bottom if applicable. The more comprehensive your scan is, the better the final 3D model will be.
- Fill in any missing areas: Some apps offer the option to fill in any gaps or missing areas in the scan. If this is available, take advantage of it to achieve a more accurate and complete scan.
- Review and adjust: Once you have completed the scanning process, review the captured scans in the app. Check for any issues such as misalignments or missing parts. Most apps will provide tools to manually adjust or refine the scan if needed.
Remember to be patient and take your time during the scanning process. Practice and experimentation will help you improve your scanning technique and achieve better results.
After following these steps, you should have successfully captured a 3D scan of your subject using your phone. In the next step, we will explore how to refine and edit your scan to ensure it is ready for further use or sharing.
Step 5: Refine and Edit Your Scan
After capturing your 3D scan, it’s time to refine and edit it to ensure it meets your requirements. Here are the steps to follow:
- Align and merge: Use the app’s alignment and merging features to combine the individual scans into a single cohesive 3D model. This will help eliminate any misalignments and create a seamless scan.
- Fill in gaps: If there are any areas in your scan with missing information, use the app’s filling or sculpting tools to fill in the gaps. This will result in a more accurate and complete 3D model.
- Smooth and refine: Depending on the app’s capabilities, you can use smoothing tools to reduce any roughness or imperfections in the scan. Additionally, you may have options to refine the geometry or texture of the model for better visual results.
- Remove unwanted elements: If there are any unwanted elements or artifacts in the scan, such as background clutter or sensor noise, use the app’s editing tools to remove or minimize them.
- Texture mapping: Some apps provide the option to apply textures or colors to the 3D model. You can either use the app’s predefined textures or import your own if you want to add more visual detail to your scan.
- Inspect and adjust: Carefully inspect your refined scan and make any necessary adjustments to ensure it meets your desired specifications. This may include further refining geometry, adjusting colors or textures, or removing any remaining artifacts.
By taking the time to refine and edit your scan, you can enhance its overall quality and prepare it for further use or sharing. Experiment with the various editing tools provided by the app to achieve the desired results.
Once you are satisfied with the refinement and editing process, it’s time to move on to the final step: exporting and sharing your 3D scan.
Step 6: Export and Share Your 3D Scan
After refining and editing your 3D scan, it’s time to export and share it with others. Here are the steps to follow:
- Select the export format: Choose the appropriate file format for your 3D scan. Common formats include OBJ, FBX, STL, or PLY. Consider the compatibility of the format with the software or platform you plan to use or share the scan on.
- Adjust export settings: Depending on the app, you may have control over the export settings. These settings can include options for geometry resolution, texture quality, and file size. Adjust the settings based on your intended use and the capabilities of the software or platform you plan to use the scan in.
- Export the scan: Once the settings are adjusted, initiate the export process. The app will generate the final file containing your 3D scan based on the chosen format and settings.
- Save and store: Save the exported file to your desired location on your phone or other storage devices. Create a separate folder for your 3D scans to keep them organized and easily accessible.
- Share your scan: Now that your 3D scan is exported and stored, you can easily share it with others. You can use various methods for sharing, such as email, messaging apps, cloud storage links, or even social media platforms. Choose the method that works best for you and your intended audience.
- Showcase your scan: Consider utilizing online platforms or communities dedicated to 3D models to showcase your scan. These platforms allow you to share your work with a wider audience of artists, designers, and enthusiasts who may appreciate and provide feedback on your creation.
By exporting and sharing your 3D scan, you can collaborate with others, showcase your work, or integrate the scan into various projects. Enjoy the process of sharing your creativity and exploring the possibilities of your scanned model!
Congratulations! You have now completed all the steps necessary to successfully use your phone as a 3D scanner. Through preparation, choosing the right app, setting up your subject, capturing the scan, refining and editing, and finally exporting and sharing, you have unlocked the potential of turning your phone into a powerful 3D scanning device. With continuous practice and exploration, you can further refine your skills and create stunning 3D scans that truly showcase your creativity.
Tips and Tricks for Better Scanning
While you now have a solid understanding of the steps involved in using your phone as a 3D scanner, here are some additional tips and tricks to help you achieve even better results:
- Optimize lighting: Experiment with different lighting setups to find the best conditions for your scans. Soft, diffused lighting can help capture more accurate details and reduce reflections.
- Use a calibration object: When starting out, consider using a calibration object, like a scale or a reference item, to ensure accurate measurements and scaling in your scans.
- Create a turntable: If you frequently scan objects, consider building or purchasing a turntable to automate the rotation process. This can result in more consistent scans from different angles.
- Keep the phone steady: Use a tripod or stabilizer to minimize camera shake. A stable phone position leads to crisper scans and reduces the chances of misalignments.
- Experiment with different scanning apps: Try out different scanning apps and compare their results. Some apps may specialize in particular types of scans or have unique features that can enhance your scanning experience.
- Clean reflective surfaces: If your subject has reflective surfaces, make sure to clean and dry them to reduce reflections that can interfere with the scanning process.
- Scan from different distances: Vary your distance from the subject while scanning to capture both close-up details and a broader view. This can provide more context and depth to your scan.
- Be patient and take multiple scans: Don’t rush the scanning process. Take your time, be thorough, and capture multiple scans from different angles to ensure you have enough data to create a complete 3D model.
- Learn from experience: The more you practice, the better you’ll become at scanning. Learn from your previous scans, analyze your mistakes, and continuously improve your technique.
Remember, practice makes perfect, and each scan is a learning opportunity. Don’t be discouraged if your early scans don’t turn out as expected. Embrace the process, experiment with different techniques, and enjoy the creative possibilities that 3D scanning with your phone can offer.
With these tips and tricks in mind, you’ll be well-equipped to elevate your scanning skills and create impressive 3D scans with your phone.
Conclusion
Congratulations on completing the journey of using your phone as a 3D scanner! By following the steps outlined in this guide and incorporating the tips and tricks provided, you’ve gained the knowledge and skills necessary to transform your smartphone into a powerful tool for capturing the world in 3D.
From preparing your phone and choosing the right app to setting up your subject, capturing the scan, refining and editing, and finally exporting and sharing your 3D scans, you’ve navigated through each step with precision and creativity. Along the way, you’ve learned about the fundamentals of 3D scanning, the various techniques involved, and the considerations needed for achieving accurate and high-quality scans.
Remember, mastering 3D scanning takes practice and experimentation. As you continue your 3D scanning journey, don’t hesitate to explore new apps, try different scanning techniques, and push the boundaries of your creativity. Each scan is an opportunity to learn and improve, allowing you to create stunning 3D models that showcase your artistic vision and technical prowess.
Whether you’re an artist, designer, hobbyist, or simply curious about the world of 3D scanning, using your phone as a 3D scanner opens up exciting possibilities. You now have the ability to capture real-world objects, transform them into digital replicas, and unleash your creativity in new and innovative ways.
So go ahead, grab your phone, and let your imagination run wild. Turn everyday objects into stunning 3D models, share your creations with others, and continue to push the boundaries of what’s possible with your phone as a 3D scanner. Happy scanning!