Introduction
If you own a Samsung tablet, keeping its operating system up to date is crucial for optimal performance and security. An updated OS ensures that you have access to the latest features, bug fixes, and security patches. Additionally, updating your Samsung tablet’s OS helps to enhance its compatibility with newer apps and software.
Updating the OS on a Samsung tablet is a relatively simple process that can be done in a few easy steps. In this guide, we will walk you through the process of updating the OS on your Samsung tablet, ensuring that you can enjoy the best possible experience with your device.
Before we dive into the steps, it’s essential to note that the exact process may vary slightly depending on the specific model and version of your Samsung tablet. However, the general procedure remains the same across most devices. If you encounter any significant differences, refer to the user manual or support documentation provided by Samsung for your specific tablet model.
Now, let’s get started with updating the operating system on your Samsung tablet.
Step 1: Check for Updates
The first step in updating the operating system on your Samsung tablet is to check whether any updates are available. To do this, follow these simple steps:
- Unlock your tablet and navigate to the Home Screen.
- Swipe down from the top of the screen to access the Notification Panel.
- Tap on the “Settings” icon, usually represented by a gear or cogwheel.
- In the Settings menu, scroll down and look for the “Software update” option. This might be located under the “System” or “About device” section, depending on your tablet’s model.
- Tap on “Software update” to proceed.
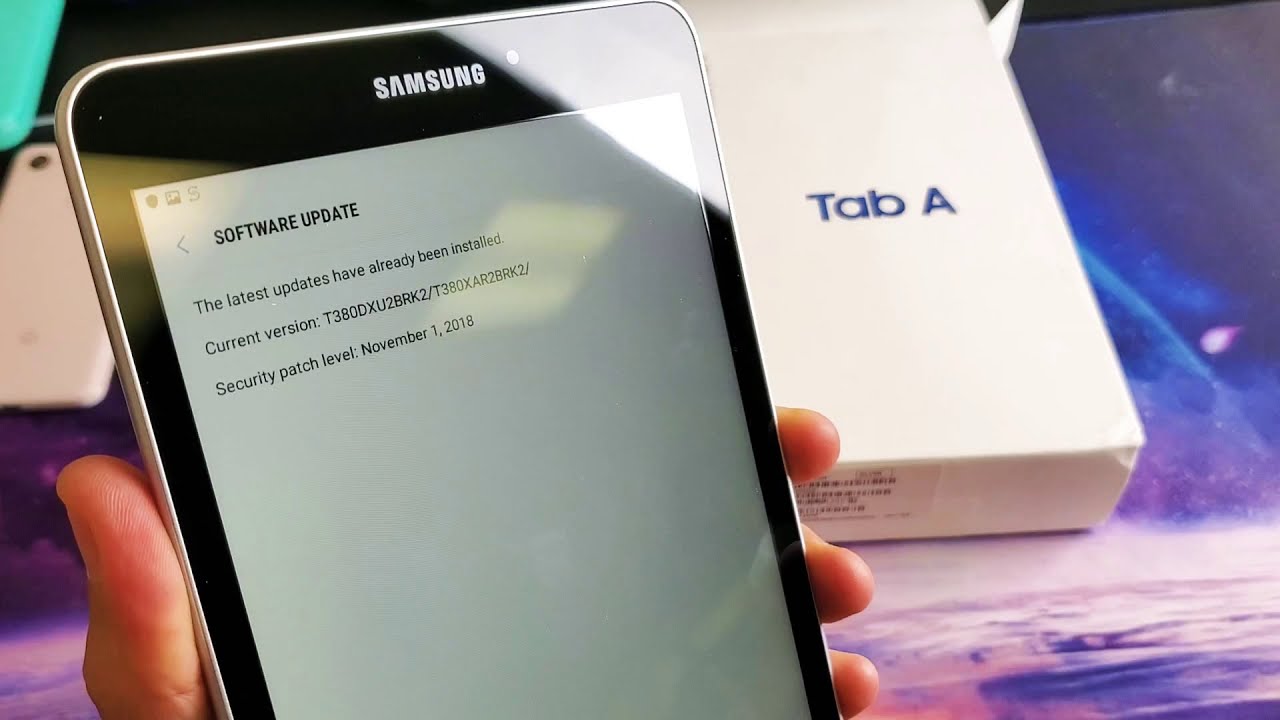
Once you have reached the Software update menu, your tablet will check for any available updates. This process may take a few moments, so it’s important to be patient. If there are updates available, you will be prompted to download and install them. If not, you will see a notification stating that your tablet is up to date.
It’s worth noting that it’s a good practice to perform this check regularly, as Samsung releases updates periodically to improve the performance and security of their tablets. By staying up to date, you can ensure that your tablet is operating at its best.
After checking for updates, we move on to the next step: connecting your tablet to Wi-Fi.
Step 2: Connect to Wi-Fi
Before downloading and installing any updates on your Samsung tablet, it’s important to connect to a stable Wi-Fi network. This ensures a fast and reliable download process without consuming excessive data from your cellular plan. Follow these steps to connect your tablet to Wi-Fi:
- From the Software update menu, navigate back to the main Settings menu by tapping the back arrow or using the navigation buttons.
- In the Settings menu, locate and tap on the “Wi-Fi” option.
- Toggle the switch to turn on Wi-Fi if it isn’t already enabled.
- A list of available Wi-Fi networks will appear. Tap on your desired network to connect.
- If the network is password-protected, enter the password when prompted. Be sure to enter it correctly to establish a successful connection.
- Wait for the tablet to connect to the Wi-Fi network. Once connected, you will see a Wi-Fi icon in the status bar at the top of the screen.
Connecting to a Wi-Fi network is crucial to ensure a smooth and uninterrupted download and installation process for the software updates. It is recommended to connect to a stable and reliable Wi-Fi network, preferably with a high-speed internet connection, to expedite the update process.
Once you are successfully connected to a Wi-Fi network, it’s time to move on to the next step: backing up your data.
Step 3: Backup Your Data
Before proceeding with any software updates on your Samsung tablet, it is essential to back up your data. While the update process is generally smooth and without issues, there is always a small possibility of data loss or corruption during the installation. Backing up your data helps to safeguard important files, documents, photos, videos, and other valuable information.
There are two primary methods to back up your data on a Samsung tablet: using Samsung’s built-in backup feature or utilizing third-party backup solutions. Here’s how you can back up your data using the built-in backup feature:
- Go to the Settings menu on your tablet by tapping on the gear or cogwheel icon from the Home Screen.
- Scroll down and tap on the “Accounts and backup” option. The location of this option may vary depending on your tablet’s model and the version of the operating system.
- In the “Accounts and backup” section, tap on “Backup and restore”.
- Ensure that the toggle switch for “Back up my data” is enabled. This will allow your tablet to back up various data, including app data, Wi-Fi passwords, and some device settings.
- Tap on “Backup account” to select the Google account to which you wish to backup your data. If you haven’t added a Google account, you will be prompted to do so.
- Toggle the switch for “Automatically restore” if you want your tablet to restore your data automatically after the update process.
By following these steps, your tablet will back up your data to Google Drive, ensuring that you can easily restore it in case of any unforeseen issues during the update process. Alternatively, you can use third-party backup solutions, such as Samsung Smart Switch or cloud backup services, to create backups of your important data.
With your data backed up, you can proceed to the next step: ensuring sufficient battery life on your tablet.
Step 4: Ensure Sufficient Battery Life
Before initiating the software update process on your Samsung tablet, it is crucial to ensure that your device has sufficient battery life. A stable power source is necessary to avoid any interruptions or potential damage during the update process. Here’s how you can ensure sufficient battery life:
- Make sure your tablet is connected to a charger or USB cable connected to a power source.
- Check the battery level of your tablet by looking at the battery icon in the status bar at the top of the screen. If the battery level is less than 50%, it is recommended to charge your tablet until it reaches at least 80%.
- Leave your tablet connected to the power source throughout the update process to prevent any possibility of battery drain or interruption.
Updating the operating system on your Samsung tablet can take some time, depending on the size of the update and the speed of your internet connection. Therefore, having sufficient battery life ensures that the update process can be completed without any hiccups.
If your tablet’s battery is critically low and you do not have access to a power source, it is advisable to charge your tablet first before proceeding with the update. This will help avoid any sudden shutdowns or interruptions that could potentially lead to issues with your tablet’s software.
With sufficient battery life ensured, you can now move on to the next step: navigating to the Settings menu on your tablet.
Step 5: Go to Settings
Now that you have ensured sufficient battery life on your Samsung tablet, it’s time to navigate to the Settings menu to initiate the software update process. The Settings menu is where you can access various system settings and configurations on your tablet. Follow these simple steps to get to the Settings menu:
- Unlock your tablet and go to the Home Screen.
- Swipe down from the top of the screen to access the Notification Panel.
- Tap on the “Settings” icon, typically represented by a gear or cogwheel.
Alternatively, you can also access the Settings menu by tapping on the “Apps” icon on your tablet’s Home Screen and then locating and tapping on the “Settings” app.
Once you have tapped on the Settings icon, you will be taken to the main Settings menu. From here, you can access a wide range of options to customize and manage your tablet, including the software update settings.
Keeping your tablet’s software up to date is essential for improved performance and security, so accessing the Settings menu is an important step in updating the operating system.
Now that you are in the Settings menu, you can proceed to the next step: navigating to the Software Update section.
Step 6: Navigate to Software Update
Once you have entered the Settings menu on your Samsung tablet, the next step is to navigate to the Software Update section. This is where you can check for and initiate the installation of any available updates for your tablet’s operating system. Follow these steps to find the Software Update section:
- From the main Settings menu, scroll down until you find the option labeled “Software update”. Depending on your tablet model and the version of the operating system, this option may also be labeled as “Software updates”, “System update”, or something similar.
- Tap on the “Software update” option to proceed.
By selecting the Software Update option, you are one step closer to updating the OS on your Samsung tablet. This section contains all the necessary information and controls to manage the software update process. It allows you to check for available updates, download new software, and install it on your device.
If you are unable to locate the Software Update section within the main Settings menu, you can try using the search function by tapping on the magnifying glass icon at the top of the Settings menu and typing in “Software update”. This should bring up the relevant option for you to select.
Now that you have successfully navigated to the Software Update section, you can move on to the next step: checking for updates.
Step 7: Check for Updates
Once you have reached the Software Update section in the Settings menu of your Samsung tablet, the next step is to check for any available updates. This ensures that you have the latest version of the operating system installed on your device. Follow these steps to check for updates:
- In the Software Update section, tap on the “Check for updates” or “Check now” option. This will prompt your tablet to initiate a search for any available updates.
- Wait for your tablet to finish checking for updates. This process may take a few moments, so it’s important to be patient.
- If there are updates available for your tablet, you will see a notification indicating the availability of new software. The notification may display details such as the size of the update and the new features or improvements it brings.
It’s worth noting that if there are no available updates, you will see a notification stating that your tablet is up to date. In such cases, there is no need to proceed with further steps as your device is already running the latest version of the operating system.
Checking for updates regularly is important to ensure that your Samsung tablet remains optimized and secure. Operating system updates often include bug fixes, performance improvements, and enhanced security measures. By keeping your tablet up to date, you can enjoy a better user experience and protect your device from potential vulnerabilities.
Now that you have checked for updates, it’s time to move on to the next step: downloading and installing the available updates.
Step 8: Download and Install Updates
After checking for updates on your Samsung tablet, the next step is to download and install any available updates. These updates may include new features, bug fixes, performance enhancements, and security patches. Follow these steps to download and install updates:
- If your tablet has detected an available update, tap on the “Download” or “Download and install” button. The exact wording may vary depending on your tablet model and the version of the operating system.
- Wait for the download process to complete. The time it takes to download the update will depend on the size of the update and the speed of your internet connection. It is recommended to connect to a stable Wi-Fi network to ensure a faster and more reliable download.
- Once the download is complete, tap on the “Install” button to start the installation process. Your tablet will now proceed to install the downloaded update.
- During the installation, your tablet may restart multiple times. This is normal and part of the update process. It’s essential not to interrupt or power off your tablet during this time to avoid any potential issues or data loss.
- After the installation is complete, your tablet will restart one final time. This restart is to finalize the update and ensure that all changes take effect.
It’s worth noting that the update process can take some time, especially if the update is large or includes significant changes. It is recommended to have your tablet connected to a power source throughout the installation process to prevent any interruptions due to battery drainage.
Once your tablet has successfully installed the updates and restarted, it will be running the latest version of the operating system. You can now enjoy the benefits of the updated software, including new features, improved performance, and enhanced security.
With the updates installed, we’re ready for the next step: verifying the new operating system version on your tablet.
Step 9: Restart Your Tablet
After successfully installing the updates on your Samsung tablet, it is important to restart your device. Restarting your tablet helps to ensure that all the changes made during the update process are applied correctly and that your tablet is running the updated operating system smoothly. Follow these steps to restart your tablet:
- Press and hold the power button on your tablet. The power button is usually located on the side or top of the device.
- A power menu will appear on the screen, showing options such as “Restart”, “Power off”, and “Emergency mode”.
- Select the “Restart” option from the power menu.
- Your tablet will now restart. This process may take a few moments as the device shuts down and boots up again.
During the restart, your tablet will perform necessary system checks and configurations to finalize the update installation. It is crucial not to interrupt the restart process or power off the device. Doing so may cause instability or incomplete installation of the updates.
After the restart, your tablet will be fully updated and ready to use with the latest version of the operating system. You may notice improvements in performance, new features, and enhanced security measures.
Restarting your tablet after an update also helps to clear any temporary files or system caches that may have accumulated during the installation process. This can contribute to a smoother and more responsive user experience.
Now that your tablet has been restarted, it’s time for the final step: verifying the new operating system version.
Step 10: Verify the New OS Version
After successfully restarting your Samsung tablet, the final step is to verify that the new operating system (OS) version has been installed. Verifying the new OS version ensures that the update process was completed successfully and that your tablet is running the latest software. Follow these steps to check the new OS version:
- Go to the Settings menu on your tablet by tapping on the gear or cogwheel icon from the Home Screen.
- Scroll down and tap on the “About device” or “About phone” option.
- In the “About device” section, look for the “Software information” or “Software version” option.
- Tap on “Software information” or “Software version” to view the details.
- In the software information, you will find the new OS version listed. It will be displayed as a combination of numbers and letters, such as “Android 11” or “One UI 3.0”.
By verifying the new OS version, you can confirm that the update process was successful and that your tablet is running the latest software. This is important for accessing new features, improvements, and security enhancements offered by the updated OS version.
If the OS version displayed matches the one expected for the update you installed, congratulations! Your Samsung tablet is now running the latest software. However, if the OS version is not what you expected or if you encounter any issues, it is advisable to contact Samsung support or refer to the official documentation for further assistance.
Now that you have verified the new OS version, you can enjoy the full benefits of the updated software on your Samsung tablet.
Conclusion
Updating the operating system on your Samsung tablet is vital to ensure optimal performance, security, and access to the latest features. In this guide, we have walked through the step-by-step process of updating your Samsung tablet’s OS. Let’s recap the essential steps:
- Check for Updates: Access the Software Update section in the Settings menu to check for any available updates.
- Connect to Wi-Fi: Connect your tablet to a stable Wi-Fi network to ensure a fast and reliable download process.
- Backup Your Data: It is crucial to back up your data to safeguard against any potential data loss during the update process.
- Ensure Sufficient Battery Life: Keep your tablet connected to a power source or charged to avoid interruptions during the update.
- Go to Settings: Navigate to the Settings menu on your tablet to access various system configurations and options.
- Navigate to Software Update: Find the Software Update section within the Settings menu.
- Check for Updates: Initiate a search for any available updates for your tablet’s operating system.
- Download and Install Updates: Download and install the available updates on your tablet.
- Restart Your Tablet: Restart your tablet to finalize the installation and for the updates to take effect.
- Verify the New OS Version: Confirm that the new operating system version has been successfully installed.
By following these steps, you can ensure that your Samsung tablet is running the latest software, offering improved performance, bug fixes, new features, and enhanced security measures.
Remember to regularly check for updates and keep your tablet’s software up to date to maintain its optimal functionality. Keeping your tablet updated ensures a seamless user experience and protects your device from potential vulnerabilities.
If you have any further questions or encounter any issues during the update process, be sure to refer to the official documentation or contact Samsung support for assistance specific to your tablet model.
Now that you have successfully updated your Samsung tablet’s operating system, you can enjoy the full benefits of the latest software version and make the most out of your device.