Introduction
Setting up multiple Linksys routers in your home or office can greatly expand your network coverage and provide better connectivity. Whether you need to extend your Wi-Fi range or create a separate network for guests or specific devices, this step-by-step guide will walk you through the process of setting up two Linksys routers.
Having two routers allows you to divide the load and improve performance by distributing the network traffic. This setup can be especially useful in larger homes or areas with multiple floors, where a single router may not be sufficient to reach every corner with a strong Wi-Fi signal.
While the process may seem daunting, it’s actually fairly straightforward, even for those with limited technical knowledge. All you need is a bit of time, the necessary equipment, and access to the router settings. So, if you’re ready to enjoy seamless connectivity throughout your space, let’s dive into the steps to set up two Linksys routers!
Step 1: Gather the necessary equipment
Before you begin setting up two Linksys routers, make sure you have all the necessary equipment at hand. Here’s what you’ll need:
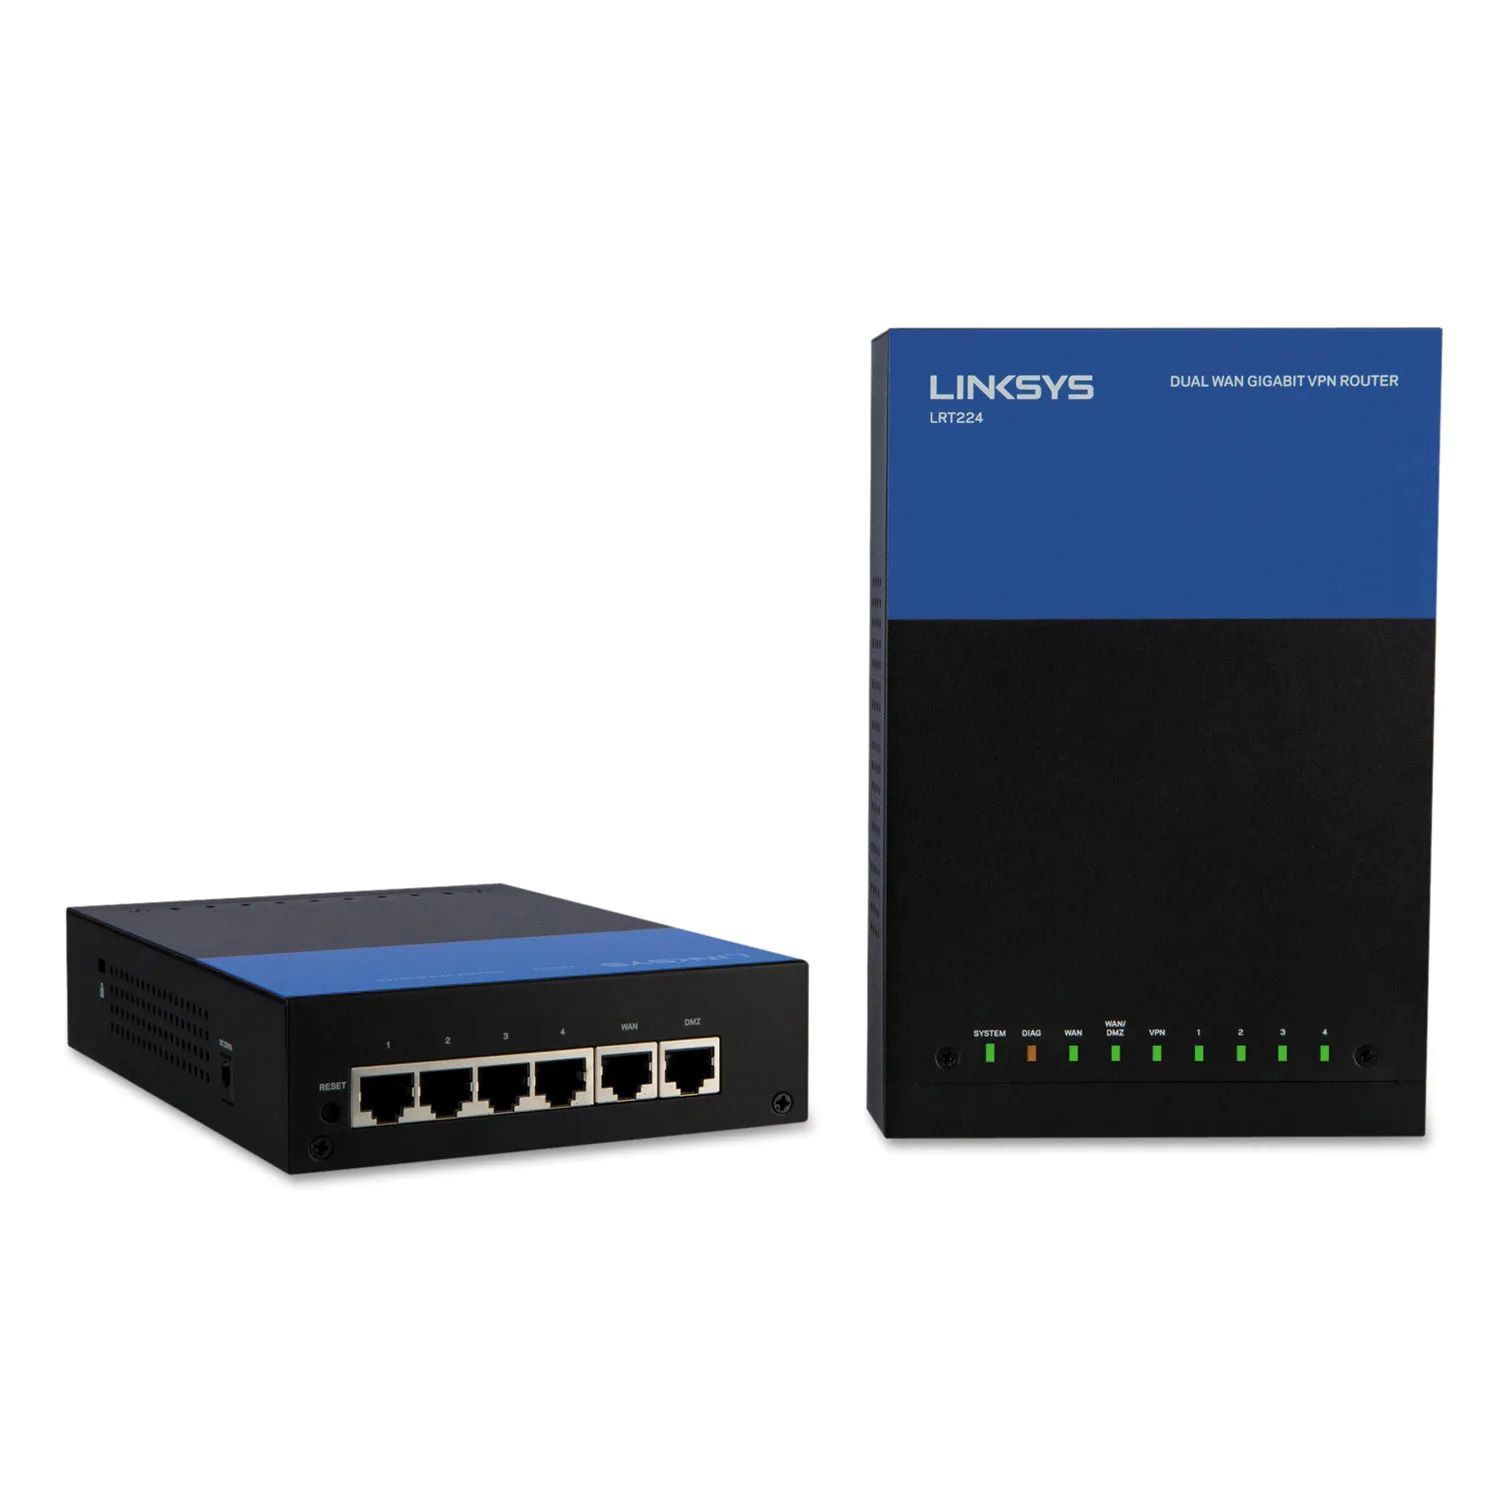
- Routers: You’ll obviously need two Linksys routers to set up your network. Ensure that both routers are in good working condition.
- Ethernet cables: You’ll need at least two Ethernet cables to connect your routers. Make sure they are long enough to reach the desired locations.
- Power adapters: Each router comes with its own power adapter. Ensure you have both power adapters handy.
- Computers or devices: To access the router settings and configure the network, you’ll need a computer or device with a web browser and Wi-Fi capability.
In addition to the above equipment, it’s important to have a basic understanding of your home or office network layout and your internet service provider’s (ISP) instructions or account details. This information will come in handy during the configuration process, so keep it readily available.
Once you have gathered all the necessary equipment and information, you’re ready to move on to the next step: connecting the primary router.
Step 2: Connect the primary router
Now that you have all the equipment gathered, it’s time to connect the primary router. Follow these steps:
- Unplug your modem’s power and, if present, any existing router connected to it. This will ensure a clean start for your new network setup.
- Take one end of an Ethernet cable and connect it to the modem’s Ethernet port. Connect the other end to the WAN or Internet port on the primary Linksys router.
- Plug in the power adapter for the primary router and connect it to a power source. Wait for the router to power up and establish a stable connection.
- Use another Ethernet cable to connect your computer or device to one of the LAN ports on the primary router. This will allow you to access the router’s settings via a web browser.
Once the connections are made, power on your computer or device and open a web browser. In the address bar, enter the default IP address of the primary router. Typically, this is “192.168.1.1”, but you can check the router’s documentation or underside for the correct IP address if unsure.
Upon entering the IP address, you will be prompted to enter the router’s username and password. Depending on the model, this information is either “admin” for both fields or “admin” for the username and the router’s serial number as the password. Consult the router’s documentation for exact details.
Once you’ve successfully logged in, you are ready to configure the primary router settings. This will be covered in the next step, so proceed to Step 3 to continue the setup process.
Step 3: Access the primary router’s settings
To set up and configure your primary Linksys router, you need to access its settings. Here’s how:
- Ensure that you are still connected to the primary router via the Ethernet cable. Open a web browser and enter the router’s IP address in the address bar. This will take you to the router’s login page.
- Enter the router’s username and password when prompted. If you haven’t changed these credentials, the default values are typically “admin” for both fields. However, if you have previously changed them, use the updated login information.
- Once successfully logged in, you will be presented with the router’s settings page. The layout and options may vary depending on the router model, but key settings are generally found under the “Setup” or “Basic Setup” section.
- On the setup page, you can configure important settings such as the router’s network name (SSID) and password. Choose a unique and secure SSID, and create a strong password to protect your network from unauthorized access.
- Additionally, you may need to set the internet connection type based on your ISP’s instructions. This can be typically found under the “Internet” or “WAN” settings. Choose the appropriate connection type (e.g., Dynamic IP, PPPoE, or Static IP) and enter the required details.
- Once you have made the necessary changes and configurations, don’t forget to save your settings. Look for a “Save” or “Apply” button at the bottom or top of the page.
Remember, it’s essential to carefully review each setting and ensure they align with your specific requirements and network setup. Take your time and make any adjustments needed to optimize the performance and security of your primary Linksys router.
With the primary router’s settings configured, you’re ready to proceed to the next step: connecting the secondary router. This will be covered in Step 4 of the setup process.
Step 4: Configure the primary router
After accessing the settings of your primary Linksys router, it’s time to configure it according to your specific needs. Here’s what you need to do:
- Review the basic settings: Start by reviewing the basic settings you previously configured, such as the network name (SSID) and password. Double-check for any errors or make adjustments if necessary.
- Network security: Enable WPA2 or WPA3 encryption to secure your wireless network. This will prevent unauthorized users from accessing your network. Choose a strong and unique password for your Wi-Fi network.
- Advanced settings: Explore the advanced settings options to further customize your network. In this section, you can change channel settings, adjust transmission power, set up port forwarding, and enable parental controls, among other features.
- Guest network: If you want to provide a separate network for guests, many Linksys routers offer a guest network feature. Enable it and set a unique password to restrict guest access from your main network.
- Quality of Service (QoS): If you have multiple devices connected to your primary router and want to prioritize certain types of traffic, configure the QoS settings. This will ensure that critical applications like video streaming or online gaming receive sufficient bandwidth.
- Firmware updates: Check for firmware updates for your router model. Ensure that your router is running the latest firmware version to benefit from bug fixes, security patches, and performance improvements.
While configuring the primary router, it’s recommended to refer to the user manual or online documentation specific to your router model. These resources will provide detailed instructions on various settings and options available to you.
Once you have finished configuring the primary router, save the settings and give the router some time to apply the changes. Congratulations! Your primary Linksys router is now set up and ready to facilitate a fast and secure network connection.
In the next step, we will dive into the process of connecting the secondary router to further boost your network coverage and performance. Proceed to Step 5 to continue the setup process.
Step 5: Connect the secondary router
With the primary router configured, it’s time to connect the secondary Linksys router to expand your network coverage. Follow these steps:
- Place the secondary router in a location where it will provide optimal coverage and range for the desired area.
- Connect one end of an Ethernet cable to one of the LAN ports on the primary router.
- Connect the other end of the Ethernet cable to the WAN or Internet port on the secondary router.
- Plug in the power adapter for the secondary router and connect it to a power source. Allow the router to power up and establish a stable connection.
The secondary router should now be connected to the primary router, extending the network coverage. It essentially acts as a wireless access point, allowing devices to connect to the same network as the primary router. This means you can now enjoy seamless connectivity throughout your home or office space.
It’s important to note that the secondary router should not have the same IP address as the primary router. By default, the primary router will assign IP addresses to devices on the network. The secondary router should be set to “Auto” or “DHCP” mode to obtain an IP address automatically from the primary router.
Once the secondary router is connected, you can proceed to access its settings and configure it to work in conjunction with the primary router. In the next step, we will explore how to access the secondary router’s settings and make the necessary adjustments to optimize your network. Continue to Step 6 to learn more.
Step 6: Access the secondary router’s settings
To configure the secondary Linksys router and ensure it works seamlessly with the primary router, you need to access its settings. Follow these steps to access the secondary router’s settings:
- Ensure that you are connected to the secondary router’s network either via a wired connection or through its Wi-Fi.
- Open a web browser on a computer or device connected to the secondary router.
- In the address bar of the web browser, enter the default IP address of the secondary router. This IP address can be found in the router’s documentation or on the underside of the device.
- Once you’ve entered the IP address, you will be prompted to enter the router’s username and password. The default login credentials for Linksys routers are typically “admin” for both the username and password fields. However, if you have changed these credentials in the past, use the updated login information.
- After successfully logging in, you will be directed to the secondary router’s settings page. This page may have a different layout from the primary router’s settings page but will likely have similar sections and options.
- Review the settings: Begin by reviewing the basic settings of the secondary router, such as the network name (SSID) and password. Ensure they align with what you configured on the primary router.
- Wireless settings: Adjust the wireless settings as needed, like choosing the appropriate channel and transmission power. Sync these settings with the primary router to ensure seamless roaming between the two routers.
- Advanced settings: You may also have advanced settings available on the secondary router. Check for options like port forwarding, DHCP settings, and firmware updates. Configure these settings if required.
Make sure to save any changes you make to the secondary router’s settings. Once the settings are saved, the secondary router should automatically sync with the primary router and extend your network’s coverage.
With the secondary router’s settings configured, you are now ready to enjoy an expanded network with improved coverage and connectivity. In the next step, we will test the network connection to ensure everything is set up correctly. Proceed to Step 7 to learn more.
Step 7: Configure the secondary router
Configuring the secondary Linksys router is crucial to ensure it functions properly and extends your network effectively. Follow these steps to configure the secondary router:
- Access the settings of the secondary router by entering its IP address in a web browser on a device connected to the secondary router’s network.
- Enter the router’s username and password when prompted. If you haven’t changed the login credentials, the default values are typically “admin” for both fields.
- Once logged in, navigate to the router’s settings pages and review the basic settings. Make sure the network name (SSID) and password are consistent with the primary router’s settings.
- Wireless settings: Adjust the wireless settings to ensure seamless connectivity with the primary router. Choose the appropriate channel and transmit power to minimize interference and maximize coverage.
- Security settings: Enable the same level of security measures on the secondary router as on the primary router. Set a strong password and enable encryption (WPA2 or higher) to protect your network.
- IP settings: While the primary router handles IP address assignment, ensure that the secondary router is set to obtain its IP address dynamically (DHCP) from the primary router. This will prevent IP conflicts and allow devices to seamlessly connect to either router.
- Advanced settings: Explore the advanced settings options specific to your router model. Here, you may find options like port forwarding, VLAN settings, and firmware updates. Adjust these settings as necessary.
Once you have made the necessary configurations, be sure to save the settings on the secondary router. This will synchronize it with the primary router and enable seamless roaming between the two routers.
Congratulations! With the secondary router configured, you have successfully set up an extended network that offers improved coverage and connectivity throughout your home or office. In the next step, we will test the network connection to ensure everything is working as expected. Proceed to Step 8 to learn more.
Step 8: Test the network connection
After setting up and configuring the secondary Linksys router, it’s time to test the network connection to ensure everything is functioning correctly. Follow these steps to test the network connection:
- Disconnect any devices that were connected to the primary router from the network, including your computer or mobile devices.
- Connect these devices to the secondary router’s network. You can do this by selecting the secondary router’s network name (SSID) and entering the corresponding password.
- Once connected, test the network connection by accessing different websites or streaming services on your devices. Check if you can browse the internet, stream videos, or perform any other online activities without any issues.
- Move around your home or office and test the Wi-Fi signal strength. Ensure that you have a strong and stable connection in all areas where you need network coverage.
- Check for seamless roaming between the primary and secondary routers. Move from the primary router’s coverage area to the secondary router’s coverage area and vice versa. Your device should automatically switch between the routers without any interruptions.
- If you encounter any connectivity issues or weak Wi-Fi signals in certain areas, consider adjusting the placement of the secondary router to improve coverage or upgrading your equipment if necessary.
By testing the network connection, you can ensure that both routers are functioning correctly and providing a reliable network connection. If you encounter any issues during the testing process, refer to the routers’ documentation or seek assistance from Linksys technical support to troubleshoot and address the problem.
With a successful network connection test, you have completed the setup process for your two Linksys routers. Enjoy the expanded coverage and improved connectivity provided by your setup!
Conclusion
Setting up two Linksys routers can greatly enhance your network coverage, providing better connectivity throughout your home or office. By following the step-by-step guide outlined in this article, you can successfully configure multiple routers while ensuring optimal performance and security.
Throughout the setup process, you learned how to gather the necessary equipment and connect the primary and secondary routers. You accessed the routers’ settings to configure them according to your specific needs, including network names, passwords, and advanced settings. Lastly, you tested the network connection to ensure seamless connectivity and roaming between the routers.
Remember that proper placement of your routers is essential to maximize coverage. Consider placing them in central locations to ensure a strong and stable Wi-Fi signal throughout your space.
Additionally, periodically check for firmware updates for your routers to benefit from bug fixes, improvements, and security patches released by Linksys. These updates can help maintain a secure and efficient network.
If you encounter any issues during the setup process or while using your network, don’t hesitate to consult the user manual, online documentation, or reach out to Linksys technical support for assistance. They can provide guidance and help resolve any concerns you may have.
Now that you have successfully set up your two Linksys routers, enjoy seamless connectivity and expanded network coverage. Whether you’re streaming movies, working from home, or gaming, you can now benefit from a strong and reliable network connection in every corner of your space.