Introduction
Setting an alarm on your Android phone can be extremely helpful in managing your schedule and ensuring you never miss an important event or appointment. Whether you need to wake up on time in the morning, keep track of your daily tasks, or remind yourself of an upcoming meeting, the alarm feature on your Android device has got you covered.
With a few simple steps, you can easily set up an alarm on your Android phone and customize it according to your preferences. In this guide, we will walk you through the process of setting an alarm, choosing the alarm sound, and customizing other settings to ensure you have the best alarm experience possible.
Whether you are a heavy sleeper or someone who has a packed schedule, having a reliable alarm to wake you up or remind you of important events can make a significant difference in your day. With the Clock app available on Android devices, you can conveniently set multiple alarms, customize their settings, and repeat them as needed.
Step 1: Open Clock App
The first step in setting an alarm on your Android phone is to open the Clock app. The Clock app is pre-installed on most Android devices and can usually be found in the app drawer or on the home screen.
To open the Clock app, simply locate its icon and tap on it. The icon typically resembles a round clock or has the word “Clock” written on it. Once you tap on the icon, the Clock app will launch, and you will be greeted with various options and features.
If you can’t locate the Clock app on your home screen or app drawer, you can also try searching for it using the search function on your device. Simply swipe down on the home screen and enter “Clock” in the search bar. The Clock app should appear in the search results, allowing you to open it with a single tap.
Once you have successfully opened the Clock app, you are now ready to move on to the next step and start setting up your alarm.
Keep in mind that the Clock app’s appearance and functionality may vary slightly depending on the manufacturer and Android version of your device. However, the general process of setting an alarm is similar across different Android phones.
Step 2: Tap on the Alarm tab
Once you have opened the Clock app on your Android phone, you will typically see different tabs or options at the bottom or top of the screen. Look for the tab labeled “Alarm” and tap on it.
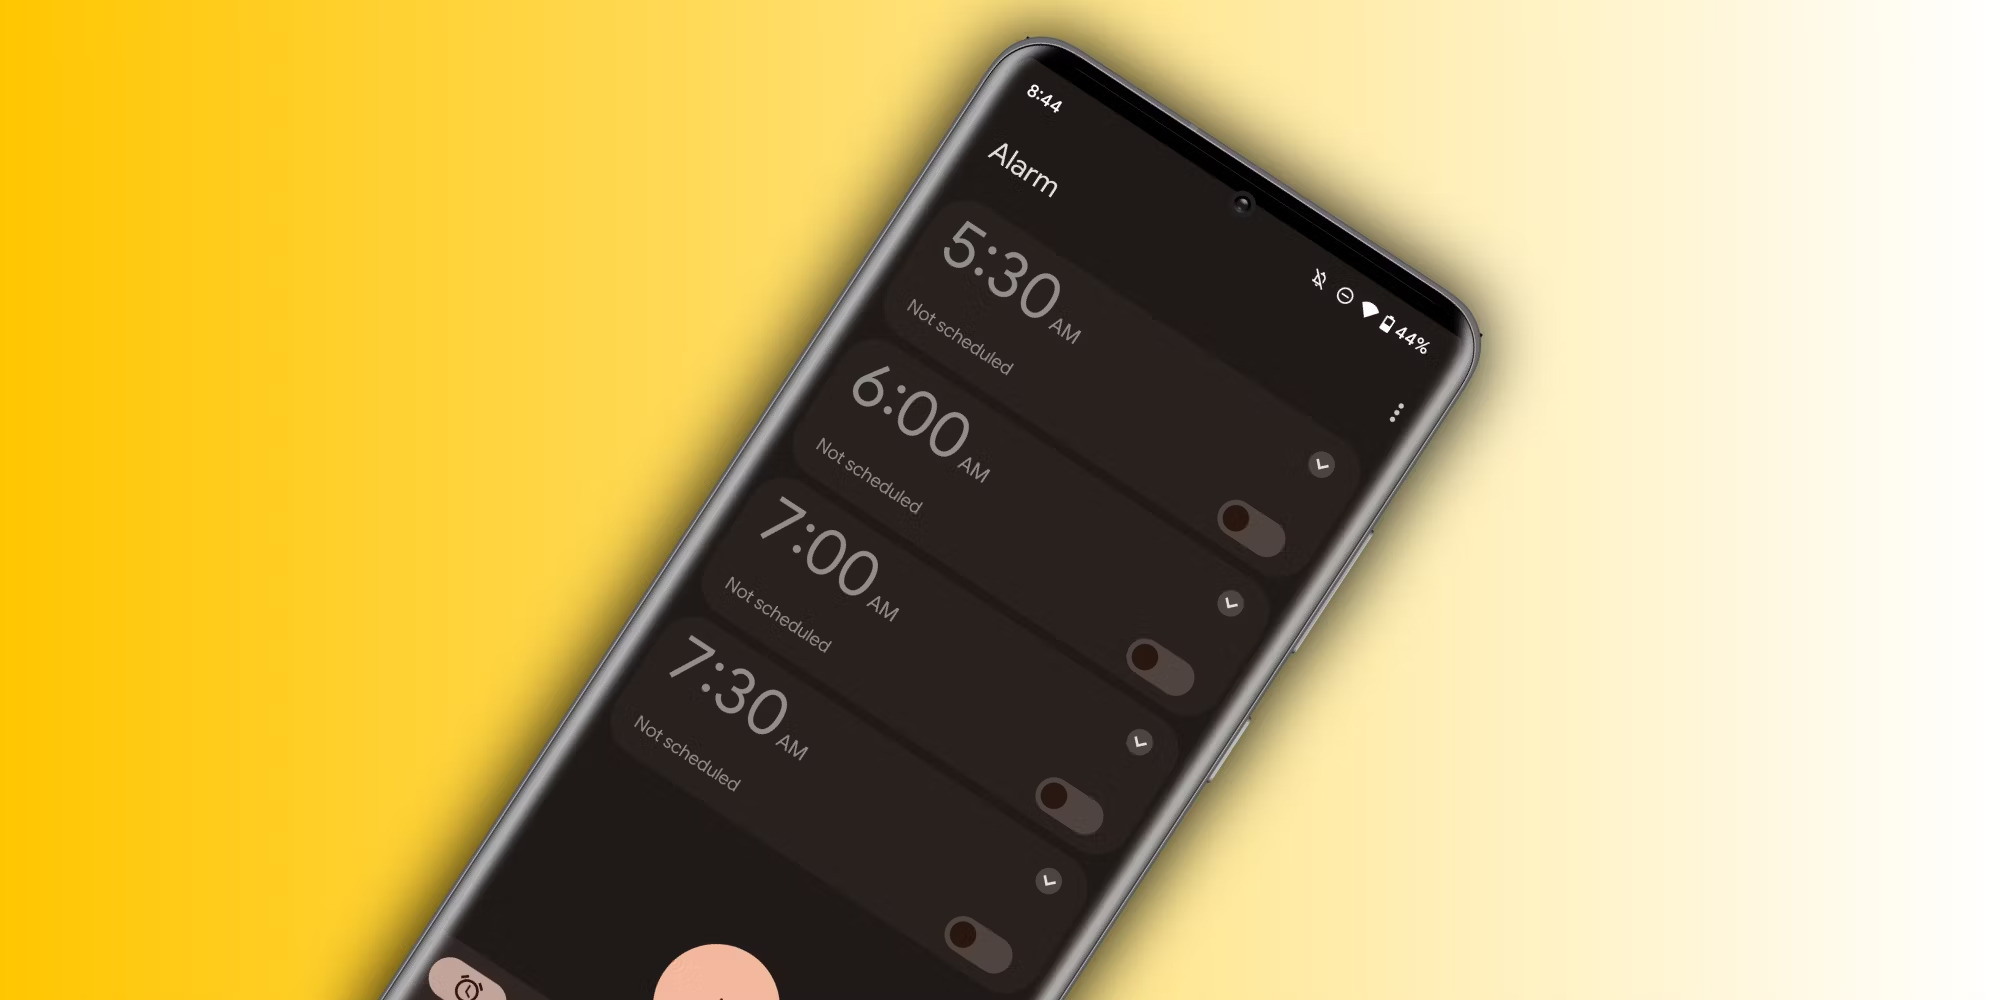
The Alarm tab is where you can view, create, and manage your alarms. It allows you to have multiple alarms set up at different times, making it convenient for various purposes, such as waking up in the morning or reminding yourself of important tasks throughout the day.
When you tap on the Alarm tab, you will be taken to the alarms section, where you can see a list of your existing alarms if you have any. Each alarm will display its time, repeat settings, and other customization options.
If you haven’t set up any alarms yet, the alarms section will be empty. Don’t worry, setting up a new alarm is a breeze, and we will guide you through the process in the following steps.
In some Android versions or devices, the Alarm tab may be labeled differently, such as “Alarms” or “Create Alarm”. Regardless of the exact wording, you want to select the option that allows you to create a new alarm.
By tapping on the Alarm tab, you are now ready to proceed to the next step and start setting up your desired alarm time.
Step 3: Tap on the “+” button
After tapping on the Alarm tab in the Clock app on your Android phone, you will be presented with a list of existing alarms or an empty screen if you haven’t set up any alarms yet. To create a new alarm, locate and tap on the “+” button.
The “+” button is typically located in the bottom or top corner of the screen, depending on your device’s interface design. It is usually represented by a plus sign or labeled with the word “Add” or “New”. By tapping on this button, you initiate the process of creating a new alarm.
Once you tap on the “+” button, you will be taken to the alarm creation screen. Here, you can customize various settings for your alarm, including the time, repeat schedule, sound, and more. The options available may vary slightly depending on your Android version and device manufacturer.
If you are unable to locate the “+” button, you can also look for an option like “Create Alarm” or “New Alarm” within the alarms section. Tapping on this option will also bring you to the alarm creation screen, where you can set up your desired alarm.
By tapping on the “+” button, you have now started the process of creating a new alarm on your Android phone. In the next step, we will guide you through setting up the desired time for your alarm.
Step 4: Set the desired time for the alarm
Once you have tapped on the “+” button in the Clock app on your Android phone, you will be presented with the alarm creation screen. It’s time to set the desired time for your alarm.
In most cases, you will see a digital clock display with hours and minutes. To adjust the time, simply use the arrows or swipe up and down to increase or decrease the hour and minute values. Alternatively, you may find a keypad where you can directly input the time.
Scroll through the options to select the hour and minute that you want your alarm to go off. Take note of whether it is set for AM or PM, and ensure it aligns with your desired wake-up or reminder time.
If your Android device supports the 24-hour format, you may have the option to choose between the 12-hour format and the 24-hour format. Make sure to select the format that you are most comfortable with.
Take your time when setting the alarm time to avoid any confusion or mistakes. Double-check that the time is accurately reflecting your intended wake-up or reminder time. Once you are satisfied with the selected time, proceed to the next step.
Remember that you can always edit the time later on if needed. Simply locate the alarm in the Clock app, tap on it, and make the necessary adjustments.
Now that you have set the desired time for your alarm, you are one step closer to ensuring you never miss an important event or oversleep again.
Step 5: Choose the days for the alarm to repeat
After setting the desired time for your alarm in the Clock app on your Android phone, you have the option to choose the specific days for the alarm to repeat.
Look for the “Repeat” or “Days” option in the alarm creation screen. By tapping on this option, you will be presented with a list of days of the week, usually in the form of checkboxes or toggles.
To choose the days for your alarm to repeat, simply tap on the checkboxes next to the respective days. For example, if you want the alarm to go off every Monday, Tuesday, Wednesday, and Friday, select the checkboxes next to those days.
If you prefer your alarm to go off only on specific days, make sure to uncheck the boxes for the days you don’t want the alarm to repeat. This allows you to customize the alarm according to your weekly schedule.
In some cases, you may also find options like “Weekdays” or “Weekends” that allow you to quickly select all the weekdays or weekends for your alarm to repeat.
Additionally, some versions of Android provide advanced options for custom repeating patterns. For example, you may have the option to select “Every other day” or “Every week” to create more flexible alarm schedules.
Once you have chosen the days for your alarm to repeat, take a moment to review your selections and ensure they align with your intended schedule. If all looks good, you can proceed to the next step with confidence.
Keep in mind that the repeat option is not mandatory. If you prefer your alarm to be a one-time event, simply skip this step or leave all checkboxes unchecked.
By selecting the days for your alarm to repeat, you are creating a reliable schedule that fits your needs and helps you stay organized in your daily activities.
Step 6: Select the alarm sound and vibration settings
Once you have set the time and repeat schedule for your alarm in the Clock app on your Android phone, it’s time to choose the alarm sound and vibration settings.
Look for the options related to sound and vibration in the alarm creation screen. Typically, you will see a section labeled “Sound” or “Ringtone” where you can select the alarm sound.
Tap on the sound option to open a list of available alarm tones. Android devices offer a variety of pre-installed alarm sounds to choose from, ranging from gentle melodies to more energetic tunes. You can preview each sound by tapping on it and adjust the volume if necessary. Additionally, you may have the option to use a custom sound from your device’s storage.
If you prefer a silent alarm, you may find an option to select “None” or “Silent” as the alarm sound. This will ensure the alarm does not produce any sound but only activates vibration or other notification methods.
Speaking of vibration, if you want your phone to vibrate along with the alarm sound, look for the vibration settings. You may be able to choose between different vibration patterns or adjust the intensity of the vibration.
Once you have selected the alarm sound and vibration settings that suit your preferences, take a moment to test them by tapping on the “Test” or “Preview” button, if available. This allows you to ensure that the chosen sound and vibration are satisfactory and easily noticeable.
Remember that sound and vibration settings can be adjusted or changed at any time. If you ever wish to modify these settings for a particular alarm, simply locate the alarm in the Clock app and make the desired adjustments.
By selecting the alarm sound and vibration settings, you are personalizing your wake-up or reminder experience and ensuring that it suits your preferences and needs.
Step 7: Customize additional alarm settings (snooze, volume, etc.)
As you continue to set up your alarm in the Clock app on your Android phone, you have the option to customize additional settings to enhance your alarm experience. These settings can include snooze duration, alarm volume, and other features.
To access the additional alarm settings, look for options like “More” or “Additional Settings” in the alarm creation screen. Tapping on these options will expand the settings menu, revealing various customization options.
Snooze duration allows you to set the interval at which your alarm will repeat after you hit the snooze button. You can typically choose between preset snooze durations, such as 5 minutes, 10 minutes, or you may have the option to input a custom snooze duration.
Alarm volume determines how loud or soft your alarm will be. You can adjust the volume slider to your preferred level, ensuring it is loud enough to wake you up but not too jarring. Some Android devices also offer the option to gradually increase alarm volume for a more gentle awakening.
Other settings you may find include gradually increasing alarm volume, which starts with a low volume and gradually increases to the desired level, or the ability to label your alarm with a custom name or description.
Take the time to explore and customize these additional settings according to your preferences. Experiment with different snooze durations, alarm volume levels, and any other features available, until you find the combination that suits you best.
Remember that these additional settings are not mandatory to set up your alarm. If you’re satisfied with the default settings or prefer not to customize them, you can simply skip this step.
By customizing the additional alarm settings, you can tailor your alarm experience to match your preferences and enjoy a more personalized and convenient wake-up or reminder system.
Step 8: Save the alarm
After customizing the various settings for your alarm in the Clock app on your Android phone, it’s time to save the alarm and ensure it’s ready to go.
Look for the “Save” or “Done” button in the alarm creation screen. By tapping on this button, you confirm and save all the settings you have chosen for your alarm.
Double-check that all the details, including the alarm time, repeat schedule, sound, and vibration settings, are correctly set according to your preferences. Once you are satisfied with the configured alarm, go ahead and save it.
After saving the alarm, you will typically be taken back to the alarms section in the Clock app, where you can see the newly created alarm listed along with any other existing alarms. The new alarm will display its time, repeat settings, and other customization options.
Keep in mind that you can always go back and edit the alarm later if needed. Simply locate the alarm in the Clock app, tap on it, and make the desired changes.
Once you have saved the alarm, you can now rely on it to wake you up on time or remind you of important events. Make sure to keep your device charged and place it in a location where you can hear or easily access the alarm when it goes off.
Remember to periodically check and adjust your alarms as needed, especially when there are changes in your schedule, so that you never miss important appointments or deadlines.
By saving the alarm, you have completed the process of setting up an alarm on your Android phone. You can now enjoy the convenience and reliability of the alarm feature, ensuring you stay on top of your daily tasks and activities.
Step 9: Edit or delete existing alarms
Once you have set up an alarm in the Clock app on your Android phone, you have the flexibility to edit or delete it as needed. This allows you to make any necessary adjustments to your alarm settings or remove alarms that are no longer relevant.
To edit an existing alarm, navigate to the alarms section in the Clock app. Locate the alarm that you wish to modify and tap on it. This will bring up the alarm details, where you can make changes to the time, repeat schedule, sound, vibration, and any other settings you wish to modify. Once you have finished editing, make sure to save the changes.
If you want to delete an existing alarm, follow similar steps by navigating to the alarms section in the Clock app. Locate the alarm that you wish to remove and swipe left or right, or look for the delete icon. Tap on it to delete the alarm. Alternatively, you may find an “Edit” option that allows you to delete the alarm from the alarm details screen.
Regularly reviewing and managing your alarms is essential to ensure they remain accurate and aligned with your schedule. For instance, if you no longer need a recurring alarm, deleting it can free up space and reduce clutter in your alarm list.
Additionally, if you have multiple alarms, organizing them in a logical order can make it easier to navigate and manage them. You can rearrange the order of alarms by tapping and holding an alarm, then dragging it to the desired position.
Remember to review your alarms periodically, especially when there are changes in your schedule, or when daylight saving time starts or ends. This helps prevent any confusion or missed alarms due to adjustments in time.
By efficiently managing your existing alarms and regularly reviewing and updating them, you can ensure that your alarm system remains effective and supports your daily routine.
Conclusion
Setting an alarm on your Android phone is a simple and effective way to manage your time, wake up on schedule, and stay organized throughout the day. With the Clock app and the step-by-step guide provided, you can easily set up alarms, customize their settings, and ensure you never miss an important event or task.
By following the steps outlined in this guide, you can confidently navigate the Clock app on your Android phone to set the desired alarm time, choose the days for it to repeat, select the alarm sound and vibration settings, and customize other features such as snooze duration and alarm volume.
Additionally, don’t forget that you have the ability to edit or delete existing alarms to accommodate changes in your schedule or preferences. Regularly reviewing and managing your alarms ensures their accuracy and helps you stay on track with your daily activities.
Remember, the Clock app and its alarm feature are designed to make your life easier and more organized. Experiment with different options and settings to find what works best for you. With a reliable alarm system in place, you can wake up refreshed, stay on top of your tasks, and make the most of your day.
Start setting your alarms today and experience the benefits of a well-managed schedule and enhanced productivity!


