Introduction
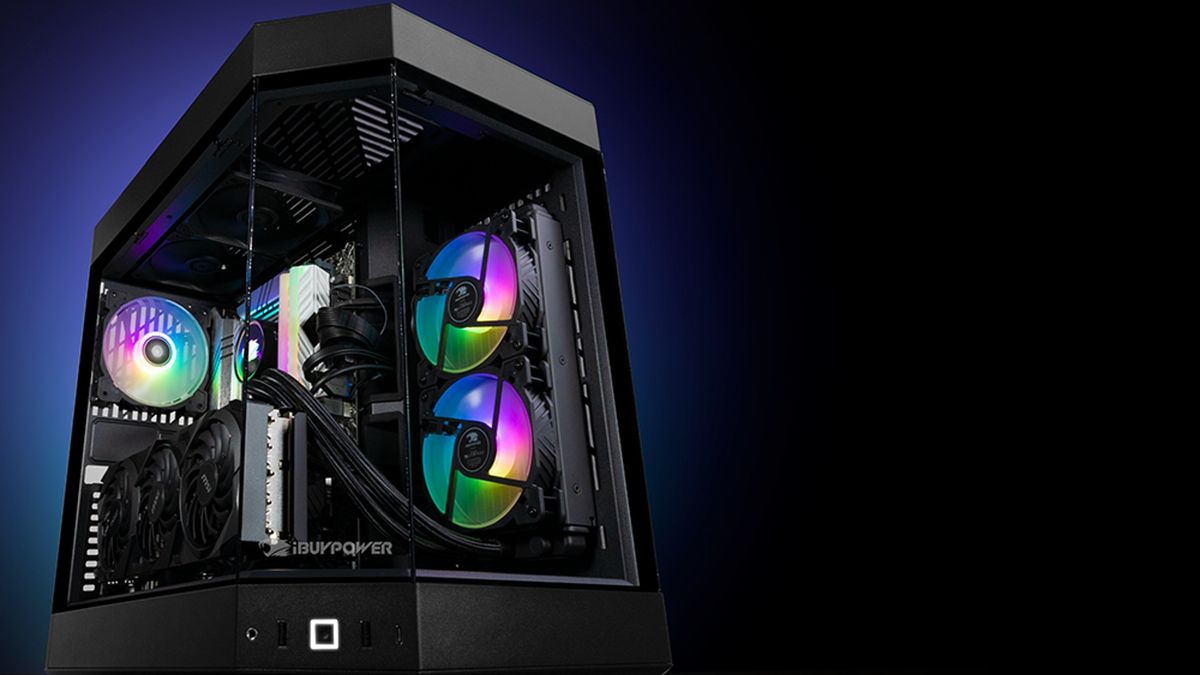
Welcome to our guide on how to replace a case fan in iBuyPower cases. Case fans play a crucial role in maintaining the optimal temperature and airflow inside your computer case, ensuring that your components stay cool and perform at their best. Over time, case fans can wear out or become noisy, indicating the need for a replacement. Fortunately, replacing a case fan in iBuyPower cases is a relatively straightforward process that you can easily tackle on your own.
In this guide, we will take you through the step-by-step process of replacing a case fan in iBuyPower cases. We will cover the tools and materials you will need, as well as the necessary precautions to ensure your safety and the proper functioning of your computer. Whether you are experiencing overheating issues, excessive noise, or simply want to upgrade your case fans to enhance your system’s cooling capabilities, this guide will provide you with the essential knowledge to carry out the replacement smoothly.
Before we begin, it’s important to note that iBuyPower cases may vary in design and features, so you should consult the user manual or online resources specific to your model for any specific instructions or differences. With that said, the general steps outlined in this guide should apply to most iBuyPower cases and provide a solid foundation for replacing case fans.
Now, let’s dive in and learn how to replace a case fan in iBuyPower cases!
Tools and Materials Needed
Before you begin replacing the case fan in your iBuyPower case, it’s important to gather the necessary tools and materials to ensure a smooth and efficient process. Here’s a list of the items you will need:
- Screwdriver – Depending on your case, you may need a Phillips head or a flathead screwdriver to remove screws.
- Replacement Case Fan – Make sure you choose a case fan that is compatible with your iBuyPower case. Consider factors such as size, airflow, and noise level based on your needs and preferences.
- Anti-static Wrist Strap (optional) – This is a precautionary measure to protect sensitive electronic components from static electricity. It’s recommended, especially if you are working in a dry environment or on a carpeted surface.
- Clean Cloth – This will come in handy for wiping away any dust or debris that may have accumulated inside your case.
- Compressed Air Can or Dust Cleaner – Use this to blow away any stubborn dust or debris from your case and components.
By having these tools and materials ready, you’ll be well-prepared to tackle the case fan replacement process without any unnecessary delays or setbacks.
Step 1: Shut Down and Unplug the Computer
The first and most crucial step before replacing a case fan in your iBuyPower case is to shut down your computer and disconnect it from the power source. This ensures your safety and prevents any potential damage to your components during the replacement process.
Here’s how to properly shut down and unplug your computer:
- Save your work and close any open applications to prevent data loss.
- Click on the “Start” menu and select “Shut Down” from the options.
- Wait for your computer to fully shut down before proceeding.
- Once your computer is shut down, gently unplug the power cord from the wall outlet or power strip.
- Make sure to also disconnect any other connected cables, such as the monitor, keyboard, and mouse.
By following these steps, you ensure that your computer is completely powered off and disconnected from any power source, minimizing the risk of electrical shock or damage to your device.
Before moving on to the next step, it’s a good practice to ground yourself to discharge any static electricity that may have built up. You can do this by touching a metal surface, or better yet, by wearing an anti-static wrist strap, which can be connected to a grounded surface.
Now that your computer is safely shut down and unplugged, you’re ready to move on to the next step of replacing the case fan in your iBuyPower case.
Step 2: Remove the Side Panel of the Case
Now that your computer is shut down and unplugged, it’s time to remove the side panel of your iBuyPower case. The side panel provides access to the internal components, including the case fan that needs to be replaced.
Follow these steps to remove the side panel:
- Locate the screws or latches that secure the side panel to the case. These are typically located at the back of the case.
- Using a screwdriver, carefully unscrew the screws or release the latches to loosen the side panel.
- Once the screws or latches are undone, gently slide or pull the side panel away from the case. Take care not to use excessive force to avoid damaging the panel or other components inside.
Depending on your iBuyPower case model, the side panel may slide off or require more complicated steps to remove. It’s always a good idea to consult the user manual specific to your case if you encounter any difficulties or specific instructions.
With the side panel removed, you now have clear access to the internal components of your iBuyPower case, including the case fan that needs to be replaced. Be cautious not to touch any sensitive parts or components unless necessary, as static electricity can damage them. If you do touch any components, make sure you are grounded by touching a metal surface or wearing an anti-static wrist strap.
Now that the side panel is removed, you’re ready to proceed to the next step of locating the case fan that needs to be replaced in your iBuyPower case.
Step 3: Locate the Case Fan that Needs to be Replaced
With the side panel of your iBuyPower case removed, it’s time to locate the case fan that needs to be replaced. Identifying the specific case fan will ensure that you remove and replace the correct one, preventing any confusion or potential damage to other components.
Follow these steps to locate the case fan:
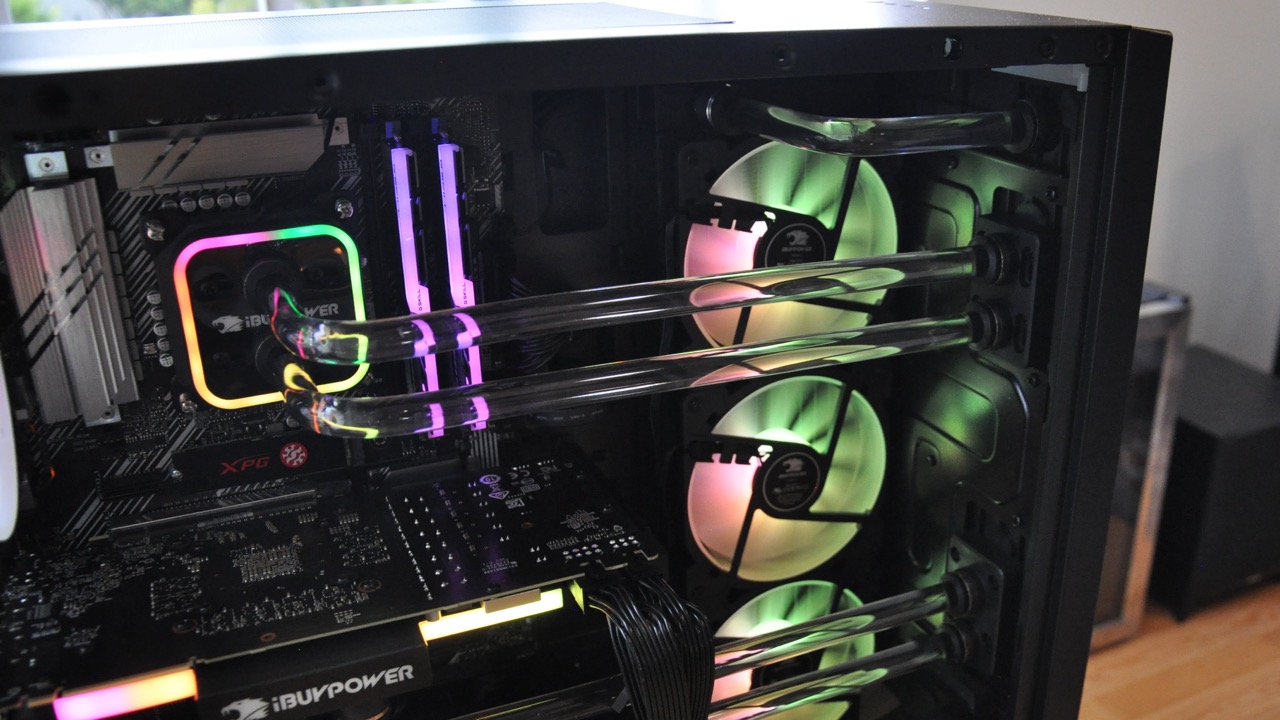
- Take a moment to visually inspect the inside of your case. Look for any fans positioned around the internal components. Typically, case fans are situated at the front, back, or side of the case.
- Observe the airflow direction of the case fan. This information is usually indicated by arrow symbols on the fan or on the surrounding components.
- Once you have identified the case fan that needs replacement, note its position within the case. You may want to take a picture or make a mental note for reference during the installation of the new fan.
It’s important to ensure that the replacement fan you have is compatible in terms of size, airflow, and connector type with the fan you are replacing. This information can typically be found in the specifications of the original case fan or the user manual of your iBuyPower case.
By accurately locating the case fan that needs to be replaced, you are now ready to proceed with disconnecting the power cable in the next step.
Step 4: Disconnect the Power Cable from the Case Fan
Now that you have located the case fan that needs to be replaced, the next step is to disconnect the power cable that is attached to the fan. Disconnecting the power cable ensures that the fan is completely disconnected from the power source, allowing you to safely remove and replace it.
Follow these steps to disconnect the power cable:
- Identify the power cable that is connected to the case fan. The power cable is typically a small, four-pin connector.
- Gently grip the power cable connector and firmly pull it away from the fan. It may require a slight amount of force, but be careful not to pull too forcefully to avoid damaging the cable or other components.
- Once the power cable is disconnected from the case fan, ensure that it is secure and won’t accidentally reconnect during the replacement process.
It’s important to note that some case fans may have additional cables or connectors for features such as RGB lighting or fan speed control. If your case fan has any additional cables or connectors, make sure to disconnect them accordingly.
By disconnecting the power cable, you have successfully disconnected the case fan from the power source, ensuring that it is safe to remove and replace. You are now ready to move on to the next step of removing the screws securing the case fan.
Step 5: Remove the Screws Securing the Case Fan
After disconnecting the power cable, the next step is to remove the screws that are securing the case fan in place. Removing these screws will allow you to easily take out the old case fan and prepare for the installation of the new one.
Follow these steps to remove the screws:
- Locate the screws that are holding the case fan in place. The number and position of the screws may vary depending on your iBuyPower case model.
- Using a screwdriver, carefully unscrew each screw in a counterclockwise direction. Be sure to keep the screws in a safe place, as you will need them later to secure the new case fan.
- Once all the screws have been removed, set them aside and gently lift the old case fan away from the mounting points. Take care not to damage any other components or cables while removing the fan.
If the case fan feels stuck or difficult to remove, double-check for any additional connectors or cables that may still be attached. Sometimes, case fans have additional connectors for features like RGB lighting or fan speed control. If you encounter any additional connectors, disconnect them to release the case fan completely.
Once you have removed the screws and effectively detached the old case fan from its mounting points, you are ready to proceed to the next step of installing the new case fan.
Step 6: Take Out the Old Case Fan
Now that you have successfully removed the screws securing the case fan, it’s time to take out the old case fan from your iBuyPower case. Removing the old fan will create space for the installation of the new one and ensure a smooth replacement process.
Follow these steps to take out the old case fan:
- Gently lift the old case fan away from the mounting points. Be cautious not to damage any other components or cables in the process.
- Inspect the area around the fan for any dust or debris. If you notice any accumulation, use a clean cloth or compressed air can to gently remove the debris. It’s essential to maintain a clean environment for optimal airflow and cooling.
- Set the old case fan aside in a safe place. Depending on the condition of the fan, you may consider recycling it or disposing of it according to local regulations.
During this step, it’s crucial to handle the old fan with care. Avoid touching the fan blades excessively, as they can be delicate. Additionally, be cautious of any sharp edges or protrusions on the fan casing.
By removing the old case fan, you have cleared the way for the installation of the new fan. Take a moment to inspect the surrounding area and ensure that it is clean and free from any obstructions. This will optimize the performance of the new case fan and promote efficient cooling for your iBuyPower case.
With the old case fan safely removed, you are now ready to move on to the next step of installing the new case fan into your iBuyPower case.
Step 7: Install the New Case Fan
With the old case fan removed, it’s time to install the new case fan in your iBuyPower case. Proper installation ensures optimal airflow and cooling for your computer, promoting the performance and longevity of your components.
Follow these steps to install the new case fan:
- Take the new case fan and align it with the mounting points in your iBuyPower case. Ensure that the fan’s screw holes align with the corresponding holes in the case.
- Gently lower the new case fan onto the mounting points, keeping it aligned and level. Take care not to force the fan into place, as this can cause damage to the fan or the case.
- Once the new case fan is positioned correctly, insert the screws that you previously removed. Start by loosely screwing in each screw to hold the fan in place.
- With all screws in place, use a screwdriver to tighten them clockwise. Be careful not to overtighten the screws, as this could damage the fan or the case threads.
It’s important to mention that some case fans have arrows or markings indicating the direction of airflow. Make sure the new fan is oriented correctly based on the desired airflow direction in your iBuyPower case. This information can usually be found in the fan’s specifications or in the fan’s manual.
Once the new case fan is securely installed and the screws are tightened, give the fan a gentle wiggle to ensure it is firmly in place and does not move excessively. This will minimize any vibrations or noise during operation.
Now that the new case fan is successfully installed, you are ready to move on to the next step of securing the fan with screws.
Step 8: Secure the New Case Fan with Screws
Now that you have installed the new case fan in your iBuyPower case, it’s time to secure it in place using the screws. Properly securing the fan ensures that it remains stable and functions effectively to provide optimal airflow and cooling.
Follow these steps to secure the new case fan with screws:
- Take the screws that you previously removed or any screws provided with the new case fan.
- Align each screw with the corresponding screw holes on the case and the fan.
- Using a screwdriver, tighten each screw clockwise until it is snug but not overly tight. Avoid overtightening, as this can strip the screw holes or damage the fan.
- Repeat this process for all the screws, ensuring that they are evenly tightened on all sides of the fan.
Double-check that the new case fan is securely fastened by giving it a gentle wiggle. The fan should not move excessively or feel loose after the screws are tightened properly.
If your new case fan has additional mounting options, such as rubber mounts or vibration dampeners, refer to the fan’s instructions to determine the best method for securing it.
By securely fastening the new case fan with screws, you have completed the installation process and are one step closer to enjoying optimal cooling and performance for your iBuyPower case.
Now that the new case fan is properly secured, you can move on to the next step of reconnecting the power cable to the new case fan.
Step 9: Reconnect the Power Cable to the New Case Fan
With the new case fan securely in place, the next step is to reconnect the power cable to ensure that the fan receives the necessary power to operate. Properly connecting the power cable is crucial for the functionality of the fan and the overall cooling performance of your iBuyPower case.
Follow these steps to reconnect the power cable to the new case fan:
- Locate the power cable that was disconnected earlier.
- Take the power cable connector and carefully align it with the corresponding port on the new case fan. The connector should fit smoothly and snugly into place.
- Gently push the power cable connector into the port until it is fully seated. Ensure that it is securely connected and not loose.
It’s important to note that some case fans may have a separate connector for additional features like RGB lighting or fan speed control. If your new case fan has any additional connectors, make sure to connect them accordingly.
Once the power cable is securely connected to the new case fan, take a moment to ensure that it is positioned in a way that will not obstruct other components or cables. Ensure that the cable is safely routed and clear of any potential hazards.
By reconnecting the power cable to the new case fan, you have completed a vital step in the replacement process. The fan is now ready to receive power and function effectively to provide adequate cooling for your iBuyPower case.
Now that the power cable is properly connected, you can move on to the next step of replacing the side panel of your iBuyPower case and preparing for the final testing of the new case fan.
Step 10: Replace the Side Panel of the Case
Now that the new case fan is installed and the power cable is connected, it’s time to replace the side panel of your iBuyPower case. Putting the side panel back on ensures that your components remain protected and helps maintain proper airflow within the case.
Follow these steps to replace the side panel:
- Hold the side panel at a slight angle and align it with the case. Make sure that any cables or connectors are tucked away to avoid any interference.
- Gently slide or push the panel back into place. Align the screw holes on the panel with the corresponding holes on the case.
- Once the panel is aligned, use a screwdriver to insert and tighten the screws. Start with the top or bottom screws, depending on your case design, and then move to the remaining screws. Tighten them clockwise until they are snug but avoid overtightening.
Ensure that the side panel is properly seated and secured in its original position. The panel should fit flush with the case and not have any gaps or protrusions.
With the side panel securely in place, double-check that there are no loose cables or obstructions within the case. Ensure that everything is properly organized and secured to avoid any potential issues or damage to your components.
By replacing the side panel of your iBuyPower case, you have completed the physical installation of the new case fan. Congratulations! Your computer is now ready for the final step of testing the new case fan.
Before proceeding to the final test, make sure to power off and unplug your computer to ensure your safety during the testing phase.
Now that the side panel is back on, let’s move on to the last step of powering on the computer and testing your newly installed case fan.
Step 11: Power On the Computer and Test the New Case Fan
With the side panel securely replaced, it’s time to power on your computer and test the newly installed case fan. Testing the fan ensures that it is functioning correctly and contributing to the cooling efficiency of your iBuyPower case.
Follow these steps to power on the computer and test the new case fan:
- Double-check that your computer is still powered off and unplugged for safety.
- Plug in the power cable and any other necessary peripherals, such as the monitor, keyboard, and mouse.
- Once the necessary cables are connected, press the power button to turn on your computer.
- As your computer boots up, listen for any unusual noises coming from the new case fan. It should run smoothly and quietly.
- Observe the airflow and ensure that the new case fan is effectively circulating air within the case, providing proper cooling to your components.
- Monitor the temperatures of your CPU and other components to ensure that they are within acceptable ranges. You can use software utilities or BIOS settings to check the temperature readings.
If you notice any issues during the testing phase, such as excessive noise, poor airflow, or abnormal temperature readings, double-check the installation of the case fan and make any necessary adjustments. It’s also possible that the new fan may require additional configuration or settings in your system’s BIOS or fan control software.
Once you are satisfied with the performance of the new case fan and have confirmed that it is functioning as expected, congratulations! You have successfully replaced the case fan in your iBuyPower case.
Remember to regularly clean your case and monitor the performance of your case fan to ensure optimal cooling and prolong the lifespan of your components.
Now that the new case fan has been tested and proven operational, you can enjoy the benefits of improved airflow and better temperature management for your iBuyPower case.
Conclusion
Congratulations on successfully replacing the case fan in your iBuyPower case! By following the step-by-step guide outlined in this article, you have ensured proper cooling and airflow within your computer, which is essential for maintaining optimal performance and longevity of your components.
We started by gathering the necessary tools and materials, including a screwdriver, replacement case fan, and other optional items like an anti-static wrist strap. Then, we went through each step, from shutting down and unplugging the computer to locating and disconnecting the power cable from the old case fan.
Next, we removed the screws securing the old case fan, carefully took out the old fan, and installed the new case fan, securing it in place with screws. After that, we reconnected the power cable to the new fan and replaced the side panel of the iBuyPower case.
Finally, we powered on the computer and tested the new case fan, ensuring it operated smoothly and effectively in circulating air and maintaining optimal temperatures for your components.
Remember to regularly clean your case and monitor the performance of the case fan to prevent dust accumulation and maintain efficient cooling. Additionally, consult your user manual or the manufacturer’s instructions for any specific guidelines or differences unique to your iBuyPower case model.
By replacing a faulty or inefficient case fan, you’ve taken an important step towards enhancing the overall performance and stability of your computer. Enjoy the improved cooling and quieter operation that comes with a properly functioning case fan!


